

Raspberry filling for desserts: the vibrant, tangy secret weapon that can elevate any sweet treat from ordinary to extraordinary! Have you ever bitten into a perfectly crafted pastry, a burst of fruity flavor exploding on your tongue, leaving you craving more? Chances are, that delightful surprise was thanks to a luscious raspberry filling.
Raspberries, with their delicate sweetness and subtle tartness, have been cherished for centuries. Evidence suggests that raspberries were enjoyed by people as far back as the Roman Empire, and they’ve been cultivated in monasteries throughout Europe since the Middle Ages. This rich history speaks to the enduring appeal of this delightful fruit, and its versatility makes it a perfect candidate for transforming into a delectable filling.
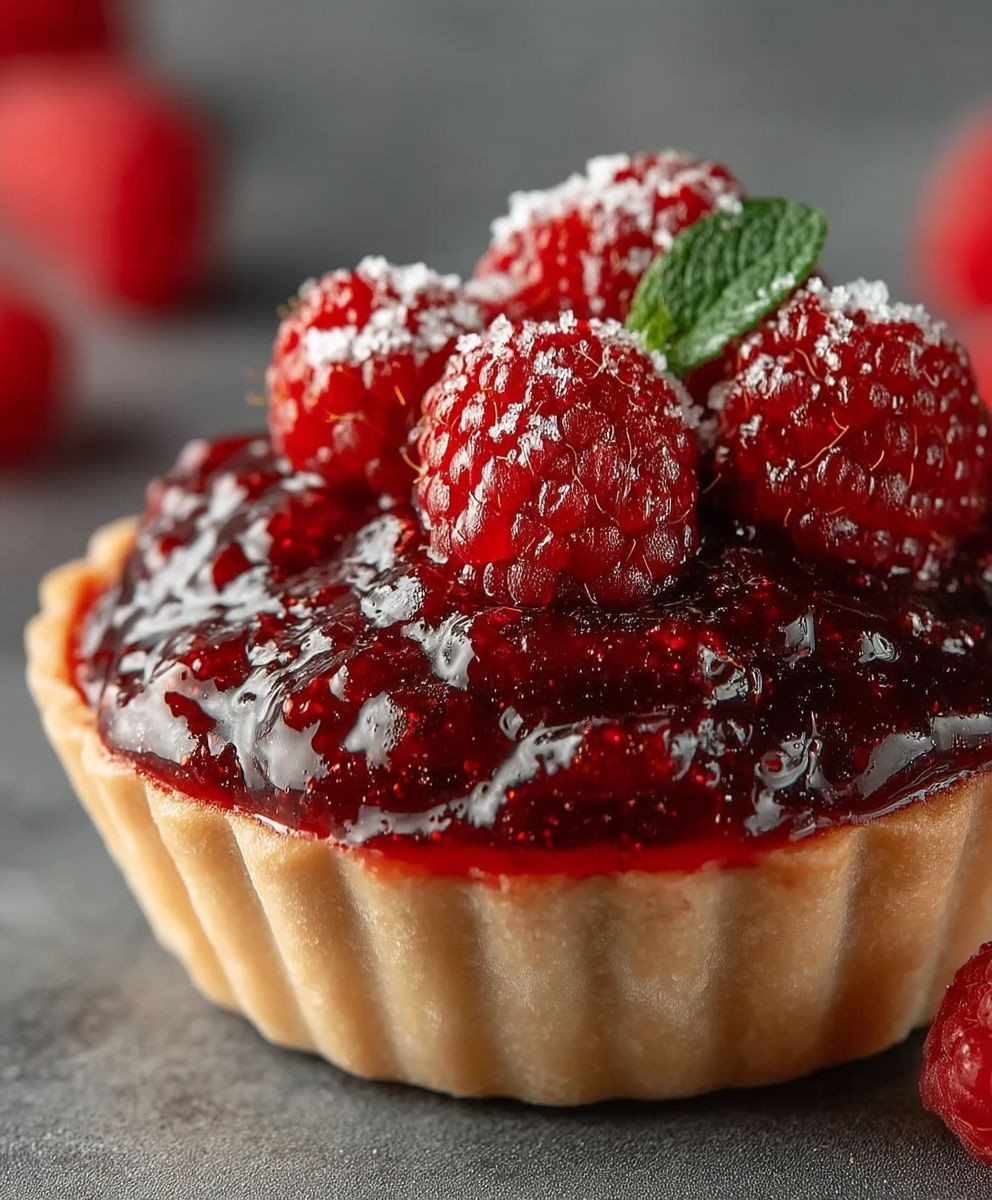
What makes a good raspberry filling for desserts so irresistible? It’s the perfect balance of sweet and tart, a flavor profile that awakens the senses. The smooth, jammy texture complements a wide range of desserts, from delicate pastries and flaky tarts to rich cakes and creamy cheesecakes. Plus, making your own raspberry filling is surprisingly simple, allowing you to control the sweetness and consistency to perfectly match your preferences. It’s a convenient way to add a touch of homemade goodness to any dessert, impressing your friends and family with your culinary skills. So, are you ready to unlock the secrets to creating the perfect raspberry filling? Let’s get started!

Ingredients:
- 6 cups fresh raspberries (about 3 pints), or frozen raspberries (thawed)
- 1 cup granulated sugar, adjust to taste depending on the sweetness of the berries
- 1/4 cup cornstarch
- 1/4 cup cold water
- 1 tablespoon lemon juice, freshly squeezed
- 1/2 teaspoon vanilla extract (optional, but highly recommended)
- Pinch of salt
Preparing the Raspberry Base:
- Rinse the Raspberries: Gently rinse the fresh raspberries under cold water. If using frozen raspberries, ensure they are fully thawed and drain any excess liquid. This step is crucial to prevent a watery filling.
- Combine Raspberries and Sugar: In a medium-sized saucepan, combine the raspberries and granulated sugar. Stir gently to coat the raspberries evenly with the sugar. The sugar will help draw out the natural juices from the berries, creating a flavorful base for the filling.
- Simmer the Mixture: Place the saucepan over medium heat. Bring the raspberry and sugar mixture to a gentle simmer, stirring occasionally. As the mixture heats up, the raspberries will begin to break down and release their juices. Be careful not to boil the mixture vigorously, as this can cause the sugar to burn.
- Cook Down the Berries: Continue to simmer the mixture for about 8-10 minutes, or until the raspberries have softened and released a significant amount of juice. Stir frequently to prevent sticking and ensure even cooking. The mixture should start to thicken slightly as the water evaporates.
- Smash Some of the Berries (Optional): For a smoother filling, you can use a potato masher or the back of a spoon to gently smash some of the raspberries against the side of the saucepan. This will help release more of their juices and create a more uniform texture. If you prefer a chunkier filling, you can skip this step or only smash a small portion of the berries.
Creating the Cornstarch Slurry:
- Whisk Cornstarch and Water: In a small bowl, whisk together the cornstarch and cold water until smooth. Ensure there are no lumps of cornstarch remaining. This mixture, known as a cornstarch slurry, will act as a thickening agent for the raspberry filling. Using cold water is essential to prevent the cornstarch from clumping.
- Slowly Add Slurry to Raspberry Mixture: Once the raspberry mixture has simmered and thickened slightly, slowly pour the cornstarch slurry into the saucepan while continuously stirring. It’s important to add the slurry gradually to prevent lumps from forming.
- Stir Constantly: Continue to stir the mixture constantly as you add the cornstarch slurry. This will ensure that the cornstarch is evenly distributed and that the filling thickens smoothly.
Thickening and Finishing the Filling:
- Simmer and Thicken: After adding the cornstarch slurry, continue to simmer the raspberry filling over medium heat, stirring constantly. The mixture will begin to thicken rapidly as the cornstarch cooks.
- Cook Until Desired Consistency: Cook the filling for about 2-3 minutes, or until it reaches your desired consistency. The filling should be thick enough to coat the back of a spoon. Be careful not to overcook the filling, as it can become too thick and gummy.
- Remove from Heat: Once the filling has reached the desired consistency, remove the saucepan from the heat.
- Add Lemon Juice and Vanilla Extract: Stir in the lemon juice and vanilla extract (if using). The lemon juice will add a bright, tangy flavor that complements the sweetness of the raspberries, while the vanilla extract will enhance the overall flavor profile.
- Add a Pinch of Salt: Add a pinch of salt to balance the sweetness and enhance the other flavors.
- Taste and Adjust: Taste the filling and adjust the sweetness or tartness as needed. If the filling is too tart, add a little more sugar. If it’s too sweet, add a squeeze more lemon juice.
- Cool Slightly: Allow the raspberry filling to cool slightly before using it in your dessert. As it cools, it will thicken further.
Using the Raspberry Filling:
This raspberry filling is incredibly versatile and can be used in a variety of desserts. Here are a few ideas:
- Pies and Tarts: Use the filling as the base for a delicious raspberry pie or tart. Simply pour the cooled filling into a pre-baked pie crust or tart shell and bake until the crust is golden brown.
- Cakes and Cupcakes: Spread the filling between layers of cake or cupcakes for a burst of raspberry flavor. It pairs particularly well with vanilla, chocolate, or almond cakes.
- Cheesecakes: Swirl the filling into a cheesecake batter before baking for a beautiful and flavorful cheesecake. You can also use it as a topping for individual cheesecakes or cheesecake bars.
- Pastries: Fill croissants, danishes, or other pastries with the raspberry filling for a sweet and fruity treat.
- Crepes and Pancakes: Serve the filling as a topping for crepes or pancakes. It’s a delicious and easy way to add a touch of elegance to your breakfast or brunch.
- Yogurt and Oatmeal: Stir the filling into yogurt or oatmeal for a healthy and flavorful breakfast or snack.
- Ice Cream Topping: Drizzle the cooled filling over ice cream for a simple and delicious dessert.
Storage Instructions:
If you have any leftover raspberry filling, you can store it in an airtight container in the refrigerator for up to 3-4 days. To prevent a skin from forming on the surface of the filling, press a piece of plastic wrap directly onto the surface before sealing the container.
Tips and Tricks:
- Use High-Quality Raspberries: The flavor of the raspberry filling will depend heavily on the quality of the raspberries you use. Choose fresh, ripe raspberries that are plump and juicy. If using frozen raspberries, opt for a high-quality brand that hasn’t been sitting in the freezer for too long.
- Adjust Sweetness to Taste: The amount of sugar you need will depend on the sweetness of the raspberries. Taste the filling as you go and adjust the sugar accordingly.
- Don’t Overcook the Filling: Overcooking the filling can result in a thick, gummy texture. Cook it just until it reaches your desired consistency.
- Let the Filling Cool Completely: Allow the filling to cool completely before using it in your dessert. This will allow it to thicken further and prevent it from making your dessert soggy.
- Add Other Flavors: Feel free to experiment with other flavors in your raspberry filling. A pinch of cinnamon, a dash of almond extract, or a tablespoon of orange zest can all add a unique twist.
- Strain for a Seedless Filling: If you prefer a seedless filling, you can strain the cooked raspberry mixture through a fine-mesh sieve before adding the cornstarch slurry. This will remove the seeds and create a smoother texture.
Troubleshooting:
- Filling is Too Thin: If your raspberry filling is too thin, you can thicken it by simmering it for a few more minutes, stirring constantly. You can also add a small amount of cornstarch slurry (1 teaspoon cornstarch mixed with 1 tablespoon cold water) to the mixture.
- Filling is Too Thick: If your raspberry filling is too thick, you can thin it by adding a little water or raspberry juice.
- Filling is Lumpy: If your raspberry filling is lumpy, it’s likely due to the cornstarch not being properly dissolved. To fix this, whisk the filling vigorously until the lumps disappear. You can also strain the filling through a fine-mesh sieve to remove any remaining lumps.
Variations:
- Mixed Berry Filling: Combine raspberries with other berries, such as blueberries, strawberries, or blackberries, for a mixed berry filling.
- Raspberry Rhubarb Filling: Add diced rhubarb to the raspberry mixture for a tart and tangy filling.
- Raspberry Apple Filling: Add diced apples to the raspberry mixture for a sweet and comforting filling.
- Spiced Raspberry Filling: Add a pinch of cinnamon, nutmeg, or cloves to the raspberry mixture for a warm and spicy filling.
Enjoy your homemade raspberry filling!
Conclusion:
This raspberry filling recipe isn’t just another filling; it’s a vibrant burst of summer sunshine bottled into a spoonful. Its intense raspberry flavor, perfectly balanced sweetness, and delightful texture make it an absolute game-changer for your desserts. Seriously, you need this in your life! It’s the kind of recipe that elevates everything it touches, transforming ordinary baked goods into extraordinary treats.
Why is it a must-try? Because it’s incredibly easy to make, uses readily available ingredients, and delivers a flavor punch that store-bought fillings simply can’t match. Forget those bland, overly sweet concoctions – this raspberry filling is the real deal. It’s the perfect way to add a touch of homemade love to your creations.
But the best part? Its versatility! Imagine swirling it into your morning yogurt for a delightful breakfast boost. Or picture it nestled between layers of a delicate vanilla cake, creating a show-stopping centerpiece for your next celebration. Don’t even get me started on how amazing it is in thumbprint cookies – the sweet and tart combination is simply irresistible.
Here are a few serving suggestions and variations to get your creative juices flowing:
* Classic Cake Filling: Use it as a filling for layer cakes, cupcakes, or even a simple sponge cake. Pair it with vanilla, chocolate, or almond frosting for a truly decadent experience.
* Pastry Perfection: Fill croissants, danishes, or tarts with this raspberry goodness. The flaky pastry and tangy filling are a match made in heaven.
* Cookie Companion: As mentioned before, thumbprint cookies are a classic choice. But don’t stop there! Use it as a filling for sandwich cookies or swirl it into your favorite sugar cookie dough.
* Breakfast Bliss: Add a dollop to your pancakes, waffles, or French toast. It’s also delicious stirred into oatmeal or yogurt.
* Cheesecake Topping: Drizzle it over a creamy cheesecake for a beautiful and flavorful finish.
* Variation Alert! For a slightly different flavor profile, try adding a squeeze of lemon juice or a pinch of cardamom to the filling while it’s simmering. You could also incorporate other berries like blackberries or strawberries for a mixed berry sensation. A splash of Chambord liqueur after cooking will add a sophisticated touch.
I’m so confident that you’ll love this recipe that I urge you to try it as soon as possible. It’s a simple yet impactful way to elevate your baking and impress your friends and family.
Once you’ve made this incredible raspberry filling, I’d absolutely love to hear about your experience! Did you use it in a cake, cookies, or something completely different? What variations did you try? Share your photos and stories in the comments below. Let’s inspire each other with our delicious creations! Happy baking!
Raspberry Filling for Desserts: The Ultimate Guide
Vibrant, versatile homemade raspberry filling for pies, cakes, pastries, and more! Easy to customize with fresh or frozen raspberries for a sweet and tart flavor.
Ingredients
Instructions
Recipe Notes
- Use high-quality raspberries for the best flavor.
- Adjust the sugar to taste based on the sweetness of your raspberries.
- Don’t overcook the filling, as it can become too thick.
- Let the filling cool completely before using it in your dessert.
- For a seedless filling, strain the cooked raspberry mixture through a fine-mesh sieve before adding the cornstarch slurry.
- Store leftover filling in an airtight container in the refrigerator for up to 3-4 days. Press plastic wrap directly onto the surface to prevent a skin from forming.
Leave a Comment