

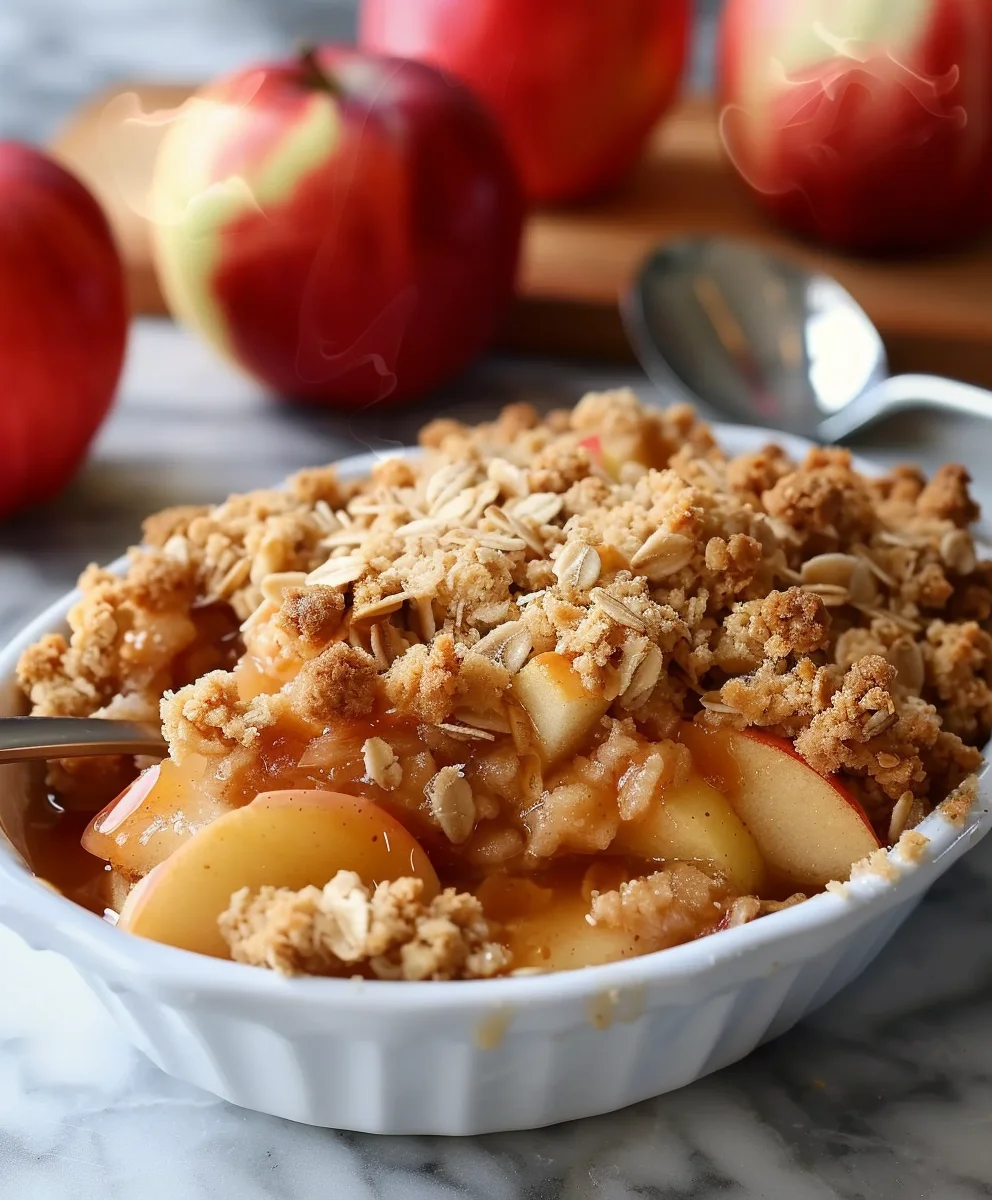
The Best Apple Crisp Recipe is more than just a dessert; it’s a sensory experience that promises comfort with every single spoonful. Imagine the intoxicating aroma of cinnamon and baked apples wafting through your home, a warm invitation to gather loved ones around the table. This classic dish, often considered a comforting staple of autumn and a simpler alternative to a traditional pie, has a rich history, gaining popularity during World War I when pie crust ingredients were scarce. Its charm lies in its beautiful simplicity and profound deliciousness.
I genuinely believe this version stands out because it perfectly balances the tender, spiced apple filling—bursting with natural sweetness and a hint of tartness—with a gloriously golden, buttery, and irresistibly crunchy oat topping. People adore this dish not only for its incredible flavor profile but also for its wonderfully contrasting textures and the sheer ease of preparation compared to more complex baked goods. It’s a guaranteed crowd-pleaser, whether served warm on its own, with a scoop of vanilla bean ice cream, or a dollop of fresh whipped cream.
Why This Is Truly The Best Apple Crisp Recipe
Prepare to discover why this truly is The Best Apple Crisp Recipe you’ll ever make, bringing smiles and warmth to any occasion.

Ingredients:
For the Apple Filling:
- 6-8 medium apples (about 2.5 – 3 pounds), a mix of sweet and tart varieties works best. My personal favorites for The Best Apple Crisp Recipe are a combination of Honeycrisp, Granny Smith, and Fuji.
- 1/2 cup granulated sugar (adjust to taste depending on the sweetness of your apples)
- 1/4 cup packed light brown sugar
- 2 tablespoons all-purpose flour (or cornstarch for a gluten-free option)
- 1 teaspoon ground cinnamon
- 1/4 teaspoon ground nutmeg
- 1/8 teaspoon ground cloves (optional, but I think it adds a lovely depth)
- 1 tablespoon fresh lemon juice
- 2 tablespoons unsalted butter, cut into small pieces
For the Crisp Topping:
- 1 cup all-purpose flour
- 1/2 cup old-fashioned rolled oats (do not use instant oats)
- 1/2 cup granulated sugar
- 1/2 cup packed light brown sugar
- 1 teaspoon ground cinnamon
- 1/2 teaspoon ground nutmeg (optional, but it enhances the warm spice notes beautifully)
- 1/2 teaspoon salt
- 1 stick (1/2 cup or 8 tablespoons) unsalted butter, very cold and cut into small cubes
Equipment You’ll Need:
- 9×13 inch baking dish (or an equivalent 3-quart oven-safe dish)
- Large mixing bowls (at least two)
- Vegetable peeler
- Apple corer (optional, but very helpful)
- Sharp knife and cutting board
- Pastry blender or your fingertips
- Whisk or spoon
- Measuring cups and spoons
Preparing the Filling for The Best Apple Crisp Recipe:
This is where the magic begins, transforming simple apples into a luscious, tender base that will perfectly complement our crunchy topping. Taking your time with each step here ensures a wonderfully flavorful and perfectly textured filling.
- First things first, I preheat my oven. I set it to 375°F (190°C). This allows the oven to get to temperature while I prepare everything, ensuring a consistent bake from the moment the crisp goes in. While the oven warms up, I grab my chosen baking dish, usually a 9×13 inch, and lightly grease it. This tiny step prevents any sticky situations later, making cleanup a breeze and ensuring every last bit of that delicious apple crisp can be scooped out.
- Next, I tackle the apples. For The Best Apple Crisp Recipe, a blend of sweet and tart apples is absolutely crucial for a balanced flavor profile. I gather my Honeycrisps, Granny Smiths, and Fujis. I start by carefully peeling each apple. A good quality swivel peeler makes this task much less daunting, allowing me to remove the skin efficiently while preserving as much of that precious apple flesh as possible. Once peeled, I move on to coring. A sturdy apple corer is invaluable here, creating a clean opening right through the center. If you don’t have one, carefully cut around the core with a small paring knife.
- With the apples peeled and cored, it’s time for slicing. I aim for slices that are about 1/4 to 1/2 inch thick. Consistency is key here; slices that are too thin will turn to mush, while overly thick slices might not soften enough during baking. I like to quarter the apples first, then lay the flat side down and slice, creating beautiful, uniform crescent shapes. As I slice them, I immediately place them into a very large mixing bowl to prevent browning.
- Once all the apples are sliced and in the bowl, I promptly drizzle them with 1 tablespoon of fresh lemon juice. This isn’t just to prevent browning; the lemon juice also adds a subtle bright tang that cuts through the sweetness and enhances the natural apple flavor, which is a secret weapon in crafting an exceptional apple crisp. I gently toss the apples to ensure they are all lightly coated.
- Now, for the dry ingredients that will create our flavorful sauce. In a separate, medium-sized bowl, I whisk together the granulated sugar, light brown sugar, all-purpose flour (or cornstarch if I’m making it gluten-free), ground cinnamon, ground nutmeg, and the optional touch of ground cloves. The flour here acts as a thickening agent, ensuring the apple juices turn into a luscious, syrupy sauce rather than a watery mess.
- I then sprinkle this beautiful spice and sugar mixture evenly over the sliced apples in the large bowl. Using a large spoon or my clean hands, I gently toss the apples until every single slice is thoroughly coated. It’s important to be gentle to avoid breaking up the apple slices, but thorough enough so that the spices can work their magic on every piece. This step ensures that the flavor permeates throughout the entire filling.
- Finally, I scatter the 2 tablespoons of unsalted butter, cut into small pieces, over the seasoned apples. These small pats of butter will melt into the filling as it bakes, adding richness and a beautiful glossy sheen to the apple mixture. Once everything is well combined and coated, I pour the entire apple mixture into my prepared 9×13 inch baking dish, spreading it out evenly. I set this aside while I prepare the topping. The aroma at this stage is already incredible, a promise of the deliciousness to come!
Crafting the Irresistible Crisp Topping:
The topping is arguably what makes or breaks an apple crisp. We’re aiming for a perfect balance of buttery, crunchy, and crumbly, with just the right amount of warm spice. My technique ensures a texture that delivers on every front, providing that quintessential crisp experience.
- To begin crafting The Best Apple Crisp Recipe topping, I grab a separate, large mixing bowl. Into this bowl, I measure out my dry ingredients: the all-purpose flour, old-fashioned rolled oats, granulated sugar, light brown sugar, ground cinnamon, the optional but recommended ground nutmeg, and the salt. It’s crucial to use old-fashioned rolled oats, as they provide that hearty chewiness we want; instant oats would become too mushy. I give everything a good whisk to ensure all the ingredients are evenly distributed and no lumps of brown sugar remain. This step ensures consistent flavor throughout the topping.
- Now for the butter – this is where the magic really happens for that perfect crumbly texture. I take my stick of very cold unsalted butter and cut it into small, 1/2-inch cubes. Keeping the butter cold is absolutely essential; it creates pockets of butter throughout the mixture that, when melted in the oven, produce that desirable flaky, crisp texture. If the butter is too warm, it will incorporate too much into the flour, resulting in a dense, cake-like topping instead of a crumbly one.
- I add the cold butter cubes to the dry ingredients in the bowl. Now, there are two primary methods I use to incorporate the butter:
- Using a pastry blender: This tool is specifically designed for cutting cold butter into flour. I work the pastry blender through the mixture, pressing down and twisting, until the butter is broken down into pea-sized pieces. This method is efficient and keeps the butter cold.
- Using my fingertips: This is my preferred method as I find it gives me the best feel for the texture. I use my fingertips to rub the butter into the flour mixture. It’s important to work quickly and lightly to avoid warming the butter with the heat from my hands. I gently rub the butter between my thumb and fingers, pressing and crumbling it into the dry ingredients. I continue this process until the mixture resembles coarse crumbs, with some pieces still being pea-sized and others smaller, like fine meal. The goal is a mixture that clumps together slightly when squeezed, but also crumbles easily. This texture is what gives the crisp its delightful crunch after baking.
A quick tip: If your kitchen is warm and the butter starts to soften too much, don’t hesitate to pop the bowl into the refrigerator for 10-15 minutes to chill everything down before continuing. This small effort makes a big difference in the final texture of your crisp.
- Once the topping has reached that perfect coarse, crumbly consistency, it’s ready to be spread over our waiting apple filling. The smell of the raw topping is already a hint of the comforting flavors to come, a blend of sweet, spicy, and buttery notes that always makes my kitchen feel inviting.
Assembling and Baking Your Apple Crisp:
With both the filling and the topping meticulously prepared, we’re just a few steps away from enjoying a warm, bubbling apple crisp. This phase brings everything together and, through the magic of the oven, transforms our individual components into a cohesive, comforting dessert that truly earns the title of The Best Apple Crisp Recipe.
- I now take my prepared baking dish, filled with the seasoned apple slices, and prepare to add the topping. I grab the bowl containing my perfectly crumbly crisp topping and, using my hands, gently sprinkle it evenly over the entire surface of the apples. I try to ensure good coverage, making sure that there are no large gaps. This ensures that every spoonful of the finished crisp will have that delightful contrast between the soft, spiced apples and the crunchy, buttery topping. There’s no need to press it down; we want it to remain light and airy to achieve maximum crispness during baking.
- With the topping in place, my apple crisp is ready for the oven. I carefully transfer the baking dish to the preheated 375°F (190°C) oven. I usually place it on the middle rack to ensure even baking and browning.
- The baking process typically takes between 45 to 60 minutes. However, baking times can vary slightly depending on your oven and the type of apples you’ve used. Here’s what I look for to know when my apple crisp is perfectly done:
- Visual Cues: The topping should be a beautiful golden brown and appear wonderfully crisp. You should also see the apple filling bubbling up around the edges of the dish, a clear sign that the apples are tender and their juices are thickening into a luscious sauce.
- Tenderness of Apples: To be absolutely sure, I sometimes gently insert a thin, sharp knife or a skewer into the apple filling (through a gap in the topping, if possible). It should slide in with very little resistance, indicating that the apples are perfectly tender and cooked through. If there’s still a crunch, I return it to the oven for another 5-10 minutes and check again.
- Aroma: Oh, the aroma! When your kitchen is filled with an irresistible scent of baked apples, warm cinnamon, and sweet butter, you know you’re very close. It’s a comforting, tell-tale sign that perfection is near.
Important Tip: If you notice the topping browning too quickly before the apples are tender, you can loosely tent the dish with aluminum foil for the last 15-20 minutes of baking. This prevents scorching while allowing the apples to finish cooking.
- Once baked to perfection, I carefully remove the apple crisp from the oven. I always place it on a wire rack to cool slightly. It’s incredibly tempting to dig in right away, but allowing it to rest for at least 15-20 minutes is crucial. This cooling period allows the filling to set up a bit more, preventing it from being too runny when served, and also allows the flavors to meld beautifully. The bubbling will subside, and the crisp topping will become even crispier as it cools slightly.
Serving Suggestions and Storage:
The culmination of our efforts, The Best Apple Crisp Recipe, is a dessert that truly shines when served warm. While delicious on its own, a few additions can elevate the experience to pure bliss.
- After allowing it to cool just enough to handle, I usually serve my apple crisp warm, directly from the baking dish. This is when the aromas are most potent, and the apples are at their most tender and juicy.
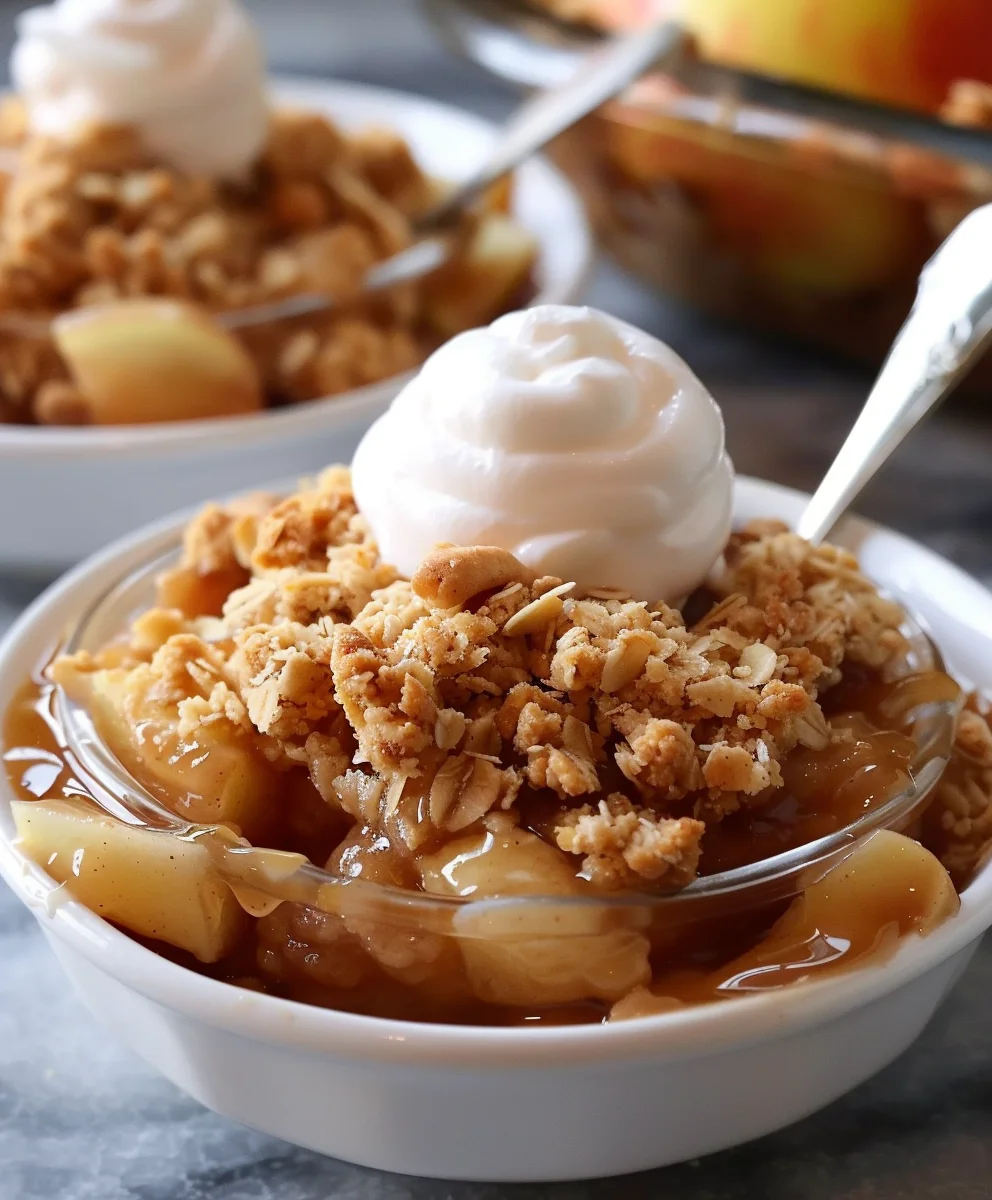
- For an absolutely divine experience, I wholeheartedly recommend serving individual portions with a generous scoop of vanilla bean ice cream. The cold, creamy ice cream melting into the warm, spiced apples and crunchy topping is a textural and temperature contrast that is simply unparalleled. Alternatively, a dollop of freshly whipped cream or a drizzle of warm caramel sauce also makes for a fantastic accompaniment. Sometimes, if I’m feeling extra decadent, I’ll add both ice cream AND caramel – because why not?
- Leftovers of this magnificent apple crisp, if you’re lucky enough to have any, can be stored covered in the refrigerator for up to 3-4 days. I typically cover the baking dish tightly with plastic wrap or aluminum foil once it has completely cooled down to room temperature.
- To reheat, I usually scoop individual portions into a microwave-safe bowl and warm them gently in the microwave for 30-60 seconds, or until heated through. For a crispier topping, I sometimes prefer to reheat the entire dish (or larger portions) in a preheated oven at 300°F (150°C) for about 15-20 minutes, or until warmed through and the topping has regained some of its crunch. The gentle heat helps to revive the crisp texture, making leftovers almost as good as fresh.
And there you have it – my tried-and-true method for creating what I confidently believe is The Best Apple Crisp Recipe you’ll ever make. It’s a dessert that speaks of comfort, warmth, and homemade goodness, perfect for any occasion, or simply to brighten a quiet evening at home. Enjoy every delicious, crumbly, apple-filled bite!
Conclusion:
And there you have it, my friends! We’ve reached the sweet finale of our delicious journey together. If you’ve been following along, you now hold the key to creating a truly unforgettable dessert that will warm hearts and fill your home with the most enticing aromas. What makes this recipe an absolute must-try isn’t just its simplicity, but the sheer joy it brings from the very first bite to the last crumb. Imagine the sweet, tender apples, perfectly spiced and cooked to a delightful softness, mingling with that incredibly crunchy, buttery, and golden-brown oat topping. It’s a symphony of textures and flavors that dance on your palate – a perfect balance of tart and sweet, comforting and exhilarating.
I truly believe that this isn’t just a dessert; it’s an experience. It evokes memories of cozy autumn evenings, family gatherings, and the simple pleasure of homemade goodness. Every spoonful is a testament to how humble ingredients, when combined with a little love and the right technique, can transform into something extraordinary. This particular approach to baking ensures that the apples retain their character while becoming exquisitely tender, and the crisp topping achieves that perfect, addictive crunch without being too heavy. It’s a dessert that feels both rustic and refined, impressive enough for a dinner party, yet comforting enough for a quiet night in. Seriously, once you try it, you’ll understand why I confidently call it The Best Apple Crisp Recipe – it simply delivers on every front, every single time.
Now, while this apple crisp is absolutely divine on its own, I’m a firm believer in embracing delicious possibilities! For a classic indulgence, nothing quite beats a generous scoop of good quality vanilla bean ice cream melting into the warm crisp. The contrast of hot and cold, creamy and crunchy, is pure bliss. Alternatively, a dollop of freshly whipped cream, perhaps infused with a hint of cinnamon or a splash of vanilla extract, adds a cloud-like lightness that’s simply irresistible. If you’re feeling a bit more adventurous, consider a drizzle of warm salted caramel sauce over the top – it adds another layer of decadent sweetness that pairs wonderfully with the apples. For those who enjoy a touch of warmth, a small pour of brandy or bourbon over the crisp just before serving can add a sophisticated depth of flavor. And don’t shy away from experimenting with the apples themselves; a mix of tart Granny Smiths and sweeter Fuji or Honeycrisp varieties creates an even more complex flavor profile. You could also toss a handful of toasted pecans or walnuts into the crisp topping for extra nuttiness and crunch. For a delightful breakfast or brunch treat, serve a smaller portion alongside some plain Greek yogurt – the tanginess cuts through the sweetness beautifully. You could even bake individual servings in ramekins for a charming presentation at your next get-together!
Your Kitchen Awaits: Time to Bake!
So, what are you waiting for? I’ve shared all my secrets and tips, and now it’s your turn to bring this magic to life in your own kitchen. Trust me, the aroma alone is worth the effort, but the taste… oh, the taste is something truly special. I am so incredibly excited for you to experience the warmth, the comfort, and the sheer deliciousness of this apple crisp. Don’t let another day go by without trying it!
Share Your Crisp Creations!
Once you’ve baked up a batch of this amazing dessert, I would absolutely love to hear from you! What did you think? Did you try any of the serving suggestions or come up with your own brilliant variations? Please share your photos, your feedback, and your triumphs in the comments below or tag me on social media. Your experiences not only brighten my day but also inspire other home bakers in our community. Let’s celebrate the joy of baking together. Happy crisp-making, and enjoy every single delightful bite!
The Best Apple Crisp Recipe
The Best Apple Crisp Recipe is a sensory experience that promises comfort with every spoonful. This version perfectly balances tender, spiced apple filling, bursting with natural sweetness and a hint of tartness, with a gloriously golden, buttery, and irresistibly crunchy oat topping. It’s a guaranteed crowd-pleaser, whether served warm with vanilla bean ice cream or fresh whipped cream.
Ingredients
-
For the Apple Filling:
-
6-8 medium apples (2.5 – 3 lbs), e.g., Honeycrisp, Granny Smith, Fuji
-
1/2 cup granulated sugar
-
1/4 cup packed light brown sugar
-
2 tablespoons all-purpose flour (or cornstarch)
-
1 teaspoon ground cinnamon
-
1/4 teaspoon ground nutmeg
-
1/8 teaspoon ground cloves (optional)
-
1 tablespoon fresh lemon juice
-
2 tablespoons unsalted butter, cut into small pieces
-
For the Crisp Topping:
-
1 cup all-purpose flour
-
1/2 cup old-fashioned rolled oats
-
1/2 cup granulated sugar
-
1/2 cup packed light brown sugar
-
1 teaspoon ground cinnamon
-
1/2 teaspoon ground nutmeg (optional)
-
1/2 teaspoon salt
-
1 stick (1/2 cup) unsalted butter, very cold, cut into small cubes
Instructions
-
Step 1
Preheat oven to 375°F (190°C). Lightly grease a 9×13 inch baking dish. -
Step 2
Peel, core, and slice apples 1/4 to 1/2 inch thick. Place in a large bowl and drizzle with 1 tablespoon lemon juice, tossing to coat. -
Step 3
In a separate medium bowl, whisk granulated sugar, light brown sugar, flour, cinnamon, nutmeg, and optional cloves. Sprinkle over apples and toss gently until coated. Scatter 2 tablespoons unsalted butter pieces over the apples. Pour apple mixture into the prepared baking dish. -
Step 4
In a large mixing bowl, combine 1 cup all-purpose flour, 1/2 cup old-fashioned rolled oats, 1/2 cup granulated sugar, 1/2 cup light brown sugar, 1 teaspoon cinnamon, optional 1/2 teaspoon nutmeg, and 1/2 teaspoon salt. Whisk to combine. -
Step 5
Cut 1 stick (1/2 cup) very cold unsalted butter into small cubes. Add to dry topping ingredients. Using a pastry blender or fingertips, cut butter into the flour mixture until it resembles coarse crumbs. Keep butter cold to ensure crisp texture. -
Step 6
Sprinkle the prepared crisp topping evenly over the apple filling in the baking dish. Do not press down. -
Step 7
Bake for 45-60 minutes, or until the topping is golden brown and crisp, and the apple filling is bubbling and tender when pierced with a knife. If topping browns too quickly, loosely tent the dish with aluminum foil for the last 15-20 minutes of baking. -
Step 8
Remove from oven and cool on a wire rack for at least 15-20 minutes. This allows the filling to set and flavors to meld. -
Step 9
Serve warm, optionally with a scoop of vanilla bean ice cream, a dollop of fresh whipped cream, or a drizzle of warm caramel sauce. -
Step 10
Store leftovers, covered, in the refrigerator for up to 3-4 days. To reheat, warm individual portions in the microwave (30-60 seconds) or larger portions in a 300°F (150°C) oven for 15-20 minutes to restore crispiness.
Important Information
Nutrition Facts (Per Serving)
It is important to consider this information as approximate and not to use it as definitive health advice.
Allergy Information
Please check ingredients for potential allergens and consult a health professional if in doubt.


Leave a Comment