

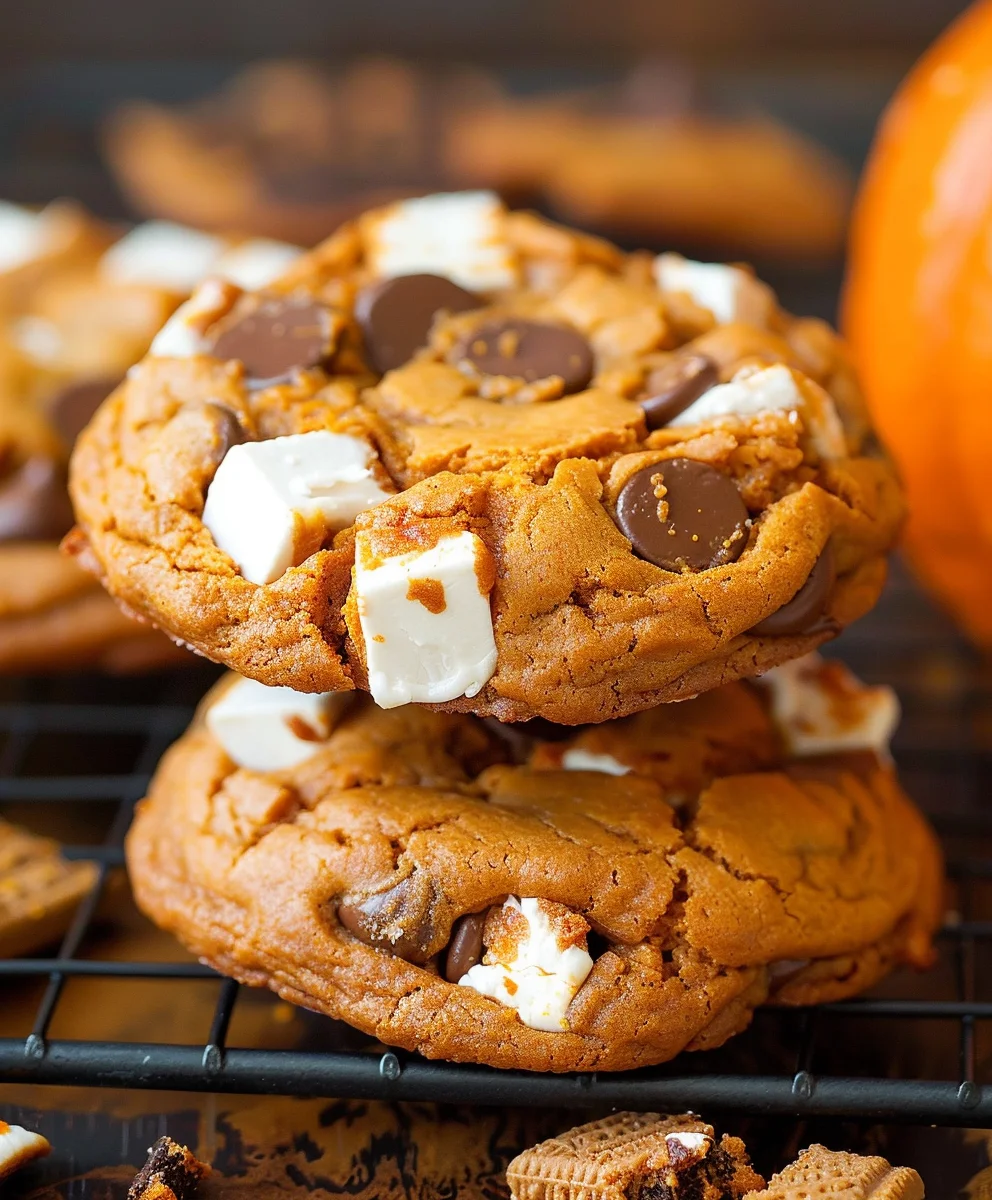
Pumpkin Smores Cookies – prepare to discover your new favorite autumn indulgence! I’m absolutely thrilled to share a recipe that masterfully marries the cozy, spiced essence of fall’s most beloved squash with the nostalgic, campfire magic of a classic s’more. This isn’t just another cookie; it’s an experience, a symphony of flavors and textures designed to evoke warmth and joy with every single bite.
The s’more, a beloved American tradition, traces its roots back to the early 20th century, with recipes appearing in Girl Scout handbooks, forever linking it to cherished memories of campfires and togetherness. Simultaneously, pumpkin has long been a culinary cornerstone of autumn, representing harvest, comfort, and the festive spirit of the season. Bringing these two iconic elements together creates something truly extraordinary. People adore this dish because it offers the ultimate comforting combination: the soft, spiced chewiness of a pumpkin cookie base, the rich, melting allure of chocolate, the distinct crunch of graham crackers, and the utterly delightful gooeyness of toasted marshmallow. It’s a perfect treat for those crisp evenings, inviting you to gather and savor a moment of pure bliss. I guarantee that these Pumpkin Smores Cookies will become a cherished tradition in your home, offering a sophisticated yet undeniably fun twist on two timeless favorites.

Ingredients:
- 1 cup (2 sticks or 226g) unsalted butter, softened to room temperature
- 1 cup (200g) granulated sugar
- 1/2 cup (100g) packed light brown sugar
- 1 large egg, at room temperature
- 1 cup (240g) pumpkin puree (not pumpkin pie filling)
- 1 teaspoon vanilla extract
- 2 1/2 cups (300g) all-purpose flour
- 2 teaspoons pumpkin pie spice
- 1 teaspoon ground cinnamon
- 1 teaspoon baking soda
- 1/2 teaspoon salt
- 6 ounces (about 1 cup) semi-sweet chocolate chips or chopped chocolate bars
- 1 cup mini marshmallows or larger marshmallows cut into quarters
- 6 full sheets graham crackers, broken into smaller pieces (about 1/2-inch to 1-inch pieces)
Equipment You’ll Need:
- Large mixing bowl
- Electric mixer (stand or hand-held)
- Medium bowl
- Whisk
- Rubber spatula
- Measuring cups and spoons
- Baking sheets
- Parchment paper or silicone baking mats
- Cookie scoop (1.5-2 tablespoon size)
- Wire cooling rack
Phase 1: Preparing the Pumpkin Cookie Dough
- Begin by preparing your dry ingredients. In a medium bowl, whisk together the all-purpose flour, pumpkin pie spice, ground cinnamon, baking soda, and salt. Make sure these are thoroughly combined. A good whisking ensures that the leavening and spices are evenly distributed throughout the flour, which is crucial for uniform texture and flavor in your finished Pumpkin S’mores Cookies. Set this mixture aside for a moment.
- In a large mixing bowl, using an electric mixer, cream together the softened unsalted butter, granulated sugar, and light brown sugar. Beat on medium speed for about 2-3 minutes, or until the mixture becomes light, fluffy, and noticeably pale in color. This creaming process incorporates air into the butter and sugar, which is vital for creating a soft and chewy cookie texture. Take your time with this step; it truly makes a difference in the final cookie. Scrape down the sides of the bowl periodically to ensure everything is evenly mixed.
- Now, add the egg. Crack the large egg into the creamed butter and sugar mixture. Beat on medium speed for another minute until it is fully incorporated. The mixture might look a little curdled at first, but keep mixing until it smooths out. The egg acts as a binder and adds richness to our Pumpkin S’mores Cookies.
- Incorporate the pumpkin puree and vanilla extract. Add the cup of pumpkin puree and the teaspoon of vanilla extract to the wet ingredients. Mix on low speed until just combined. It’s important not to overmix at this stage, as too much agitation can develop the gluten in the flour too much once it’s added, leading to a tougher cookie. The mixture will be quite wet and luscious, with a beautiful orange hue that promises that delicious pumpkin flavor.
- Gradually add the dry ingredients to the wet mixture. With the mixer on low speed, slowly add the flour mixture in two or three additions. Mix only until just combined and no streaks of flour are visible. Be very careful not to overmix the dough. Overmixing will develop the gluten in the flour, resulting in a dense, tough cookie rather than the wonderfully soft and chewy Pumpkin S’mores Cookies we are aiming for. The dough will be soft and slightly sticky, holding a lovely, vibrant orange color.
- Cover the bowl with plastic wrap and chill the cookie dough for at least 1 hour in the refrigerator. For best results and easier handling, I often chill it for 2 hours, or even overnight if I’m preparing ahead. Chilling the dough helps solidify the butter, preventing the cookies from spreading too much during baking, and allows the flavors to meld beautifully. This step is essential for achieving the perfect texture and shape for your Pumpkin S’mores Cookies. Don’t skip it!
Phase 2: Preparing the S’mores Components
- While your dough is chilling, take this time to prepare the “s’mores” part of your Pumpkin S’mores Cookies. If you’re using larger marshmallows instead of mini marshmallows, cut them into quarters. This makes them easier to distribute on the cookies and ensures they melt beautifully without overwhelming the cookie base.
- Break your graham cracker sheets into smaller, rustic pieces. Aim for pieces roughly 1/2-inch to 1-inch in size. These don’t need to be perfectly uniform; the varied sizes will add to the charm and texture of your finished cookies. Place these in a small bowl.
- Measure out your chocolate chips or chop your chocolate bar. If you’re using a chocolate bar, roughly chop it into small, irregular pieces. The variety in size provides wonderful pockets of melted chocolate throughout the cookie. Keep these separate from the graham crackers and marshmallows for now.
Phase 3: Baking the Pumpkin S’mores Cookies
- Preheat your oven and prepare your baking sheets. Once your cookie dough has chilled sufficiently, preheat your oven to 375°F (190°C). Line two large baking sheets with parchment paper or silicone baking mats. This prevents sticking and makes for easy cleanup, ensuring your Pumpkin S’mores Cookies come off the pan perfectly.
- Scoop the cookie dough. Using a 1.5 to 2-tablespoon cookie scoop, portion out rounded balls of dough. Place them about 2 inches apart on the prepared baking sheets. Remember, these cookies will spread, so giving them ample space is key to preventing them from baking into one giant cookie. I usually fit about 12 cookies per standard baking sheet.
- Bake the initial cookie base. Place one baking sheet in the preheated oven and bake for 8-10 minutes. At this point, the edges of the cookies should be just set and lightly golden, but the centers will still look a little underbaked and puffy. They shouldn’t be fully cooked yet, as they’ll go back into the oven. This initial bake provides a sturdy base for our toppings.
- Prepare for the s’mores assembly. While the first batch is baking, get ready to add your toppings. You’ll want to work fairly quickly once the cookies come out of the oven.
- Add the s’mores toppings. Carefully remove the baking sheet from the oven after the initial bake. Immediately, and while the cookies are still hot, gently press a few mini marshmallows (or pieces of cut marshmallow), a scattering of chocolate chips (or chopped chocolate), and a few pieces of graham cracker onto the top of each cookie. Don’t be shy here! The heat from the cookies will help the toppings adhere. You want a good amount of s’mores goodness on each cookie.
- Return to the oven for the final bake. Place the baking sheet with the topped cookies back into the oven for an additional 2-4 minutes. Keep a very close eye on them during this stage! The marshmallows will puff up and start to turn a beautiful golden brown, and the chocolate will become wonderfully gooey and melted. The graham cracker pieces will toast slightly, enhancing their flavor and crunch. The exact timing will depend on your oven and how toasted you like your marshmallows, so watch carefully to avoid burning.
- Remove and repeat. Once the cookies are perfectly golden and the marshmallows are toasted, carefully remove the baking sheet from the oven. Let the cookies cool on the baking sheet for about 5 minutes. This brief cooling period on the hot pan helps the cookies finish setting and prevents them from breaking when you transfer them.
Phase 4: Cooling and Enjoying Your Pumpkin S’mores Cookies
- Transfer the cookies to a wire rack. After their initial cooling on the baking sheet, use a sturdy spatula to carefully transfer the warm Pumpkin S’mores Cookies to a wire cooling rack to cool completely. This allows air to circulate around them, preventing the bottoms from becoming soggy and ensuring a perfectly chewy texture throughout.
- Exercise patience (if you can!). It’s incredibly tempting to devour these warm, straight from the oven, especially with that melty chocolate and gooey marshmallow. And honestly, a warm Pumpkin S’mores Cookie is an absolute delight! However, allowing them to cool completely will set the texture and make them easier to handle, and the flavors continue to develop. The pumpkin spice and s’mores elements truly shine once cooled.
- Serving suggestions. These Pumpkin S’mores Cookies are fantastic on their own, perhaps with a tall glass of cold milk or a warm cup of coffee or tea. They are perfect for autumn gatherings, Halloween parties, or simply as a cozy treat on a cool evening. The combination of warm pumpkin spice with the classic campfire flavors of s’mores is truly magical and uniquely comforting.
- Storage tips for maximum freshness. Once completely cooled, store your Pumpkin S’mores Cookies in an airtight container at room temperature for up to 3-4 days. To retain their chewiness, you can even place a slice of bread in the container; the cookies will absorb moisture from the bread, keeping them soft. While they are delicious the next day, they are absolutely at their peak on the day they are baked, especially if you can warm them slightly in the microwave for a few seconds to get that melty chocolate and gooey marshmallow experience again. These cookies are a fantastic way to celebrate the flavors of fall!
Conclusion:
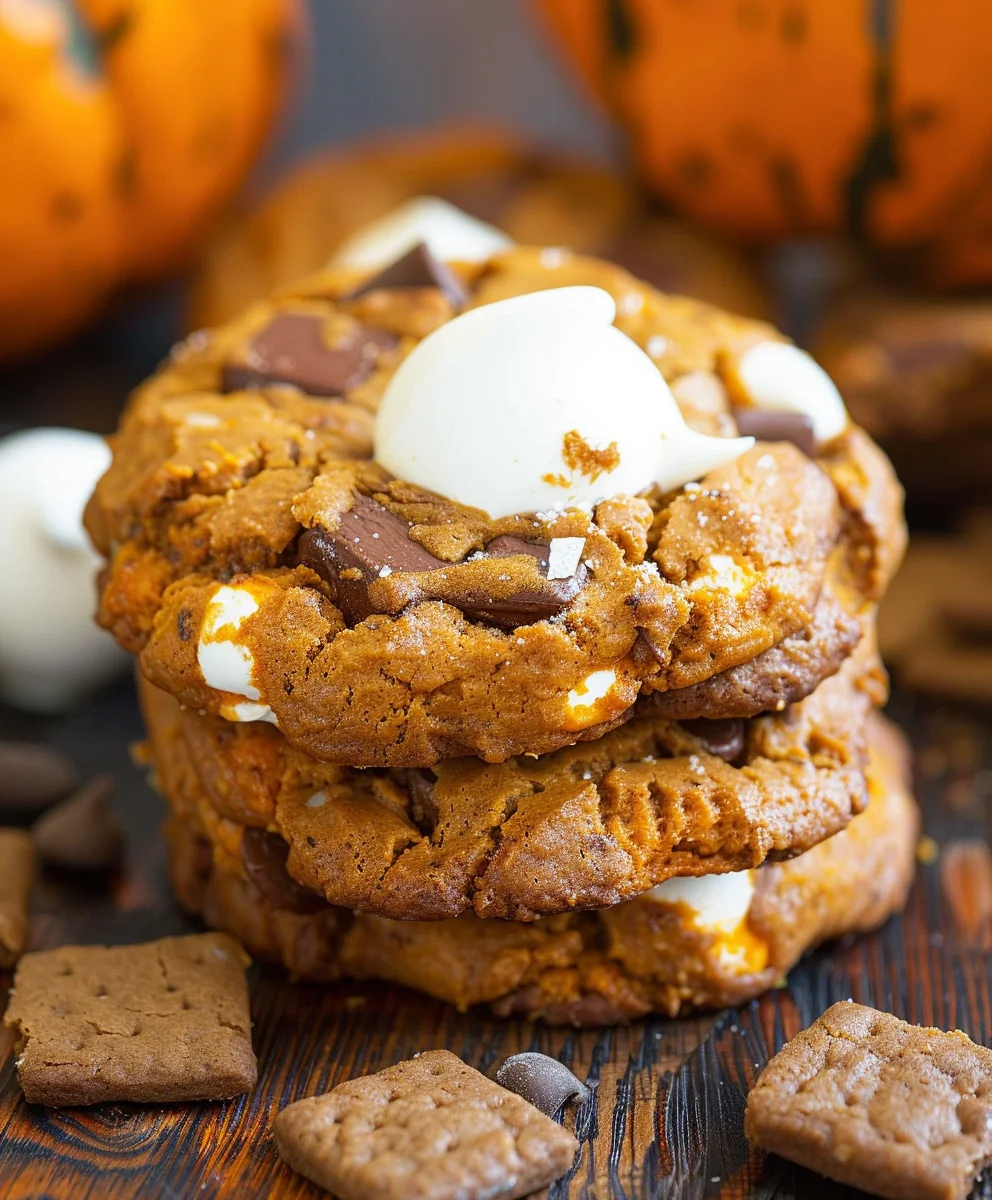
And there you have it! We’ve journeyed through the delightful process of creating a truly unforgettable treat, a dessert that perfectly encapsulates the cozy embrace of autumn and the playful joy of a campfire classic. These aren’t just any cookies; they are a celebration of flavor, a symphony of textures, and a surefire way to bring smiles to faces. I honestly believe that once you try these, you’ll understand why I’m so enthusiastic about them. They offer that ideal balance of warmth from the pumpkin spice, the decadent chewiness of melted chocolate, and the signature gooey, slightly toasted marshmallow topping, all grounded by the nostalgic crunch of graham cracker. It’s an innovative twist on two beloved classics that truly elevates the cookie experience. You get the best of both worlds in every single bite – a comforting hug of fall flavors combined with the irresistible fun of a s’mores, all in one easy-to-handle cookie package.
What makes these Pumpkin Smores Cookies a must-try isn’t just their unique flavor profile, but also the sheer delight they bring. Imagine biting into a soft, chewy cookie infused with aromatic pumpkin and cinnamon, then discovering pockets of melted chocolate, followed by that incredible stretchy marshmallow pull, and finally, the delightful snap of graham cracker bits. It’s a multi-sensory experience that goes beyond what you’d expect from a simple cookie. They are perfect for those crisp autumn evenings, a fantastic addition to your holiday baking repertoire, or simply as a special treat when you crave something truly extraordinary. They’re impressive enough for a party, yet comforting enough for a quiet night in. Seriously, if you’re looking for a recipe that will impress and satisfy, this is it.
Elevate Your Cookie Experience: Serving Suggestions & Creative Variations
Now that you’ve mastered the basic recipe, let’s talk about how to make these even more spectacular, or how to put your own unique spin on them. My absolute favorite way to enjoy these cookies is fresh out of the oven, still warm and gooey, with a tall, cold glass of milk. The contrast between the warm, soft cookie and the refreshing milk is simply divine. For an even more indulgent experience, serve them slightly warm alongside a scoop of vanilla bean ice cream. The melting ice cream mingling with the rich cookie creates an amazing spoonful. You could also pair them with a steaming mug of hot cocoa or a pumpkin spice latte for the ultimate cozy autumn treat.
But don’t stop there! The beauty of baking is in experimentation. Feel free to get creative with your variations. Instead of milk chocolate chips, why not try dark chocolate for a richer, more intense flavor, or even white chocolate chips for a sweeter, creamier note? You could also swirl in a tablespoon of peanut butter or almond butter into the dough before baking for a nutty twist. A sprinkle of chopped pecans or walnuts would add another layer of texture and warmth. For those who love extra spice, a pinch more cinnamon, nutmeg, or even a tiny dash of ginger would enhance the pumpkin flavor beautifully. If you’re feeling adventurous, try different types of marshmallows – perhaps square or rectangular ones for a different aesthetic. And if you’re baking for a crowd, consider turning this recipe into cookie bars by pressing the dough into a baking dish and layering the toppings before baking and slicing. The possibilities are truly endless, allowing you to tailor this incredible recipe to your personal preferences or what you have on hand.
Your Baking Adventure Starts Now!
So, what are you waiting for? I wholeheartedly encourage you to roll up your sleeves, preheat your oven, and embark on this delightful baking journey. These cookies are not just a recipe; they’re an experience, a moment of pure joy waiting to happen in your kitchen. Whether you’re an experienced baker or just starting out, I promise you, the process is rewarding, and the results are absolutely phenomenal. Trust me, your taste buds will thank you! Don’t let another autumn pass without savoring the unique magic of these cookies. They are truly something special that deserves a spot in your fall baking rotation.
Once you’ve baked your batch, I would absolutely love to hear about your experience! Did you stick to the original recipe, or did you venture into some of the variations? What was your favorite part of making them? Please share your stories, your photos, and any tips or tricks you discovered along the way in the comments below. Your feedback and creativity inspire me and our entire baking community. Happy baking, friends! I can’t wait to see your delicious creations.
Easy Pumpkin S’mores Cookies: Your New Favorite Fall Bake
Discover your new favorite autumn indulgence! These Pumpkin S’mores Cookies perfectly blend the cozy, spiced essence of fall’s pumpkin with the nostalgic magic of a classic s’more. Enjoy the comforting combination of a soft pumpkin cookie base, rich melting chocolate, crunchy graham crackers, and delightful gooey toasted marshmallow. A perfect treat for crisp evenings and festive autumn gatherings.
Ingredients
-
1 cup unsalted butter, softened
-
¾ cup packed brown sugar
-
¼ cup granulated sugar
-
½ cup pumpkin puree
-
1 large egg
-
1 tsp vanilla extract
-
2 ¼ cups all-purpose flour
-
1 tsp baking soda
-
1 tsp pumpkin pie spice
-
½ tsp salt
-
1 cup chocolate chips (for dough)
-
1 cup mini marshmallows
-
8 graham crackers, broken into small pieces
-
1 tsp orange food coloring, optional
-
½ cup chocolate chips (for topping)
Instructions
-
Step 1
In a medium bowl, whisk together 2 ¼ cups all-purpose flour, 1 tsp pumpkin pie spice, 1 tsp baking soda, and ½ tsp salt. Set aside. -
Step 2
In a large bowl, cream 1 cup softened unsalted butter, ¼ cup granulated sugar, and ¾ cup packed brown sugar with an electric mixer for 2-3 minutes until light and fluffy. Scrape down sides. -
Step 3
Beat in 1 large egg until fully incorporated. Then, mix in ½ cup pumpkin puree and 1 tsp vanilla extract on low speed until just combined. Add 1 tsp orange food coloring if desired. -
Step 4
Gradually add the dry ingredient mixture to the wet mixture, mixing on low speed until just combined. Do not overmix. Stir in 1 cup chocolate chips (for the dough). -
Step 5
Cover the bowl and chill the cookie dough in the refrigerator for at least 1-2 hours. -
Step 6
While dough chills, cut 1 cup larger marshmallows into quarters if not using mini. Break 8 graham cracker sheets into 1/2-inch to 1-inch pieces. Measure out ½ cup chocolate chips for topping. -
Step 7
Preheat oven to 375°F (190°C). Line two large baking sheets with parchment paper or silicone mats. -
Step 8
Using a 1.5-2 tablespoon scoop, portion dough balls 2 inches apart on prepared sheets. Bake for 8-10 minutes until edges are set but centers are slightly underbaked. -
Step 9
Remove baking sheet from oven. Immediately press a few mini marshmallows, a scattering of the ½ cup chocolate chips (for topping), and graham cracker pieces onto each hot cookie. Return to oven for 2-4 minutes, watching closely until marshmallows are golden and puffed, and chocolate is melted. Repeat for remaining dough. -
Step 10
Let cookies cool on the baking sheet for 5 minutes, then transfer to a wire rack to cool completely. Serve warm or cooled. Store in an airtight container for 3-4 days for maximum freshness.
Important Information
Nutrition Facts (Per Serving)
It is important to consider this information as approximate and not to use it as definitive health advice.
Allergy Information
Please check ingredients for potential allergens and consult a health professional if in doubt.


Leave a Comment