

Grilled Fig Jam Sandwich Melt Step By Step Preparation And Serving Suggestions are what I’m incredibly excited to share with you today. This isn’t just any sandwich; it’s a culinary revelation that promises a delightful fusion of flavors and textures, transforming a simple meal into an exquisite experience.
A Gourmet Twist on Comfort: The Irresistible Grilled Fig Jam Sandwich Melt
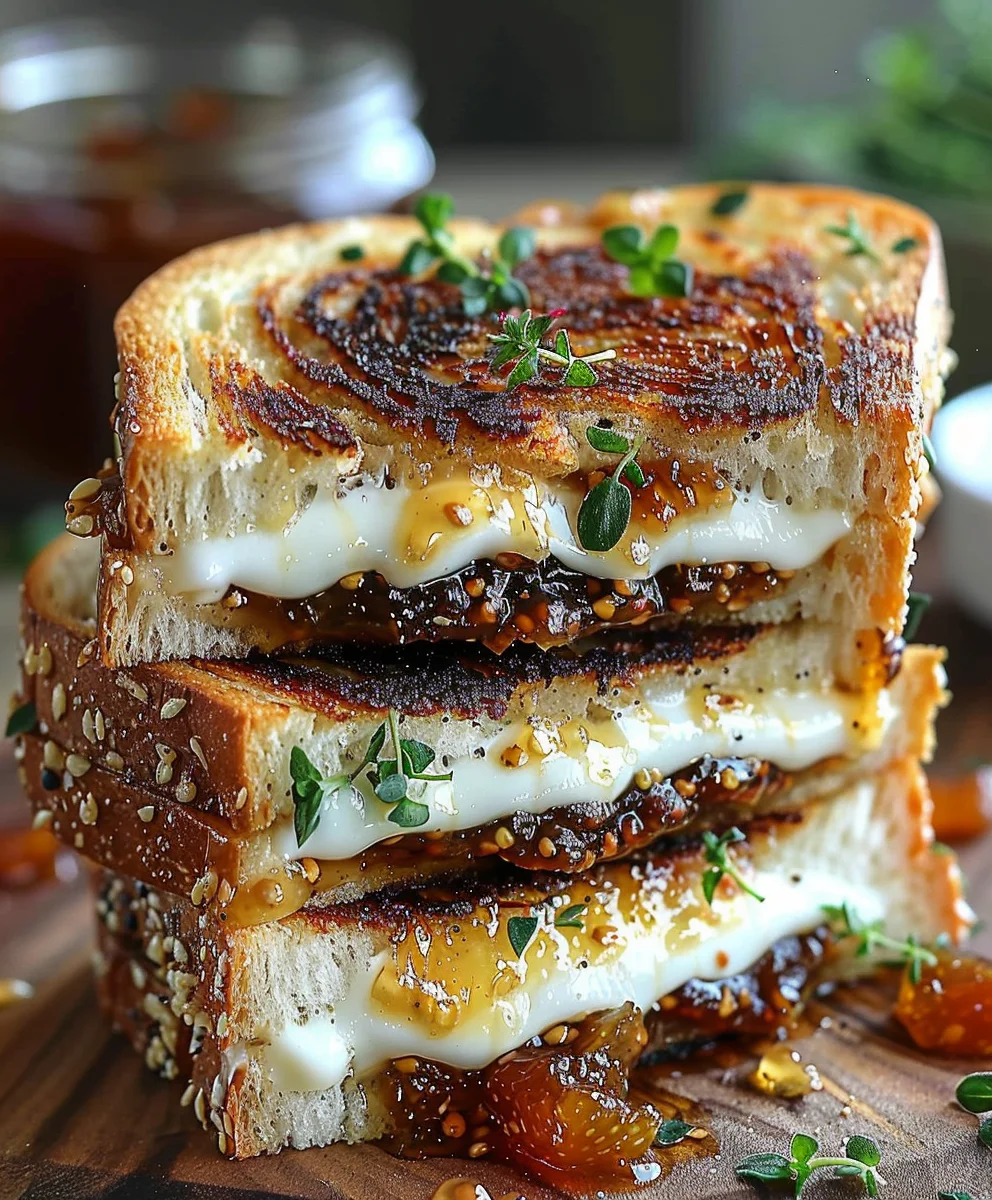
Imagine a perfectly golden-brown, crispy exterior yielding to a warm, gooey interior where sweet, luscious fig jam dances with creamy, savory cheese. It’s a symphony of flavors and textures that elevates the humble sandwich into an unforgettable culinary experience, making every bite a moment to savor.
I’ve always been captivated by how simple ingredients can transform into something extraordinary, and this melt is a prime example. While the concept of a grilled cheese sandwich has roots in comfort food across many cultures, the addition of fig jam brings a sophisticated, gourmet twist, reminiscent of elegant charcuterie boards where sweet fruits perfectly complement rich cheeses. It’s a delightful way to introduce an unexpected sweetness that truly enhances the savory notes, creating a balanced and incredibly satisfying bite that feels both familiar and excitingly new.
People absolutely adore this dish not just for its incredible taste—the delightful blend of sweet and savory is truly addictive—but also for its wonderful textural contrast: the crunch of the perfectly grilled bread against the melting cheese and soft jam. It’s remarkably convenient to prepare, yet feels incredibly luxurious, making it perfect for a quick, elegant lunch or a light dinner that impresses without effort. Throughout this comprehensive guide, I will walk you through the essential Grilled Fig Jam Sandwich Melt Step By Step Preparation And Serving Suggestions, ensuring you can recreate this masterpiece with ease and delight everyone at your table.

Ingredients:
- For the Sandwich Base:
- 8 slices of your favorite artisan bread. I personally love a good sourdough, brioche, or challah for this melt. Their sturdy texture and subtle flavors provide an excellent foundation. Think about a bread that can stand up to grilling and hold its shape.
- 4-6 tablespoons unsalted butter, softened to room temperature. This is crucial for achieving that golden-brown, crispy exterior.
- The Star Fillings:
- 8 ounces (about 2 cups) good quality melting cheese. For a classic, I recommend a sharp white cheddar, Gruyère, or Fontina. For a more adventurous twist, a creamy Brie or even a smoked Gouda can be phenomenal. Feel free to mix and match!
- ½ cup fig jam or fig spread. The quality of your fig jam will truly shine here, so opt for one with rich, concentrated fig flavor. Some even have a hint of orange zest or spices, which can add another layer of complexity.
- Optional Enhancements (Highly Recommended for an Elevated Experience):
- 2 ounces thinly sliced prosciutto or crispy bacon (about 4-6 slices). The salty, savory crunch provides a wonderful counterpoint to the sweet jam and creamy cheese.
- ½ cup fresh arugula or baby spinach. A handful of fresh greens added right before serving adds a peppery freshness and cuts through the richness.
- 2 tablespoons balsamic glaze. A drizzle of this sweet and tangy reduction after grilling can pull all the flavors together beautifully.
- 2 tablespoons chopped toasted walnuts or pecans. For an added textural crunch and nutty depth.
- A pinch of freshly ground black pepper.
Gathering Your Ingredients and Setting the Stage
Before we dive into the exciting part of assembling and grilling, it’s always a good practice to prepare your workspace and ensure all your ingredients are ready. This mise en place approach makes the cooking process smooth and enjoyable, especially when crafting the perfect Grilled Fig Jam Sandwich Melt Step By Step Preparation And Serving Suggestions.
- Butter Your Bread Generously: Take your softened butter and, using a butter knife or offset spatula, spread an even, generous layer on one side of each of your 8 slices of bread. This buttered side will be the exterior of your sandwich, the part that makes contact with the hot pan, so don’t skimp! We’re aiming for that irresistible golden crispness. Ensure the butter is truly softened; it makes spreading much easier and prevents tearing the bread.
- Prepare Your Cheese: If your cheese isn’t already sliced, now is the time to slice or shred it. Aim for slices that are about 1/8 to 1/4 inch thick. If shredding, ensure it’s not too fine, as you want distinct layers that will melt beautifully. Having it ready prevents delays once the sandwich is assembled.
- Pre-Heat Your Pan or Griddle: Place a large non-stick skillet or a cast-iron griddle over medium-low to medium heat. The key here is gentle, consistent heat. If the pan is too hot, the bread will burn before the cheese has a chance to fully melt. We want a slow, steady cook that allows for maximum meltiness inside and perfect crispness outside. Give it about 5-7 minutes to come up to temperature.
Assembling the Perfect Grilled Fig Jam Sandwich Melt
Now comes the fun part – building your masterpiece! This careful layering ensures every bite is balanced and delicious.
- First Bread Layer: Take four of your buttered bread slices and place them butter-side down on a clean surface or cutting board. These will form the bottom of your sandwiches.
- Cheese Foundation: On each of these four slices, layer half of your cheese. This creates a protective barrier for the bread and ensures maximum cheese pull later. Distribute it evenly, going almost to the edges.
- The Fig Jam Layer: Generously spread a tablespoon or two of fig jam over the cheese on each sandwich. Don’t be shy with the jam; its sweetness is a defining characteristic of this melt. Ensure an even spread so you get a burst of fig in every bite.
- Add Your Optional Fillings (If Using):
- Prosciutto/Bacon: If you’re adding prosciutto, gently lay 1-2 slices on top of the fig jam. If using cooked bacon, crumble it evenly over the jam.
- Nuts: Sprinkle your chopped toasted walnuts or pecans over the jam/meat layer for added crunch and richness.
- More Cheese, Please! Add the remaining half of your cheese on top of the fig jam and any optional fillings. This ensures that gooey, melty goodness from top to bottom, securely holding everything in place once melted.
- Top it Off: Place the remaining four buttered bread slices on top, butter-side up. Gently press down on each sandwich to slightly compress it and help all the layers adhere.
The Grilling Process: Achieving Golden Perfection
This is where the magic happens! Patient and even grilling is essential for a truly spectacular Grilled Fig Jam Sandwich Melt.
- Initiate Grilling: Carefully transfer the assembled sandwiches to your pre-heated pan or griddle. If your pan isn’t large enough to accommodate all four at once, work in batches to avoid overcrowding, which can lower the pan temperature and lead to uneven cooking.
- The First Side: Cook the sandwiches for approximately 4-6 minutes on one side. You’re looking for a beautiful, deep golden-brown crust. Resist the urge to flip too early! The slower cook time allows the cheese to start melting gently. You can gently lift an edge with a spatula to check the color. If it’s browning too quickly, slightly reduce the heat.
- Optional: Weight it Down (for even crispness): For an extra-crispy, evenly flattened melt, you can gently place a second, slightly smaller pan on top of the sandwiches, or use a bacon press. This helps compress the sandwich and ensures more surface contact with the heat, resulting in a perfectly even crust. Just don’t press too hard, or you’ll squeeze out all the delicious fillings!
- The Flip: Once the first side is perfectly golden, carefully flip each sandwich using a wide spatula. At this point, you should already see the cheese beginning to soften and melt around the edges.
- The Second Side: Continue cooking for another 4-6 minutes on the second side, or until it, too, is a gorgeous golden-brown and, most importantly, the cheese inside is completely melted and gooey. This might take a little longer if you’ve added many fillings. The key indicator is seeing the cheese gently oozing from the sides.
- Check for Doneness: Gently press the top of a sandwich; if it feels soft and yielding, and you can see cheese melting out, it’s ready! If you’re unsure, you can carefully separate the slices slightly to peek inside.
Resting, Slicing, and Serving Suggestions for Your Grilled Fig Jam Sandwich Melt
A little rest time makes all the difference, allowing the internal temperatures to equalize and the cheese to set just enough for a clean cut. The presentation and accompaniment are key for a truly satisfying experience with your Grilled Fig Jam Sandwich Melt Step By Step Preparation And Serving Suggestions.
- The Crucial Rest: Transfer the finished melts from the pan to a cutting board. Let them rest for 2-3 minutes. This seemingly small step is vital; it allows the super-hot cheese to stabilize slightly, preventing it from gushing out when you cut into it and ensuring a more pleasant eating experience.
- Slice and Serve: Using a sharp serrated knife, slice each sandwich in half, either diagonally or straight down the middle. Diagonally always feels a bit more gourmet, doesn’t it?
- Final Touches (Optional but Recommended):
- Arugula/Spinach: If you’re using fresh greens, carefully lift the top half of the sandwich, tuck a small handful of arugula or spinach inside, and replace the top. The residual heat will slightly wilt them, adding a wonderful freshness and slight peppery bite.
- Balsamic Glaze: Drizzle a thin line of balsamic glaze artfully over the exposed cut edges or directly on top of the sandwich halves. This adds a beautiful sheen and a tangy counterpoint that truly elevates the dish.
- A Dash of Pepper: A final grind of fresh black pepper can awaken the flavors and add a subtle kick.
The Ultimate Serving Experience:
This Grilled Fig Jam Sandwich Melt is fantastic on its own, but it truly shines when paired with thoughtful accompaniments. Here are some of my favorite ways to enjoy and serve it:
- Simple Green Salad: A light, fresh green salad with a bright vinaigrette (lemon and olive oil) is the quintessential pairing. It offers a refreshing contrast to the richness of the sandwich.
- Tomato Soup: You can never go wrong with a classic! A warm bowl of creamy tomato soup or a rustic roasted red pepper and tomato soup is the perfect dipping companion, especially on a chilly day.
- Fresh Fruit: Sliced apples, pears, or a handful of grapes can provide a crisp, clean counterpoint.
- Pickles: A side of tangy cornichons or your favorite dill pickle spears adds a welcome acidity that cuts through the richness and cleanses the palate.
- A Glass of Wine: For the adults, a light-bodied red like a Pinot Noir or a crisp, dry white wine like a Sauvignon Blanc would complement the flavors beautifully.
Variations to Keep Things Exciting:
The beauty of the Grilled Fig Jam Sandwich Melt Step By Step Preparation And Serving Suggestions is its versatility. Once you’ve mastered the basic recipe, don’t hesitate to experiment with different combinations:
- Spicy Fig Jam: Look for fig jams with chili flakes or add a tiny pinch of red pepper flakes to your jam for a sweet and spicy kick.
- Herbed Cheese: Use a flavored cream cheese (like chive and onion, though use sparingly) or a cheese infused with herbs like rosemary or thyme for an aromatic dimension.
- Caramelized Onions: A thin layer of sweet, slow-cooked caramelized onions can add incredible depth and a savory sweetness that pairs wonderfully with figs and cheese.
- Goat Cheese & Honey: For a truly decadent experience, swap out some of the melting cheese for a thin layer of creamy goat cheese, and drizzle with a touch of honey before grilling.
- Apple or Pear Slices: Thinly sliced apples or pears added to the filling provide a refreshing crunch and complementary fruitiness. Add them when you add the fig jam.
- Different Breads: While I love sourdough, experiment with ciabatta, rye, or even a denser whole wheat bread for different textures and flavors.
- Vegetarian Delight: For a purely vegetarian version, focus on the cheese, fig jam, and add fresh basil leaves, roasted red peppers, or even grilled eggplant slices.
I genuinely hope you enjoy creating and savoring this magnificent Grilled Fig Jam Sandwich Melt as much as I do. It’s a simple recipe with complex flavors that truly satisfies, perfect for any meal of the day. Happy cooking!
Conclusion:
And there you have it, friends! We’ve journeyed through the delightful process of creating a sandwich that truly stands out from the crowd. If you’ve been searching for that elusive combination of comfort, gourmet flair, and surprising simplicity, then this recipe for a fig jam sandwich melt is absolutely calling your name. It’s more than just a sandwich; it’s an experience. The moment the warm, crisp bread gives way to the gooey, melted cheese, and that luscious burst of sweet and savory fig jam hits your palate, you’ll understand exactly what I mean. This isn’t just about satisfying a craving; it’s about elevating a simple meal into something truly memorable. I firmly believe that everyone deserves to taste this perfect symphony of textures and flavors. The caramelized exterior of the bread, the melty, tangy cheese, and the rich, fruity fig jam create a harmony that is truly addictive. It’s a versatile dish that works its magic whether you’re looking for a quick, comforting lunch or a sophisticated starter for a dinner party. The ease of preparation belies the impressive outcome, making it an ideal recipe for both seasoned cooks and kitchen novices alike. I’m confident that this sandwich will quickly become a cherished staple in your home, offering a unique blend of familiar comfort and exciting, unexpected flavors.
Now that you’re armed with all the knowledge for its creation, let’s talk about how to truly make this masterpiece your own. While incredible on its own, the Grilled Fig Jam Sandwich Melt Step By Step Preparation And Serving Suggestions truly shine when considered with a few accompaniments. For a light lunch, I love serving it alongside a fresh, peppery arugula salad, perhaps with a simple lemon vinaigrette to cut through the richness. It also pairs wonderfully with a warm bowl of creamy tomato soup on a chilly afternoon, creating the ultimate comfort food duo that feels both indulgent and homey. If you’re hosting, consider cutting the melts into smaller, elegant triangles or squares, transforming them into sophisticated appetizers that are sure to impress your guests with their unique taste and beautiful presentation. For an evening treat, a glass of dry rosé or a light-bodied red wine can beautifully complement the sweet and savory notes, enhancing the overall dining experience. Don’t be afraid to experiment with cheese variations either! While I adore a good sharp cheddar or Gruyère, a creamy brie, a salty provolone, or even a tangy goat cheese can offer exciting new dimensions to the flavor profile, each bringing its own distinct character to the melt. For an extra layer of decadence and complexity, try adding a thin slice of prosciutto, speck, or a few caramelized onions before grilling. A handful of fresh spinach or arugula tucked inside just before serving can add a lovely peppery bite and a touch of freshness, balancing the richness. You could even drizzle a tiny bit of high-quality balsamic glaze over the top just after grilling for an added layer of complex sweetness and acidity that truly elevates the dish. The possibilities for customization are vast, allowing you to tailor this incredible sandwich to your exact preferences or whatever wonderful ingredients you happen to have on hand.
So, what are you waiting for? I wholeheartedly encourage you to dive into your kitchen and give this incredible recipe a try. You’ll be amazed at how quickly it comes together and how profoundly satisfying it is, delivering a gourmet experience with minimal effort. This isn’t just a recipe; it’s an invitation to create, to savor, and to share a truly special dish. Don’t let the simplicity fool you; the flavors are complex and deeply rewarding, promising a delightful culinary adventure. Once you’ve experienced the magic of this grilled fig jam sandwich melt, I’m confident it will earn a permanent spot in your culinary repertoire, becoming a go-to for quick meals and impressive entertaining alike. And when you do make it, I would absolutely love to hear about your experience! Did you stick to the original recipe, or did you put your own creative spin on it? What were your favorite serving suggestions? Please feel free to share your photos, your triumphs, and your personalized twists in the comments below or on social media. Your insights and creativity inspire not only me but also our entire community of food lovers to explore new flavors and techniques. Let’s celebrate the joy of good food and the simple pleasure of a perfectly crafted sandwich together. Happy cooking, and happy eating!

Grilled Fig Jam Sandwich Melt: Sweet, Savory & Simple!
A gourmet twist on a classic comfort food, this Grilled Fig Jam Sandwich Melt features golden-brown bread, gooey cheese, and sweet fig jam, with optional savory smoked beef and fresh greens. Perfect for a quick, elegant meal.
Ingredients
-
8 slices artisan bread (e.g., sourdough, brioche, or challah)
-
4-6 tbsp unsalted butter, softened
-
8 oz (about 2 cups) melting cheese (e.g., sharp white cheddar, Gruyère, Fontina)
-
½ cup fig jam or fig spread
-
2 oz thinly sliced smoked beef or crispy beef bacon (cooked, optional)
-
½ cup fresh arugula or baby spinach (optional)
-
2 tbsp balsamic glaze (optional)
-
2 tbsp chopped toasted walnuts or pecans (optional)
-
Pinch freshly ground black pepper (optional)
Instructions
-
Step 1
1. Prepare Ingredients: Spread softened butter evenly on one side of each of the 8 bread slices. Slice or shred cheese as needed. -
Step 2
2. Preheat Pan: Heat a large non-stick skillet or cast-iron griddle over medium-low to medium heat for 5-7 minutes. -
Step 3
3. Assemble Sandwich Base: Place 4 buttered bread slices (butter-side down) on a clean surface. Layer half of the cheese evenly on each slice. -
Step 4
4. Add Fillings: Generously spread ½ cup fig jam over the cheese on each sandwich. If using, add thinly sliced smoked beef or crispy beef bacon and chopped toasted nuts over the jam layer. -
Step 5
5. Complete Assembly: Layer the remaining cheese on top of the fig jam and any optional fillings. Cover with the remaining 4 buttered bread slices (butter-side up). Gently press down on each sandwich. -
Step 6
6. Grill First Side: Carefully transfer assembled sandwiches to the preheated pan. Cook for 4-6 minutes until the first side is a beautiful, deep golden-brown crust. For an even crust, you can gently weigh down the sandwiches with a second pan or bacon press. -
Step 7
7. Grill Second Side: Flip each sandwich using a wide spatula. Continue cooking for another 4-6 minutes, or until the second side is golden-brown and the cheese inside is completely melted and gooey. Check for doneness by gently pressing the top. -
Step 8
8. Rest & Slice: Transfer the finished melts from the pan to a cutting board. Let them rest for 2-3 minutes to allow the cheese to stabilize. Using a sharp serrated knife, slice each sandwich in half, preferably diagonally. -
Step 9
9. Serve & Garnish: (Optional) Carefully lift the top half of the sandwich and tuck in a small handful of fresh arugula or baby spinach. Drizzle with balsamic glaze and add a final grind of fresh black pepper. Serve warm with suggested accompaniments.
Important Information
Nutrition Facts (Per Serving)
It is important to consider this information as approximate and not to use it as definitive health advice.
Allergy Information
Please check ingredients for potential allergens and consult a health professional if in doubt.


Leave a Comment