

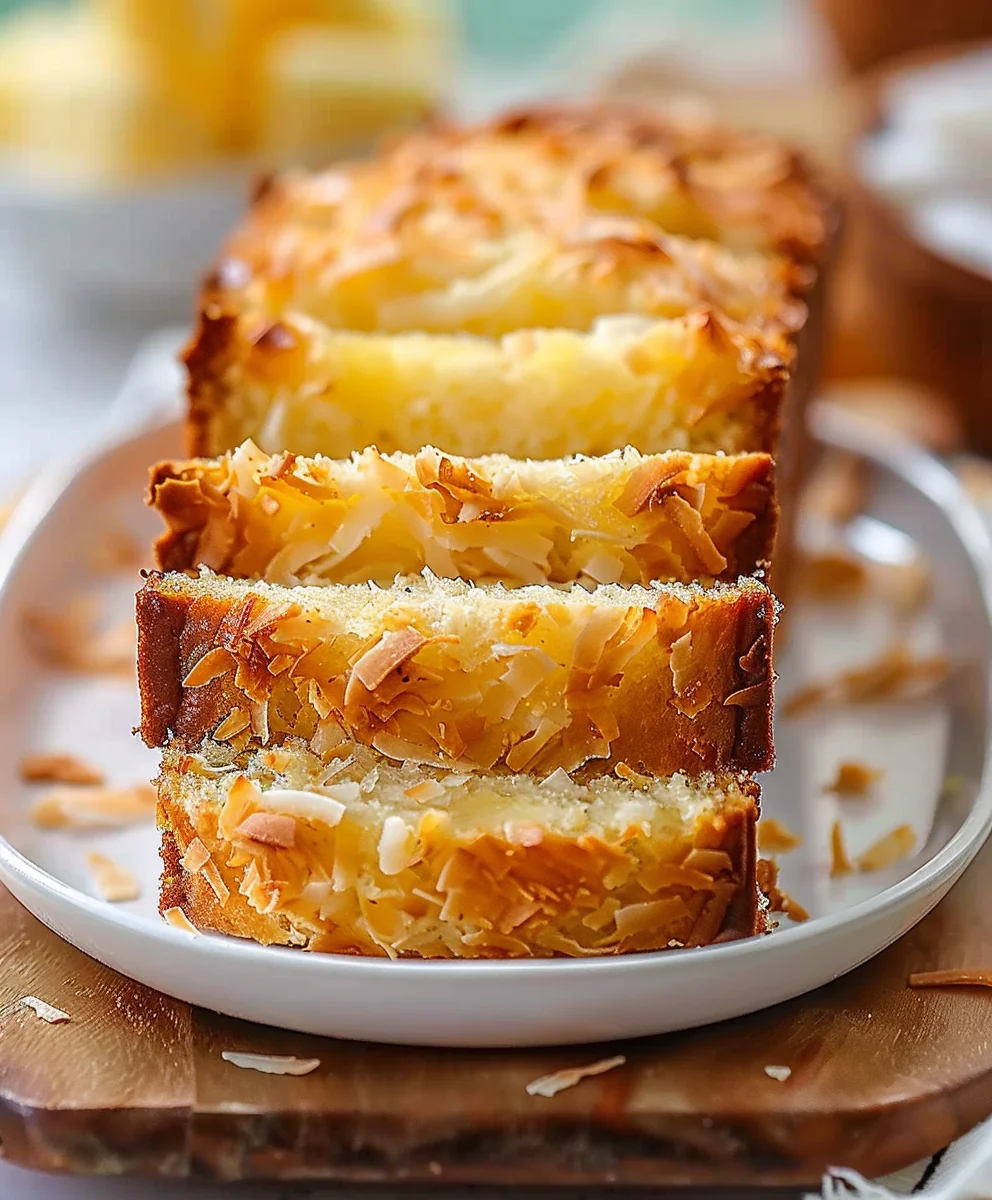
Pineapple Coconut Bread Recipe Taste Of Maui – just the name instantly transports me to the sun-drenched shores and gentle breezes of paradise. Have you ever wished you could bottle that feeling of Hawaiian warmth and bring it into your own kitchen? This delightful bread is my answer to that craving.
I find that this isn’t merely a loaf of bread; it’s a culinary escape, deeply inspired by the vibrant flavors and aloha spirit of Hawaii’s breathtaking island. Maui, renowned for its lush landscapes, abundant pineapple plantations, and the sweet scent of tropical blooms, truly shines through in every tender, fragrant crumb of this recipe. It embodies the essence of island baking, combining readily available, delicious ingredients into something truly special.
Why this recipe is a cherished favorite:
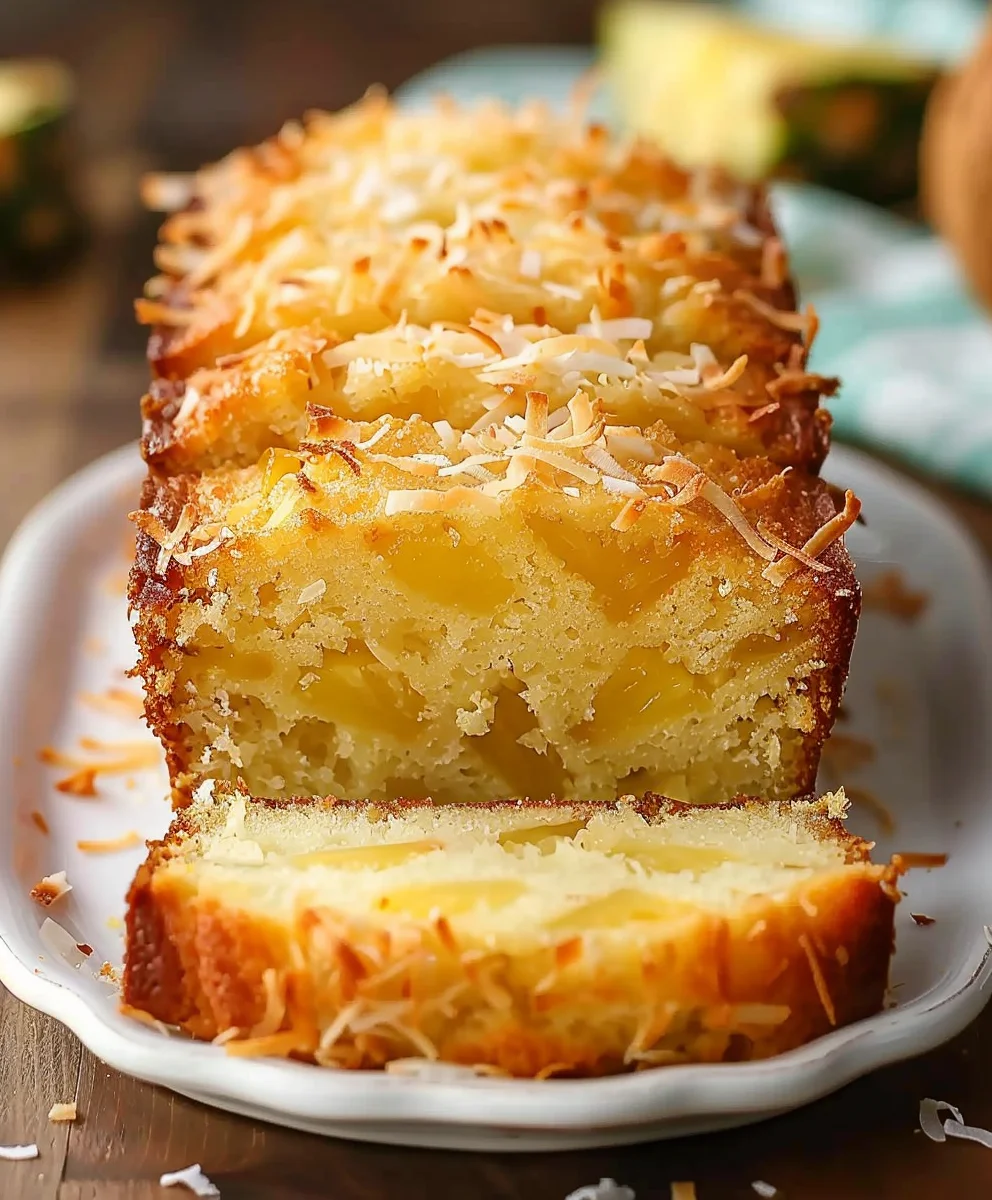
People absolutely adore this dish for its irresistible combination of sweet, juicy pineapple and the rich, creamy notes of coconut. The result is an incredibly moist, wonderfully tender, and fragrant loaf, bursting with a genuine tropical essence that brightens any day. It’s perfect as a comforting breakfast, a delightful snack with your afternoon tea, or even a simple, elegant dessert. The aroma alone as it bakes will fill your home with an inviting warmth. When you share this Pineapple Coconut Bread Recipe Taste Of Maui, you’re not just offering a treat; you’re sharing a little piece of island magic, lovingly baked and ready to be savored.

Ingredients:
- 2 and 1/2 cups (300g) all-purpose flour
- 1 teaspoon baking soda
- 1/2 teaspoon salt
- 1/2 cup (113g) unsalted butter, softened to room temperature
- 1 cup (200g) granulated sugar
- 1/2 cup (100g) packed light brown sugar
- 2 large eggs, at room temperature
- 1 teaspoon pure vanilla extract
- 1/2 cup (120ml) full-fat coconut milk (canned, not the refrigerated beverage type)
- 1 (20-ounce/567g) can crushed pineapple, undrained
- 1 and 1/2 cups (120g) unsweetened shredded coconut
- 1 cup (150g) chopped macadamia nuts (optional, but highly recommended for that authentic Taste Of Maui experience)
Preparing Your Ingredients and Oven:
- Preheat Your Oven: I always start by preheating my oven to 350°F (175°C). This gives the oven plenty of time to come to a consistent temperature, which is crucial for even baking. There’s nothing worse than a loaf that’s overdone on the outside and undercooked in the middle, and an improperly preheated oven can certainly contribute to that. I like to set it about 15-20 minutes before I even start mixing, just to be sure it’s perfectly stable when the bread goes in. A consistently hot oven ensures that the leavening agents in our Pineapple Coconut Bread activate correctly, giving us that beautiful, even rise we’re looking for.
- Prepare Your Loaf Pans: For this delightful Pineapple Coconut Bread Recipe Taste Of Maui, I usually prepare two standard 9×5-inch loaf pans. If you only have one, you can bake them sequentially, or use a larger pan and adjust baking time, keeping a close eye on it. I generously grease and flour my pans, ensuring every nook and cranny is thoroughly coated. This step is non-negotiable for me, as it guarantees that your beautiful, tender bread won’t stick, preserving its perfect shape and crumb when it comes time to unmold. As an alternative, you can create parchment paper slings, leaving an overhang on the sides. This method makes for super easy removal once your delicious bread is baked, allowing you to just lift the loaves right out.
- Gather and Measure: I find it incredibly helpful to measure out all my ingredients before I begin the actual mixing process. This is often called “mise en place” in professional kitchens, and it truly makes the baking experience so much smoother, more organized, and ultimately more enjoyable. It also prevents you from realizing halfway through that you’re missing a crucial ingredient! Make sure your butter and eggs are at room temperature; this is a small but mighty detail. Room temperature butter creams better with sugar, incorporating more air, and room temperature eggs emulsify better with the other ingredients, leading to a much more uniform, tender, and moist crumb in your finished Pineapple Coconut Bread. I like to take them out of the fridge at least an hour before I plan to bake, or for a quicker method, place the eggs in warm water for 5-10 minutes.
Mixing the Batter:
- Whisk Dry Ingredients: In a medium bowl, I combine the all-purpose flour, baking soda, and salt. I give these a good whisk for about 30 seconds to a minute, using a balloon whisk to really aerate them. This step, while seemingly simple and sometimes overlooked, is very important. It ensures that the leavening agent (baking soda) and salt are evenly distributed throughout the flour. This uniform distribution prevents pockets of unmixed ingredients, which can lead to uneven rising or inconsistent flavor profiles in your bread. Think of it as creating the perfect, harmonious foundation for a truly light and airy Pineapple Coconut Bread, ensuring every bite is perfectly balanced.
- Cream Wet Ingredients: Now for the magic! In a large mixing bowl, using an electric mixer (either a stand mixer with the paddle attachment or a hand mixer), I cream together the softened unsalted butter, granulated sugar, and light brown sugar. I beat these on medium speed for about 3-4 minutes, or until the mixture is light, fluffy, and pale in color. This process is called creaming, and it incorporates air into the butter and sugar mixture. This trapped air expands during baking, contributing significantly to the bread’s overall texture, making it light and tender. You’ll notice the mixture becoming much lighter in color and softer in consistency. Do not rush this step; it’s one of the key secrets to that wonderful, tender crumb we’re aiming for in our Pineapple Coconut Bread Recipe Taste Of Maui.
- Add Eggs and Vanilla: Next, I add the two large eggs, one at a time, beating well after each addition until fully incorporated. It’s important to fully incorporate each egg before adding the next one to ensure a smooth batter. Then, I stir in the pure vanilla extract. The mixture might look a little curdled or separated at this point, especially after the first egg, but don’t worry, that’s perfectly normal! As you continue to beat, it will come back together and become smooth. The vanilla adds a beautiful, warm, and aromatic depth that beautifully complements the vibrant tropical flavors of the pineapple and coconut. It’s that subtle background note that makes the other flavors truly sing.
- Incorporate Coconut Milk and Pineapple: With the mixer on low speed, I slowly pour in the full-fat canned coconut milk. Make sure it’s the rich, creamy kind from a can, not the thinner refrigerated beverage type, as the fat content is crucial for moisture and flavor. After the coconut milk is just barely combined, I add the entire can of crushed pineapple, including all its juice. Yes, you read that right – do not drain the pineapple! The pineapple juice is absolutely integral to both the moisture content and the intense tropical flavor of this Pineapple Coconut Bread. Mix until just combined; overmixing at this stage can develop the gluten too much, which can lead to a tough, rubbery bread. We want it moist, tender, and melt-in-your-mouth.
- Combine Wet and Dry: With the mixer still on low speed, I gradually add the whisked dry ingredients to the wet ingredients, mixing only until just combined. This usually takes about 30 seconds to a minute. As soon as you no longer see obvious streaks of dry flour, stop mixing. This is another critical point: overmixing develops the gluten in the flour too much, which can result in a dense, chewy bread rather than the light, fluffy, and tender texture we so desire. I often finish this step by hand with a rubber spatula, gently folding to ensure I don’t overmix and to scrape down the sides of the bowl, catching any rogue flour pockets.
- Fold in Coconut and Macadamia Nuts: Finally, I gently fold in the unsweetened shredded coconut and, if using, the chopped macadamia nuts. I use a spatula for this part, carefully incorporating them into the batter with a light hand. The shredded coconut adds texture and even more tropical fragrance, while the macadamia nuts add a delightful, buttery crunch and a sophisticated flavor that truly elevates this to a genuine Taste Of Maui experience. If you’ve never tried macadamia nuts in your baking, I highly encourage it for this recipe! They really make this Pineapple Coconut Bread shine, adding an extra layer of luxury.
Baking Your Bread:
- Fill the Loaf Pans: I carefully divide the luscious batter evenly between the two prepared loaf pans. I find that using an ice cream scoop or a large spoon helps to ensure even distribution, which is important for uniform baking. Once the batter is in, I gently tap the pans on the counter a couple of times. This helps to release any large air bubbles that might be trapped within the batter and to level the top. This simple step ensures a more even rise and a beautiful, classic domed top on your finished bread.
- Bake to Golden Perfection: I place the filled loaf pans in the preheated oven on the middle rack. The baking time typically ranges from 50 to 65 minutes, but this can vary significantly depending on your specific oven and even the humidity in your kitchen. I usually start checking around the 50-minute mark. You’ll know the Pineapple Coconut Bread is perfectly done when a wooden skewer or toothpick inserted into the very center of a loaf comes out clean, or with just a few moist crumbs attached. If the tops are browning too quickly before the inside is fully cooked, you can loosely tent them with aluminum foil for the last 15-20 minutes of baking. This helps prevent over-browning while allowing the inside to finish cooking thoroughly. The aroma filling your kitchen at this point will be absolutely heavenly – a true tropical paradise! This is the magic of our Pineapple Coconut Bread Recipe Taste Of Maui truly coming to life.
Cooling and Serving:
- Initial Cooling in Pans: Once baked to golden perfection, I carefully remove the loaves from the oven. It’s important to let them cool in their pans for about 10-15 minutes on a wire rack. This initial cooling period is crucial; it allows the bread to set properly and firm up, which makes it significantly easier to remove from the pans without breaking apart or losing its beautiful shape. Resist the urge to pull them out immediately; a little patience here will be abundantly rewarded with perfectly structured loaves!
- Complete Cooling on Rack: After the initial cooling period, I carefully invert the loaves out of their pans and onto the wire rack to cool completely. Allowing the bread to cool completely on a wire rack is absolutely crucial for several reasons: it prevents a soggy bottom (which can happen if moisture is trapped), ensures the texture is just right throughout, and allows the flavors to fully meld. While it’s incredibly tempting to slice into a warm, fragrant loaf, I promise you, the flavors of this Pineapple Coconut Bread truly develop and intensify as it cools. Plus, it slices much cleaner and more beautifully when it’s fully cooled. I know it’s hard, but trust me on this one – it’s worth the wait!
- Serving Suggestions: This Pineapple Coconut Bread is absolutely divine on its own, showcasing its rich, tropical flavors perfectly. However, you can certainly elevate the experience if you wish. I love serving it with a light dusting of powdered sugar, or for an extra special treat, a simple glaze made from powdered sugar, a splash of coconut milk, and a tiny bit of vanilla extract. It’s wonderfully versatile – perfect for breakfast alongside your coffee, as a delightful coffee break snack, or even as a light, tropical-inspired dessert. It also makes a fantastic, heartfelt homemade gift! The incredibly moist, tender crumb infused with the sweet tang of pineapple and the fragrant richness of coconut truly embodies the “Taste Of Maui.” It’s like having a slice of sun-drenched paradise in every single bite.
- Storage: To keep your homemade Pineapple Coconut Bread fresh and delicious for as long as possible, I recommend storing it at room temperature in an airtight container. It will stay wonderfully moist and flavorful for up to 3-4 days. For longer storage, you can wrap individual slices or even whole loaves tightly in plastic wrap, and then further protect them with aluminum foil. This double-wrapping technique helps prevent freezer burn. You can then freeze your bread for up to 3 months. When you’re ready to enjoy that amazing tropical flavor again, simply thaw the bread at room temperature. This way, you can easily enjoy the Taste Of Maui any time you like, whenever a craving for sunshine strikes!
Conclusion:
Well, my fellow bakers and food enthusiasts, we’ve reached the sweet end of our journey through this truly remarkable recipe. I genuinely hope that by now, your imagination is already filled with the tantalizing aroma and the exquisite taste of this tropical delight. This isn’t just another bread recipe; it’s an invitation to a mini-vacation, a passport to paradise that you can bake right in your own kitchen. I can confidently say that this particular creation stands out because it perfectly balances the vibrant sweetness of ripe pineapple with the creamy, delicate notes of coconut, all wrapped up in an incredibly moist and tender crumb. It’s a sensory experience from the moment it starts baking, filling your home with a fragrance that transports you straight to sun-drenched beaches and swaying palm trees. The texture is simply divine – never dry, always yielding, with just enough substance to satisfy without being heavy. It’s that perfect blend of familiar comfort and exotic allure that makes it an absolute showstopper, whether it’s for a casual breakfast or a special gathering.
Why This Recipe Shines as a Must-Try:
What makes this recipe an undeniable must-try? Firstly, its unique flavor profile. Unlike many quick breads that rely on common spices, this one celebrates the bright, refreshing essence of its namesake fruits. It’s a breath of fresh air, a taste of sunshine on even the cloudiest day. Secondly, the ease of preparation belies its sophisticated taste. You don’t need to be a pastry chef to achieve spectacular results; the steps are straightforward, and the ingredients are readily available. It’s incredibly forgiving, making it perfect for both seasoned bakers looking for something new and novices eager to impress. And finally, the sheer joy it brings – both in the baking process and the shared enjoyment afterwards. There’s something profoundly satisfying about pulling a golden-brown loaf from the oven, knowing you’ve created something truly special that will bring smiles to faces.
Discover Its Versatility: Serving Suggestions and Delicious Variations:
Now, let’s talk about enjoying your masterpiece! While this bread is utterly phenomenal on its own, perhaps still warm from the oven, it’s also incredibly versatile. For a simple breakfast, I love a thick slice with my morning coffee or tea, maybe lightly toasted with a smear of softened butter to really enhance its richness. For an indulgent dessert, try serving it with a scoop of vanilla bean ice cream or a dollop of freshly whipped cream, perhaps with a sprinkle of toasted coconut flakes for added texture. You could even drizzle it with a light lime glaze (just powdered sugar and fresh lime juice) for an extra zesty kick! Don’t be afraid to experiment with variations either. Consider folding in a handful of chopped macadamia nuts or white chocolate chips into the batter for an added layer of flavor and crunch. A hint of rum extract could also elevate the tropical notes even further, making it an adult-friendly treat. This bread is robust enough to handle various additions, inviting you to put your own creative spin on it.
Your Island Escape Awaits: Try It and Share Your Experience!
So, what are you waiting for? I wholeheartedly encourage you to roll up your sleeves, preheat your oven, and embark on this delightful baking adventure. You won’t regret it. This particular Pineapple Coconut Bread Recipe Taste Of Maui is truly an experience, a little piece of tropical bliss that you can recreate in your very own kitchen. I promise, the moment you take that first bite, you’ll understand exactly what I mean. The flavors will dance on your palate, and you’ll feel a warmth spread through you, reminiscent of island sunsets. Once you’ve baked it, I would absolutely love to hear about your experience! Did you stick to the recipe, or did you add your own creative twist? What did your family and friends think? Please don’t hesitate to share your thoughts, your successes, and even your funny baking anecdotes in the comments below. Your feedback and stories inspire me and our entire community of food lovers. Take a photo of your beautiful creation and share it with us – let’s spread the aloha spirit, one delicious loaf at a time! Happy baking!
Tropical Maui Pineapple Coconut Bread
A delightful, incredibly moist, and tender bread inspired by the vibrant flavors and aloha spirit of Maui, bursting with sweet pineapple and rich coconut.
Ingredients
-
2 cups all-purpose flour
-
1 cup granulated sugar
-
1 teaspoon baking powder
-
1 teaspoon baking soda
-
1/2 teaspoon salt
-
1/2 cup unsweetened shredded coconut
-
1 cup crushed pineapple, drained
-
1/2 cup unsalted butter, melted
-
2 large eggs
-
1 teaspoon vanilla extract
-
1/2 cup buttermilk
Instructions
-
Step 1
Preheat oven to 350°F (175°C). Grease and flour two 9×5-inch loaf pans, or use parchment slings for easy removal. -
Step 2
In a medium bowl, whisk together the flour, baking powder, baking soda, and salt. -
Step 3
In a large bowl, combine the melted butter and granulated sugar. Beat in the eggs one at a time until well incorporated, then stir in the vanilla extract. -
Step 4
Add the buttermilk and drained crushed pineapple to the wet mixture, mixing until just combined. -
Step 5
Gradually add the whisked dry ingredients to the wet ingredients, mixing on low speed only until just combined. Do not overmix. -
Step 6
Gently fold in the unsweetened shredded coconut. -
Step 7
Divide the batter evenly between the prepared loaf pans and tap gently to level. -
Step 8
Bake for 50-65 minutes, or until a wooden skewer inserted into the center comes out clean. Tent with foil if tops brown too quickly. -
Step 9
Cool in pans for 10-15 minutes, then invert onto a wire rack to cool completely before slicing. -
Step 10
Serve plain or with a light glaze. Store in an airtight container at room temperature for up to 3-4 days, or freeze for longer storage.
Important Information
Nutrition Facts (Per Serving)
It is important to consider this information as approximate and not to use it as definitive health advice.
Allergy Information
Please check ingredients for potential allergens and consult a health professional if in doubt.


Leave a Comment