

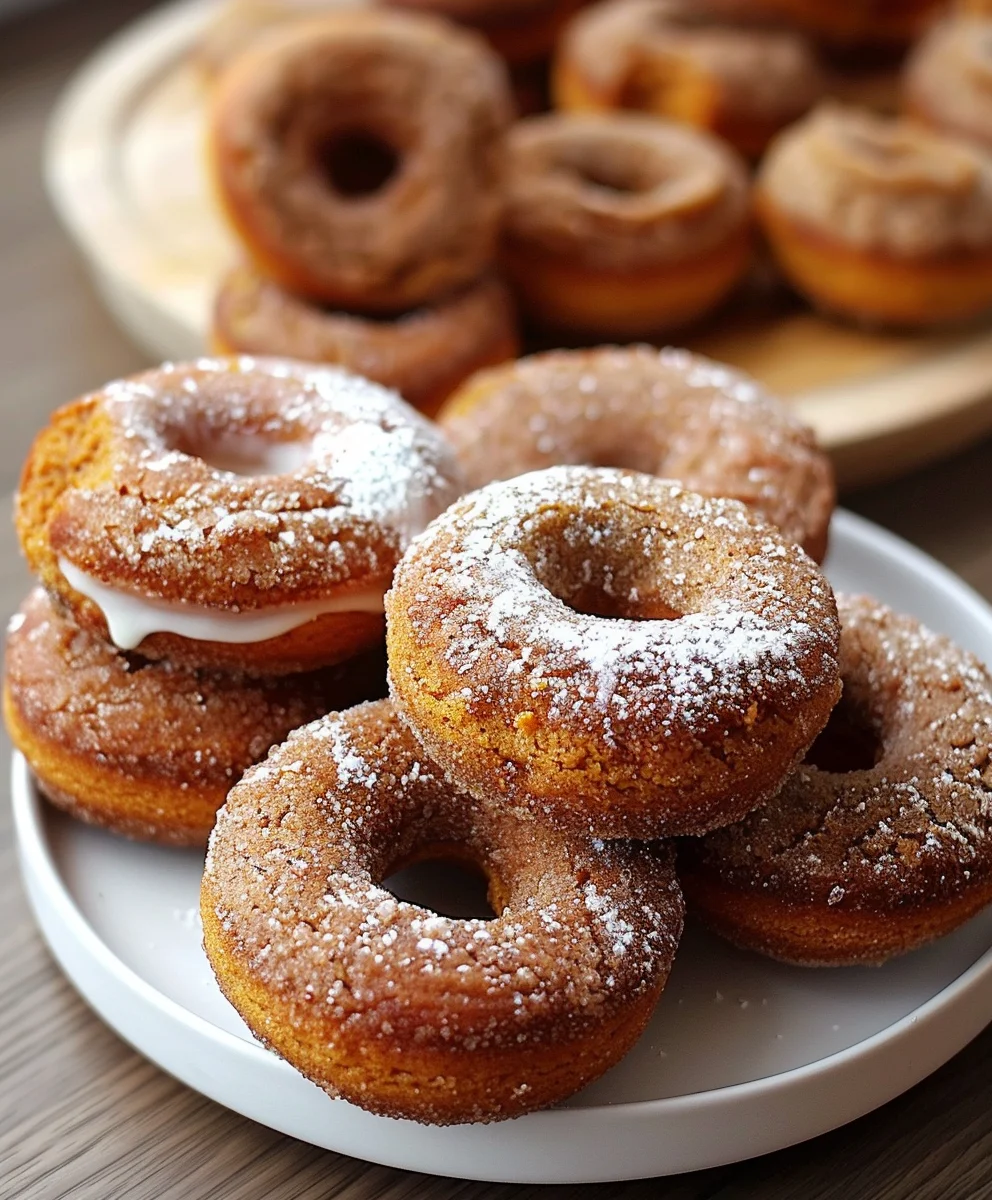
Baked Pumpkin Donuts offer an unparalleled taste of autumn, delivering a symphony of warming spices and sweet pumpkin in every delightful bite. There is truly something magical about the aroma of these golden treats filling your home, instantly evoking feelings of comfort and nostalgia. While the humble donut boasts a rich history spanning centuries and diverse cultures, its modern incarnation, especially when infused with the quintessential flavors of pumpkin, speaks to a deeply ingrained love for seasonal comfort food.
I find this dish isn’t just a simple dessert; it’s an experience, a small celebration of the changing seasons. People adore these Baked Pumpkin Donuts not only for their incredibly moist, cake-like texture and the perfect balance of cinnamon, nutmeg, and ginger, but also for their convenience and healthier profile compared to their fried counterparts. Baking these donuts allows you to achieve that irresistible tender crumb without the excess oil, making them a wonderful indulgence for a cozy weekend breakfast or a delightful afternoon treat with a hot cup of coffee or tea. This recipe truly captures the heart of autumn, making it a beloved staple in many homes.

Ingredients:
- For the Baked Pumpkin Donuts:
- 1 ½ cups (190g) all-purpose flour
- 1 teaspoon baking powder
- ½ teaspoon baking soda
- 1 teaspoon ground cinnamon
- ½ teaspoon ground nutmeg
- ¼ teaspoon ground ginger
- ⅛ teaspoon ground cloves (or a tiny pinch of allspice)
- ½ teaspoon salt
- ½ cup (100g) granulated sugar
- ¼ cup (50g) packed light brown sugar
- 1 large egg, at room temperature
- ¾ cup (180g) pumpkin puree (not pumpkin pie filling)
- ¼ cup (60ml) whole milk, at room temperature
- 2 tablespoons (30g) unsalted butter, melted and slightly cooled
- 1 teaspoon pure vanilla extract
- For the Classic Vanilla Glaze:
- 1 ½ cups (180g) powdered sugar (confectioners’ sugar), sifted
- 3-4 tablespoons (45-60ml) whole milk or heavy cream, at room temperature
- 1 teaspoon pure vanilla extract
- A tiny pinch of salt (optional, but enhances flavor)
- Optional Toppings:
- A dusting of cinnamon sugar
- Finely chopped pecans or walnuts
- Festive sprinkles
Prepping for Perfect Baked Pumpkin Donuts
- Preheat Your Oven and Prepare Your Donut Pans: My first step for any baking adventure, and especially for these delightful Baked Pumpkin Donuts, is to get the oven ready. I always set my oven to 350°F (175°C) to ensure it’s thoroughly heated and stable by the time my batter is ready. This consistent temperature is crucial for an even rise and perfect texture. While the oven warms up, I grab my donut pans. For most standard donut pans, a light greasing with cooking spray or a thin swipe of butter is usually sufficient. If you’re using a non-stick pan that’s a bit older or you just want to be extra cautious, a light flouring after greasing can provide an additional layer of non-stick protection, preventing any sticking mishaps. I often use a silicone donut pan, which typically requires less preparation, but a quick spritz of cooking spray still gives me peace of mind. Taking these few moments to prepare your pans ensures your beautiful Baked Pumpkin Donuts will release cleanly and beautifully once baked, avoiding any frustration later on. Remember, a well-prepped pan is the first secret to bakery-worthy results.
Crafting the Dry Mix for Your Baked Pumpkin Donuts
- Combine Your Dry Ingredients with Precision: In a large mixing bowl, I carefully measure out all of my dry ingredients. This includes the all-purpose flour, baking powder, baking soda, ground cinnamon, ground nutmeg, ground ginger, and that tiny pinch of ground cloves (or allspice, if that’s what I have on hand). The salt also goes in here; it’s not just for seasoning, but it plays a vital role in balancing the sweetness and enhancing the overall flavor profile of our Baked Pumpkin Donuts. I always recommend sifting these ingredients together, especially the flour and powdered spices. Sifting not only removes any lumps but also aerates the flour, which contributes to a lighter, more tender crumb in the final donut. After sifting, I take a whisk and gently, but thoroughly, combine everything. The goal here is to ensure that the leavening agents (baking powder and baking soda) and all those wonderful autumn spices are evenly distributed throughout the flour. This uniform distribution means every bite of your Baked Pumpkin Donuts will have that consistent, warm, spiced flavor we’re aiming for, and each donut will rise beautifully without any dense spots. Set this perfectly spiced dry mixture aside for now; it’s waiting for its wet companions.
Whipping Up the Wet Wonders for Your Baked Pumpkin Donuts
- Prepare Your Rich Wet Ingredients: In a separate, medium-sized bowl, it’s time to bring together the heart and soul of our pumpkin flavor. I start by whisking the granulated sugar and light brown sugar together. Brown sugar adds a lovely molasses note and extra moisture, complementing the pumpkin beautifully. Next, I crack in the large egg. Ensuring the egg is at room temperature is important because it incorporates more easily and creates a smoother emulsion with the other liquids, leading to a more consistent batter. I whisk these vigorously until they are well combined and slightly lighter in color, a process that usually takes about 1-2 minutes. Then, I add the star of the show: the pumpkin puree. It’s absolutely crucial to use 100% pure pumpkin puree, not pumpkin pie filling, which contains added sugars and spices that would throw off our recipe. Alongside the pumpkin, I pour in the whole milk (also at room temperature, for the same reason as the egg), the melted and slightly cooled unsalted butter, and the pure vanilla extract. I give everything another good whisk until all the wet ingredients are thoroughly combined and the mixture is smooth and homogenous. You’ll notice a beautiful, vibrant orange hue forming. This luscious wet mixture is now perfectly poised to lend its moisture, flavor, and richness to our incredibly delicious Baked Pumpkin Donuts.
Uniting the Elements: Creating the Perfect Donut Batter
- Gently Combine Wet and Dry to Form Your Donut Batter: Now comes the moment to bring our meticulously prepared dry and wet mixtures together. I take the bowl of wet ingredients and pour it directly into the bowl containing our spiced dry ingredients. This is a critical step where technique truly matters for the texture of your Baked Pumpkin Donuts. Using a rubber spatula, I begin to fold the ingredients together very gently. The key word here is “gently” – we want to mix just until the dry ingredients are fully incorporated into the wet. Overmixing is the arch-nemesis of tender baked goods, and especially donuts. When you overmix, you develop the gluten in the flour too much, leading to tough, dense donuts rather than the light, fluffy texture we’re aiming for. So, I mix just until there are no streaks of dry flour visible. A few small lumps are perfectly acceptable, even desirable; they often indicate you haven’t overmixed. The batter will be thick, resembling a rich cake batter, and wonderfully fragrant with all those pumpkin and spice notes. This beautifully unified batter is now ready to be transformed into our delicious Baked Pumpkin Donuts.
- Prepare for Piping: Once the batter is ready, I transfer it into a large piping bag. If you don’t have a piping bag, a large resealable plastic bag with one corner snipped off will work just as well. This method, while perhaps seeming like an extra step, is incredibly helpful for neatly filling the donut molds without making a mess. Attempting to spoon the thick batter into the small donut cavities can be challenging and often results in uneven filling and smudged pans, which can lead to burnt edges on your Baked Pumpkin Donuts. I snip off about a ½-inch to ¾-inch opening at the corner of the bag, ensuring it’s wide enough for the thick batter to flow easily but not so wide that it’s uncontrollable. Having the batter in a piping bag makes the next step of filling the pans so much cleaner and more efficient.
Baking Brilliance: Your Baked Pumpkin Donuts Take Shape
- Fill Your Donut Molds and Begin Baking: With the batter safely tucked into the piping bag, I carefully pipe the batter into each well of my prepared donut pans. I aim to fill each cavity approximately two-thirds to three-quarters full. This allows ample room for the Baked Pumpkin Donuts to rise during baking without overflowing their molds. It’s a bit like Goldilocks – not too little, not too much, but just right. Overfilling can lead to misshapen donuts that lose their signature hole, while underfilling might result in smaller, less satisfying donuts. Once all the wells are filled, I gently place the donut pan into my preheated 350°F (175°C) oven. The baking time for these beauties is typically between 10 to 14 minutes. I always recommend keeping a close eye on them, especially towards the end of the baking time, as oven temperatures can vary slightly.
- Check for Doneness and Cool: You’ll know your Baked Pumpkin Donuts are perfectly done when they are beautifully golden brown around the edges, and when you gently touch the tops, they spring back lightly. Another reliable test is to insert a toothpick into one of the donuts; if it comes out clean, they are ready. Once baked to perfection, I carefully remove the pan from the oven. Resist the urge to immediately transfer them! I let the donuts cool in the pan for about 5 minutes. This brief cooling period allows them to firm up slightly, making them much easier to handle and preventing them from breaking apart when you remove them. After 5 minutes, I gently invert the pan onto a wire rack. If using a standard metal pan, a gentle tap usually helps them release. If using silicone, they often pop out with ease. I then arrange the Baked Pumpkin Donuts on the wire rack in a single layer to cool completely. It’s absolutely essential that the donuts are completely cool before glazing. Glazing warm donuts will cause the glaze to melt and run off, resulting in a sticky mess rather than a beautiful, set finish. Patience is a virtue when it comes to the cooling process for these delicious treats!
Mastering the Glaze for Irresistible Baked Pumpkin Donuts
- Whip Up Your Classic Vanilla Glaze: While the Baked Pumpkin Donuts are cooling down, I turn my attention to preparing the glaze. In a medium-sized bowl, I measure out the sifted powdered sugar. Sifting is crucial here to prevent lumps and ensure a silky-smooth glaze. To this, I add the pure vanilla extract and that tiny pinch of salt, which truly helps to amplify the vanilla and cuts through the sweetness just a touch. Then, I start adding the whole milk or heavy cream, beginning with 3 tablespoons. I whisk these ingredients together vigorously. The goal is to achieve a glaze that is thick enough to coat the donuts beautifully without being overly runny, but still thin enough to drip appealingly. If the glaze appears too thick, I add the remaining tablespoon of milk or cream, a tiny bit at a time, whisking well after each addition until I reach the perfect consistency. You’re looking for a consistency that coats the back of a spoon and slowly drips off, but isn’t watery. It should be able to hold its shape somewhat on the donut. This creamy, fragrant vanilla glaze is the perfect crowning glory for our Baked Pumpkin Donuts, adding that essential layer of sweetness and shine.
The Grand Finale: Glazing and Enjoying Your Baked Pumpkin Donuts
- Glaze Your Baked Pumpkin Donuts to Perfection: Once your Baked Pumpkin Donuts are completely cool – and I mean completely cool, to ensure the glaze sets properly – it’s time for the fun part: glazing! I take one donut at a time and gently dip the top half into the prepared vanilla glaze. I like to submerge it just enough so that the entire top surface is coated. Then, with a slight twist, I lift the donut out of the glaze, allowing any excess to drip back into the bowl for a few seconds. This helps create a neat, even coating.
- Set and Garnish (Optional): After glazing, I immediately place the dipped donut back onto the wire rack, which I’ve thoughtfully placed over a sheet of parchment paper or aluminum foil to catch any drips and make cleanup a breeze. If I’m adding any optional toppings like cinnamon sugar, chopped nuts, or festive sprinkles, I sprinkle them over the wet glaze right away, before it has a chance to set. This ensures they adhere beautifully. I continue this process with all the remaining Baked Pumpkin Donuts, dipping, dripping, and garnishing.
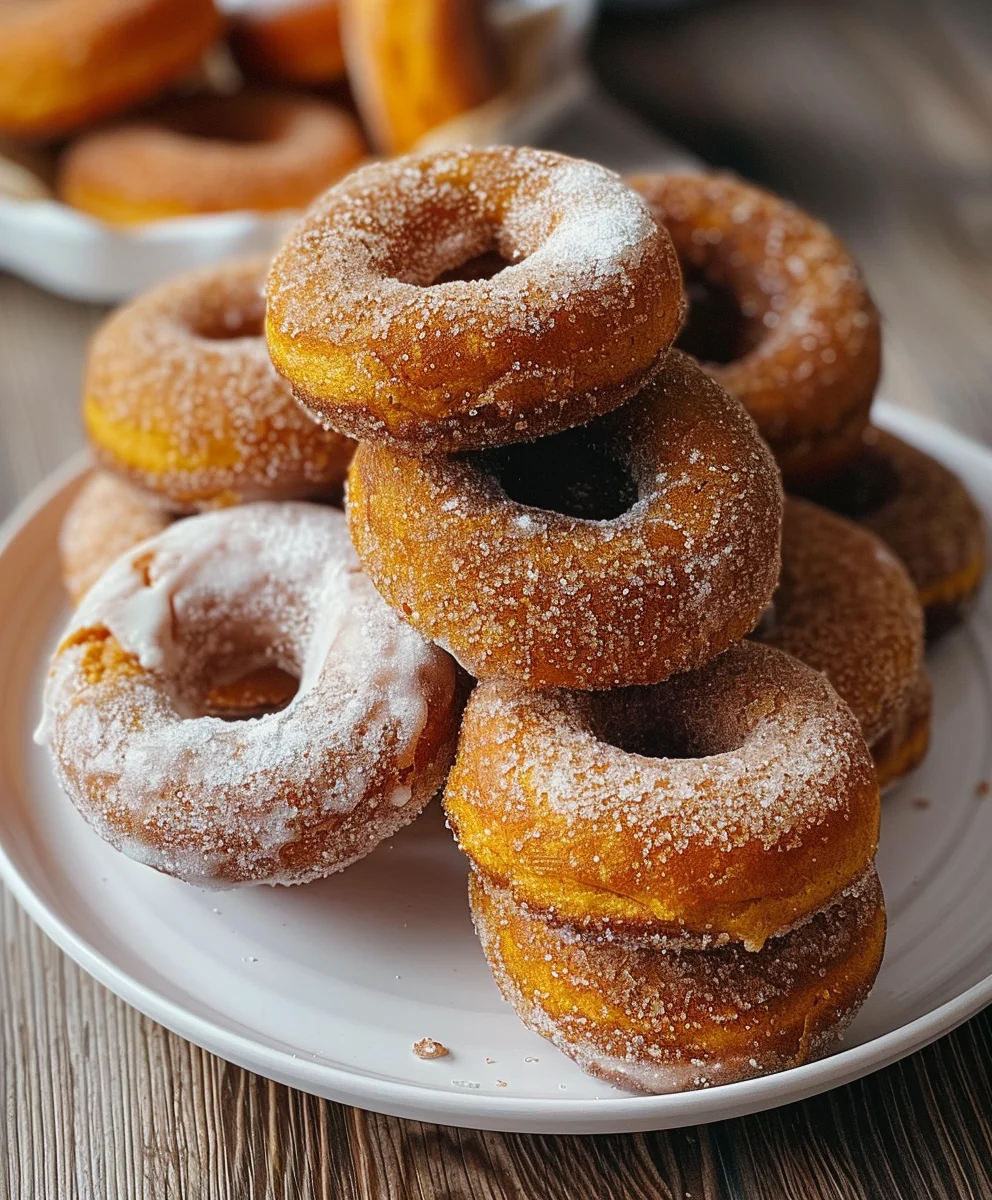
- Allow the Glaze to Set and Serve: I let the glazed Baked Pumpkin Donuts sit on the wire rack for at least 15 to 20 minutes, or until the glaze has fully set. This waiting period is crucial for the glaze to firm up, preventing sticky hands and ensuring a clean, bakery-style finish. Once the glaze is firm and no longer tacky to the touch, your gorgeous and incredibly delicious Baked Pumpkin Donuts are ready to be devoured! They are absolutely perfect served fresh with a cup of coffee or tea, making for a wonderfully comforting treat. I often find they disappear remarkably quickly!
Conclusion:
Well, my friends, we’ve journeyed through the magic of creating something truly special, something that embodies the very essence of comfort and joy. This recipe isn’t just about baking; it’s about crafting moments, infusing your home with an aroma that signals warmth, welcome, and pure delight. These aren’t just any donuts; they are a gateway to autumn bliss, a testament to the simple pleasures that truly make life sweet. I genuinely believe this recipe for Baked Pumpkin Donuts is an absolute must-try for everyone, regardless of your baking prowess. From the moment you mix the batter, you’ll feel a sense of accomplishment, and the results will speak for themselves. The texture is divine – wonderfully moist, tender, and cake-like, a perfect contrast to the often greasy, heavy nature of fried varieties. Each bite delivers that quintessential pumpkin flavor, elevated by a harmonious blend of cinnamon, nutmeg, ginger, and cloves, all without being overwhelmingly sweet. It’s the kind of treat that truly nourishes the soul, offering a wholesome alternative that doesn’t skimp on flavor or satisfaction.
Imagine a crisp morning, a warm mug in your hand, and one of these golden beauties – it’s a picture of perfection, a little escape from the everyday.
But the experience doesn’t end with the baking! The versatility of these Baked Pumpkin Donuts is another reason they deserve a permanent spot in your recipe collection. While they are utterly scrumptious plain, fresh from the oven, there are countless ways to elevate them further. For a classic finish, a simple powdered sugar glaze, whisked with a touch of milk and vanilla extract, provides a delicate sweetness and a beautiful sheen. If you’re feeling a bit more indulgent, try a maple glaze, made by substituting the milk with pure maple syrup – it adds an extra layer of autumn flavor that is simply irresistible. And for those who adore a bit of tang, a cream cheese glaze, combining softened cream cheese with powdered sugar and a splash of milk, creates a luscious topping that perfectly complements the warm spices within the donuts.
Beyond glazes, consider a sprinkle of cinnamon sugar while they’re still warm for a classic donut shop vibe. Or, for an extra textural delight, chop some toasted pecans or walnuts and sprinkle them over a freshly glazed donut. You could even fold in a handful of mini chocolate chips into the batter before baking for a delightful surprise.
Serving these Baked Pumpkin Donuts is just as flexible.
They are, of course, a phenomenal breakfast or brunch item, perfect alongside your morning coffee, a steaming cup of tea, or even a glass of chilled apple cider. But don’t relegate them solely to the morning! They make an excellent after-dinner dessert, particularly when served slightly warm with a scoop of vanilla bean ice cream. Imagine them as a cozy afternoon snack, a little pick-me-up during a busy day, or even as thoughtful edible gifts for friends and family during the holiday season. They store beautifully in an airtight container at room temperature for a few days, so you can enjoy their deliciousness over time.
So, I truly hope you’re feeling inspired to roll up your sleeves and dive into this recipe. It’s more than just following instructions; it’s an invitation to create, to share, and to savor. Don’t be shy – give these wonderful Baked Pumpkin Donuts a try! You might just discover your new favorite fall tradition. And once you do, I would absolutely love to hear about your experience. Did you try a unique variation? Did you serve them at a special gathering? What did your loved ones think? Your feedback and shared culinary adventures mean the world to me. So, bake with heart, share with joy, and let’s celebrate the magic of homemade treats together! I eagerly await hearing about your delicious donut success!
Baked Pumpkin Donuts: Easy & Delicious Fall Treat!
Baked Pumpkin Donuts offer an unparalleled taste of autumn, delivering a symphony of warming spices and sweet pumpkin in every delightful bite. This recipe yields incredibly moist, cake-like donuts with the perfect balance of cinnamon, nutmeg, and ginger, and a healthier profile compared to fried versions.
Ingredients
-
For the Baked Pumpkin Donuts:
-
1 3/4 cups all-purpose flour
-
1 1/2 tsp baking powder
-
1/2 tsp baking soda
-
1 tsp ground cinnamon
-
1 tsp pumpkin pie spice
-
1/2 tsp salt
-
1/2 cup packed light brown sugar
-
1/2 cup granulated sugar
-
1 cup pumpkin puree
-
2 large eggs
-
1/3 cup vegetable oil
-
1 tsp vanilla extract
-
For the Classic Vanilla Glaze:
-
1 1/2 cups powdered sugar, sifted
-
3-4 tbsp whole milk or heavy cream
-
1 tsp vanilla extract
-
Pinch of salt (optional)
Instructions
- Step 1
Preheat oven to 350°F (175°C). Lightly grease donut pans with cooking spray or butter. - Step 2
In a large bowl, whisk together flour, baking powder, baking soda, ground cinnamon, pumpkin pie spice, and salt. Sift for best results. - Step 3
In a separate bowl, whisk granulated sugar, brown sugar, eggs, pumpkin puree, vegetable oil, and vanilla extract until smooth and well combined. - Step 4
Pour the wet ingredients into the dry ingredients. Gently fold with a rubber spatula until just combined and no streaks of dry flour remain. Do not overmix; a few small lumps are acceptable. - Step 5
Transfer the thick batter into a large piping bag (or a resealable plastic bag with a snipped corner). Pipe the batter into the prepared donut wells, filling each cavity approximately two-thirds to three-quarters full. - Step 6
Bake in the preheated oven for 10 to 14 minutes, or until the donuts are golden brown around the edges and spring back lightly when gently touched. A toothpick inserted should come out clean. - Step 7
Remove the pan from the oven and let the donuts cool in the pan for 5 minutes. Then, gently invert the pan onto a wire rack to cool completely. Ensure donuts are completely cool before glazing. - Step 8
While the donuts cool, whisk together the sifted powdered sugar, 3 tablespoons of milk/heavy cream, vanilla extract, and an optional pinch of salt in a medium bowl until smooth. Add more milk/cream sparingly, 1/2 teaspoon at a time, until the desired thick but pourable consistency is reached. - Step 9
Once the donuts are completely cool, dip the top half of each donut into the prepared glaze. Lift, allowing excess glaze to drip off, then place on the wire rack (set over parchment paper to catch drips). Garnish immediately with optional toppings if desired. - Step 10
Allow the glazed donuts to sit on the wire rack for at least 15-20 minutes for the glaze to set. Serve fresh and enjoy!
Important Information
Nutrition Facts (Per Serving)
It is important to consider this information as approximate and not to use it as definitive health advice.
Allergy Information
Please check ingredients for potential allergens and consult a health professional if in doubt.
Leave a Comment