

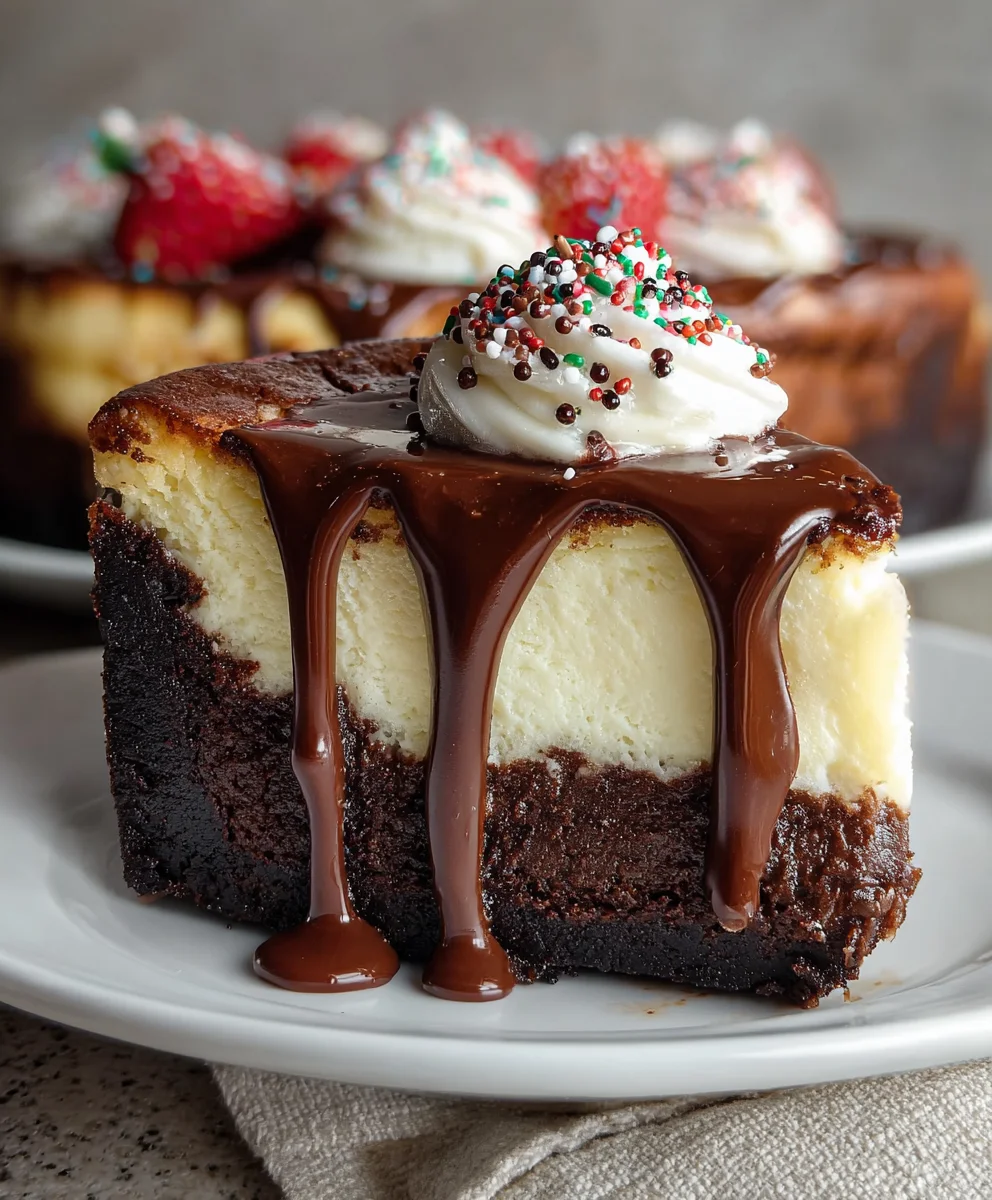
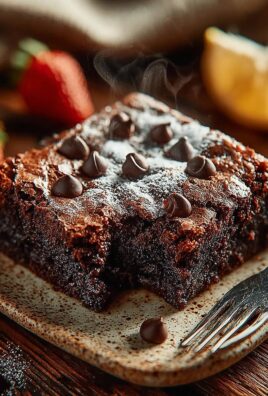
Brownie Cheesecake Birthday Cake – what an extraordinary combination! Imagine the blissful moment when two beloved dessert legends unite to form an unparalleled celebratory masterpiece. I’ve always believed that a truly memorable birthday calls for a cake that not only tastes incredible but also sparks joy and conversation. And this recipe, my friends, delivers precisely that.
For centuries, cakes have marked special occasions, from ancient honey cakes to elaborate Victorian tiers. While the brownie, a distinctly American innovation, and the classic cheesecake, with its surprisingly ancient origins, have each graced countless dessert tables independently, their marriage in this particular form creates something truly exceptional. It’s the ultimate fusion: the rich, fudgy decadence of a homemade brownie base perfectly complementing the smooth, tangy, and impossibly creamy texture of a classic cheesecake layer. This isn’t just a cake; it’s an experience, a symphony of textures and flavors that will undoubtedly steal the show at any celebration.
Why This Brownie Cheesecake Birthday Cake is a Must-Try!
People absolutely adore this dish because it eliminates the delightful dilemma of choosing between a rich chocolate treat and a luscious, creamy confection. You get both, in one magnificent slice! It’s impressively elegant yet surprisingly simple to prepare, making you look like a culinary genius without the extra fuss. Each forkful promises a delightful contrast, ensuring every guest, from the most ardent chocoholic to the dedicated cheesecake lover, finds something to rave about. I am so excited for you to try making this ultimate celebratory dessert.

Ingredients:
-
For the Fudgy Brownie Layer:
- Unsalted Butter: 1 cup (226g), plus extra for greasing
- Granulated Sugar: 1 ½ cups (300g)
- Light Brown Sugar: ½ cup (100g), packed
- Large Eggs: 3, at room temperature
- Vanilla Extract: 1 teaspoon, high-quality
- All-Purpose Flour: 1 cup (125g)
- Unsweetened Cocoa Powder: ¾ cup (75g), Dutch-processed for deep color
- Salt: ½ teaspoon
- Baking Powder: ¼ teaspoon
- Chocolate Chips or Chunks: ½ cup (90g), semi-sweet or dark (optional, for extra chocolatey goodness)
-
For the Creamy Cheesecake Layer:
- Cream Cheese: 3 (8-ounce) blocks (680g total), full-fat, softened at room temperature
- Granulated Sugar: 1 cup (200g)
- Large Eggs: 3, at room temperature
- Sour Cream: ½ cup (120g), full-fat, at room temperature
- Vanilla Extract: 1 teaspoon, pure
- All-Purpose Flour: 1 tablespoon (optional, helps prevent cracking)
-
For the Decadent Chocolate Ganache Topping:
- Semi-Sweet or Dark Chocolate: 8 ounces (226g), finely chopped or good quality chocolate chips
- Heavy Cream: 1 cup (240ml)
- Light Corn Syrup: 1 tablespoon (optional, for extra shine)
- Vanilla Extract: ½ teaspoon
-
For Garnish (Optional but Recommended for a Birthday Cake):
- Fresh berries (raspberries, strawberries)
- Chocolate shavings or curls
- Sprinkles (colorful birthday sprinkles are perfect!)
- Edible gold dust or glitter
Phase 1: Preparing the Fudgy Brownie Base for Your Brownie Cheesecake Birthday Cake
Creating the perfect foundation for your Brownie Cheesecake Birthday Cake starts with a rich, fudgy brownie. This layer needs to be dense enough to support the creamy cheesecake but still incredibly moist and flavorful. Let’s get started on this essential first step.
- Preheat and Prepare: First things first, preheat your oven to 350°F (175°C). This ensures your oven is at the correct temperature when your brownie batter is ready. Grease a 9-inch springform pan generously with butter. I like to line the bottom with a circle of parchment paper as well, just for extra insurance against sticking. For a super clean release later, you can also line the sides with parchment paper, allowing it to extend a couple of inches above the rim.
- Melt Butter and Sugars: In a large, microwave-safe bowl or a saucepan over low heat, melt the 1 cup of unsalted butter. Once melted, remove it from the heat and stir in the 1 ½ cups of granulated sugar and ½ cup of packed light brown sugar. Stir until the sugars are mostly dissolved and the mixture is smooth and glossy. This step is crucial for that signature fudgy texture; the sugar melting into the hot butter helps create a dense crumb. Allow this mixture to cool for about 5-10 minutes. Don’t skip the cooling part! Adding eggs to hot butter will cook them, and we definitely don’t want scrambled eggs in our brownie batter.
- Incorporate Wet Ingredients: Once the butter-sugar mixture has cooled slightly, whisk in the 3 large eggs, one at a time, ensuring each egg is fully incorporated before adding the next. This helps to create an emulsion, leading to a perfectly structured brownie. Then, stir in the 1 teaspoon of pure vanilla extract. You should have a thick, glossy mixture at this point.
- Combine Dry Ingredients: In a separate medium bowl, whisk together the 1 cup of all-purpose flour, ¾ cup of Dutch-processed unsweetened cocoa powder, ½ teaspoon of salt, and ¼ teaspoon of baking powder. Using Dutch-processed cocoa powder will give your brownies a deeper, richer chocolate flavor and a darker color, which is ideal for a show-stopping Brownie Cheesecake Birthday Cake.
- Gentle Mixing: Gradually add the dry ingredients to the wet ingredients, mixing only until just combined. Be careful not to overmix! Overmixing develops the gluten in the flour, which can lead to a tough, cake-like brownie instead of the desirable fudgy texture. If you’re adding chocolate chips or chunks, fold them in now.
- Bake the Brownie: Pour the brownie batter evenly into your prepared springform pan. Bake for 25-30 minutes, or until a toothpick inserted into the center comes out with moist crumbs, but not wet batter. The edges should be set, but the center will still look a little gooey – that’s perfect for fudgy brownies!
- Cool Completely: Remove the brownie from the oven and let it cool completely in the pan on a wire rack. This can take a couple of hours. Resist the urge to move it prematurely! A fully cooled brownie is essential for the next step, as it provides a stable base for the cheesecake layer.
Phase 2: Crafting the Creamy Cheesecake Layer for Your Brownie Cheesecake Birthday Cake
Now that our brownie base is cooling, it’s time to focus on the star of the show – the rich, velvety cheesecake layer. This part of your Brownie Cheesecake Birthday Cake is what makes it truly special and gives it that luxurious texture. Patience and room temperature ingredients are key here!
- Prepare for the Cheesecake: Reduce your oven temperature to 325°F (160°C). This lower temperature is crucial for baking cheesecake evenly and preventing cracks. You’ll also want to prepare a water bath (bain-marie) for your springform pan. Wrap the outside of your springform pan (which still contains the cooled brownie) tightly with several layers of heavy-duty aluminum foil to prevent any water from seeping in. This water bath provides a moist, even heat, which is the secret to a smooth, crack-free cheesecake.
- Soften Cream Cheese: In a large mixing bowl, using an electric mixer (stand mixer with paddle attachment or a hand mixer), beat the 3 blocks of softened full-fat cream cheese on medium-low speed until it is completely smooth and creamy, with no lumps. This is probably the most important step for a silky cheesecake. If your cream cheese isn’t soft enough, you’ll end up with lumps, and nobody wants lumpy cheesecake!
- Add Sugar Gradually: Gradually add the 1 cup of granulated sugar to the cream cheese, beating on low speed until just combined and smooth. Scrape down the sides of the bowl frequently to ensure everything is evenly mixed. Again, avoid overmixing.
- Incorporate Eggs Carefully: Add the 3 large eggs, one at a time, beating on low speed until each egg is just incorporated. Stop mixing as soon as the yolk disappears. Overmixing after adding eggs can incorporate too much air, which can cause the cheesecake to puff up too much during baking and then crack as it cools.
- Stir in Remaining Wet Ingredients: Gently fold in the ½ cup of full-fat sour cream and 1 teaspoon of pure vanilla extract. If you are using the optional 1 tablespoon of all-purpose flour (which I highly recommend for extra insurance against cracks), gently whisk it in at this stage until just combined. The sour cream adds a wonderful tang and extra creaminess, balancing the sweetness of the cheesecake.
- Pour and Bake: Pour the cheesecake batter carefully over the cooled brownie layer in the springform pan. Gently tap the pan on the counter a few times to release any large air bubbles.
- The Water Bath Baking Process: Place the foil-wrapped springform pan into a larger roasting pan. Carefully pour hot water into the roasting pan until it comes about halfway up the sides of the springform pan. Transfer this setup to your preheated oven. Bake for 60-75 minutes, or until the edges of the cheesecake are set, but the center still has a slight wobble when gently nudged. This slight wobble is key! It means it’s perfectly cooked.
- Cooling the Cheesecake: Once baked, turn off the oven and leave the cheesecake in the water bath inside the oven with the door slightly ajar for 1 hour. This slow cooling process is vital for preventing cracks. After an hour, remove the cheesecake from the water bath and the roasting pan, carefully unwrap the foil, and let it cool completely on a wire rack at room temperature for another 1-2 hours.
- Chill Thoroughly: Once cooled to room temperature, cover the cheesecake loosely with plastic wrap and refrigerate for at least 6-8 hours, or preferably overnight. This chilling step is non-negotiable for a firm, perfectly set cheesecake that slices beautifully.
Phase 3: Making the Decadent Chocolate Ganache for Your Brownie Cheesecake Birthday Cake
A truly spectacular Brownie Cheesecake Birthday Cake deserves a crowning glory, and nothing says “celebration” quite like a rich, glossy chocolate ganache. This topping is simple to make but adds immense visual appeal and deep chocolate flavor.
- Prepare the Chocolate: Finely chop the 8 ounces of semi-sweet or dark chocolate and place it in a heatproof bowl. Chopping it finely helps it melt more quickly and evenly when the hot cream is added.
- Heat the Cream: In a small saucepan, heat the 1 cup of heavy cream over medium heat until it just begins to simmer around the edges, but do not let it boil vigorously. You’ll see small bubbles forming. If you’re using the optional 1 tablespoon of light corn syrup (which gives a lovely extra shine and helps prevent crystallization), whisk it into the cream now.
- Combine and Melt: Remove the hot cream from the heat and immediately pour it over the chopped chocolate in the bowl. Let it sit undisturbed for 5 minutes. This allows the heat from the cream to begin melting the chocolate.
- Whisk to Perfection: After 5 minutes, gently whisk the mixture starting from the center and slowly working your way out to the edges until the ganache is completely smooth, glossy, and uniform. If there are any stubborn lumps, you can gently place the bowl over a pot of simmering water (bain-marie style) for a minute, stirring constantly, until everything is melted and smooth. Stir in the ½ teaspoon of vanilla extract.
- Cool the Ganache: Allow the ganache to cool at room temperature for about 30-60 minutes, stirring occasionally, until it thickens to a pourable but not runny consistency – think warm honey. It should be thick enough to cling to the back of a spoon. This is the perfect consistency for drizzling or spreading over your chilled cheesecake.
Phase 4: Assembling and Decorating Your Ultimate Brownie Cheesecake Birthday Cake
The moment of truth! After all the careful baking and chilling, it’s time to bring all the delicious components together and transform them into your magnificent Brownie Cheesecake Birthday Cake. This is where your creativity can shine!
- Release and Transfer: Once your cheesecake has thoroughly chilled (at least overnight is best), run a thin knife around the edge of the pan before releasing the springform collar. This helps ensure a clean release and prevents the cheesecake from sticking to the sides. Carefully transfer the cheesecake to a serving platter or cake stand. You can use two large spatulas to help lift it if needed.
- Apply the Ganache: Once the ganache has cooled to that perfect pourable consistency, spoon or pour it over the top of the chilled cheesecake. Using an offset spatula or the back of a spoon, gently spread the ganache evenly over the top, allowing some to drip enticingly down the sides. For a truly professional look, you can tilt the cake stand and rotate it slowly to let the ganache cascade naturally.
- Re-Chill for Setting: Place the ganache-covered cheesecake back into the refrigerator for at least 30 minutes to allow the ganache to set. This will make it much easier to slice and decorate without smudging.
- Time for Garnish (Birthday Magic!): Now for the fun part – decorating your Brownie Cheesecake Birthday Cake! This is where you make it truly special for a birthday celebration.
- Fresh Berries: Arrange fresh raspberries, sliced strawberries, or a mix of berries around the edge or artfully on top of the ganache. Their bright color and fresh tartness provide a lovely contrast to the rich chocolate and cream cheese.
- Chocolate Accents: Sprinkle chocolate shavings or curls over the top for added texture and visual appeal. You can make these by gently scraping a bar of chocolate with a vegetable peeler or sharp knife.
- Birthday Sprinkles: For that unmistakable birthday vibe, generously sprinkle colorful birthday sprinkles over the top. This is especially fun and visually appealing, adding a festive touch to your creation.
- Elegant Touches: For a more sophisticated birthday cake, a dusting of edible gold dust or glitter can make it truly sparkle.
Be creative and personalize it! This is your chance to make the Brownie Cheesecake Birthday Cake reflect the celebration.
- Final Chill and Serve: Once decorated, return the cheesecake to the refrigerator for a final chill, ideally for another 15-30 minutes, to ensure all the garnishes are set and the cake is perfectly firm for slicing.
- Slicing and Serving: When you’re ready to serve this glorious dessert, use a sharp knife dipped in hot water and wiped clean between each slice. This will give you beautifully clean cuts. Serve chilled and watch the smiles erupt as everyone enjoys a slice of your homemade, decadent Brownie Cheesecake Birthday Cake! It’s truly a showstopper and the perfect celebratory dessert for any chocolate and cheesecake lover. Enjoy every rich, creamy, and fudgy bite!
Conclusion:
And there you have it, my friends! We’ve reached the sweet finale of our delicious journey together, and I truly hope you’re feeling as inspired as I am about this incredible creation. This isn’t just any dessert; it’s a celebration in itself, a symphony of textures and flavors that promises to impress and delight. When I set out to craft this recipe, I wanted something that transcended the ordinary, something that truly delivered on every single indulgent promise, and I genuinely believe we’ve achieved that. The rich, fudgy foundation, the unbelievably creamy, tangy cheesecake layer, and the perfectly balanced sweet finish all come together in a way that simply has to be experienced to be fully appreciated. It’s the kind of dessert that stops conversations, bringing a moment of pure, unadulterated bliss to anyone lucky enough to take a bite. It’s a labor of love, yes, but every single step is worth the ultimate reward, turning simple ingredients into something truly magical.
This particular dessert holds a special place in my heart because it perfectly marries two universally adored treats into one magnificent masterpiece. Imagine the sheer delight of a rich, dense brownie base, providing that perfect chew and deep chocolate flavor, seamlessly flowing into a smooth, luxurious cheesecake that offers a delightful tang to cut through the richness. It’s an alchemy of baking that delivers on multiple levels, promising a complex yet harmoniously balanced flavor profile with every forkful. This isn’t just about baking a cake; it’s about crafting an experience, a centerpiece that will undoubtedly become the star of any gathering. I’ve seen firsthand the wide smiles and surprised gasps of delight when this beauty is presented, and that’s precisely why I consider it an absolute must-try for any home baker looking to elevate their dessert game. Seriously, if you’re looking for a showstopper that tastes even better than it looks, this is your recipe. It truly represents the pinnacle of celebratory baking, offering layers of enjoyment that unfold with each exquisite mouthful, making it a truly unforgettable culinary adventure.
Serving Suggestions & Creative Variations:
Now that you’ve put in the effort to create this magnificent dessert, let’s talk about how to serve it and how you can make it even more uniquely yours! While this cake is undeniably spectacular on its own, a simple dusting of high-quality cocoa powder or a sprinkle of powdered sugar can add a touch of elegant simplicity. For a more decadent presentation, consider a drizzle of homemade chocolate ganache or a luscious caramel sauce cascading down the sides. Fresh berries—think vibrant raspberries or juicy sliced strawberries—offer a beautiful contrast in both color and tartness, making each slice feel even more special and visually appealing. For the true chocolate lover, a scattering of dark chocolate shavings or even mini chocolate chips can heighten the cocoa experience. And don’t forget the power of a dollop of freshly whipped cream, perhaps infused with a hint of vanilla bean or a touch of coffee liqueur, to add an airy lightness that balances the richness of the cake beautifully. This dessert is best served chilled, allowing the cheesecake to set perfectly and the flavors to fully meld, but a slice left at room temperature for just a few minutes before serving will yield a slightly softer, almost melt-in-your-mouth texture that some prefer.
Feeling adventurous? The beauty of this recipe lies in its adaptability! For the brownie base, you could incorporate chopped walnuts or pecans for an added crunch and nutty flavor, or swirl in some peanut butter for a delightful peanut butter cup twist. The cheesecake layer itself can be a canvas for your creativity; a swirl of raspberry puree or cherry pie filling before baking can add a fruity dimension, or you could infuse it with espresso powder for a mocha kick. For festive occasions, a splash of peppermint extract in the cheesecake, perhaps topped with crushed candy canes, could transform it into a holiday wonderland. And for those who love a hint of salt to balance their sweets, a sprinkle of flaky sea salt over the top before serving will truly make the chocolate notes sing. Think about making individual mini cheesecakes in ramekins or muffin tins for portion control and adorable presentation, perfect for parties or personal treats. This versatility means you can truly make this recipe a reflection of your own tastes and the specific occasion you’re celebrating. Imagine the possibilities!
Your Turn to Shine!
So, my dear fellow bakers, I genuinely hope I’ve convinced you to roll up your sleeves and give this incredible recipe a try. It’s more than just a dessert; it’s an invitation to create something truly memorable. There’s an undeniable joy that comes from baking something spectacular from scratch, especially when that something is a magnificent, show-stopping dessert like this. The process might seem a little involved, but I promise you, the gasps of delight and the satisfied smiles on the faces of your loved ones will make every single minute worthwhile. This isn’t just a simple cake; it’s a full-blown Brownie Cheesecake Birthday Cake experience, perfect for any celebration, big or small, or simply to treat yourself to something extraordinary. Don’t be shy; step into your kitchen, embrace the challenge, and let your culinary creativity shine. I absolutely cannot wait to hear about your experiences! Please, do share your creations, your personal twists, and any triumphs (or delicious mishaps!) you encounter along the way. Your feedback, your photos, and your unique insights are what make our baking community so vibrant and inspiring. Happy baking, everyone, and get ready to be utterly amazed by what you can create!
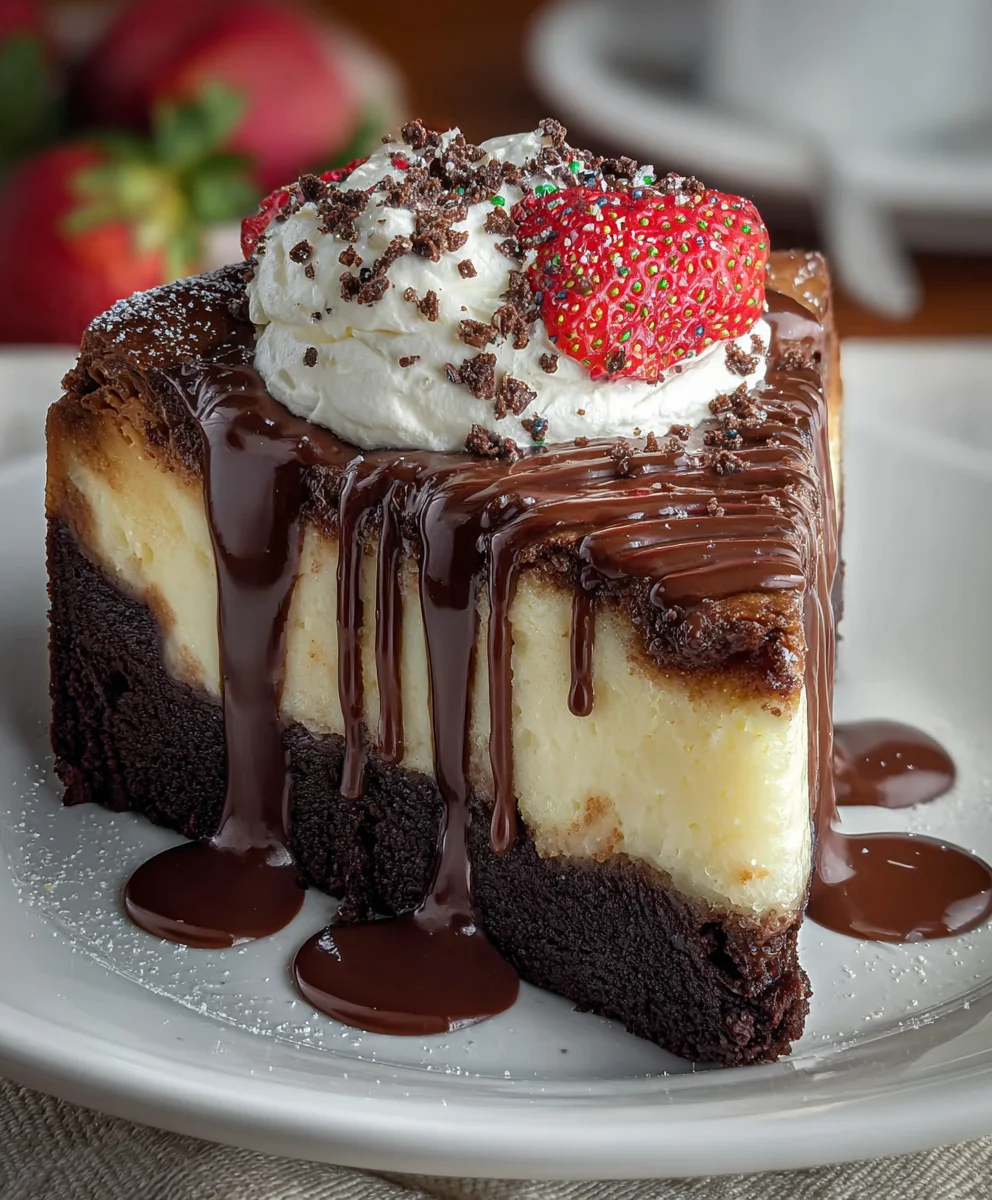
Ultimate Brownie Cheesecake Birthday Cake – Perfect Celebration!
An extraordinary combination of two beloved dessert legends: a rich, fudgy homemade brownie base perfectly complementing a smooth, tangy, and impossibly creamy cheesecake layer. Topped with a decadent chocolate ganache and customizable garnishes, this ultimate fusion dessert is perfect for any celebration, ensuring every guest finds something to rave about.
Ingredients
-
1/2 cup (115g) unsalted butter
-
8 oz (225g) semisweet chocolate chips
-
1 cup (200g) granulated sugar
-
1/2 cup (100g) packed light brown sugar
-
3 large eggs
-
1 tsp vanilla extract
-
3/4 cup (95g) all-purpose flour
-
1/2 tsp salt
-
1/4 tsp baking powder
-
16 oz (450g) cream cheese, softened
-
2/3 cup (135g) granulated sugar (for cheesecake)
-
2 large eggs (for cheesecake)
-
1 tsp vanilla extract (for cheesecake)
-
8 oz (226g) semi-sweet or dark chocolate, finely chopped
-
1 cup (240ml) heavy cream
-
1 tbsp light corn syrup (optional)
-
1/2 tsp vanilla extract (for ganache)
-
Fresh berries (optional, for garnish)
-
Chocolate shavings or curls (optional, for garnish)
-
Sprinkles (optional, for garnish)
-
Edible gold dust or glitter (optional, for garnish)
Instructions
-
Step 1
Preheat oven to 350°F (175°C). Grease a 9-inch springform pan and line the bottom with parchment paper. Melt 1/2 cup butter, then stir in 1 cup granulated sugar and 1/2 cup brown sugar. Let cool 5-10 minutes. Whisk in 3 eggs, one at a time, then 1 tsp vanilla extract. In a separate bowl, whisk together 3/4 cup flour, 1/2 tsp salt, and 1/4 tsp baking powder. Gradually add dry to wet ingredients, mixing until just combined. Fold in chocolate chips. Pour batter into the prepared pan and bake for 25-30 minutes, until edges are set but the center is slightly gooey. Cool completely in the pan on a wire rack (approx. 2 hours). -
Step 2
Reduce oven temperature to 325°F (160°C). Wrap the cooled brownie pan tightly with several layers of foil for a water bath. In a large bowl, beat 16 oz softened cream cheese until smooth. Gradually add 2/3 cup granulated sugar, beating on low until combined. Beat in 2 eggs, one at a time, then 1 tsp vanilla extract, mixing until just incorporated. Pour batter over the cooled brownie base. Place the foil-wrapped pan into a larger roasting pan. Pour hot water into the roasting pan until it comes halfway up the sides of the springform pan. Bake for 60-75 minutes, until edges are set and the center has a slight wobble. -
Step 3
Turn off the oven and leave the cheesecake in the water bath inside the oven with the door slightly ajar for 1 hour. Remove from water bath, unwrap foil, and cool completely on a wire rack at room temperature for 1-2 hours. Cover loosely with plastic wrap and refrigerate for at least 6-8 hours, or preferably overnight. -
Step 4
Finely chop 8 oz semi-sweet or dark chocolate and place in a heatproof bowl. In a small saucepan, heat 1 cup heavy cream (and 1 tbsp corn syrup, if using) until it just begins to simmer. Pour hot cream over chopped chocolate and let sit undisturbed for 5 minutes. Whisk until smooth, glossy, and uniform. Stir in 1/2 tsp vanilla extract. Let cool at room temperature for 30-60 minutes, stirring occasionally, until it thickens to a pourable consistency. -
Step 5
Once cheesecake is thoroughly chilled, run a thin knife around the edge before releasing the springform collar. Transfer to a serving platter. Pour or spread the cooled ganache over the top, allowing some to drip down the sides. Refrigerate for at least 30 minutes to allow the ganache to set. Garnish with fresh berries, chocolate shavings, colorful sprinkles, or edible gold dust as desired. Return to the refrigerator for a final 15-30 minute chill before serving. Use a sharp knife dipped in hot water and wiped clean between each slice for beautiful cuts. Serve chilled.
Important Information
Nutrition Facts (Per Serving)
It is important to consider this information as approximate and not to use it as definitive health advice.
Allergy Information
Please check ingredients for potential allergens and consult a health professional if in doubt.
Leave a Comment