

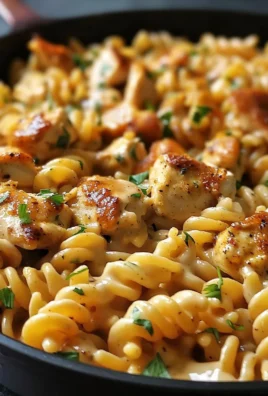
Crispy Dill Pickle Parmesan Chicken An Amazing Ultimate Recipe is more than just a dish; it’s a flavor adventure that promises to transform your dinner routine! I remember the first time I conceptualized this recipe, wondering if the bold tang of dill pickles could truly harmonize with the savory richness of Parmesan cheese, all coating perfectly cooked chicken. The result? A resounding yes, and an utterly addictive combination that has quickly become a favorite in my kitchen and, I am sure, will be in yours too. While dill pickles boast a venerable history as a beloved condiment across many cultures, providing that distinct sour and briny kick, and Parmesan hails from the esteemed culinary traditions of Italy, this recipe brings these two powerhouses together in a remarkably modern and exciting way.
What makes this dish so incredibly popular and something you simply must try? It’s that irresistible textural contrast. Each bite delivers an astonishing crunch from the golden-brown coating, giving way to incredibly juicy, tender chicken. The dill pickle infusion isn’t just a subtle hint; it’s a vibrant, zesty flavor that cuts through the richness of the Parmesan, creating a beautifully balanced and incredibly satisfying experience. Forget bland chicken dinners; this is a meal that excites the palate and leaves you craving more. Trust me when I say that preparing this Crispy Dill Pickle Parmesan Chicken An Amazing Ultimate Recipe isn’t just cooking; it’s crafting a culinary masterpiece that will impress everyone at your table. It’s surprisingly straightforward to achieve such spectacular results, making it perfect for both weeknight dinners and special occasions.

Ingredients:
- For the Chicken:
- 4 boneless, skinless chicken breasts (approximately 6-8 oz each)
- 1/2 teaspoon salt
- 1/4 teaspoon black pepper
- For the Flour Dredge:
- 1/2 cup all-purpose flour
- 1/2 teaspoon garlic powder
- 1/4 teaspoon onion powder
- 1/4 teaspoon paprika
- 1/4 teaspoon salt
- 1/8 teaspoon black pepper
- For the Egg Wash:
- 2 large eggs
- 2 tablespoons dill pickle juice (from the jar!)
- 1 tablespoon Dijon mustard
- For the Crispy Dill Pickle Parmesan Breading:
- 1 1/2 cups Panko breadcrumbs (the key to ultimate crispiness!)
- 1/2 cup finely grated Parmesan cheese (freshly grated is always best)
- 1/4 cup finely minced dill pickles (use a food processor for best results, squeeze out excess liquid)
- 1 tablespoon dried dill weed
- 1 teaspoon garlic powder
- 1/2 teaspoon onion powder
- 1/2 teaspoon paprika
- 1/2 teaspoon salt
- 1/4 teaspoon black pepper
- For Cooking:
- 3-4 tablespoons high-smoke point oil (such as canola, vegetable, or grapeseed oil)
- 1 tablespoon unsalted butter
- Optional Garnishes:
- Fresh dill sprigs
- Extra dill pickle slices
- Lemon wedges for serving
Preparing Your Chicken Cutlets and Dredging Station
-
Prepare the Chicken Breasts: First things first, we need to get our chicken ready for this incredible transformation into a Crispy Dill Pickle Parmesan Chicken An Amazing Ultimate Recipe. Place each boneless, skinless chicken breast between two pieces of plastic wrap or in a large freezer bag. Using a meat mallet or the bottom of a heavy skillet, pound each chicken breast evenly until it is about 1/4 to 1/2 inch thick. The goal here is uniformity; thinner cutlets cook faster and more evenly, ensuring every bite is perfectly tender. Pounding them thin also increases the surface area for our amazing breading, which means more crispy goodness in every bite! Once pounded, remove the plastic wrap, pat the chicken dry with paper towels – this is crucial for the breading to adhere properly – and season both sides lightly with 1/2 teaspoon of salt and 1/4 teaspoon of black pepper.
-
Set Up Your Dredging Station: This is where the magic really begins for our Crispy Dill Pickle Parmesan Chicken An Amazing Ultimate Recipe! We’re going to create a classic three-station breading setup, which is the secret to achieving that wonderfully crispy, flavorful crust. Grab three shallow dishes or pie plates that are wide enough to accommodate your chicken cutlets. Setting them up in an assembly line fashion will make the process smooth and mess-free.
- Dish 1 (Flour Dredge): Into the first dish, combine 1/2 cup all-purpose flour, 1/2 teaspoon garlic powder, 1/4 teaspoon onion powder, 1/4 teaspoon paprika, 1/4 teaspoon salt, and 1/8 teaspoon black pepper. Whisk these ingredients together thoroughly until well combined. The flour creates a dry surface for the egg to cling to, forming a base for our breading.
- Dish 2 (Egg Wash): In the second dish, crack 2 large eggs. To these, add 2 tablespoons of dill pickle juice – this is one of our secret weapons for that signature tangy flavor! – and 1 tablespoon of Dijon mustard. The Dijon adds a subtle savory depth that perfectly complements the pickle. Whisk these ingredients together vigorously until the eggs are completely broken down and the mixture is well combined. This egg wash acts as the “glue” for our breadcrumbs.
- Dish 3 (Crispy Dill Pickle Parmesan Breading): This is the star dish! Into the third dish, combine 1 1/2 cups Panko breadcrumbs. Panko breadcrumbs are paramount here; their larger, flakier structure is what gives this Crispy Dill Pickle Parmesan Chicken An Amazing Ultimate Recipe its unparalleled crunch. Add 1/2 cup finely grated Parmesan cheese (freshly grated melts better and has a more robust flavor than pre-grated), 1 tablespoon dried dill weed, 1 teaspoon garlic powder, 1/2 teaspoon onion powder, 1/2 teaspoon paprika, 1/2 teaspoon salt, and 1/4 teaspoon black pepper. Now for the truly special ingredient: 1/4 cup of finely minced dill pickles. When mincing the pickles, it’s best to use a food processor for a very fine, almost paste-like consistency. After mincing, make sure to squeeze out as much excess liquid as possible using a clean kitchen towel or paper towels. Too much moisture will make your breading soggy. Incorporate these minced pickles evenly into the Panko mixture. The finely minced pickles will fuse with the breadcrumbs, ensuring every bite carries that delightful dill pickle tang and crunch. Take your time to really mix this well so the pickle bits are distributed throughout the breadcrumbs.
The Crispy Coating Application
-
Dredge the Chicken Cutlets: Now it’s time to coat our chicken and create that magnificent, ultimate crispy exterior. Working with one chicken cutlet at a time, carefully pick it up and first dredge it in the flour mixture (Dish 1). Make sure to coat both sides completely and gently shake off any excess flour. We want a thin, even layer. The flour layer helps to absorb any residual moisture on the chicken surface, providing a perfect base for the egg wash.
-
Next, transfer the flour-dredged chicken to the egg wash (Dish 2). Ensure both sides are thoroughly coated, allowing any excess egg mixture to drip off. The egg wash provides the necessary stickiness for the breadcrumbs to adhere beautifully. Don’t let it sit too long in the egg wash; a quick dip and turn is all you need.
-
Finally, move the egg-coated chicken to the Crispy Dill Pickle Parmesan Breading mixture (Dish 3). This is the critical step for our Crispy Dill Pickle Parmesan Chicken An Amazing Ultimate Recipe. Generously press the breadcrumb mixture firmly onto both sides of the chicken cutlet. Use your hands to really pat and press the Panko and pickle mixture onto the chicken, making sure it’s completely covered. We want every nook and cranny filled with this flavorful breading. The more firmly you press, the better the breading will stick, reducing the chances of it falling off during cooking and maximizing that incredible crispy texture. Place the fully breaded cutlet onto a clean plate or a baking sheet lined with parchment paper. Repeat this dredging process for all remaining chicken breasts.
-
Allow Coating to Set: This step is often overlooked but is incredibly important for achieving the best results for your Crispy Dill Pickle Parmesan Chicken An Amazing Ultimate Recipe. Once all the chicken cutlets are breaded, allow them to rest on the plate or baking sheet for at least 15-20 minutes at room temperature. Even better, you can pop them into the refrigerator for 30 minutes. This resting period gives the breading a chance to hydrate slightly and adhere more firmly to the chicken, preventing it from falling off during frying. It’s a simple trick that makes a huge difference in the final crispiness and integrity of your crust. While the chicken rests, you can prepare any sides you plan to serve with this amazing dish.
Pan-Frying to Golden Perfection
-
Heat the Oil: Choose a large, heavy-bottomed skillet or cast-iron pan for optimal results. You want a pan that can hold at least two chicken cutlets comfortably without overcrowding. Overcrowding the pan will lower the oil temperature, leading to steamed chicken instead of beautifully crispy chicken, which is absolutely against the spirit of our Crispy Dill Pickle Parmesan Chicken An Amazing Ultimate Recipe! Add 3-4 tablespoons of your chosen high-smoke point oil (like canola, vegetable, or grapeseed) to the skillet. The exact amount may vary slightly depending on the size of your pan, but aim for about 1/4 inch of oil. Place the skillet over medium-high heat. Allow the oil to heat up thoroughly. A good way to test if the oil is ready is to sprinkle a tiny pinch of breadcrumbs into the pan; if they immediately sizzle and turn golden brown, your oil is at the perfect temperature. This usually takes about 3-5 minutes. Don’t rush this step – proper oil temperature is key to crispiness!
-
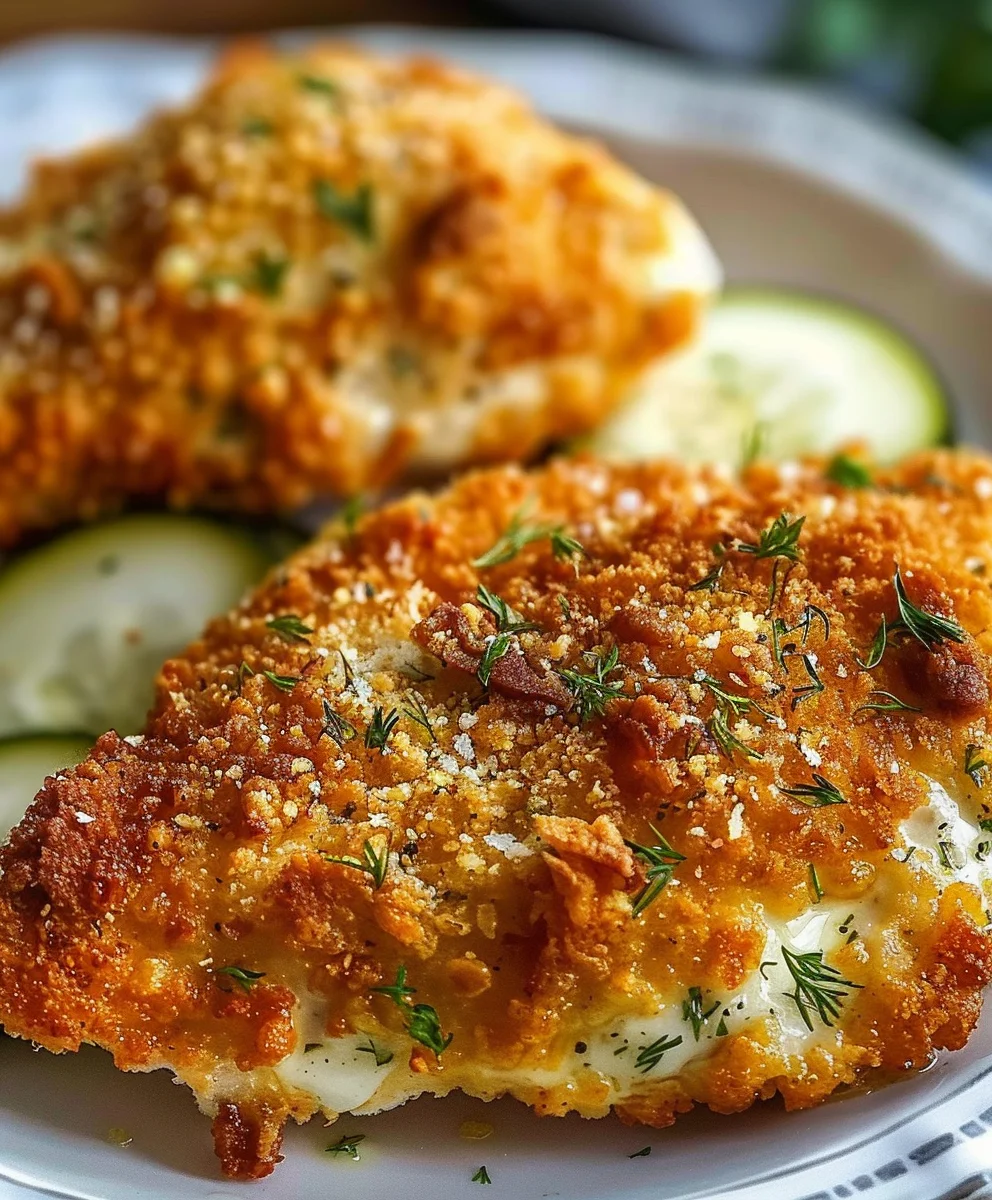
Add the Butter and Fry the Chicken: Once the oil is hot, add 1 tablespoon of unsalted butter to the pan. The butter will melt and foam, adding a rich, nutty flavor to the crust and helping to achieve a beautiful golden-brown color. Carefully place 1-2 breaded chicken cutlets into the hot skillet, making sure not to overcrowd the pan. You should hear a satisfying sizzle immediately. Fry the chicken for approximately 4-6 minutes per side. Resist the urge to move the chicken around too much during this initial frying stage; let it develop that gorgeous, golden-brown crust. When it’s time to flip, use tongs to carefully turn each cutlet over. You’ll be greeted with a perfectly golden, crispy surface – a testament to the “Crispy” in our Crispy Dill Pickle Parmesan Chicken An Amazing Ultimate Recipe! Continue to fry for another 4-6 minutes on the second side, or until the chicken is cooked through and reaches an internal temperature of 165°F (74°C) as measured with an instant-read thermometer. The cooking time can vary based on the thickness of your chicken. The coating should be deeply golden and incredibly crunchy. If you notice the breading browning too quickly, slightly reduce the heat.
-
Drain and Repeat: Once the chicken is beautifully golden brown and cooked through, carefully remove it from the skillet using tongs. Transfer the cooked cutlets to a wire rack set over a baking sheet. This allows air to circulate around the chicken, preventing the bottom from becoming soggy and ensuring maximum crispiness. This is a crucial step for maintaining the “Crispy Dill Pickle Parmesan Chicken An Amazing Ultimate Recipe” integrity. If you have more chicken to fry, you may need to add a bit more oil to the pan before frying the next batch. Remember to maintain the oil temperature and repeat the frying process until all your amazing chicken cutlets are cooked to perfection.
Serving Your Amazing Ultimate Creation
-
Brief Resting Period: After all the chicken has been fried, allow it to rest on the wire rack for just 2-3 minutes. This brief resting period allows the juices within the chicken to redistribute, ensuring a more tender and flavorful bite. It also gives the incredibly crispy coating a moment to stabilize even further. This is a small but mighty step that contributes to the overall “Amazing Ultimate Recipe” experience.
-
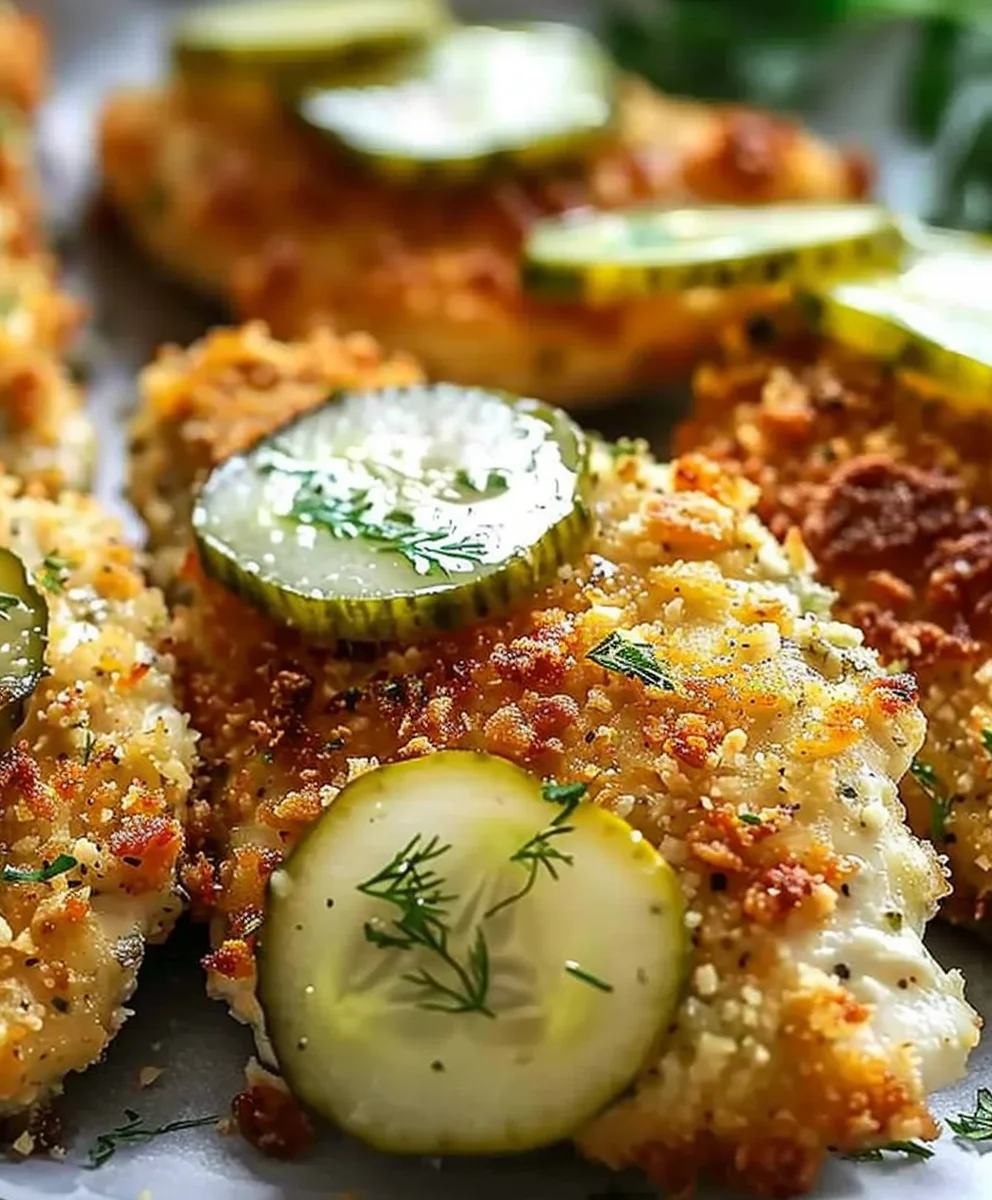
Garnish and Serve Immediately: Your Crispy Dill Pickle Parmesan Chicken An Amazing Ultimate Recipe is best enjoyed hot and fresh from the pan. Arrange the beautiful, golden-brown chicken cutlets on a serving platter. For an extra touch of freshness and visual appeal, garnish generously with fresh dill sprigs. The vibrant green of the fresh dill not only looks appealing but also enhances the dill flavor profile. You can also add a few extra dill pickle slices on the side for those who want an additional tangy bite, or even some lemon wedges for a squeeze of bright acidity that cuts through the richness of the fried chicken. This dish is hearty enough to be the star of your meal. You might serve it alongside a simple green salad with a light vinaigrette, some creamy mashed potatoes, or even just on its own. The flavors are so bold and satisfying, you might not need much else!
-
Enjoy the Ultimate Flavor Experience: Take a moment to appreciate the masterpiece you’ve created. Each bite of this Crispy Dill Pickle Parmesan Chicken An Amazing Ultimate Recipe delivers an explosion of textures and flavors: the incredible crunch from the Panko and finely minced pickles, the savory depth of the Parmesan cheese, the aromatic freshness of dill, and the juicy, tender chicken underneath. The tangy pickle notes come through beautifully, balanced by the savory Parmesan and the perfectly seasoned breading. This isn’t just fried chicken; it’s a culinary adventure that promises to delight your taste buds and become a new favorite in your recipe collection. Get ready for compliments, because this recipe is truly amazing and ultimate in every sense of the word!
Conclusion:
And there you have it, my friends! We’ve reached the end of our culinary journey, but truly, it’s just the beginning of your delicious adventure. I genuinely hope you’re as excited as I am about what we’ve created together today. This isn’t just another chicken recipe; it’s a game-changer, a weeknight hero, and a dish that promises to impress even the pickiest eaters. We’ve taken humble chicken and elevated it into something truly extraordinary, bursting with unexpected flavors and a texture that will have everyone reaching for seconds.
Why this recipe is an absolute must-try:
What makes this particular chicken dish stand out from the crowd? It’s the impeccable balance of bold, briny tang from the dill pickles, the savory, umami richness of the Parmesan cheese, and that undeniably satisfying crunch that envelops every juicy piece of chicken. This combination isn’t just good; it’s sensational. The dill pickle breading isn’t just a gimmick; it’s a brilliant innovation that delivers an incredibly unique flavor profile and an unbelievably crispy exterior that holds up beautifully. Every bite is a delightful explosion of savory, tangy, and cheesy notes, followed by that perfect textural contrast of crispiness giving way to tender, succulent chicken. It’s comforting yet exciting, familiar yet utterly new. Truly, this is the Crispy Dill Pickle Parmesan Chicken An Amazing Ultimate Recipe you’ve been searching for to revitalize your dinner rotation and wow your taste buds.
Elevate Your Meal: Serving Suggestions and Delicious Variations
Now that you’ve mastered the art of making this incredible chicken, let’s talk about how to serve it and how you can make it your own! For a classic, comforting meal, I love pairing this crispy chicken with a generous scoop of creamy mashed potatoes or a vibrant, garlicky green bean sauté. A simple side salad with a light vinaigrette also provides a lovely fresh counterpoint to the richness of the chicken. If you’re feeling adventurous, try serving it alongside a tangy coleslaw to really lean into those pickle flavors, or even atop a bed of buttery egg noodles. Don’t forget a squeeze of fresh lemon juice right before serving to brighten everything up!
But the fun doesn’t stop there. This recipe is wonderfully adaptable. Want to kick up the heat? Add a pinch of cayenne pepper or a dash of your favorite hot sauce to the breading mixture. For a different cheesy experience, consider swapping out some of the Parmesan for sharp cheddar or smoked gouda – just ensure it grates finely. If you’re looking for a lighter option, you can absolutely make this recipe in an air fryer for an even faster, crispier result with less oil, or bake it in the oven at a slightly higher temperature to achieve that golden crust. You could even experiment with different herbs; a touch of dried tarragon or chives could add another layer of flavor. For a fun appetizer, cut your chicken breasts into smaller tenders before breading and serving with an extra side of ranch or a homemade dill aioli for dipping.
Your Culinary Journey Begins Now!
I truly encourage you to step into your kitchen and give this extraordinary recipe a try. Don’t let the unique combination intimidate you; I promise the results are utterly spectacular. There’s something so incredibly satisfying about creating a dish that’s both familiar and excitingly new, and this chicken absolutely delivers on that promise. Once you experience that first crispy, tangy, savory bite, you’ll understand why I’m so passionate about it.
And when you do, please, please, please come back and share your experience with me! I absolutely adore hearing your feedback, seeing your magnificent creations, and learning about any variations you’ve tried. Did you serve it with a surprising side? Did your family rave about it? Snap a photo, drop a comment, and let us all know how your journey with this incredible chicken turned out. Happy cooking, and get ready to fall in love with your new favorite chicken dish!
Crispy Dill Pickle Parmesan Chicken: Ultimate Recipe!
Experience a flavor adventure with this Crispy Dill Pickle Parmesan Chicken! Juicy, tender chicken coated in a golden-brown, crunchy breading infused with zesty dill pickle and rich Parmesan cheese. This modern recipe combines classic flavors for an exciting, satisfying, and easy-to-make meal perfect for any occasion.
Ingredients
-
4 boneless, skinless chicken breasts (6-8 oz each)
-
1/2 tsp salt
-
1/4 tsp black pepper
-
1/2 cup all-purpose flour
-
1/2 tsp garlic powder
-
1/4 tsp onion powder
-
1/4 tsp paprika
-
1/4 tsp salt
-
1/8 tsp black pepper
-
2 large eggs
-
2 tbsp dill pickle juice
-
1 tbsp Dijon mustard
-
1 1/2 cups Panko breadcrumbs
-
1/2 cup finely grated Parmesan cheese
-
1/4 cup finely minced dill pickles (squeezed dry)
-
1 tbsp dried dill weed
-
1 tsp garlic powder
-
1/2 tsp onion powder
-
1/2 tsp paprika
-
1/2 tsp salt
-
1/4 tsp black pepper
-
3-4 tbsp high-smoke point oil
-
1 tbsp unsalted butter
-
Fresh dill sprigs (optional)
-
Extra dill pickle slices (optional)
-
Lemon wedges (optional)
Instructions
-
Step 1
Pound chicken breasts to 1/4-1/2 inch thick between plastic wrap. Pat dry and season with 1/2 tsp salt and 1/4 tsp pepper. -
Step 2
Set up 3 shallow dishes: 1. Flour Dredge: Whisk 1/2 cup flour, 1/2 tsp garlic powder, 1/4 tsp onion powder, 1/4 tsp paprika, 1/4 tsp salt, 1/8 tsp pepper. 2. Egg Wash: Whisk 2 eggs, 2 tbsp dill pickle juice, 1 tbsp Dijon mustard. 3. Breading: Combine 1 1/2 cups Panko, 1/2 cup grated Parmesan, 1/4 cup finely minced (squeezed dry) dill pickles, 1 tbsp dried dill, 1 tsp garlic powder, 1/2 tsp onion powder, 1/2 tsp paprika, 1/2 tsp salt, 1/4 tsp pepper. Mix well. -
Step 3
Dredge each chicken cutlet in flour (Dish 1), shaking off excess. -
Step 4
Dip into egg wash (Dish 2), letting excess drip off. -
Step 5
Press firmly into Panko breading (Dish 3) to fully coat. Place on a plate; repeat for all chicken. -
Step 6
Rest breaded chicken for 15-20 minutes at room temperature (or 30 minutes in the fridge) to set the coating. -
Step 7
Heat 3-4 tbsp high-smoke point oil in a large skillet over medium-high heat until shimmering (approx. 1/4 inch oil depth). Test with a pinch of breadcrumbs; it should sizzle. -
Step 8
Add 1 tbsp butter to the hot oil. Place 1-2 chicken cutlets in the skillet without overcrowding. Fry for 4-6 minutes per side until golden brown and cooked through (internal temp 165°F/74°C). -
Step 9
Transfer cooked chicken to a wire rack over a baking sheet. Add more oil if needed and repeat frying for remaining chicken. -
Step 10
Rest fried chicken on the wire rack for 2-3 minutes. -
Step 11
Serve immediately, garnished with fresh dill, extra pickle slices, or lemon wedges if desired.
Important Information
Nutrition Facts (Per Serving)
It is important to consider this information as approximate and not to use it as definitive health advice.
Allergy Information
Please check ingredients for potential allergens and consult a health professional if in doubt.
Leave a Comment