

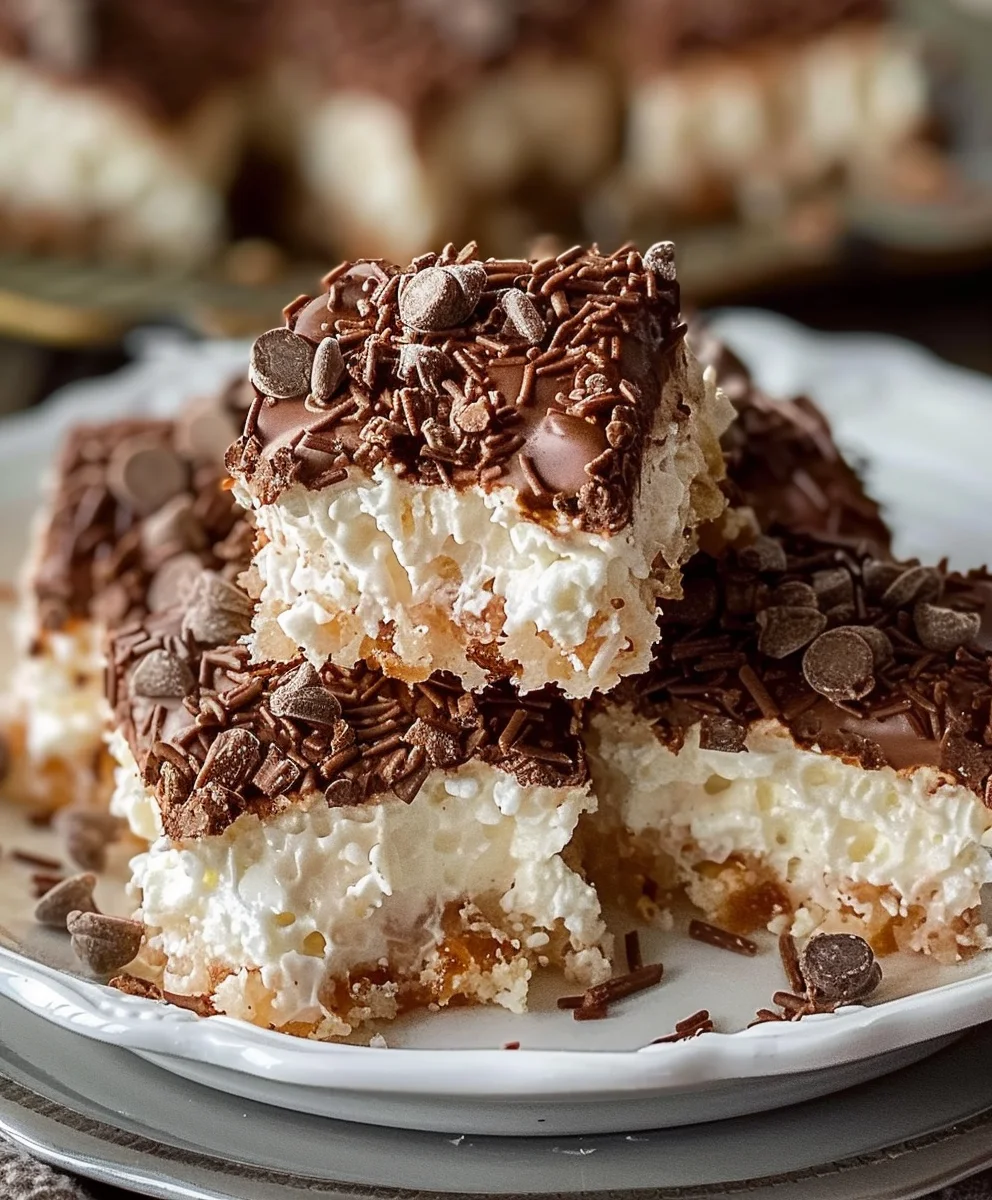
Easy No Bake Moose Farts!
Doesn’t that name just make you smile? I know it does for me, and I’m thrilled to share one of my absolute favorite, most surprisingly delicious, and undeniably fun recipes with you today. This isn’t just any sweet treat; it’s a delightful little bite-sized confection that brings joy wherever it goes, proving that sometimes the best things come with the most amusing names.
While the exact origins of the ‘Moose Fart’ might be a bit murky, these delightful little morsels are often associated with Canadian home baking, particularly as a playful twist on classic no-bake cookies or energy bites. They embody the spirit of simple, wholesome ingredients transformed into something truly special without ever turning on the oven. It’s a testament to the ingenuity of home cooks creating deliciousness with minimal fuss.
People absolutely adore these treats for so many wonderful reasons. For starters, the combination of rich chocolate, creamy peanut butter, and the delightful chewiness of oats and coconut creates an irresistible symphony of flavors and textures in every single bite. But perhaps the biggest draw, and why I reach for this recipe so often, is the incredible convenience. As the name suggests, they require absolutely no baking! This makes them the ultimate stress-free dessert for potlucks, a quick afternoon snack, or when you need a crowd-pleasing treat in a hurry. Get ready to fall in love with these Easy No Bake Moose Farts – they’re guaranteed to become a new favorite in your household.

Ingredients:
-
½ cup (1 stick) unsalted butter: I always opt for unsalted so I can control the saltiness in my recipes. Make sure it’s at room temperature or slightly softened for easier melting.
-
½ cup whole milk: Whole milk gives these treats a wonderful richness. You can use 2% if that’s what you have on hand, but whole milk really makes a difference in the texture and creaminess of our “Easy No Bake Moose Farts.”
-
½ cup unsweetened cocoa powder: For that deep, chocolatey flavor we all love. I recommend a good quality unsweetened cocoa powder for the best results. Don’t be tempted to use sweetened cocoa, as it will throw off the sugar balance.
-
1 teaspoon pure vanilla extract: A good quality vanilla extract really enhances all the other flavors. Pure vanilla is always my preference over imitation for its depth and warmth.
-
½ cup creamy peanut butter: The star of the show, in my opinion! Make sure to use creamy peanut butter for a smooth consistency. Natural peanut butter can sometimes separate and make the mixture a bit oily, so a conventional creamy peanut butter works best here.
-
3 cups old-fashioned rolled oats: These provide the perfect chewy texture. It’s important to use old-fashioned rolled oats, not instant or quick oats. Quick oats can become mushy, and instant oats just won’t give you the desired “bite” that makes “Easy No Bake Moose Farts” so satisfying.
-
3 cups powdered sugar (confectioners’ sugar): This gives our treats their sweetness and helps bind everything together. I usually don’t bother sifting for this recipe, but if your powdered sugar is particularly lumpy, a quick sift can ensure a super smooth mixture.
-
Optional coatings/mix-ins:
-
½ cup shredded coconut (sweetened or unsweetened, depending on your preference)
-
¼ cup colorful sprinkles
-
¼ cup finely chopped nuts (pecans, walnuts, or peanuts work great)
-
Gathering Your Tools & Ingredients
Before we dive into the delicious fun of making these “Easy No Bake Moose Farts,” let’s ensure we have all our ducks in a row – or rather, all our ingredients and tools at the ready! This practice, known as ‘mise en place’ in the culinary world, really makes the whole process smoother and more enjoyable. Trust me, there’s nothing worse than being in the middle of a recipe and realizing you’re missing a key ingredient or a crucial piece of equipment. So, take a moment to gather everything listed above. You’ll need:
-
A large, heavy-bottomed saucepan or pot. This will be where all the magic starts to happen on the stovetop.
-
A sturdy whisk or a heat-proof spatula for stirring.
-
Measuring cups and spoons for accurate ingredient measurement. Precision is key in baking, even in no-bake recipes!
-
A large mixing bowl, big enough to comfortably combine all your ingredients later on.
-
A baking sheet lined with parchment paper or wax paper. This will be where your finished “Easy No Bake Moose Farts” will cool and set. The parchment paper is really helpful for preventing sticking and for easy cleanup.
-
Small bowls for your optional coatings, if you choose to use them. It’s much easier to roll your treats in coconut or sprinkles if they’re in a wide, shallow dish.
Make sure your butter is at least softened, if not fully melted, before you start. And if you’re using cold milk straight from the fridge, don’t worry, it will warm up quickly in the pot. Having everything pre-measured and laid out prevents any frantic searching mid-recipe, allowing you to relax and truly enjoy the process of creating these delightful “Easy No Bake Moose Farts.”
Preparing the Moose Fart Mixture
Alright, with all our ingredients measured and tools at the ready, it’s time to get cooking! This is where the magic truly begins, transforming simple ingredients into something wonderfully decadent. Remember, the key to really good “Easy No Bake Moose Farts” is getting the base mixture just right.
-
Combine butter, milk, and cocoa powder: In your large, heavy-bottomed saucepan, combine the ½ cup of unsalted butter, ½ cup of whole milk, and ½ cup of unsweetened cocoa powder. Place the saucepan over medium heat. Now, this is where you need to be a little patient and attentive. You’re going to stir this mixture constantly with your whisk or heat-proof spatula. The goal here is to melt the butter completely and fully incorporate the cocoa powder into the milk and butter, creating a smooth, dark, glossy liquid. As it heats up, you’ll notice the butter melting and the cocoa dissolving, turning the mixture into a rich, dark brown. Keep stirring until the mixture comes to a gentle simmer. You’ll see small bubbles forming around the edges of the pot, and the surface might start to ripple. It’s important not to bring it to a rolling boil; a gentle simmer for about one minute is perfect. This brief simmering time helps to ‘bloom’ the cocoa powder, deepening its flavor and ensuring a smooth, non-gritty texture in your final “Easy No Bake Moose Farts.” The aroma filling your kitchen right now should be absolutely heavenly!
-
Remove from heat and stir in peanut butter and vanilla: Once your mixture has gently simmered for that crucial minute, immediately remove the saucepan from the heat. Don’t let it sit on the hot burner, as we don’t want anything to scorch. Now, quickly add your ½ cup of creamy peanut butter and 1 teaspoon of pure vanilla extract into the hot mixture. Stir vigorously with your spatula or whisk until the peanut butter has completely melted and is smoothly incorporated into the chocolatey base. It should look like a rich, uniform, velvety sauce. Take your time to ensure there are no streaks of peanut butter; we want everything perfectly blended. The heat from the chocolate mixture will do all the work, melting the peanut butter into a luscious, cohesive sauce. This step adds a beautiful depth of flavor and the signature creaminess that defines “Easy No Bake Moose Farts.”
-
Gradually add powdered sugar: This is where the mixture starts to transform into the thick, pliable dough we need. Gradually add the 3 cups of powdered sugar to the saucepan, stirring it in increments. I like to add about a cup at a time, stirring well after each addition to prevent a cloud of sugar dust from coating my kitchen (and me!). The mixture will start to thicken considerably with each addition. Keep stirring until all the powdered sugar is fully incorporated and the mixture is thick, sticky, and uniform. It might seem a little crumbly or stiff at first, but keep working it with your spatula. Your arm might get a little workout here, but it’s worth it! We’re looking for a consistency that is still somewhat warm and pliable, yet firm enough to hold its shape once the oats are added. Make sure there are no lumps of powdered sugar left. This step is critical for the sweetness and structure of your “Easy No Bake Moose Farts.”
-
Fold in the rolled oats: Now for the final ingredient in our base! Add the 3 cups of old-fashioned rolled oats to the thick, sticky mixture in the saucepan. Using your sturdy spatula, fold the oats into the chocolate-peanut butter mixture. Don’t just stir; try to gently fold, ensuring that every single oat flake gets thoroughly coated with the delicious sticky base. This might take a few minutes of patient folding and pressing. You want to make sure the oats are evenly distributed and completely covered. The mixture will become even thicker and quite stiff, but it should still be manageable. If it feels too dry or crumbly, it might be that your butter-milk-cocoa mixture was simmered a little too long, or perhaps the humidity in your kitchen is low. You can try adding just a tablespoon or two of extra milk to loosen it up slightly, but be very careful not to make it too wet. Conversely, if it feels too wet, you might need a tiny bit more powdered sugar. However, for most, this ratio works perfectly for creating those perfect “Easy No Bake Moose Farts.” The mixture should be firm enough to scoop and roll, but not so stiff that it crumbles apart.
Forming the Easy No Bake Moose Farts
You’ve done the hard work of creating that wonderfully rich and aromatic base! Now comes the fun part – shaping these delightful “Easy No Bake Moose Farts” into their final form. This is where they really start to look like the charming, rustic treats we all love. Don’t worry if they’re not perfectly uniform; their homemade charm is part of their appeal!
-
Allow the mixture to cool slightly: Before you dive in with your hands, it’s a good idea to let the oat mixture cool down for about 5-10 minutes. While it’s still warm, it can be a bit too sticky and hot to handle comfortably. Transfer the mixture from the hot saucepan to a large mixing bowl if it’s not already there, and let it sit. The slight cooling also helps the mixture firm up just a little, making it much easier to roll without it sticking excessively to your hands. If you plan to add any optional coatings like shredded coconut or sprinkles, cooling is even more crucial, as a very hot mixture might melt them slightly or make them clump up unevenly. We’re aiming for warm, but not scorching hot, to the touch.
-
Roll into desired shapes: Now for the hands-on fun! Lightly grease your hands with a tiny bit of butter or a neutral oil, or simply wet them with cold water (this can help prevent sticking, though you might need to re-wet occasionally). Take small portions of the oat mixture, about a tablespoon or so, and roll them gently between your palms to form small, bite-sized balls. The size is entirely up to you – some people like smaller, poppable treats, while others prefer slightly larger ones. I find that a tablespoon-sized portion works perfectly for a satisfying single bite of “Easy No Bake Moose Farts.” Aim for a relatively consistent size so they look uniform on your serving platter. As you roll, gently compress the mixture to ensure it holds together well. If the mixture starts to crumble, it might be a bit too dry; if it’s too sticky, try chilling the mixture for another 10-15 minutes, or adding a tiny bit more powdered sugar. Place your perfectly rolled balls onto your prepared baking sheet lined with parchment or wax paper.
-
Apply optional coatings (if desired): This step is where you can really personalize your “Easy No Bake Moose Farts”! If you’ve chosen to use shredded coconut, sprinkles, or finely chopped nuts, pour your chosen coating into a shallow dish or a wide bowl. As soon as you finish rolling each ball, gently drop it into the coating and roll it around until it’s evenly covered. You can use your fingers or even a spoon to help press the coating onto the surface. The slight stickiness of the freshly rolled “Moose Fart” mixture will help the coatings adhere beautifully. This adds an extra layer of texture, flavor, and visual appeal, making your treats even more irresistible. Don’t be shy with the coatings; they’re meant to be a fun and delicious addition!
-
Arrange on a prepared baking sheet: As you finish rolling and coating each “Easy No Bake Moose Fart,” place it onto the baking sheet you lined earlier with parchment or wax paper. Make sure to leave a little bit of space between each one, though they won’t expand or spread since they’re no-bake. The parchment paper is crucial here, as it will prevent them from sticking to the tray as they chill and firm up. Once all your delicious little balls are rolled and arranged, your tray should look like a wonderfully chaotic, yet appealing, collection of homemade goodness.
Chilling and Enjoying Your Easy No Bake Moose Farts
The hard work is done, and now comes the final, essential step to turn your delightful creation into perfectly set, ready-to-eat “Easy No Bake Moose Farts.” Chilling is not just a suggestion; it’s a vital part of the no-bake process, ensuring these treats firm up beautifully and achieve their ideal chewy, fudgy texture. Patience is a virtue, especially when something so delicious is waiting!
-
Chill until firm: Once all your “Easy No Bake Moose Farts” are neatly arranged on the lined baking sheet, it’s time to pop them into the refrigerator. Place the entire baking sheet into the fridge and let them chill for at least 1 to 2 hours. This chilling time is absolutely crucial for them to firm up properly. During this period, the butter and peanut butter will solidify, and the sugar will help bind everything together, giving the “Moose Farts” their characteristic chewy-yet-firm texture. Resist the temptation to sneak one too early! While they are technically edible before chilling, they will be quite soft and messy. The wait is worth it, I promise, as chilling transforms them into perfectly portable and satisfying bites. For an even quicker set, you can place them in the freezer for about 30-45 minutes, but keep a close eye on them to prevent them from becoming too hard.
-
Serve and store: After their beauty rest in the refrigerator, your “Easy No Bake Moose Farts” are ready to be devoured! You’ll notice they’ve firmed up significantly, making them easy to pick up without leaving a sticky mess on your fingers. Arrange them on a pretty plate or platter for serving. They make a fantastic snack, a delightful dessert, or a lovely addition to any potluck or party spread. To store any leftovers (if there are any!), place them in an airtight container. They can be stored at room temperature for up to 3-4 days, especially if your home isn’t too warm. However, for optimal freshness and texture, I highly recommend storing them in the refrigerator for up to a week. Chilling keeps them firmer and prevents them from becoming too soft, especially in warmer climates. You can even freeze them for up to 2-3 months; just be sure to place parchment paper between layers to prevent sticking. When ready to enjoy from the freezer, simply let them thaw for a few minutes at room temperature, and they’ll be just as delicious as when they were freshly made. They’re such an easy and satisfying treat to have on hand!
Tips for Perfect Easy No Bake Moose Farts:
-
Consistency is Key: If your mixture seems too dry and crumbly after adding the oats, you can try adding a tablespoon of milk at a time until it reaches a more manageable, rollable consistency. If it’s too sticky, a little extra powdered sugar can help.
-
Flavor Variations: Feel free to experiment! A pinch of cinnamon or a tiny bit of almond extract can add a delightful twist. You could also mix in mini chocolate chips along with the oats for an extra chocolatey punch.
-
Kid-Friendly Fun: This is a fantastic recipe to make with children! They’ll love helping to roll the balls and coat them in sprinkles or coconut. Just ensure the mixture has cooled sufficiently before they handle it.
These “Easy No Bake Moose Farts” truly live up to their name – they’re incredibly simple to make, require no oven, and result in a wonderfully satisfying treat that everyone will love. Enjoy every delicious, chocolatey, peanut buttery bite!
Conclusion:
And there you have it, my friends! We’ve reached the sweet finale of our culinary journey, and I genuinely hope you’re feeling as excited as I am about the prospect of whipping up a batch of these delightful treats. If you’ve been searching for that perfect, hassle-free dessert that delivers on both taste and charm, then allow me to reiterate why this recipe is an absolute game-changer and a non-negotiable addition to your go-to collection.
First and foremost, the sheer simplicity of this recipe is its greatest triumph. In our fast-paced world, finding time for elaborate baking projects can often feel like an impossible task. This is where the magic truly happens: no oven required, minimal cleanup, and ingredients that are likely already lurking in your pantry. We’ve crafted a dessert that isn’t just delicious; it’s a testament to the fact that extraordinary flavor doesn’t have to come with an extraordinary amount of effort. Each bite offers a harmonious blend of chewy texture, rich sweetness, and a comforting familiarity that makes it universally appealing. Whether you’re a seasoned baker or someone who’s never touched an apron, success is virtually guaranteed. It’s the kind of treat that brings a smile to everyone’s face, from the pickiest eaters to the most discerning dessert connoisseurs, and frankly, who doesn’t love a dessert that guarantees smiles?
But the true beauty of these morsels extends far beyond their ease and taste.
They are incredibly versatile, making them perfect for almost any occasion. Planning a children’s party? These are a guaranteed hit and a fun talking point. Need a quick treat for unexpected guests? You can have a batch ready in mere minutes. Looking for a thoughtful homemade gift? Pack them in a decorative box, and you’ll instantly become everyone’s favorite person. They’re also an excellent option for school bake sales, office potlucks, or simply as an indulgent pick-me-up during your afternoon coffee break. The playful name alone, “Easy No Bake Moose Farts,” sparks curiosity and a chuckle, making them not just a dessert, but an experience. I’ve personally seen them disappear faster than any other dessert at gatherings, and trust me, that’s saying something!
Now, let’s talk about how you can elevate your creations even further. While absolutely divine in their original form, these treats are fantastic canvases for your creativity. For serving, I love arranging them artfully on a platter, perhaps with a dusting of extra cocoa powder or a light sprinkle of sea salt to cut through the sweetness slightly. They pair wonderfully with a hot cup of coffee or a tall glass of cold milk. For variations, the sky’s the limit! Consider adding a teaspoon of pure vanilla extract or almond extract to the mixture for an extra layer of flavor. A pinch of ground cinnamon or nutmeg can introduce a subtle warmth, especially lovely during colder months. If you’re a nut lover, finely chopped pecans, walnuts, or even pistachios can be folded in for added crunch and richness. Mini chocolate chips, white chocolate chips, or even a mix of both can also be incorporated for even more chocolatey goodness. For a fancier touch, you could melt a little dark chocolate and drizzle it over the finished balls, or roll them in toasted coconut flakes for a tropical twist. During holidays, food coloring can transform them into festive delights – think green for St. Patrick’s Day or red and green for Christmas, finished with themed sprinkles. Don’t be afraid to experiment and make them truly your own!
So, what are you waiting for? This isn’t just a recipe; it’s an invitation to joy, simplicity, and deliciousness. I wholeheartedly encourage you to roll up your sleeves – or perhaps just wash your hands, since there’s no actual baking – and give these wonderful treats a try this week. Experience for yourself how incredibly easy and satisfying they are to make, and more importantly, how utterly delightful they are to eat. And please, please, please, don’t keep your culinary adventures to yourself! I would absolutely adore hearing about your experience. Did you add a unique twist? What was your favorite part? Share your photos, your modifications, and your triumphs with me. Your feedback and creativity inspire not just me, but our entire community of fellow food lovers. Let’s spread the word about these incredible, fuss-free delights. Happy rolling, my friends, and enjoy every single bite of your amazing homemade Moose Farts!
Easy No Bake Moose Farts Recipe
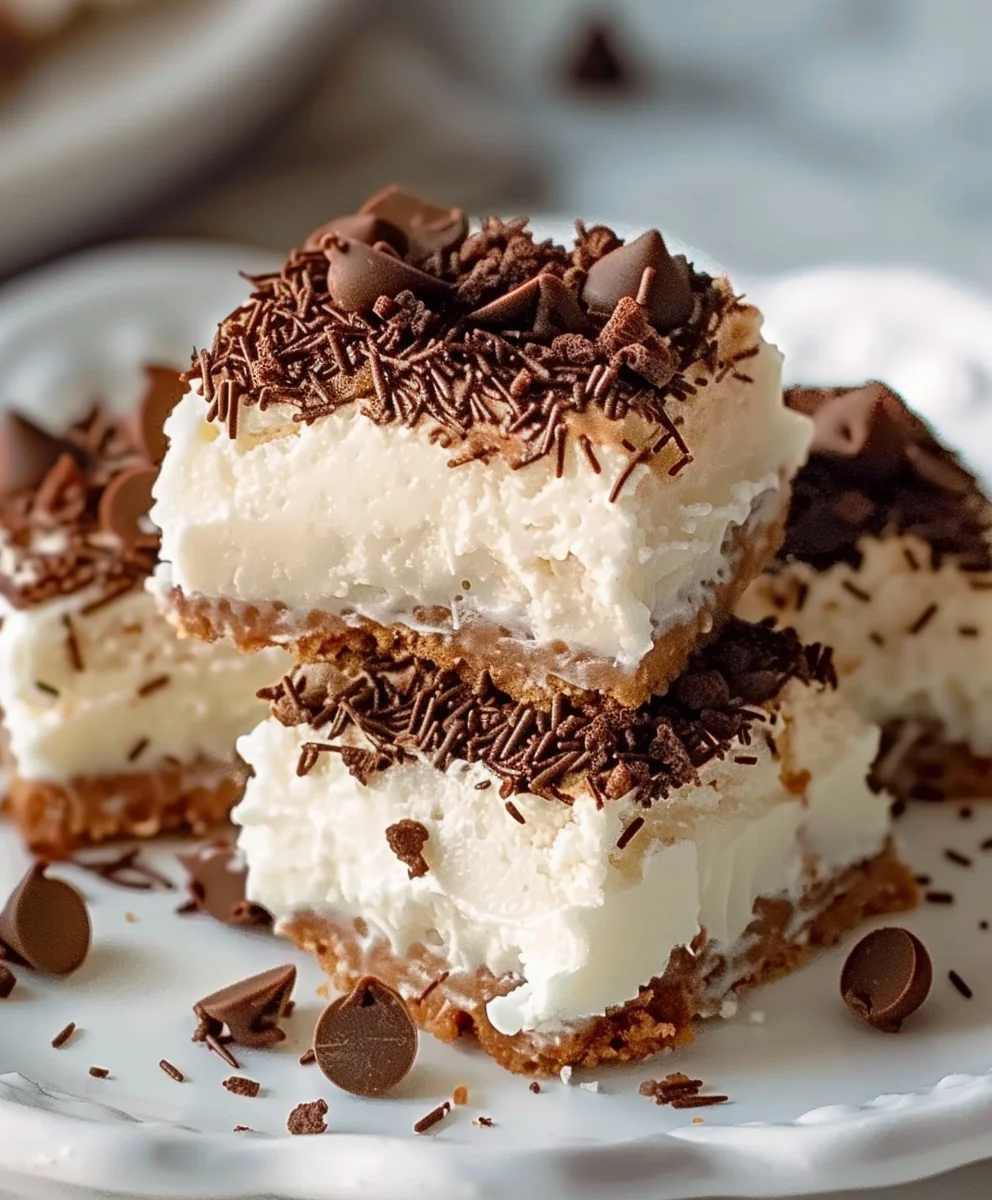
Easy No Bake Moose Farts! This delightful bite-sized confection brings joy with its irresistible symphony of chocolate, creamy peanut butter, graham cracker crumbs, and cream cheese. No baking required, making it a stress-free dessert for any occasion.
Ingredients
-
1 cup graham cracker crumbs
-
1/2 cup unsweetened cocoa powder
-
1/2 cup powdered sugar
-
1/2 cup creamy peanut butter
-
1/2 cup softened cream cheese
-
1 teaspoon vanilla extract
-
1/4 cup mini chocolate chips
-
Whipped cream (optional)
Instructions
-
Step 1
In a large mixing bowl, combine the graham cracker crumbs, unsweetened cocoa powder, and powdered sugar. Mix thoroughly. -
Step 2
Add the creamy peanut butter, softened cream cheese, and vanilla extract to the dry ingredients. Mix with a sturdy spoon or your hands until all ingredients are well combined and a uniform, pliable dough forms. -
Step 3
Fold in the mini chocolate chips, ensuring they are evenly distributed throughout the mixture. -
Step 4
Roll the mixture into small, bite-sized balls, approximately 1-inch in diameter. Place them on a baking sheet lined with parchment paper. -
Step 5
For optional coatings, roll the freshly formed balls in extra powdered sugar, cocoa powder, or sprinkles (not included in ingredient list but common for coating). -
Step 6
Refrigerate the Moose Farts for at least 30-60 minutes, or until firm. Chilling is crucial for the best texture and to prevent stickiness. -
Step 7
Serve chilled. Optionally, top with a dollop of whipped cream just before serving. Store leftovers in an airtight container in the refrigerator for up to one week.
Important Information
Nutrition Facts (Per Serving)
It is important to consider this information as approximate and not to use it as definitive health advice.
Allergy Information
Please check ingredients for potential allergens and consult a health professional if in doubt.


Leave a Comment