

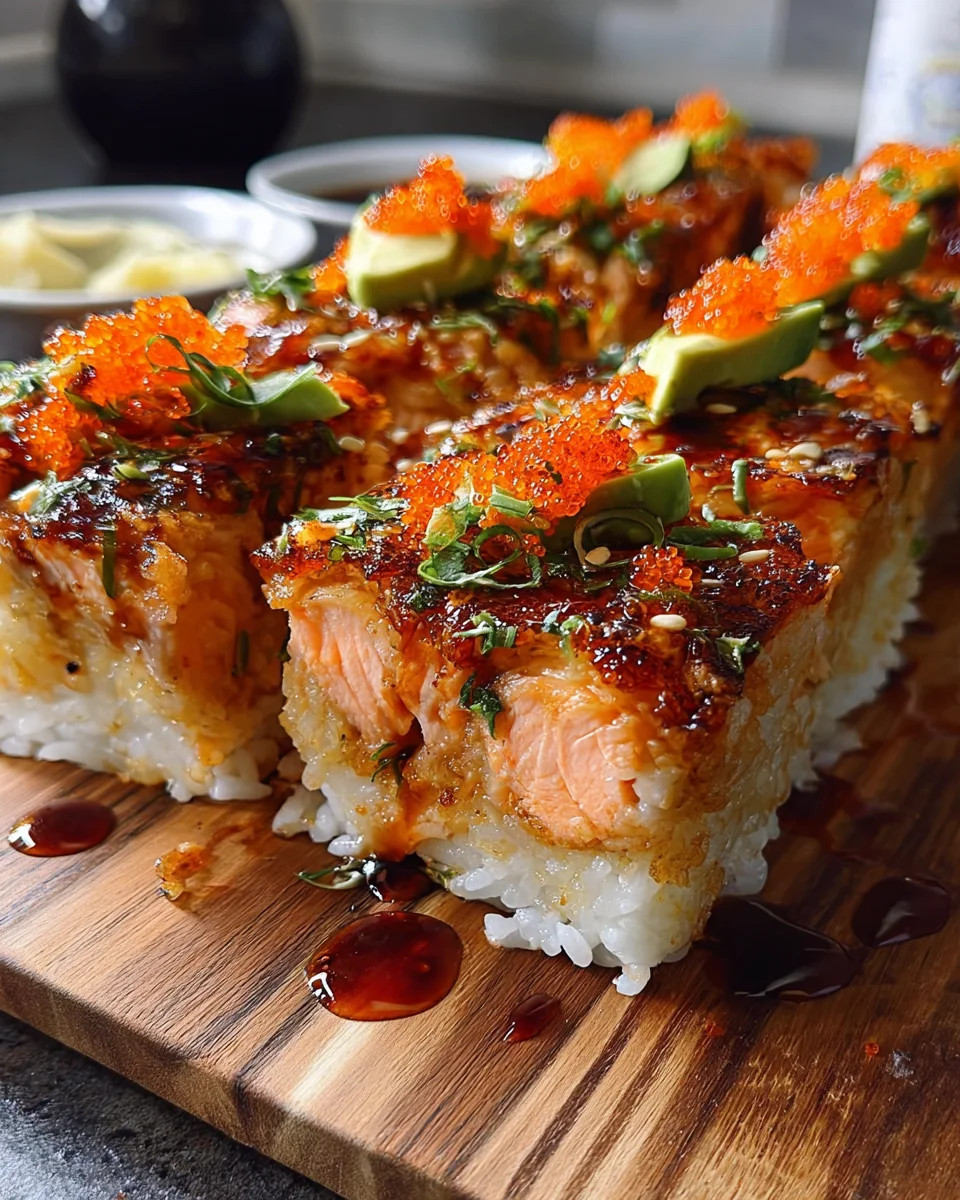
Spicy Salmon Sushi Bake Recipe is the ultimate solution for anyone craving the irresistible flavors of sushi without the intricate rolling process. I am thrilled to share with you a dish that has absolutely taken the culinary world by storm, transforming humble ingredients into a spectacular, crowd-pleasing meal. This modern marvel, often described as a deconstructed sushi roll in casserole form, soared in popularity during recent times, offering a brilliant way to enjoy your favorite Japanese-inspired flavors right from your oven. While it may not boast centuries of tradition like its rolled counterparts, the sushi bake is a testament to culinary innovation, proving that deliciousness can be both accessible and exciting.
What makes this dish so universally adored? It’s the harmonious blend of textures and tastes: the rich, creamy, and perfectly seasoned spicy salmon atop a bed of fluffy, vinegared sushi rice, all ready to be scooped into crispy nori sheets. It delivers all the umami and spice you desire, coupled with the incredible convenience of a baked dish. Forget the stress of perfectly wrapped rolls; with the Spicy Salmon Sushi Bake Recipe, you get to savor all the gourmet experience with minimal effort. It’s perfect for entertaining, a fantastic family dinner, or simply treating yourself to something truly special that’s surprisingly easy to create.

Ingredients:
Creating this delicious Spicy Salmon Sushi Bake Recipe is a true joy, and gathering your ingredients is the first exciting step! I always ensure I have everything ready before I start, it makes the whole process so much smoother and more enjoyable. Think of this as your personal sushi bake mise en place.
- For the Salmon Mixture:
- 1.5 lbs fresh salmon fillet: I usually opt for skin-on salmon because it’s easier to handle and the skin protects the flesh during baking, but you’ll remove it later. Look for vibrant, firm fillets. This amount gives us a generous, meaty layer in our bake.
- ½ cup Kewpie mayonnaise: This is a non-negotiable for me! Kewpie mayo has a richer, tangier flavor compared to regular mayo due to its use of egg yolks and rice vinegar. It really makes a difference in the creaminess and umami of the salmon mixture.
- 2-3 tablespoons Sriracha sauce: Adjust to your spice preference. I love a good kick, so I lean towards three tablespoons, but if you’re sensitive to heat, start with two and taste. This provides that quintessential spicy element.
- 1 tablespoon soy sauce or tamari: For a savory depth. Tamari is a great gluten-free alternative if needed, and I often use it for its slightly richer flavor.
- 1 teaspoon toasted sesame oil: A little goes a long way here. It adds a wonderful nutty aroma and flavor that ties everything together.
- ¼ teaspoon garlic powder: Just a hint to enhance the savory notes of the salmon.
- ¼ teaspoon onion powder: Similar to garlic powder, it adds another layer of subtle savory complexity.
- Salt and freshly ground black pepper: To taste, for seasoning the salmon before and after cooking.
- For the Sushi Rice:
- 3 cups uncooked short-grain sushi rice: This specific type of rice is crucial. It’s sticky and plump, perfect for holding its shape and absorbing the delicious flavors. Medium-grain can work in a pinch, but short-grain is superior for sushi.
- 3 ½ cups water: For cooking the rice.
- ½ cup rice vinegar (unseasoned): This is the base for our sushi seasoning. Unseasoned is important so we can control the sugar and salt.
- 3 tablespoons granulated sugar: Balances the acidity of the vinegar and gives the rice that classic slightly sweet sushi flavor.
- 1 ½ teaspoons salt: Essential for seasoning the rice properly.
- For the Spicy Mayo Drizzle (for serving):
- ½ cup Kewpie mayonnaise: Again, Kewpie is key for that creamy, rich base.
- 2-3 tablespoons Sriracha sauce: Matched to your preference for heat. This is for a final flourish and extra spice.
- 1 teaspoon lime juice: A squeeze of fresh lime juice brightens the flavor considerably and cuts through the richness.
- For the Toppings and Garnish:
- 2-3 sheets nori (roasted seaweed snacks or full sheets cut into squares/strips): Absolutely essential for scooping up the bake! I love using the pre-cut roasted seaweed snacks for convenience, but you can cut full sheets yourself.
- 1-2 ripe avocados: Sliced or diced. Their creamy texture and mild flavor offer a wonderful contrast to the spicy salmon.
- ¼ cup thinly sliced green onions (scallions): For freshness, a mild oniony bite, and a pop of color.
- 2 tablespoons toasted sesame seeds: Both black and white sesame seeds, for texture and visual appeal.
- Optional: Tobiko or masago (flying fish roe) for an authentic sushi touch and textural pop, a drizzle of unagi sauce (eel sauce) for extra sweetness and umami, or furikake for an additional layer of savory seasoning.
- Equipment You’ll Need:
- 9×13 inch baking dish: The perfect size for a family-sized sushi bake.
- Rice cooker or heavy-bottomed pot with a tight-fitting lid: For perfect sushi rice.
- Large mixing bowl: For seasoning the rice and mixing the salmon.
- Small saucepan: For dissolving the sushi rice seasoning.
- Foil or parchment paper: For lining the baking dish for easy removal and cleanup.
- Spatula or rice paddle: For handling the rice.
- Fork: For flaking the salmon.
Prepping the Salmon
- Preheat Your Oven: My first step is always to get the oven nice and hot. I set it to 400°F (200°C). This ensures the salmon bakes evenly and relatively quickly, preventing it from drying out.
- Prepare the Salmon: I like to pat the salmon fillets dry with paper towels. This helps the seasoning adhere better and promotes a nicer crust. Next, I place the salmon skin-side down on a baking sheet lined with parchment paper or foil. I then season it lightly with a pinch of salt and black pepper. Don’t overdo it, as we’ll be adding plenty of seasoned mayonnaise later.
- Bake the Salmon: Pop the salmon into the preheated oven and bake for 12-15 minutes, or until it’s cooked through and flakes easily with a fork. The cooking time can vary depending on the thickness of your fillets, so I always keep an eye on it. Once done, remove it from the oven and let it cool slightly.
- Flake the Salmon: Once the salmon is cool enough to handle, I carefully remove the skin. It should peel off quite easily. Then, using two forks, I flake the salmon into small, bite-sized pieces in a medium-sized mixing bowl. You want a consistent texture, so try to avoid large chunks. This flaky texture is key for the sushi bake!
- Create the Spicy Salmon Mixture: Now for the magic! To the flaked salmon, I add the Kewpie mayonnaise, Sriracha sauce (remember to adjust to your spice preference!), soy sauce, toasted sesame oil, garlic powder, and onion powder. I gently mix everything together with a spoon or spatula until the salmon is thoroughly coated and looks wonderfully creamy and vibrant. I give it a quick taste here and adjust any seasonings if needed – sometimes it needs a tiny extra pinch of salt or another dash of Sriracha. Set this mixture aside while we prepare the rice.
Preparing the Sushi Rice
- Wash the Rice Thoroughly: This is arguably one of the most crucial steps for perfect sushi rice. I place the 3 cups of uncooked short-grain sushi rice into a large bowl and cover it with cold water. I gently swirl the rice with my hand, noticing how cloudy the water becomes. I then drain the water and repeat this process about 5-7 times, or until the water runs mostly clear. This removes excess starch, which prevents the rice from becoming overly sticky or gummy. Patience here pays off!
- Cook the Rice: After washing, I drain the rice well and transfer it to a rice cooker along with 3 ½ cups of water. If you don’t have a rice cooker, you can use a heavy-bottomed pot with a tight-fitting lid. Bring it to a boil, then immediately reduce the heat to the lowest setting, cover, and simmer for 18-20 minutes, or until all the water is absorbed. Once cooked, I turn off the heat and let the rice steam, covered, for another 10 minutes. This resting period allows the steam to redistribute, resulting in fluffy, perfectly cooked grains.
- Prepare the Sushi Vinegar Seasoning: While the rice is cooking, I prepare the seasoning. In a small saucepan, I combine the ½ cup unseasoned rice vinegar, 3 tablespoons granulated sugar, and 1 ½ teaspoons salt. I heat this over low heat, stirring constantly, just until the sugar and salt have fully dissolved. It’s important not to boil it; we just want to melt the crystals. Once dissolved, I remove it from the heat and let it cool slightly.
- Season the Rice: Once the rice has finished steaming, I gently transfer it to a large, wide mixing bowl. It’s important to use a wide bowl or a traditional wooden sushioke if you have one, as this allows the rice to cool and be seasoned evenly. I then slowly pour the cooled vinegar seasoning over the hot rice. Using a rice paddle or a flat wooden spoon, I gently “cut” through the rice with a slicing motion, folding it over itself. The goal is to distribute the seasoning evenly without mashing the grains. I continue this gentle folding until the seasoning is fully incorporated and the rice is glossy. Don’t stir it like you would regular rice; use gentle cutting and folding motions.
- Cool the Rice: I then spread the seasoned rice out in the bowl to allow it to cool to room temperature. You can fan it gently with a piece of cardboard or a hand fan to speed up the process. We want it cool, not cold, and slightly sticky, which is perfect for our sushi bake.
Making the Spicy Mayo Drizzle (for serving)
- Combine Ingredients: This is wonderfully simple! In a small bowl, I combine the ½ cup Kewpie mayonnaise, 2-3 tablespoons Sriracha sauce (again, adjust to your preference for the final kick), and 1 teaspoon of fresh lime juice. The lime juice is a game-changer here, adding a bright, zesty note that really elevates the whole dish.
- Whisk Until Smooth: I whisk everything together thoroughly until the mixture is completely smooth and creamy. It should have a beautiful pale orange color.
- Prepare for Drizzling: If you want a fancy drizzle, you can transfer this spicy mayo into a squeeze bottle or a small Ziploc bag with a corner snipped off. Otherwise, a spoon works perfectly fine for generous dollops! Set this aside at room temperature until serving.
Assembling the Sushi Bake
- Prepare the Baking Dish: I always line my 9×13 inch baking dish with parchment paper or foil, leaving an overhang on the sides. This creates “handles” that make it incredibly easy to lift the entire sushi bake out of the dish for cutting and serving later. A little spray of non-stick cooking spray on the parchment/foil can also help, but isn’t strictly necessary.
- Form the Rice Layer: Now for the base! I evenly press the cooled, seasoned sushi rice into the bottom of the prepared baking dish. I use a spatula or the back of a spoon, sometimes even my clean, slightly damp hands, to press it down firmly and create an even, compact layer. A firm rice layer is essential for holding the bake together when cut. Ensure it’s level from edge to edge.
- Add the Spicy Salmon Layer: Next, I spoon the spicy salmon mixture over the rice layer, spreading it out evenly to cover the entire surface. I use the back of my spoon to gently spread it, making sure not to press down too hard on the rice beneath it, as we don’t want to compress the rice further. This creates a wonderfully generous and flavorful topping.
- Prepare for Baking: At this point, I often like to add a sprinkle of toasted sesame seeds (both black and white for visual appeal) over the salmon layer before baking. This adds a lovely nutty aroma and a slight crunch that develops in the oven.
Baking the Sushi Bake
- Preheat Oven (if needed): If your oven has cooled, ensure it’s still at 375°F (190°C). I usually lower the temperature slightly from the salmon baking temperature because we’re mostly just warming and melding the flavors, not cooking raw ingredients.
- Bake the Sushi Bake: Place the assembled sushi bake into the preheated oven. Bake for approximately 15-20 minutes. The goal here isn’t to cook the salmon further, but rather to warm everything through, allow the flavors to meld beautifully, and slightly toast the top layer of the salmon mixture. You’ll notice the mayo mixture might bubble gently around the edges, and the top should look slightly golden and set.
- Broil for a Golden Finish (Optional, but recommended!): For an irresistible golden-brown crust, I like to switch the oven to the broiler setting for the last 2-3 minutes. Keep a very close eye on it during this step, as broilers can toast quickly – we want golden, not burnt! This step adds a fantastic texture and depth of flavor.
- Rest Before Serving: Once baked and broiled to perfection, I carefully remove the sushi bake from the oven. I let it rest in the baking dish for about 5-10 minutes. This resting period allows the layers to set slightly, making it much easier to cut and serve without it falling apart. Patience here prevents a messy disaster!
Finishing Touches and Serving
- Lift and Cut: Using the parchment paper or foil overhangs, I carefully lift the entire Spicy Salmon Sushi Bake Recipe out of the baking dish and transfer it to a large cutting board. This step is so satisfying! Then, using a sharp knife (I often run my knife under hot water and wipe it clean between cuts to ensure neat slices), I cut the sushi bake into individual squares or rectangles, much like you would a lasagna or a casserole. I typically aim for 12-16 pieces, depending on how large I want each serving to be.
- Garnish Generously: This is where the bake truly comes to life! I arrange the cut pieces on a serving platter or leave them on the cutting board. Then, I generously top each piece with sliced avocado, a sprinkle of fresh green onions, and more toasted sesame seeds. If I have tobiko or masago on hand, I definitely add a dollop to each piece for that authentic sushi vibe and delightful pop. Sometimes, a drizzle of sweet unagi sauce also adds another layer of complexity that’s just divine.
- Drizzle with Spicy Mayo: Finally, I take my prepared spicy mayo drizzle and zig-zag it generously over the entire sushi bake. The visual appeal is fantastic, and the extra creamy, spicy kick is absolutely mandatory for that full sushi bake experience. If you put it in a squeeze bottle, you can make beautiful, neat lines!
- Serve and Enjoy: The Spicy Salmon Sushi Bake Recipe is best served warm, straight out of the oven. I always provide plenty of roasted nori seaweed sheets (cut into squares) on the side. Instruct your guests (or yourself!) to take a piece of nori, scoop a portion of the sushi bake onto it, and enjoy it like a mini sushi taco. The combination of warm, spicy salmon, seasoned rice, creamy avocado, and crispy seaweed is truly out of this world. It’s a wonderful, interactive way to enjoy sushi flavors without any rolling!
Conclusion:
Well, my friends, we’ve reached the exciting end of our culinary journey, and I truly hope you’re as enthusiastic about this dish as I am! If you’ve been searching for that perfect blend of restaurant-quality taste and homemade comfort, then the Spicy Salmon Sushi Bake Recipe delivers on all fronts. This isn’t just another dinner; it’s an experience. I promise you, once you taste that first spoonful of this incredible creation – the way the flaky, rich salmon marries with the creamy, spicy sauce, all baked to golden perfection over a bed of seasoned rice – you’ll understand exactly why I’m so passionate about it. It’s a symphony of textures and flavors that is utterly irresistible. What makes it a must-try, in my humble opinion, is its surprising simplicity paired with unbelievably impressive results. You get all the vibrant, exciting flavors you’d expect from a sushi bar, but in a warm, comforting casserole that’s perfect for any occasion. Whether it’s a casual weeknight meal or a dish designed to wow your guests, this recipe truly hits all the right notes: savory, a little sweet, with that delightful kick that keeps you coming back for more. It’s a guaranteed crowd-pleaser and a fantastic way to enjoy the vibrant flavors of sushi in a warm, comforting format without the fuss of rolling individual pieces. I can confidently say this dish has quickly become a staple in my own rotation, and I have no doubt it will become one in yours too. The ease of preparation, combined with its unforgettable taste, truly sets it apart. It’s a culinary triumph that’s accessible to everyone.
Now, let’s talk about how to truly elevate your experience with this amazing bake. While it’s absolutely fantastic on its own, I love serving it with crisp sheets of nori seaweed. This allows everyone to scoop a generous portion onto a piece of nori, add some fresh avocado slices, a thin cucumber stick, or even a sprinkle of toasted sesame seeds, and then wrap it up like a little hand roll. This creates such a fun, interactive dining experience that makes every bite an adventure! For those who love an extra kick, a drizzle of sriracha or a dollop of extra spicy mayo on top just before serving can really amp up the heat to your desired level. Beyond traditional toppings, consider a side of quick-pickled ginger or a small bowl of edamame to complete the meal, offering a refreshing counterpoint to the rich flavors. And for beverages? A chilled sake, a light Japanese beer, or even a refreshing sparkling water with a squeeze of lime would pair beautifully, cleansing the palate between each delicious bite.
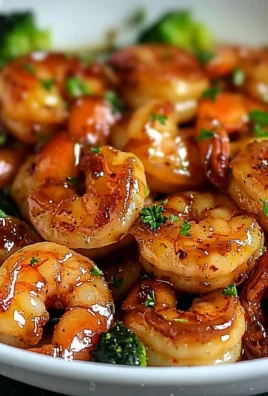
But don’t be afraid to experiment with variations either! If salmon isn’t your only love, try swapping it out for cooked shrimp, imitation crab meat, or even canned tuna (just make sure it’s drained very well to avoid excess moisture). For a delightful vegetarian twist, roasted sweet potatoes or firm tofu could be fantastic substitutes – just adjust the cooking time accordingly to ensure they are tender and perfectly incorporated. You could also play with different cheeses, perhaps a sprinkle of mozzarella or a sharper cheddar for an even gooier texture and a slightly different flavor profile. Imagine adding some finely chopped bell peppers or corn into the mix for extra veggies, sweetness, and a pop of color. The beauty of this recipe lies in its adaptability, so feel free to make it truly your own personal culinary masterpiece. Imagine adding a touch of truffle oil for an indulgent aroma, or perhaps a sprinkle of furikake right before serving for an extra layer of umami and texture. The possibilities are truly endless, and each variation opens up a new world of flavor to explore, making this bake a versatile canvas for your creativity.
So, what are you waiting for? I’m genuinely excited for you to dive into the kitchen and give this incredible recipe a try. You’ll be amazed at how easily you can bring such vibrant, restaurant-quality flavors into your own home. Trust me, your taste buds will thank you! Once you’ve whipped up your own batch, I would absolutely love to hear about your experience. Did you add any unique twists? What were your favorite toppings or variations? Please, don’t hesitate to share your culinary triumphs and even your experiments in the comments section below. Take a picture, tell us about your serving suggestions, or how you made it your own. Your insights and creativity inspire me and our entire community of food lovers. Let’s make delicious memories together. Happy cooking, everyone!
Spicy Salmon Sushi Bake Recipe
The ultimate solution for anyone craving the irresistible flavors of sushi without the intricate rolling process. This modern marvel, often described as a deconstructed sushi roll in casserole form, offers a brilliant way to enjoy your favorite Japanese-inspired flavors right from your oven.
Ingredients
Instructions
Important Information
Nutrition Facts (Per Serving)
It is important to consider this information as approximate and not to use it as definitive health advice.
Allergy Information
Please check ingredients for potential allergens and consult a health professional if in doubt.


Leave a Comment