

Grinch Oreo Truffles are undoubtedly the most delightful way to inject a dose of playful holiday cheer into your festive spread this season! As the air fills with carols and the spirit of giving, I find immense joy in crafting treats that not only taste incredible but also tell a story. And what better story to embrace during the holidays than that of the Grinch, whose heart grew three sizes? While these specific truffles may not have centuries of history, they draw inspiration from a beloved modern holiday classic, bringing a contemporary twist to the rich tradition of festive confections. It’s a wonderful nod to how cherished characters become an integral part of our holiday celebrations.
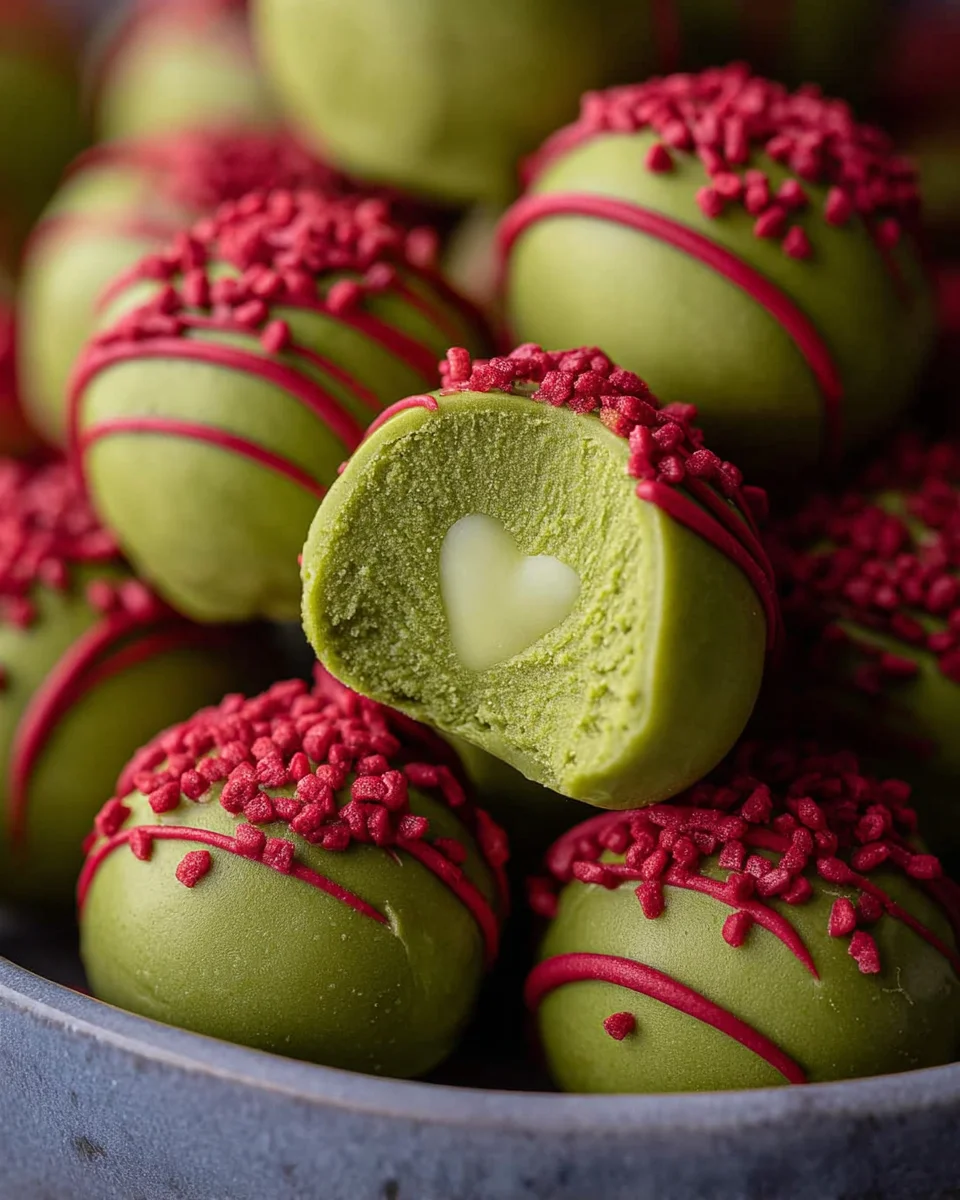
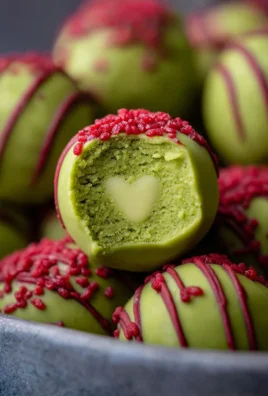
I’m always amazed by how a simple dessert can capture so much imagination. People adore these vibrant green spheres not just for their stunning visual appeal—perfectly capturing the iconic character—but also for their absolutely irresistible flavor and melt-in-your-mouth texture. Imagine the classic creamy, chocolatey goodness of Oreo cookies transformed into a decadent, no-bake truffle that requires minimal effort but delivers maximum impact. These festive bites are ideal for holiday parties, thoughtful homemade gifts, or simply for cozy evenings by the fireplace. Every bite of these Grinch Oreo Truffles promises a sweet surprise that will make your heart grow just like the Grinch’s!

Ingredients:
- 1 (14.3-ounce) package OREO cookies: I always reach for the classic chocolate sandwich cookies for Grinch Oreo Truffles. While regular Oreos work beautifully, sometimes I like to use Double Stuffed for an extra creamy filling, or even the mint-flavored ones if I’m feeling adventurous and want a hint of cool freshness to complement the sweetness. The key here is the iconic cookie and cream combination that forms the base of our delicious treat.
- 1 (8-ounce) package cream cheese, softened: Make sure it’s full-fat cream cheese for the best texture and flavor. Low-fat or fat-free varieties tend to have more water content, which can make your truffles too soft and difficult to roll. The “softened” part is crucial – I usually take it out of the fridge at least an hour before I plan to start mixing, or sometimes even microwave it for 10-15 seconds if I’m short on time, just until it’s pliable but not melted. This ensures a smooth, lump-free mixture.
- Green gel food coloring: Gel food coloring is absolutely essential here. Liquid food coloring can add too much moisture to your truffle mixture, altering the consistency and making it sticky. Gel colors are highly concentrated, meaning you’ll need less to achieve that vibrant, Grinch-green hue we’re aiming for. A little goes a long way, so start with a small amount and add more until you reach your desired shade.
- 16 ounces white candy melts or good quality white chocolate: For coating our truffles, I prefer candy melts because they are formulated to melt smoothly and set quickly, giving a beautiful, professional finish without tempering. If you opt for white chocolate, choose a high-quality brand of baking chocolate or white chocolate bars. Chocolate chips often contain stabilizers that prevent them from melting as smoothly as you’d want for dipping.
- 1-2 tablespoons vegetable oil or coconut oil (optional, for thinning chocolate): This is my secret weapon for achieving a super smooth, dippable consistency with the candy melts or white chocolate. If your melted coating feels too thick, a teaspoon at a time of vegetable oil or refined coconut oil will thin it out beautifully without affecting the flavor. Unrefined coconut oil might impart a coconut flavor, which you may or may not want.
- Red heart sprinkles: These are absolutely non-negotiable for Grinch Oreo Truffles! They represent the Grinch’s tiny, growing heart and add that iconic touch. Look for small, flat heart sprinkles that will sit nicely on the curved surface of the truffles. I usually have a few different sizes on hand just in case.
- Optional: Additional green sprinkles or sanding sugar: To add extra sparkle and texture, sometimes I like to roll the wet truffles in a bit of green sanding sugar or fine green sprinkles immediately after dipping. It adds another layer of visual appeal and a slight crunch. This is purely for fun and aesthetics!
Equipment You’ll Need:
Before we dive into the fun, let’s make sure you have all your tools ready to go. Having everything within reach makes the process much smoother and more enjoyable!
- Food processor: This is a game-changer for crushing the Oreos quickly and evenly. If you don’t have one, don’t worry, a large Ziploc bag and a rolling pin will work just fine, though it requires a bit more elbow grease.
- Large mixing bowl: For combining our crushed Oreos and cream cheese.
- Electric mixer (handheld or stand mixer): While you can mix by hand, an electric mixer will ensure a super smooth and well-incorporated truffle base.
- Rubber spatula: Essential for scraping down the sides of the bowl and ensuring everything is thoroughly mixed.
- Baking sheets: At least two, lined with parchment paper or silicone mats, for chilling and holding your truffles.
- Parchment paper or silicone baking mats: To prevent your truffles from sticking to the baking sheets during chilling and after dipping.
- Small cookie scoop (1-tablespoon size): This helps create uniformly sized truffles, which not only looks professional but also ensures even chilling and dipping.
- Double boiler setup (or microwave-safe bowls): For melting your white chocolate or candy melts. A double boiler offers more gentle, controlled heat, reducing the risk of scorching.
- Dipping tools: Forks, a candy dipping tool, or even toothpicks can be used for dipping the truffles. I find a simple fork works best for me!
Phase 1: Preparing the Grinch Truffle Base
-
Crushing the Oreos to a Fine Crumble:
Our journey to Grinch Oreo Truffle perfection begins with the cookies! Take your entire package of OREO cookies – yes, the filling and all – and place them into the bowl of your food processor. I find that about 3-4 cookies at a time is a good amount for my processor, ensuring a consistent grind without overloading it. Pulse the cookies until they are very finely crushed, resembling fine sand or coarse flour. We want absolutely no large chunks of cookie remaining, as these can make your truffles bumpy and difficult to roll smoothly. A super fine crumb is key to a smooth truffle texture! If you don’t have a food processor, no problem! Place the cookies in a large, heavy-duty Ziploc bag, seal it tightly, and then use a rolling pin to crush them. This method can be a bit more work, but it’s very effective. Just make sure to really press and roll to break down all the cookie pieces evenly.
Once you’ve achieved that fine crumb, transfer about two tablespoons of it into a separate small bowl and set aside. This reserved crumb will be used later to decorate our truffles if you wish, adding a lovely textural contrast, or simply for a little extra sprinkle on top of the finished product. The rest of the crushed Oreos should be transferred to your large mixing bowl.
-
Softening the Cream Cheese and Preparing for Mixing:
Now it’s time to bring in our creamy component. Take your 8-ounce package of full-fat cream cheese and ensure it’s properly softened. As I mentioned earlier, this usually means letting it sit at room temperature for at least an hour. You want it pliable enough that it yields easily to pressure but isn’t warm or melted. If it’s too cold, it won’t mix smoothly with the cookie crumbs, leading to lumps. If it’s too warm, the mixture might become too sticky and difficult to handle later. Cut the softened cream cheese into a few smaller chunks and add them to the large mixing bowl with the crushed Oreos.
-
Mixing, Coloring, and Achieving the Perfect Grinch Hue:
This is where the magic happens and our Grinch Oreo Truffles start to take on their iconic color! Using your electric mixer (or a sturdy spoon if you’re mixing by hand), begin to combine the crushed Oreos and softened cream cheese. Start on low speed to prevent the cookie crumbs from flying everywhere, then gradually increase to medium. Mix until the cream cheese is fully incorporated and you have a thick, uniform dough-like consistency. It will be sticky, but should hold together when pressed.
Now for the fun part: adding the green gel food coloring! Start with a small dab on a toothpick – remember, gel colors are highly concentrated. Add it to the mixture and continue to mix until the color is evenly distributed. Observe the color. Is it that vibrant, slightly mischievous Grinch green you’re envisioning? If not, add another tiny dab of food coloring and mix again. Repeat this process until you reach your desired shade. Be patient and add the coloring incrementally; you can always add more, but you can’t take it away! We’re aiming for a bright, festive green that immediately screams “Grinch.” The mixture should be firm enough to roll but still slightly tacky.
-
Chilling the Grinch Truffle Mixture:
Once your truffle mixture is perfectly green and thoroughly combined, it’s time for its first chill. Cover the mixing bowl tightly with plastic wrap and place it in the refrigerator for at least 30 minutes, or up to an hour. This chilling step is absolutely crucial! It allows the mixture to firm up, making it much easier to scoop and roll into perfect balls. If you try to roll them too soon, the mixture will be too soft and sticky, leading to frustration and messy hands. Don’t rush this part; a properly chilled base is the foundation for perfectly shaped truffles.
Phase 2: Rolling and Shaping Your Truffles
-
Scooping and Rolling Your Truffles:
After the mixture has had its glorious chill, it’s time to shape our truffles! Line your baking sheets with parchment paper or silicone mats – this is where our finished, rolled truffles will rest before their final dip. Grab your small cookie scoop (I prefer a 1-tablespoon size for perfectly bite-sized truffles). Scoop out portions of the chilled truffle mixture. If you don’t have a scoop, you can use a regular spoon, aiming for roughly the size of a golf ball.
Once you have a scooped portion, roll it gently between the palms of your hands to form a smooth, round ball. Don’t overwork the mixture, as the warmth from your hands can start to soften it too much, making it sticky. If the mixture starts to get too sticky, pop it back into the fridge for 10-15 minutes to firm up again. I sometimes keep a small bowl of cold water nearby to rinse my hands if they get too sticky, drying them thoroughly before continuing. Aim for consistency in size for even chilling and dipping later on. Place the rolled truffles onto your prepared baking sheets, leaving a small space between each one.
-
Pre-Chilling Rolled Truffles for Dipping Prep:
We’re not quite ready to dip yet! Once all your truffles are beautifully rolled, place the baking sheets back into the refrigerator for another 15-20 minutes. This second chill firms up the rolled balls, creating a solid base that will hold its shape better when dipped into the warm chocolate coating. It also helps the coating set more quickly, reducing the chances of the truffle crumbling or melting into your warm chocolate. This step prevents many common dipping disasters!
Phase 3: Dipping and Decorating Your Grinch Truffles
-
Melting the Coating Chocolate to a Silky Smoothness:
Now for the luscious coating! Take your 16 ounces of white candy melts or good quality white chocolate. There are two primary methods I use for melting:
- Microwave Method: Place the candy melts or chopped white chocolate in a microwave-safe bowl. Heat on 50% power in 30-second intervals, stirring thoroughly after each interval. White chocolate can seize or burn easily if overheated, so stirring is key to redistribute the heat. Continue until the chocolate is mostly melted and smooth.
- Double Boiler Method: Fill a saucepan with about an inch or two of water and bring it to a gentle simmer. Place a heat-proof bowl (that fits snugly over the saucepan without touching the water) with your candy melts or chopped white chocolate on top. The steam from the simmering water will gently melt the chocolate. Stir constantly with a rubber spatula until completely smooth. This method offers more control and is less prone to burning.
Once melted, if the chocolate or candy melts seem a bit too thick for dipping, stir in 1 teaspoon of vegetable oil or coconut oil at a time, until you reach a smooth, pourable consistency. You want it thin enough to coat evenly but thick enough to cling to the truffles. Do not add water, as it will cause your chocolate to seize and become unusable!
-
Dipping the Truffles with Grace and Precision:
With your chocolate perfectly melted and your truffles thoroughly chilled, it’s dipping time! Take one truffle from the baking sheet. Using a fork or a specialized candy dipping tool, carefully drop the truffle into the melted white chocolate, ensuring it’s fully submerged. Lift the truffle out of the chocolate, gently tapping the fork against the edge of the bowl to allow any excess chocolate to drip off. This helps create a thin, even coating and prevents pooling at the bottom of the truffle.
Carefully transfer the dipped truffle back to the parchment-lined baking sheet. Work relatively quickly, but don’t rush so much that you make a mess. If the chocolate in your bowl starts to cool and thicken, you can gently reheat it for a few seconds in the microwave or over the double boiler until it’s smooth again. Continue dipping all your Grinch Oreo truffles, placing them on the baking sheet.
-
Adding the Grinch’s Iconic Heart:
This is the moment that truly brings our Grinch Oreo Truffles to life! Immediately after dipping each truffle, while the white chocolate coating is still wet and tacky, carefully place one red heart sprinkle on top or slightly off-center of the truffle. This represents the Grinch’s tiny heart that grows three sizes that day! The wet chocolate will act as an adhesive, securing the sprinkle in place as it sets. If you wait too long, the chocolate will harden, and the heart won’t stick properly. Work truffle by truffle: dip, then immediately add the heart. If you’re adding additional green sprinkles or sanding sugar, you would do that now as well, gently rolling the wet truffle in the sprinkles before placing it on the baking sheet.
-
Final Set and Storage for Grinchy Goodness:
Once all your Grinch Oreo Truffles are dipped and adorned with their little red hearts, place the baking sheets back into the refrigerator. Let them chill for at least 15-30 minutes, or until the white chocolate coating is completely set and firm to the touch. This ensures a beautiful, non-sticky finish and allows the flavors to meld together.
Once set, your Grinch Oreo Truffles are ready to be enjoyed! Store any uneaten truffles in an airtight container in the refrigerator for up to one week. They are delightful served chilled, and make perfect festive treats for holiday gatherings, cookie exchanges, or just a cozy night in while watching “How the Grinch Stole Christmas.”
Conclusion:
So there you have it, my friends! We’ve reached the sweet finale of our delicious journey, and I genuinely hope you’re as excited as I am about these absolutely adorable and utterly irresistible treats. From the moment I first envisioned them, I knew these weren’t just any ordinary no-bake dessert; they truly embody everything wonderful about festive indulgence. The vibrant green hue, the playful Grinch theme, and that unbelievably creamy, rich texture make them an absolute showstopper, a dessert that instantly brings smiles and a touch of whimsical holiday cheer to any gathering.
I truly believe this recipe is a must-try for so many reasons. First, the sheer simplicity of it is a dream come true, especially during the busy holiday season. No complicated baking steps, no finicky ovens – just a few basic ingredients transformed into something truly magical with minimal effort. But beyond the ease, it’s the taste that truly seals the deal. The classic combination of crushed chocolate sandwich cookies perfectly balanced with the smooth, tangy cream cheese creates a depth of flavor that’s both comforting and exciting. And then, of course, there’s the visual appeal! These Grinch Oreo Truffles aren’t just delicious; they are a feast for the eyes, instantly captivating everyone from the youngest guest to the most seasoned dessert connoisseur. They’re guaranteed to be the most talked-about sweet on your holiday platter, sparking joy and conversations alike. They deliver a gourmet experience with homemade charm, proving that sometimes, the simplest recipes yield the most spectacular results.
Now, let’s talk about making these beauties even more special. While they are perfect just as they are, I love to get creative with serving and variations. For an elegant presentation, arrange them on a pristine white platter, perhaps nestled among some sprigs of fresh mint or a scattering of edible glitter for an extra frosty touch. They make fantastic individual gifts too – simply place a few in small cellophane bags tied with a festive ribbon, and you’ve got personalized, heartfelt presents that everyone will adore. They pair wonderfully with a warm mug of cocoa, a festive peppermint mocha, or even a glass of chilled milk.
But don’t stop there with your creativity! Consider experimenting with different coating chocolates. A dark chocolate drizzle over the vibrant green adds a sophisticated contrast, while a dusting of crushed candy canes gives them a delightful minty crunch and an even more festive look. For a slightly different flavor profile, you could try using mint-flavored chocolate sandwich cookies, or even a hint of peppermint extract in the cream cheese mixture for an extra cool kick. Imagine a batch with a tiny drop of almond extract for a subtle, nutty undertone, or even a touch of orange zest for a bright, citrusy twist that beautifully complements the chocolate. You could also vary the sprinkles – perhaps silver or gold edible pearls for a more sophisticated look, or even tiny edible stars to really play up the whimsical Grinch theme. The possibilities are truly endless, allowing you to tailor these delightful truffles to any taste or occasion.
So, my dear bakers and sweet treat enthusiasts, I implore you: don’t let this holiday season pass without making a batch (or two!) of these incredible Grinch Oreo Truffles. They are more than just a dessert; they are a celebration in miniature, a testament to the joy of simple, homemade pleasures. Gather your ingredients, put on some festive music, and let yourself enjoy the process of creating something truly special. I promise you, the smiles and compliments you’ll receive will be well worth it. Once you’ve whipped up your own batch, please don’t keep the deliciousness a secret! I absolutely love hearing about your culinary adventures. Share your triumphs, your clever variations, and even your funny kitchen anecdotes. Tag me on social media (or imagine doing so, if this were a live blog!), or drop a comment below. Let’s build a community of enthusiastic bakers who spread holiday cheer one delightful truffle at a time. I can’t wait to see your wonderful creations!
Grinch Oreo Truffles
Grinch Oreo Truffles are a delightful, no-bake holiday treat! These vibrant green, creamy, chocolatey bites are easy to make and perfect for festive parties, gifts, or a cozy evening. Every bite promises a sweet surprise that will make your heart grow just like the Grinch’s!
Ingredients
Instructions
Important Information
Nutrition Facts (Per Serving)
It is important to consider this information as approximate and not to use it as definitive health advice.
Allergy Information
Please check ingredients for potential allergens and consult a health professional if in doubt.


Leave a Comment