

Oreo Krispies
Oh boy, do I have a treat for you today! Forget everything you thought you knew about easy desserts, because these Oreo Krispies are about to blow your mind. What makes them so incredibly special, you ask? Well, imagine taking the chewy, gooey, nostalgic perfection of classic Rice Krispies Treats and then giving them a superstar makeover with everyone’s favorite chocolate sandwich cookie: Oreos! It’s a match made in dessert heaven that’s surprisingly simple to create.
You are absolutely going to love these. Seriously, who can resist the delightful crunch of puffed rice, the satisfying chewiness of melted marshmallow, and the irresistible chocolatey goodness of crushed Oreos all in one bite? This isn’t just a dessert; it’s an experience! They’re no-bake, require minimal effort, and come together in a flash, making them perfect for last-minute cravings, spontaneous get-togethers, or just because you deserve something wonderfully sweet. Kids adore them, and adults secretly (or not so secretly!) devour them just as fast.
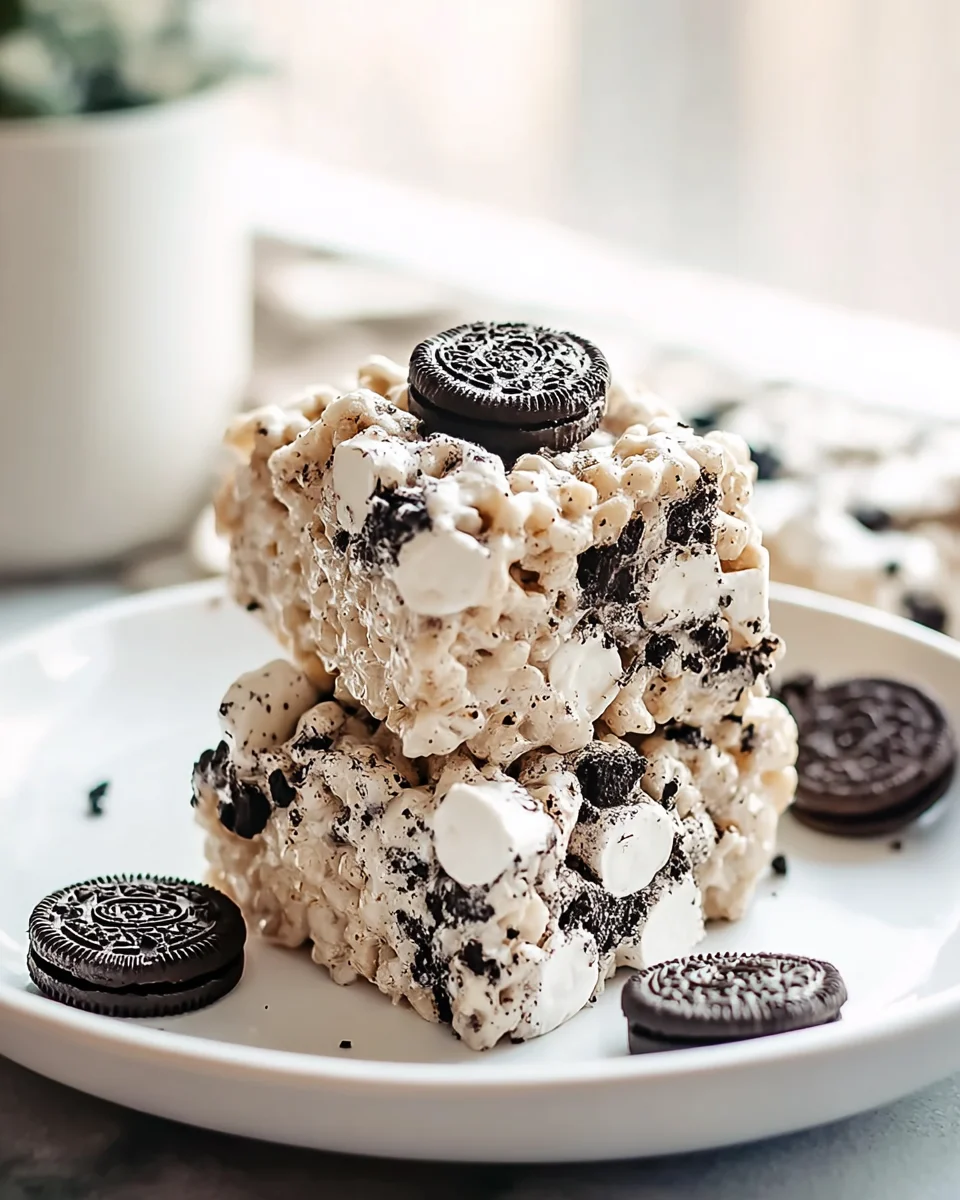
In a nutshell, Oreo Krispies are an elevated twist on the beloved no-bake bar. We’re talking golden butter, melty marshmallows, crispy puffed rice cereal, and generous handfuls of crushed Oreo cookies all stirred together, pressed into a pan, and cooled until perfectly set. The result is a delightfully sweet, wonderfully textured square that delivers a satisfying chocolate and marshmallow flavor with every single bite. Get ready to make a new favorite!

Ingredient Notes
Creating truly irresistible Oreo Krispies starts with understanding the stars of the show! While the recipe is wonderfully simple, choosing the right ingredients makes all the difference in achieving that perfect balance of gooey marshmallow and crunchy, chocolatey cookie goodness. I’ve found that sticking to good quality ingredients ensures the best results for these delightful no-bake treats.
Key Ingredients
- OREO Cookies: Naturally, these are the heart and soul of our Oreo Krispies! You’ll want a standard package of original Oreos. I usually aim for about 35-40 cookies, which translates to roughly 14 ounces. We’ll be crushing these, so don’t worry about perfection. The mix of fine crumbs and small chunks is what gives these Krispies their signature texture and intense chocolate flavor.
- Mini Marshmallows: For the ultimate melt and chewiness, mini marshmallows are my go-to. They melt quickly and evenly, creating that wonderfully sticky binding agent we all love. You’ll need about a 10-ounce bag. Larger marshmallows can be used, but they might take a bit longer to melt and could require a slightly heavier hand when stirring.
- Unsalted Butter: Good quality unsalted butter is crucial. It adds richness and helps the marshmallows melt smoothly without scorching. I typically use about 4-5 tablespoons. If you only have salted butter, you can definitely use it; just omit the added pinch of salt in the recipe to prevent it from becoming too salty.
- Vanilla Extract (Optional but Recommended): A teaspoon of pure vanilla extract really elevates the flavor profile, adding a warm, aromatic note that complements the chocolate and marshmallow beautifully. It’s a small addition that makes a big impact on the overall depth of flavor in your Oreo Krispies.
- Pinch of Salt: Just a tiny pinch, about 1/4 teaspoon, is all you need. This might seem counterintuitive for a sweet treat, but salt is a flavor enhancer that helps to balance the sweetness of the marshmallows and cookies, making the chocolate flavor pop even more.
Substitutions and Variations
- OREO Cookies: Feel free to get creative here! While original Oreos are classic, these Oreo Krispies are fantastic with other flavors. Mint Oreos would make for a refreshing twist, or even peanut butter Oreos for an extra indulgent treat. You could also try other chocolate sandwich cookies if Oreos aren’t available.
- Marshmallows: If you don’t have mini marshmallows, standard-sized marshmallows can be used. Just be sure to cut them into smaller pieces to help them melt more quickly and evenly. Marshmallow fluff or crème can also work, though you might need to adjust the quantity and the texture will be slightly softer and less chewy.
- Butter: For a dairy-free version of your Oreo Krispies, a good quality vegan butter substitute works perfectly. Coconut oil can also be used, but be aware that it might impart a very subtle coconut flavor, which could be a delicious addition for some!
- Vanilla Extract: If you’re looking to experiment with flavors, almond extract can be a lovely alternative to vanilla, offering a slightly different nutty aroma. You could also skip the extract entirely if preferred, though I always recommend it for that extra layer of flavor.
Ultimately, these ingredients come together to form a truly iconic and beloved dessert. Getting them right sets the stage for perfect Oreo Krispies every time!
Step-by-Step Instructions
Making Oreo Krispies is a truly fun and straightforward process, perfect for bakers of all skill levels. The beauty of a no-bake treat is that you get delicious results without ever having to turn on the oven! Here’s how I bring these dreamy treats to life in my kitchen.
Preparation is Key
- Crush Your Oreos: This is where the magic begins! You’ll need approximately 35-40 Oreo cookies. I find the easiest way to crush them is to place them in a large Ziploc bag and gently crush them with a rolling pin or the bottom of a heavy pan. You want a mix of fine crumbs and some slightly larger chunks – this variety in texture is what makes Oreo Krispies so delightful. Avoid turning them into a fine powder; those small cookie pieces are essential for texture. Set your crushed Oreos aside in a large mixing bowl.
- Prepare Your Pan: Grease a 9×13-inch baking dish with butter or cooking spray. For even easier removal and clean-up, I love lining the pan with parchment paper, leaving an overhang on the sides. This creates “handles” that make lifting the finished treats out a breeze.
Melting and Mixing
- Melt the Butter: In a large, heavy-bottomed pot or Dutch oven, melt 4-5 tablespoons of unsalted butter over low to medium-low heat. The key here is low and slow to prevent the butter from browning or scorching.
- Add Marshmallows: Once the butter is fully melted, add your 10-ounce bag of mini marshmallows to the pot. Continue to stir constantly with a heat-resistant spatula until the marshmallows are completely melted and smooth. This step requires a bit of patience and continuous stirring to ensure an even melt without burning the bottom. If you notice them getting too hot, reduce the heat immediately.
- Stir in Vanilla and Salt: Once the marshmallows are perfectly smooth and glossy, remove the pot from the heat. Stir in 1 teaspoon of vanilla extract and your pinch of salt. Mix well until everything is fully incorporated. The warmth of the marshmallow mixture will help the vanilla disperse beautifully.
Combining and Setting
- Combine with Oreos: Now for the fun part! Pour the melted marshmallow mixture over the crushed Oreos in your large mixing bowl. Using your spatula, gently fold the crushed Oreos into the marshmallow mixture until they are evenly coated. Work relatively quickly, as the mixture will start to set as it cools. Be careful not to overmix or press too hard, as this can crush the remaining cookie chunks too much and make your Krispies overly dense.
- Press into Pan: Transfer the sticky Oreo Krispies mixture into your prepared 9×13-inch baking dish. Now, gently and evenly press the mixture into the pan. I find it easiest to use a piece of parchment paper or wax paper placed over the top, then press down with your hands or the back of a buttered spoon or spatula. The goal is to create an even layer without compacting it too much, which can make your Krispies hard. You want them to retain a light and chewy texture.
- Cool and Set: Allow your Oreo Krispies to cool completely at room temperature for at least 1-2 hours. This gives them time to set up properly, making them easy to slice. You can also pop them in the refrigerator for about 30 minutes if you’re in a hurry, but avoid leaving them in too long, as it can make them overly firm.
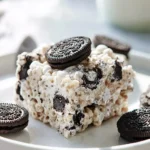
- Slice and Serve: Once fully set, use the parchment paper overhangs to lift the entire slab of Oreo Krispies out of the pan onto a cutting board. Using a sharp, buttered knife, cut them into squares or rectangles of your desired size. I usually aim for 2-inch squares, but mini bites are also a hit!
And there you have it – perfectly gooey, crunchy, and utterly delicious Oreo Krispies ready to be devoured! Enjoy every bite!
Tips & Suggestions
After making countless batches of these delightful Oreo Krispies, I’ve picked up a few tricks and tips that I’m excited to share with you. These little insights can make all the difference, helping you achieve perfect texture, amazing flavor, and even some fun variations!
Achieving the Perfect Texture
- Don’t Overcook the Marshmallows: This is probably the most crucial tip for soft, gooey Oreo Krispies. Once your marshmallows are fully melted and smooth, remove them from the heat immediately. Overcooking marshmallows can make them brittle and lead to hard, rather than chewy, treats. You want them just melted enough to incorporate everything.
- Gentle Mixing: When combining the melted marshmallow mixture with the crushed Oreos, be gentle. Over-mixing or stirring too vigorously can break down the cookie pieces too much, and it can also incorporate too much air, which affects the density. A light touch helps maintain those lovely cookie chunks.
- Don’t Pack Too Tightly: After transferring the mixture to your prepared pan, resist the urge to press it down with all your might. Gently and evenly pressing it into the pan is sufficient. If you compact it too much, your Oreo Krispies will be dense and hard instead of delightfully chewy. Using buttered hands or a buttered spatula makes this step much easier and prevents sticking.
- Temperature Matters: Allow your Oreo Krispies to cool completely at room temperature. While tempting to speed things up in the fridge, prolonged refrigeration can make them overly firm. If you do chill them, bring them back to room temperature for about 15-20 minutes before serving to restore their signature chewiness.
Flavor & Presentation Enhancements
- Experiment with Oreo Flavors: While classic Oreos are fantastic, don’t be afraid to try other varieties! Mint Oreos make an incredible, refreshing batch of Krispies, especially around the holidays. Peanut Butter Oreos or even Double Stuf Oreos could also be fun to try for an extra indulgent twist.
- Add Extra Goodies: Elevate your Oreo Krispies with some additions! Stir in a handful of chocolate chips (white chocolate, milk chocolate, or dark chocolate) along with the crushed Oreos. A sprinkle of mini M&Ms or some festive sprinkles on top before they set can also add a pop of color and extra crunch.
- Drizzle for Drama: For an extra touch of elegance and flavor, melt some white chocolate or dark chocolate and drizzle it decoratively over the cooled and cut Krispies. A sprinkle of sea salt on top of a chocolate drizzle can also beautifully enhance the flavors.
- Neat Slices: For clean, professional-looking squares, use a sharp knife and spray it with a little cooking spray or wipe it with butter between each cut. This prevents sticking and ensures smooth edges.
Common Pitfalls & Troubleshooting
- Sticking to the Pan: If your Oreo Krispies are sticking, you likely didn’t grease your pan enough or didn’t use parchment paper. Always ensure a good layer of butter or cooking spray, or better yet, line with parchment paper for effortless removal.
- Too Hard/Too Soft: Hard Krispies usually mean the marshmallows were overcooked or the mixture was packed too tightly. If they’re too soft and fall apart, you might not have used enough marshmallows relative to the Oreos, or they didn’t have enough time to set properly.
With these tips in mind, you’re well on your way to creating truly perfect Oreo Krispies that everyone will adore!
Storage
Proper storage is essential to keep your delicious Oreo Krispies fresh, soft, and perfectly chewy for as long as possible. Luckily, these no-bake treats are quite forgiving, and with a few simple steps, you can ensure they retain their wonderful texture and flavor.
Room Temperature Storage (Recommended)
- Airtight is Key: The best way to store Oreo Krispies is at room temperature in an airtight container. Exposure to air is what causes them to dry out and become hard. I like to use a container with a tight-fitting lid or even a heavy-duty Ziploc bag, ensuring all the air is squeezed out.
- Prevent Sticking: If you’re stacking multiple layers of Krispies in your container, place a sheet of parchment paper or wax paper between each layer. This prevents them from sticking together and makes it easy to grab just one (or two!).
- Shelf Life: Stored correctly at room temperature, your Oreo Krispies will remain fresh and delightfully chewy for up to 3-4 days. After this, they might start to lose some of their softness, though they will still be perfectly safe to eat.
Refrigeration (Use with Caution)
- Can Make Them Hard: While you can refrigerate Oreo Krispies for slightly longer storage (up to a week), I generally don’t recommend it as the cold temperature tends to make them quite firm and hard. The butter solidifies more, and the marshmallow loses its soft pliability.
- Bring to Room Temperature: If you do choose to refrigerate them, always allow them to come back to room temperature for at least 15-20 minutes before serving. This will help them soften up and regain their signature chewiness.
Freezing (Not Ideal)
- Texture Compromise: Freezing is generally not recommended for Oreo Krispies. While technically possible, the freezing and thawing process can significantly alter their delicate texture, often resulting in a more crumbly or overly soft consistency once thawed. The Oreos can also become somewhat soggy.
- If You Must: If you absolutely need to freeze them, wrap individual Krispies tightly in plastic wrap, then place them in an airtight freezer-safe bag. Thaw them completely at room temperature before unwrapping and serving. Expect a slight change in texture.
For the best experience, I always advise enjoying your Oreo Krispies within a few days of making them, stored snugly at room temperature. They’re usually so popular, they don’t last long anyway!
Final Thoughts
And there you have it! I truly believe that these Oreo Krispies are more than just a simple treat; they’re a delightful experience waiting to happen. What makes this recipe an absolute must-try, in my humble opinion, is the incredible way it takes the familiar comfort of a crispy rice treat and infuses it with the unmistakable, decadent crunch of Oreos. It’s a perfect harmony of textures and flavors that will surprise and satisfy anyone lucky enough to try them.
I find immense joy in how effortlessly these come together, making them perfect for last-minute cravings, a fun project with the kids, or a standout contribution to any gathering. The unique blend of creamy, chocolatey, and delightfully crunchy elements makes these Oreo Krispies utterly irresistible. Seriously, I encourage you to whip up a batch soon – I’m confident they’ll become a beloved staple in your snack repertoire!
Oreo Krispies: Easy No-Bake Treat for Everyone!
- Total Time: 25 minutes
- Yield: 12 servings 1x
Description
These Oreo Krispies are a delightful twist on classic Rice Krispies Treats, combining the chewy goodness of marshmallows with the chocolatey crunch of Oreos. Perfect for any occasion, they are simple to make and irresistibly delicious!
Ingredients
- 35–40 OREO Cookies (about 14 ounces)
- 1 (10-ounce) bag of Mini Marshmallows
- 4–5 tablespoons Unsalted Butter
- 1 teaspoon Vanilla Extract (Optional but Recommended)
- Pinch of Salt (about 1/4 teaspoon)
Instructions
- Crush Your Oreos: Place approximately 35-40 Oreo cookies in a large Ziploc bag and gently crush them with a rolling pin or the bottom of a heavy pan. Set your crushed Oreos aside in a large mixing bowl.
- Prepare Your Pan: Grease a 9×13-inch baking dish with butter or cooking spray, and line it with parchment paper for easy removal.
- Melt the Butter: In a large, heavy-bottomed pot or Dutch oven, melt 4-5 tablespoons of unsalted butter over low to medium-low heat.
- Add Marshmallows: Once the butter is fully melted, add the 10-ounce bag of mini marshmallows to the pot and stir constantly until completely melted and smooth.
- Stir in Vanilla and Salt: Remove the pot from heat and stir in 1 teaspoon of vanilla extract and a pinch of salt until fully incorporated.
- Combine with Oreos: Pour the melted marshmallow mixture over the crushed Oreos and gently fold until evenly coated.
- Press into Pan: Transfer the mixture into the prepared baking dish and gently press it down to create an even layer.
- Cool and Set: Allow the Oreo Krispies to cool completely at room temperature for at least 1-2 hours, or refrigerate for about 30 minutes.
- Slice and Serve: Use the parchment paper overhangs to lift the slab out of the pan and cut into squares or rectangles of your desired size.
- Prep Time: 15 mins
- Cook Time: 10 mins
- Category: Dessert
- Method: No-Bake
- Cuisine: American
Nutrition
- Serving Size: 1 square
- Calories: 150
- Sugar: 12 g
- Sodium: 80 mg
- Fat: 6 g
- Saturated Fat: 3 g
- Unsaturated Fat: 2 g
- Trans Fat: 0 g
- Carbohydrates: 22 g
- Fiber: 1 g
- Protein: 1 g
- Cholesterol: 10 mg
Keywords: For variations, try using different Oreo flavors or adding chocolate chips. Ensure not to overcook the marshmallows for the best texture.


Leave a Comment