

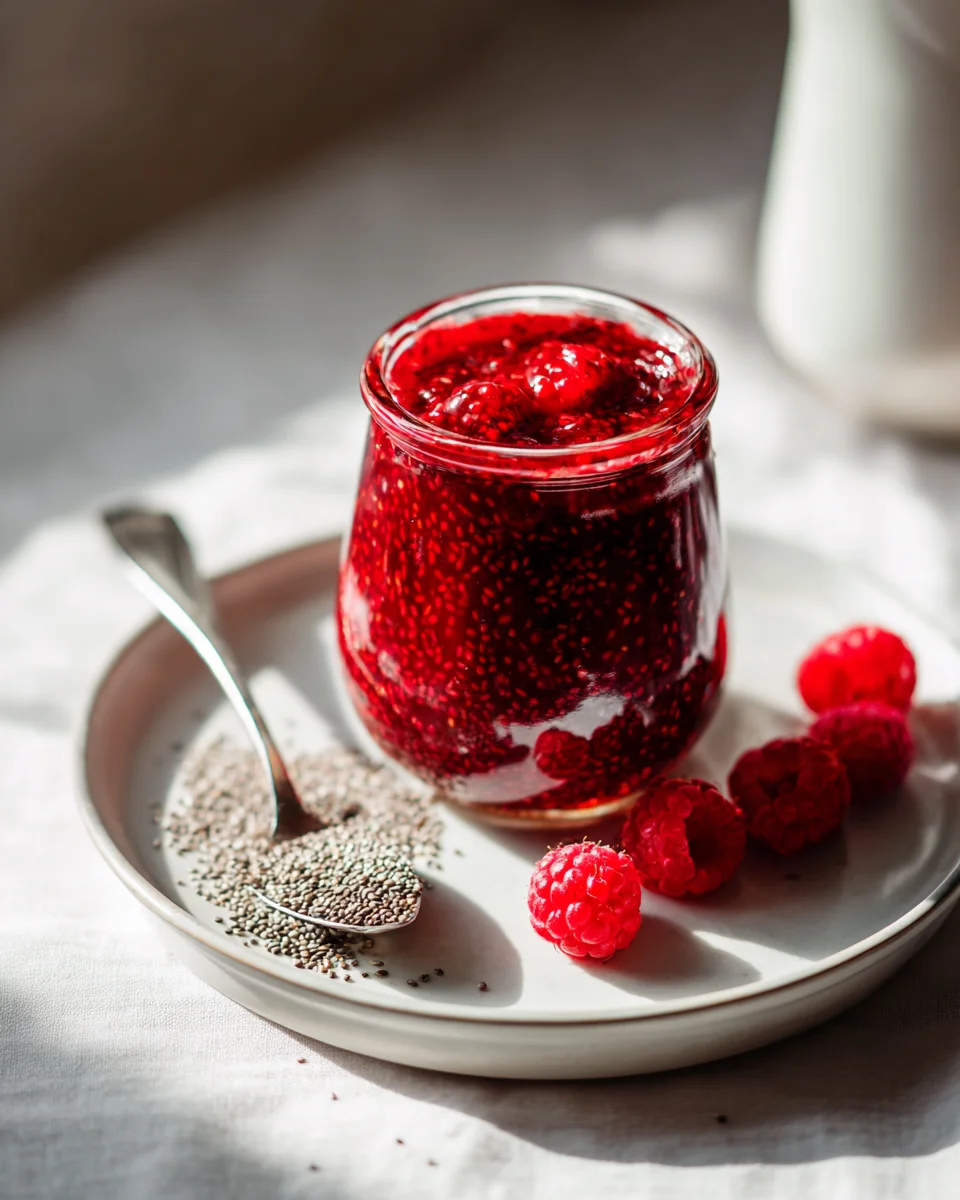
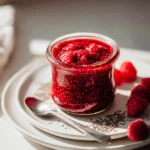
Raspberry Chia Jam (no Cook)
Oh my goodness, let me tell you, if you’ve ever dreamt of homemade jam but felt intimidated by the whole canning process or just didn’t have the time to stand over a hot stove, then you are absolutely going to adore my Raspberry Chia Jam (no Cook) recipe. This isn’t just any jam; it’s a game-changer! Imagine capturing the bright, tangy essence of fresh raspberries in a spread that’s ridiculously easy to make, packed with goodness, and ready in mere minutes.
What makes this Raspberry Chia Jam so special, you ask? Well, for starters, it’s all in the name – “no cook”! That means no boiling, no pectin, no fuss. We’re harnessing the natural thickening power of magical little chia seeds, which also bring a fantastic boost of omega-3s and fiber to the party. This isn’t just a treat for your taste buds; it’s a healthier alternative to store-bought jams, allowing you to control the sweetness and avoid all those extra preservatives. It’s incredibly fresh, vibrant, and bursting with pure fruit flavor.
I know you’ll love this because it solves so many problems – busy schedules, a desire for wholesome ingredients, and that craving for something truly homemade. It’s perfect for slathering on your morning toast, swirling into yogurt, topping pancakes, or even dolloping onto a spoonful of oatmeal. This dish is essentially a vibrant, naturally sweetened fruit spread made by simply mashing fresh raspberries, stirring in chia seeds, and a touch of your favorite sweetener. It thickens beautifully in the fridge, giving you a delicious, wholesome jam without ever turning on the heat. Get ready to fall in love with homemade jam all over again, the easiest way possible!

Hello, jam lovers! I am so excited to share one of my favorite quick and healthy recipes with you today: my incredibly simple Raspberry Chia Jam. If you’re looking for a fresh, vibrant, and utterly delicious spread that comes together in minutes without ever touching a stove, you’ve come to the right place. This no-cook method is a game-changer, preserving all the bright, natural flavor of the raspberries. It’s perfect for toast, yogurt, oatmeal, or even as a filling for desserts. Let’s dive in!
Ingredient Notes
Making a delicious batch of Raspberry Chia Jam is wonderfully straightforward, and the key lies in selecting just a few star ingredients. Here’s a breakdown of what you’ll need and some thoughts on substitutions to fit your pantry and preferences.
- Fresh or Frozen Raspberries: These are the undeniable heroes of our jam! I love using raspberries for their natural sweetness and slight tartness, which creates a beautifully balanced flavor. You can absolutely use either fresh or frozen raspberries for this recipe. If you’re using frozen, there’s no need to thaw them completely beforehand; they will soften as you mash them, and the extra liquid released can help with the jam’s texture. Any berry will work beautifully here if raspberries aren’t your favorite or aren’t in season. Strawberries, blueberries, blackberries, or a mix of berries are fantastic alternatives, though you might need to adjust the sweetness slightly depending on their natural sugar content.
- Chia Seeds: Ah, the magic ingredient! Chia seeds are what give this “jam” its incredible texture without any cooking or added pectin. When exposed to liquid, these tiny powerhouses absorb it and form a gel, creating that perfect spreadable consistency. There isn’t a direct substitute for chia seeds if you want a no-cook jam with this particular texture. They are essential for achieving the jam-like consistency without simmering.
- Sweetener (Maple Syrup, Honey, or Agave Nectar): To balance the tartness of the raspberries, we add a touch of sweetener. I personally prefer maple syrup or agave nectar for their neutral flavors, which allow the raspberry taste to shine through beautifully. Honey is also a wonderful option, lending its own unique floral notes. You can adjust the amount of sweetener to your personal taste; I always recommend starting with a smaller amount and adding more if needed after a taste test. If you prefer, you can use granulated sugar, but I find liquid sweeteners incorporate more easily into a no-cook recipe.
- Fresh Lemon Juice: A squeeze of fresh lemon juice is not just for flavor; it’s a critical component in bringing out the brightest notes in the raspberries. It also adds a touch of acidity that helps balance the sweetness and gives the jam a lovely freshness. While it won’t activate pectin in the traditional sense for a no-cook jam, it still plays an important role in the overall taste profile.
- Optional: Vanilla Extract: A splash of good quality vanilla extract can add a wonderful depth and warmth to your jam, complementing the raspberries beautifully. It’s completely optional, but I highly recommend it if you have it on hand!
Step-by-Step Instructions
Making this Raspberry Chia Jam is almost ridiculously easy. Seriously, it’s one of those recipes that makes you wonder why you ever bought store-bought jam. Here’s how I do it:
- Prepare Your Raspberries: First things first, grab your raspberries! If you’re using fresh, give them a gentle rinse under cool water and pat them dry. If they’re frozen, you can just dump them straight into a medium-sized bowl. Now, for the fun part: mashing! I like to use a fork or a potato masher to break down the raspberries. You can go as chunky or as smooth as you like. For a truly smooth jam, you could even briefly pulse them in a food processor, but I personally love a few small pieces of fruit in my jam. The more you mash, the more liquid is released, which helps the chia seeds do their job.
- Combine with the Magic Ingredients: Once your raspberries are mashed to your liking, it’s time to add the rest of the players. Sprinkle in your chia seeds, pour in your chosen sweetener (maple syrup, honey, or agave nectar), and add that vibrant splash of fresh lemon juice. If you’re using vanilla extract, now’s the time to add that too.
- Stir It Up: With all the ingredients in the bowl, give everything a really good stir. You want to make sure the chia seeds are evenly distributed throughout the raspberry mixture. This initial stir is important because it ensures the chia seeds start to absorb the liquid uniformly.
- Let It Rest (Initial Bloom): Now comes the hardest part: waiting! Cover your bowl and let the mixture sit at room temperature for about 5-10 minutes. During this short rest, the chia seeds will begin to absorb the liquid and “bloom,” starting to thicken the jam. You’ll notice it becoming less watery and more gel-like even after this short time.
- Give It Another Stir: After the initial rest, give the jam another thorough stir. This helps to break up any clumps of chia seeds and ensures an even consistency. At this point, you can also taste the jam. If you think it needs more sweetness or a bit more tang, now is the perfect time to adjust by adding a little more sweetener or lemon juice. Remember, it will thicken more in the fridge, so don’t be alarmed if it’s still a bit loose.
- Refrigerate to Thicken: Transfer your jam to an airtight jar or container. Pop it into the refrigerator for at least 1-2 hours, or until it has fully set and reached your desired jam-like consistency. The longer it chills, the thicker it will become. Overnight is ideal for the best texture.
Tips & Suggestions
Creating this Raspberry Chia Jam is wonderfully simple, but a few insider tips can elevate your experience and ensure you get the perfect batch every time. Here are my go-to suggestions:
- Achieving Your Perfect Consistency: This is a personal preference! If you like a thicker jam, you can either add an extra half-tablespoon of chia seeds or simply let it chill longer in the refrigerator. Chia seeds continue to absorb liquid over time, so patience is key. If your jam turns out a little too thick for your liking, don’t worry! You can easily thin it out by stirring in a tiny splash of water (or even a little more lemon juice) until you reach your desired consistency.
- Mashing for Texture: The beauty of a homemade jam is controlling the texture. If you prefer a super smooth jam, you can take the extra step of blending the raspberries (and even the finished jam) in a food processor or blender until it’s perfectly uniform. For me, I love a slightly rustic jam with small bits of fruit, so a fork or potato masher does the trick perfectly.
- Sweetness is Subjective: Taste, taste, taste! As I mentioned in the instructions, always taste your jam after the first stir. Raspberries can vary greatly in their natural sweetness depending on their ripeness. Don’t hesitate to add a little more maple syrup or honey if you prefer a sweeter jam, or a touch more lemon juice if you like it tangier.
- Using Frozen Berries? No Problem! Frozen raspberries are fantastic for this recipe. They tend to release more liquid as they thaw and mash, which can actually help the chia seeds gel more effectively. Just be aware that if you’re starting with frozen berries, your jam might take a tiny bit longer to reach its ultimate thickness in the fridge because it’s starting from a colder temperature.
- Serving Suggestions: The possibilities are endless! This Raspberry Chia Jam is absolutely divine slathered on warm toast, English muffins, or fresh scones. I love stirring it into my morning yogurt or oatmeal for a burst of fruit flavor. It’s also excellent layered in parfaits, swirled into smoothies, or even used as a topping for pancakes, waffles, or a simple scoop of vanilla ice cream.
- Flavor Variations: Don’t be afraid to experiment! While raspberry is a classic, you can easily swap out the raspberries for other berries like strawberries, blueberries, or mixed berries. You can also add other flavorings. A pinch of ground cinnamon, a tiny bit of almond extract, or even a hint of orange zest can create wonderful variations.
Storage
One of the trade-offs for the convenience and freshness of a no-cook chia jam is its shelf life, which is shorter than traditional, sugar-heavy cooked jams. But don’t worry, it’s still very easy to store and enjoy!
- Refrigeration: Your homemade Raspberry Chia Jam should always be stored in an airtight container or jar in the refrigerator. Because it’s a no-cook jam and has a lower sugar content than traditional jams, it doesn’t have the same preserving qualities. It will typically last for about 1 to 2 weeks in the fridge. Always use a clean spoon each time you scoop out jam to prevent contamination and extend its freshness. If you notice any signs of mold or an off smell, it’s best to discard it.
- Freezing: Good news! Raspberry Chia Jam freezes beautifully. This is a fantastic option if you’ve made a larger batch or simply want to extend its shelf life for several months. To freeze, transfer the jam into freezer-safe containers or jars, leaving a little bit of headspace (about half an inch to an inch) at the top to allow for expansion as it freezes. It can be stored in the freezer for up to 3 months. When you’re ready to use it, simply transfer the container to the refrigerator and let it thaw overnight. Give it a good stir once thawed, and it will be ready to enjoy!
Final Thoughts
And there you have it! I truly hope you’re as excited about this incredible spread as I am. This Raspberry Chia Jam (no Cook) isn’t just a recipe; it’s a revelation in simplicity and fresh flavor. I mean, who knew making delicious, healthy jam could be this effortless?
What makes this Raspberry Chia Jam (no Cook) a definite must-try is its unbeatable combination of speed, nutrition, and vibrant taste. No standing over a hot stove, no complicated canning process, just pure, unadulterated raspberry goodness thickened naturally with the magic of chia seeds. It’s naturally sweet, packed with goodness, and ready in minutes, making it perfect for busy mornings or whenever a fresh craving strikes.
So, whether you’re spreading it on toast, swirling it into yogurt, or even dolloping it over pancakes, I promise you’ll fall in love with the bright, fruity burst of this homemade delight. Go ahead, give this Raspberry Chia Jam (no Cook) a try – your taste buds (and your schedule!) will thank you. Enjoy every single spoonful!
Raspberry Chia Jam (No Cook) – Quick & Healthy Spread
- Total Time: 10 minutes
- Yield: 1 cup
Description
This Raspberry Chia Jam is a game-changer for homemade spreads, capturing the bright, tangy essence of fresh raspberries without any cooking. It’s incredibly easy to make, packed with goodness, and ready in mere minutes!
Ingredients
- Fresh or Frozen Raspberries
- Chia Seeds
- Sweetener (Maple Syrup, Honey, or Agave Nectar)
- Fresh Lemon Juice
- Optional: Vanilla Extract
Instructions
- Prepare Your Raspberries: If using fresh, rinse under cool water and pat dry. If frozen, place them in a medium-sized bowl. Mash the raspberries using a fork or potato masher to your desired consistency.
- Combine with the Magic Ingredients: Add chia seeds, your chosen sweetener, and fresh lemon juice to the mashed raspberries. If using vanilla extract, add it now.
- Stir It Up: Mix all the ingredients thoroughly to ensure the chia seeds are evenly distributed.
- Let It Rest (Initial Bloom): Cover the bowl and let the mixture sit at room temperature for about 5-10 minutes to allow the chia seeds to absorb the liquid.
- Give It Another Stir: After resting, stir the jam again to break up any clumps of chia seeds and adjust sweetness or tanginess if needed.
- Refrigerate to Thicken: Transfer the jam to an airtight jar or container and refrigerate for at least 1-2 hours until it reaches your desired consistency.
- Prep Time: 10 mins
- Cook Time: 0 mins
- Category: Spread
- Method: No Cook
- Cuisine: American
Nutrition
- Serving Size: 1 tablespoon
- Calories: 30
- Sugar: 5 g
- Sodium: 1 mg
- Fat: 0 g
- Saturated Fat: 0 g
- Unsaturated Fat: 0 g
- Trans Fat: 0 g
- Carbohydrates: 7 g
- Fiber: 1 g
- Protein: 1 g
- Cholesterol: 0 mg
Keywords: For a thicker jam, add more chia seeds or let it chill longer. Taste and adjust sweetness as raspberries can vary in natural sweetness. Frozen raspberries can be used without thawing.

Leave a Comment