

Chicken Breast Recipes That Stay Juicy (3 Simple Tricks)
Are you tired of dry, rubbery chicken breast? You know, the kind that makes you question why you even bothered cooking? For years, I struggled with bland, tough chicken, despite my best efforts. But fear not, my fellow home cooks, because I’m thrilled to share my secrets for perfectly tender, flavorful chicken every single time!
My recipe for `Chicken Breast Recipes That Stay Juicy (3 Simple Tricks)` isn’t just another way to cook chicken; it’s a revelation! I’ve cracked the code to keeping chicken breast incredibly moist and delicious, and the best part? It only takes three incredibly simple tricks that anyone can master. You’re going to love how these methods transform your everyday meals, making meal prep a joy and dinner time something to look forward to again. No more sad, flavorless poultry for you!
In this guide, I’ll walk you through my foolproof techniques that guarantee succulent results, whether you’re pan-frying, baking, or grilling. These aren’t complicated culinary gymnastics; they’re smart, easy adjustments that make all the difference. Get ready to ditch the bland and embrace the tender – your chicken breast is about to get a serious upgrade, ready to be enjoyed on its own, sliced into salads, or nestled in sandwiches. Let’s make juicy chicken a staple in your kitchen!

Ingredient Notes
When I’m making chicken breast, I focus on key ingredients and methods to ensure a juicy outcome.
Chicken Breast
I always choose boneless, skinless chicken breasts. Fresh is ideal, but properly thawed frozen chicken works too. If possible, pick breasts of similar size for even cooking, or prepare to pound them yourself for uniformity.
Brining Solution
This is my first trick for juiciness! A simple brine uses water and salt – typically 1 tablespoon of salt per cup of water. You can add a pinch of sugar, a bay leaf, or peppercorns for extra flavor, but salt and water are the essentials. If you choose to skip brining, the other tricks are still vital for maintaining moisture!
Oil and Seasonings
A good cooking oil like olive oil or avocado oil is essential for searing. For seasoning, my go-to is a mix of garlic powder, onion powder, paprika, dried oregano, salt, and black pepper. Feel free to substitute with your favorite spice blends or fresh herbs like rosemary or thyme. Sometimes I use a marinade with lemon juice, a non-alcohol alternative like apple cider vinegar, and a touch of maple syrup, but be mindful of acidic marinades, especially after brining, as they can sometimes alter texture if left too long.
Step-by-Step Instructions
Getting truly juicy chicken breast every time is simple when you follow these steps, incorporating my three easy tricks!
-
Trick #1: Brine Your Chicken
This is my secret weapon for moisture! In a large bowl or container, dissolve 1 tablespoon of salt per cup of water (e.g., 4 cups water, 4 tbsp salt for 2-3 chicken breasts). Submerge your chicken breasts completely in the brine. Cover and refrigerate for at least 30 minutes, and up to 4 hours. Don’t brine for too long! After brining, remove the chicken, rinse it thoroughly under cold water, then pat it very dry with paper towels. Drying is crucial for a good sear.
-
Trick #2: Pound to Even Thickness
Uneven chicken breasts cook unevenly, leading to dry spots. Place each chicken breast between two pieces of plastic wrap. Using a meat mallet, rolling pin, or even the bottom of a heavy pan, gently pound the thickest part until the entire breast is an even ¾ to 1 inch thick. This ensures uniform cooking and tenderness throughout.
-
Season Generously
Once your chicken is dry and evenly pounded, it’s time to season! Drizzle a little olive oil over both sides of the chicken, then sprinkle generously with your chosen spices (e.g., garlic powder, onion powder, paprika, salt, and pepper). Make sure to rub the seasoning into the chicken so it adheres well. This creates a beautiful crust and locks in flavor.
-
Preheat Your Pan Properly
For a perfect sear, I always use a heavy-bottomed skillet, like cast iron or stainless steel. Place it over medium-high heat and let it get hot for a good 3-5 minutes before adding any oil. You want it shimmering, but not smoking. Add about 1-2 tablespoons of oil to the hot pan and swirl to coat the bottom. The oil should also shimmer.
-
Sear and Cook
Carefully place the seasoned chicken breasts in the hot pan, making sure not to overcrowd it (cook in batches if necessary). Let them sear undisturbed for 4-6 minutes, or until a beautiful golden-brown crust forms. Resist the urge to move them! Flip the chicken and cook for another 4-6 minutes on the other side, or until a thermometer inserted into the thickest part of the breast registers 165°F (74°C). This leads us to our third trick…
-
Trick #3: Don’t Overcook & Let it Rest!
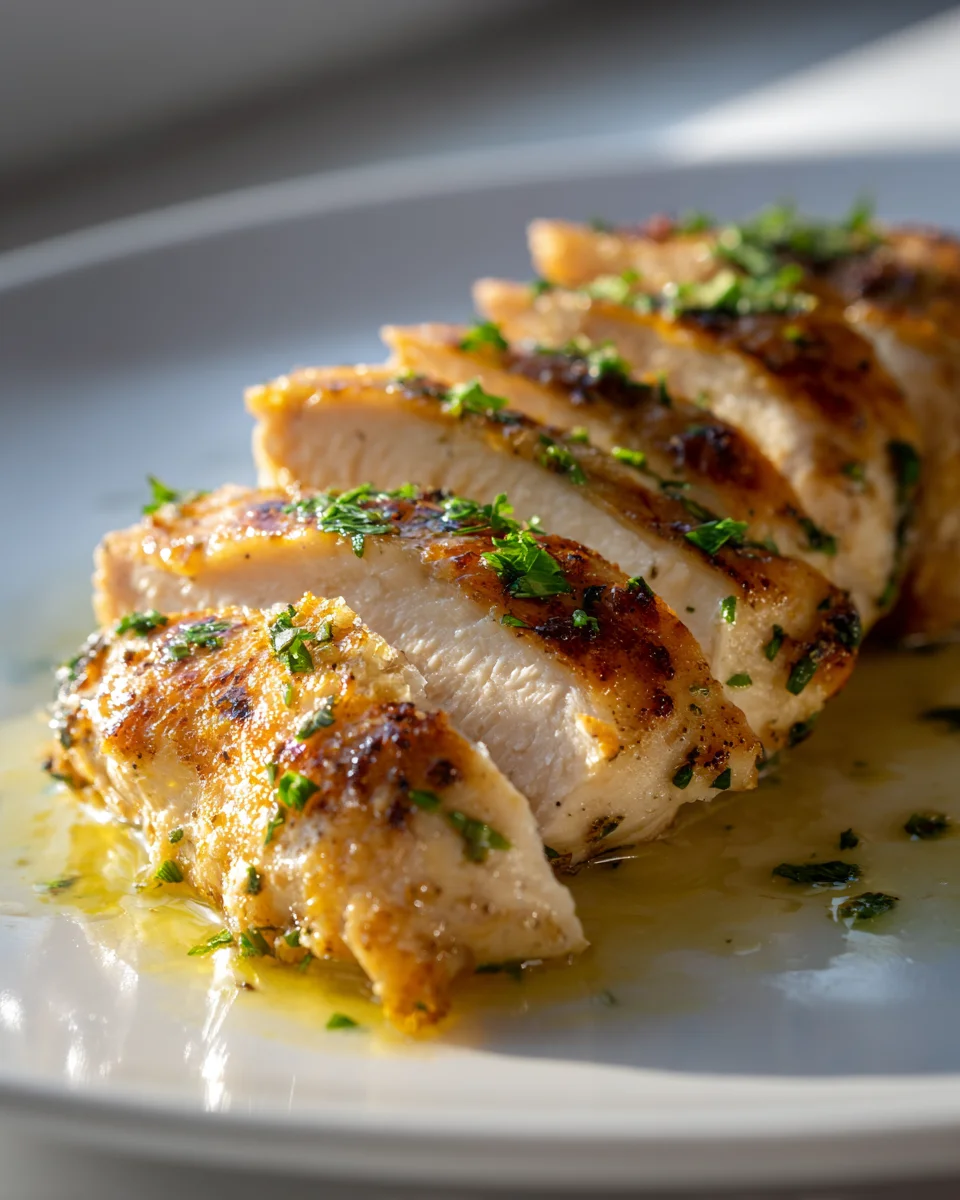
Overcooking is the number one killer of juicy chicken. Always use a meat thermometer! Once your chicken reaches 165°F (74°C), immediately remove it from the pan and transfer it to a cutting board. This is a critical step: let it rest! Loosely tent the chicken with foil and allow it to rest for 5-10 minutes. This resting period allows the juices to redistribute throughout the meat, resulting in incredibly moist and tender chicken. If you cut into it too soon, all those delicious juices will run out onto your board. Slice against the grain and serve immediately. Enjoy your perfectly juicy chicken!
Tips & Suggestions
Achieving consistently juicy chicken breasts really boils down to mastering a few core techniques. Here are my favorite tips and suggestions to help you nail it every time:
- Embrace the Brine: Seriously, if you’re not brining your chicken, you’re missing out on the easiest way to guarantee moisture. Even a quick 30-minute brine makes a noticeable difference. It not only seasons the chicken from the inside out but also helps the muscle fibers retain moisture during cooking.
- Don’t Skip Pounding: This step ensures even cooking. No more dry edges and undercooked centers! It also tenderizes the meat, making it even more pleasant to eat. Aim for about ¾ to 1 inch thick.
- Invest in a Meat Thermometer: This is, hands down, the most important tool for preventing dry chicken. Guessing leads to overcooking. A simple instant-read thermometer will become your best friend in the kitchen. Remember, 165°F (74°C) is the magic number.
- High Heat, Short Cook Time: Searing on medium-high heat quickly forms a crust, locking in juices. Then, you finish cooking until the internal temperature is reached. Don’t be afraid of the heat, just watch it so it doesn’t burn.
- Rest is Best: Just like with a good beef steak, letting your chicken breast rest after cooking is non-negotiable for juiciness. Those 5-10 minutes allow the muscle fibers to relax and reabsorb the juices that have been pushed to the center during cooking. Cutting too early means losing all that delicious moisture.
- Experiment with Flavors: While the techniques are key, don’t be afraid to play with your seasonings. Marinating for 30 minutes to an hour (after brining and rinsing) can add another layer of flavor.
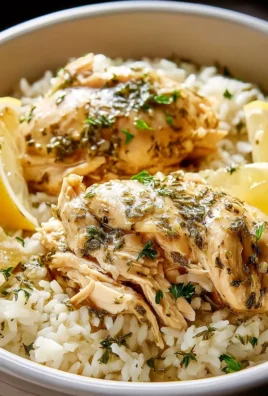
- Serving Suggestions: Juicy chicken breast is incredibly versatile! I love serving it sliced over a fresh salad, alongside roasted vegetables and quinoa, or nestled in a whole wheat pita with some tzatziki. It’s also fantastic cubed and added to pasta dishes or stir-fries.
Storage
Proper storage and reheating are crucial to keep your perfectly cooked chicken breast delicious and juicy even as leftovers.
Refrigeration
Once your chicken breasts have cooled completely to room temperature (this usually takes about 30 minutes to an hour), transfer them to an airtight container. You can store them whole, or slice them first if you prefer. They will stay fresh and delicious in the refrigerator for 3-4 days. I love having pre-cooked, juicy chicken on hand for quick lunches throughout the week!
Freezing
If you’ve made a larger batch, cooked chicken breast freezes beautifully. Once cooled, wrap individual breasts tightly in plastic wrap, then place them in a freezer-safe bag or container. This double-layer protection helps prevent freezer burn. Frozen cooked chicken breast will maintain its quality for up to 3 months. When you’re ready to use it, thaw it overnight in the refrigerator.
Reheating Tips to Maintain Juiciness
Reheating can be tricky, as it’s easy to dry out chicken breast. Here’s how I do it to keep it juicy:
- Oven/Toaster Oven: Preheat your oven to a low temperature, around 275-300°F (135-150°C). Place the chicken in an oven-safe dish, add a splash of chicken broth or water to the bottom of the dish, and cover tightly with foil. This creates steam and helps retain moisture. Heat for 10-15 minutes, or until warmed through.
- Stovetop: Slice the chicken breast and heat it gently in a skillet over medium-low heat with a tablespoon of broth or water, or a pat of butter, covering the pan. This method works well for smaller portions and helps prevent drying.
- Microwave (Use with Caution): If you must use the microwave, slice the chicken first, place it on a microwave-safe plate, and cover it with a damp paper towel or microwave-safe lid. Heat in short bursts (30-60 seconds) until just warmed through, checking often. This is the riskiest method for maintaining juiciness, but sometimes convenience wins!
Always avoid overheating, as that’s the fastest way to turn your tender chicken dry. By following these storage and reheating tips, you can enjoy your delicious, juicy chicken breast for days to come!
Final Thoughts
There you have it! No more dry, disappointing chicken breasts for you. I truly believe that my guide, Chicken Breast Recipes That Stay Juicy (3 Simple Tricks), is a game-changer for anyone looking to master perfectly cooked chicken. By applying these three straightforward yet incredibly effective techniques, you’re not just cooking; you’re transforming what can often be a bland meal into something consistently delicious and, most importantly, unbelievably juicy.
I encourage you to try these methods for yourself and taste the difference. Experience the satisfaction of serving up tender, flavorful chicken breasts every single time. It’s a simple culinary win that will elevate your everyday cooking and impress anyone at your table. Trust me, once you master these tricks, you’ll wonder how you ever cooked chicken breast any other way!

Never Dry! Juicy Chicken Breast Recipes (3 Easy Tricks)
- Total Time: 42 minutes
- Yield: 4 servings
Description
Discover the secrets to cooking chicken breasts that are always juicy and flavorful. With three simple tricks, you’ll transform your chicken into a delicious meal every time!
Ingredients
- Boneless, skinless chicken breasts
- Water
- Salt (1 tablespoon per cup of water)
- Sugar (optional)
- Bay leaf (optional)
- Peppercorns (optional)
- Olive oil or avocado oil
- Garlic powder
- Onion powder
- Paprika
- Dried oregano
- Black pepper
- Lemon juice (optional)
- Apple cider vinegar (optional)
- Maple syrup (optional)
Instructions
- Trick #1: Brine Your Chicken – In a large bowl or container, dissolve 1 tablespoon of salt per cup of water. Submerge your chicken breasts completely in the brine. Cover and refrigerate for at least 30 minutes, and up to 4 hours. After brining, remove the chicken, rinse it thoroughly under cold water, then pat it very dry with paper towels.
- Trick #2: Pound to Even Thickness – Place each chicken breast between two pieces of plastic wrap. Using a meat mallet, rolling pin, or the bottom of a heavy pan, gently pound the thickest part until the entire breast is an even ¾ to 1 inch thick.
- Season Generously – Drizzle a little olive oil over both sides of the chicken, then sprinkle generously with your chosen spices. Rub the seasoning into the chicken so it adheres well.
- Preheat Your Pan Properly – Use a heavy-bottomed skillet over medium-high heat and let it get hot for 3-5 minutes before adding any oil. Add about 1-2 tablespoons of oil to the hot pan and swirl to coat the bottom.
- Sear and Cook – Carefully place the seasoned chicken breasts in the hot pan. Let them sear undisturbed for 4-6 minutes, then flip and cook for another 4-6 minutes or until a thermometer inserted into the thickest part registers 165°F (74°C).
- Trick #3: Don't Overcook & Let it Rest! – Once your chicken reaches 165°F (74°C), immediately remove it from the pan and transfer it to a cutting board. Loosely tent the chicken with foil and allow it to rest for 5-10 minutes before slicing against the grain.
- Prep Time: 30 mins (plus brining time)
- Cook Time: 12 mins
- Category: Dinner
- Method: Pan-frying
- Cuisine: American
Nutrition
- Serving Size: 1 chicken breast
- Calories: 165
- Sugar: 1 g
- Sodium: 740 mg
- Fat: 7 g
- Saturated Fat: 1.5 g
- Unsaturated Fat: 5 g
- Trans Fat: 0 g
- Carbohydrates: 0 g
- Fiber: 0 g
- Protein: 31 g
- Cholesterol: 70 mg
Keywords: Brining is essential for moisture. Pounding ensures even cooking. Use a meat thermometer to avoid overcooking. Letting the chicken rest after cooking is crucial for juiciness.


Leave a Comment