

Classic Chocolate Chip Cookies With Crisp Edges + Chewy Center
Oh, friends, let me tell you about my absolute favorite kind of treat – the kind that brings an instant smile and a wave of pure comfort. Today, we’re diving headfirst into the magic of Classic Chocolate Chip Cookies With Crisp Edges + Chewy Center. This isn’t just any cookie recipe; it’s the recipe for those of us who believe the perfect chocolate chip cookie isn’t just good, but an experience in textural bliss.
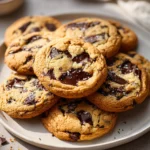
You know the feeling, right? That first bite where you get that satisfying snap from the golden-brown edge, followed immediately by the soft, melt-in-your-mouth goodness of a perfectly chewy center, studded with molten chocolate chips. That’s exactly what we’re aiming for, and trust me, we nail it every single time with this method. I’ve spent countless hours perfecting the ratios and techniques to ensure you achieve that glorious contrast – a delightful crispiness giving way to a wonderfully tender, buttery core.
Why will you love making these? Because they’re the ultimate crowd-pleaser, a guaranteed mood-lifter, and surprisingly simple to master. Using readily available ingredients, we’ll walk through the steps to create a batch of cookies that are deeply flavorful, beautifully golden, and perfectly embody that iconic crisp-edge, chewy-center combo. Get ready to fill your kitchen with the irresistible aroma of freshly baked cookies and create memories with every delicious bite!

Ingredient Notes
Achieving those perfectly crisp edges and a delightfully chewy center in our classic chocolate chip cookies isn’t just magic – it’s all about understanding the role each ingredient plays. Here’s a breakdown of what you’ll need and why:
- Unsalted Butter: I always start with unsalted butter so I can control the salt content precisely. Melting the butter is a critical first step here; it contributes significantly to that wonderful chewy texture we’re aiming for. You can even brown the butter slightly for a deeper, nuttier flavor that elevates the cookie even further. If you only have salted butter, omit the added salt in the recipe, and taste as you go.
- Granulated Sugar: This sugar is a major player in creating those coveted crisp edges. It helps the cookies spread beautifully and contributes to their golden-brown color.
- Light Brown Sugar: The molasses in brown sugar is essential for moisture and chewiness. A good ratio of brown to granulated sugar is key to balancing the crispness and chewiness. I prefer light brown for a classic flavor, but dark brown sugar will yield an even chewier, more robustly flavored cookie.
- Large Eggs (plus an extra yolk): Eggs act as a binder and provide richness. Using one whole egg plus an additional egg yolk contributes extra fat, leading to a richer, chewier cookie with a more tender crumb. Make sure your eggs are at room temperature for better emulsification with the butter and sugar mixture.
- All-Purpose Flour: Standard all-purpose flour works perfectly for these cookies. It provides structure without making them too tough. The key here is to measure correctly (spoon and level!) and avoid overmixing, which can develop too much gluten and result in a dense, cake-like texture rather than chewy.
- Baking Soda: This leavening agent reacts with the acidic brown sugar to help the cookies spread, leading to thinner, crispier edges. It also aids in browning.
- Salt: A pinch of salt is absolutely crucial! It balances the sweetness, enhances all the other flavors, and prevents the cookies from tasting one-dimensional. I often use fine sea salt in the dough and a sprinkle of flaky sea salt on top after baking for an extra pop of flavor and texture.
- Vanilla Extract: Good quality vanilla extract adds a warmth and depth of flavor that is simply irreplaceable in chocolate chip cookies. Don’t skimp on this!
- Chocolate Chips (or Chunks): This is where you can truly customize! I love using a mix of semi-sweet chocolate chips and milk chocolate chunks for varied melt and flavor. High-quality chocolate makes a noticeable difference. Feel free to use dark chocolate, white chocolate, or even chopped chocolate bars for those beautiful puddles of melted chocolate.
Step-by-Step Instructions
Follow these steps closely to ensure your cookies have that ideal balance of crisp edges and a gooey, chewy center:
- Melt the Butter: In a medium microwave-safe bowl or a small saucepan over medium heat, melt the unsalted butter. If you want an extra layer of flavor, continue cooking the butter until it’s light brown and smells nutty (brown butter!). Remove from heat and let it cool slightly for about 5 minutes.
- Combine Sugars and Butter: Pour the slightly cooled melted butter into a large mixing bowl. Add the granulated sugar and light brown sugar. Whisk vigorously for about 1 minute until well combined and smooth. This step is important for getting the sugars to dissolve slightly and create that wonderful chewy texture.
- Add Eggs and Vanilla: Add the whole egg, the extra egg yolk, and the vanilla extract to the butter-sugar mixture. Whisk for another 1-2 minutes until the mixture is lightened in color, thick, and well emulsified. It should look glossy and smooth.
- Combine Dry Ingredients: In a separate medium bowl, whisk together the all-purpose flour, baking soda, and salt. Make sure there are no lumps and everything is evenly distributed.
- Add Dry to Wet: Gradually add the dry ingredients to the wet ingredients, mixing on low speed with an electric mixer or by hand with a spatula until just combined. Be careful not to overmix! Stop as soon as you no longer see streaks of flour. Overmixing develops gluten, which can lead to tough cookies.
- Fold in Chocolate Chips: Gently fold in your chosen chocolate chips and/or chunks until they are evenly distributed throughout the dough.
- Chill the Dough (CRITICAL!): Cover the bowl tightly with plastic wrap and refrigerate the dough for a minimum of 2 hours, or preferably overnight (up to 72 hours). Chilling is non-negotiable for these cookies! It allows the flavors to meld, the flour to fully hydrate, and the butter to re-solidify, which prevents excessive spreading and contributes immensely to both the crisp edges and chewy center.
- Preheat Oven & Prep Sheets: When ready to bake, preheat your oven to 375°F (190°C). Line two large baking sheets with parchment paper or silicone baking mats.
- Portion the Dough: Use a 2-tablespoon cookie scoop or roll about 1.5-inch balls of dough. Place them about 2 inches apart on the prepared baking sheets. For extra visual appeal, press a few extra chocolate chips onto the tops of the dough balls.
- Bake: Bake one sheet at a time for 10-12 minutes, or until the edges are golden brown and crisp, but the centers are still slightly pale and appear slightly underbaked (this is key for chewiness!). The cookies will continue to cook and set as they cool.
- Cool: Remove the baking sheets from the oven. If desired, sprinkle a little flaky sea salt on top of the warm cookies immediately. Let the cookies cool on the baking sheets for 5-10 minutes to allow them to set up. Then, carefully transfer them to a wire rack to cool completely.
Tips & Suggestions
To truly master the “crisp edges + chewy center” phenomenon in your classic chocolate chip cookies, keep these expert tips in mind:
- Embrace the Chill: I cannot stress this enough – chilling the dough is paramount! Beyond flavor development, it solidifies the butter, which prevents the cookies from spreading too quickly in the oven. This slower spread means the edges have more time to crisp up while the center remains delightfully thick and chewy. A minimum of 2 hours, but 24-48 hours yields truly superior results.
- Don’t Overmix the Flour: Once you add the flour, mix only until just combined. Overmixing develops gluten, which can lead to tough, cakey cookies rather than tender, chewy ones. A light hand is all you need here.
- Room Temperature Eggs: While the butter starts melted, having your eggs at room temperature helps them emulsify better with the sugar and butter mixture, leading to a smoother, more uniform dough.
- The Power of Brown Butter: For an elevated flavor profile, take the extra step to brown your butter. The nutty notes complement the chocolate beautifully and add an extra layer of richness to the chewy center. Just be sure to cool it slightly before adding sugars.
- Perfect Portioning: Use a cookie scoop to ensure consistent cookie size. This leads to even baking, meaning all your cookies will achieve that perfect crisp-chewy balance at the same time.
- Visual Cues for Doneness: Don’t rely solely on time. Look for golden-brown, set edges, but a center that still looks slightly pale, puffed, and maybe even a little underdone. This indicates a perfectly chewy interior. They will continue to firm up as they cool.
- Sprinkle with Flaky Sea Salt: A little sprinkle of flaky sea salt right after the cookies come out of the oven is a game-changer. It enhances the chocolate flavor and adds a delightful textural contrast.
- Rotate Your Baking Sheets: If your oven has hot spots, rotate your baking sheet halfway through baking to ensure even browning and crispness on all cookies.
- Experiment with Chocolate: Don’t be afraid to mix and match your chocolate! A combination of semi-sweet chips, milk chocolate chunks, and even some chopped dark chocolate can create incredible flavor and texture variety within each cookie.
Storage
Proper storage ensures your classic chocolate chip cookies stay delicious, maintaining their crisp edges and chewy centers for as long as possible:
- At Room Temperature (Baked Cookies): Once completely cooled, store your baked cookies in an airtight container at room temperature. I usually place a piece of parchment paper between layers if stacking to prevent sticking. They will retain their best texture for 3-4 days. After that, the crispness may soften, but they’ll still be perfectly edible. For an extra touch, you can place half a slice of bread in the container; the cookies will absorb moisture from the bread, keeping them softer and chewier for longer.
- Freezing Baked Cookies: If you’ve baked a big batch and want to save some for later, completely cool the cookies first. Then, arrange them in a single layer on a baking sheet and freeze until solid (about 1-2 hours). Once frozen, transfer them to a freezer-safe airtight container or heavy-duty freezer bag, separating layers with parchment paper. They will last for up to 3 months. Thaw at room temperature or warm briefly in a microwave (10-15 seconds) or oven (300°F/150°C for 5-7 minutes) for that fresh-baked experience.
- Freezing Cookie Dough: This is my favorite method for having fresh cookies on demand! After forming the dough balls (step 9), place them on a parchment-lined baking sheet and freeze until solid. Once firm, transfer the frozen dough balls to a freezer-safe airtight container or freezer bag. They will keep for up to 3 months. When you’re ready to bake, simply place the frozen dough balls on a prepared baking sheet and bake as directed, adding 2-4 minutes to the baking time. No need to thaw!

Final Thoughts
There’s a reason why I truly believe these Classic Chocolate Chip Cookies With Crisp Edges + Chewy Center are an absolute must-try. This isn’t just another chocolate chip cookie recipe; it’s a meticulously crafted experience designed to deliver that iconic, perfect balance. The moment you bite into one, you’ll be greeted by that satisfying snap of a crisp, golden edge, immediately followed by the comforting surrender of a soft, irresistibly chewy center, generously dotted with melty chocolate. It’s a symphony of textures and flavors that simply can’t be beaten.
If you’ve been on a quest for the ultimate homemade cookie, one that consistently delivers on its promise of pure, unadulterated deliciousness, your search genuinely ends here. I promise you, once you bake and taste these Classic Chocolate Chip Cookies With Crisp Edges + Chewy Center, you’ll understand why they’re destined to become a beloved staple in your kitchen. Get ready to bake a batch and discover your new favorite!
Amazing Chocolate Chip Cookies – Crisp Edge & Chewy Center
- Total Time: 27 minutes
- Yield: 24 cookies 1x
Description
Indulge in the ultimate treat with these Classic Chocolate Chip Cookies that feature a perfect balance of crisp edges and a chewy center. Experience the joy of baking cookies that are deeply flavorful and irresistibly comforting.
Ingredients
- 1 cup Unsalted Butter
- 3/4 cup Granulated Sugar
- 3/4 cup Light Brown Sugar
- 1 Large Egg
- 1 Extra Egg Yolk
- 2 teaspoons Vanilla Extract
- 2 1/4 cups All-Purpose Flour
- 1 teaspoon Baking Soda
- 1/2 teaspoon Salt
- 1 cup Chocolate Chips (or Chunks)
Instructions
- Melt the Butter: In a medium microwave-safe bowl or a small saucepan over medium heat, melt the unsalted butter. If you want an extra layer of flavor, continue cooking the butter until it's light brown and smells nutty (brown butter!). Remove from heat and let it cool slightly for about 5 minutes.
- Combine Sugars and Butter: Pour the slightly cooled melted butter into a large mixing bowl. Add the granulated sugar and light brown sugar. Whisk vigorously for about 1 minute until well combined and smooth.
- Add Eggs and Vanilla: Add the whole egg, the extra egg yolk, and the vanilla extract to the butter-sugar mixture. Whisk for another 1-2 minutes until the mixture is lightened in color, thick, and well emulsified.
- Combine Dry Ingredients: In a separate medium bowl, whisk together the all-purpose flour, baking soda, and salt. Make sure there are no lumps and everything is evenly distributed.
- Add Dry to Wet: Gradually add the dry ingredients to the wet ingredients, mixing on low speed with an electric mixer or by hand with a spatula until just combined. Be careful not to overmix!
- Fold in Chocolate Chips: Gently fold in your chosen chocolate chips and/or chunks until they are evenly distributed throughout the dough.
- Chill the Dough (CRITICAL!): Cover the bowl tightly with plastic wrap and refrigerate the dough for a minimum of 2 hours, or preferably overnight.
- Preheat Oven & Prep Sheets: When ready to bake, preheat your oven to 375°F (190°C). Line two large baking sheets with parchment paper or silicone baking mats.
- Portion the Dough: Use a 2-tablespoon cookie scoop or roll about 1.5-inch balls of dough. Place them about 2 inches apart on the prepared baking sheets.
- Bake: Bake one sheet at a time for 10-12 minutes, or until the edges are golden brown and crisp, but the centers are still slightly pale.
- Cool: Remove the baking sheets from the oven. If desired, sprinkle a little flaky sea salt on top of the warm cookies immediately. Let the cookies cool on the baking sheets for 5-10 minutes to allow them to set up.
- Prep Time: 15 mins
- Cook Time: 12 mins
- Category: Dessert
- Method: Baking
- Cuisine: American
Nutrition
- Serving Size: 1 cookie
- Calories: 150
- Sugar: 10 g
- Sodium: 80 mg
- Fat: 7 g
- Saturated Fat: 4 g
- Unsaturated Fat: 2 g
- Trans Fat: 0 g
- Carbohydrates: 20 g
- Fiber: 1 g
- Protein: 2 g
- Cholesterol: 30 mg
Keywords: Chilling the dough is crucial for achieving the perfect texture. Use room temperature eggs for better emulsification and consider browning the butter for enhanced flavor.


Leave a Comment