

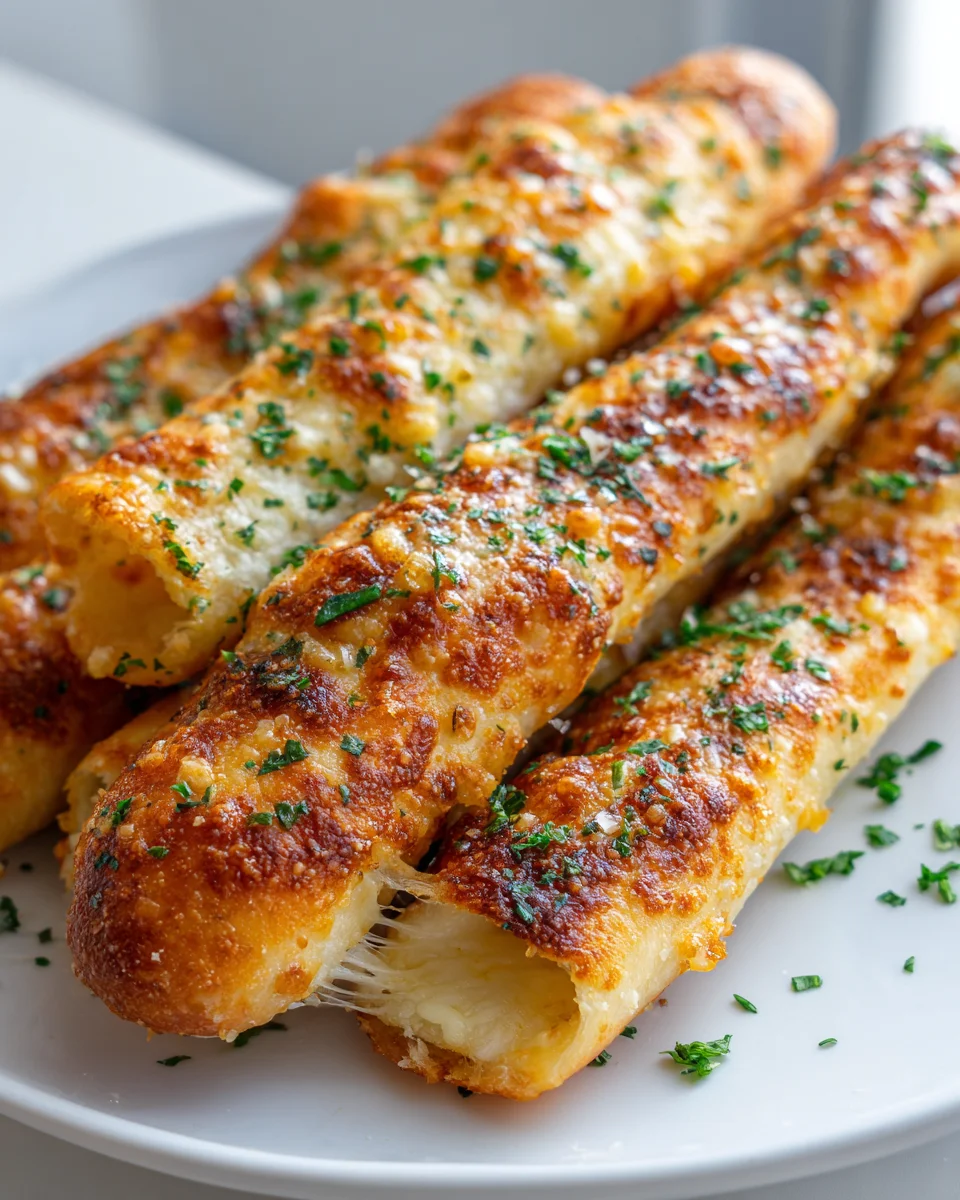
Homemade Cheesy Garlic Breadsticks
Oh, where do I even begin with the sheer delight of Homemade Cheesy Garlic Breadsticks? There’s just something utterly magical about a basket of warm, tender breadsticks, dripping with garlicky goodness and loaded with gooey, melted cheese. This isn’t just any side dish; it’s an experience. Forget those bland, store-bought versions – we’re talking about making them from scratch, filling your kitchen with an aroma that will make everyone’s mouth water the moment they walk through the door. The satisfaction of pulling these golden, cheesy wonders straight from your own oven is truly unmatched and makes them incredibly special.
Imagine sinking your teeth into a perfectly golden, soft-on-the-inside, slightly crispy-on-the-outside breadstick. Each bite delivers that irresistible punch of savory garlic, complemented by a generous blanket of bubbling, stretchy cheese that just melts in your mouth. You’ll love how incredibly versatile they are – perfect for dunking into your favorite marinara, alongside a hearty bowl of beef stew, or simply devoured on their own as a satisfying, comforting snack. These breadsticks are guaranteed to be a massive hit, easy enough for a weeknight, yet special enough to impress any crowd. Get ready to fall in love with your new favorite cheesy, garlicky creation!

Ingredient Notes
Making homemade cheesy garlic breadsticks is incredibly rewarding, and it all starts with choosing the right components. I always emphasize quality ingredients for the best flavor, but I’ll also share some handy substitutions to make these accessible for everyone!
Dough
- Store-Bought Pizza Dough: This is my absolute favorite shortcut! Look for fresh dough in the refrigerated section of your grocery store. It saves so much time and effort, letting you get straight to the cheesy goodness. Just make sure to let it come to room temperature for about 30 minutes before rolling, it makes it much easier to work with.
- Frozen Pizza Dough: If fresh isn’t available, frozen dough works too. Just be sure to follow the package instructions for thawing, which usually involves placing it in the refrigerator overnight or on the counter for a few hours.
- Homemade Pizza Dough: If you’re feeling ambitious and have a favorite recipe, homemade dough will, of course, yield fantastic results. Just ensure it’s well-proofed and ready to roll!
Cheese
- Low-Moisture Part-Skim Mozzarella: This is the star of the show for its incredible melt and stretch. I always use freshly shredded mozzarella from a block rather than pre-shredded bags, as it melts smoother and tastes fresher.
- Provolone: A wonderful addition for an extra layer of savory, slightly sharp flavor. It melts beautifully alongside mozzarella.
- Parmesan Cheese: Freshly grated Parmesan or Pecorino Romano adds a salty, umami finish. I like to sprinkle some on top right after baking for a final flourish.
- Substitutions: Feel free to experiment with other good melting cheeses like Monterey Jack, Fontina, or even a mild cheddar for a different flavor profile. A blend often works best!
Garlic
- Fresh Garlic: This is non-negotiable for me! Minced fresh garlic provides an unbeatable pungent, aromatic flavor. You’ll need about 4-6 cloves, depending on how garlicky you like your breadsticks.
- Garlic Powder: While fresh is superior, if you’re in a pinch, garlic powder can be used. Use about 1 teaspoon for every 2-3 cloves of fresh garlic, but be aware the flavor won’t be as robust.
Butter & Oil
- Unsalted Butter: I prefer unsalted butter so I can control the amount of salt in the garlic spread. If you only have salted butter, simply reduce or omit the added salt in the recipe.
- Olive Oil: A drizzle of good quality extra virgin olive oil over the dough before baking can add another layer of flavor and help achieve a beautiful golden crust.
Herbs & Seasoning
- Fresh Parsley: Chopped fresh parsley adds a pop of color and a fresh, herbaceous note. It’s lovely sprinkled on top after baking.
- Dried Italian Seasoning: A blend of dried herbs like oregano, basil, thyme, and rosemary. I mix this into the garlic butter for an authentic Italian flavor.
- Salt and Black Pepper: Essential for seasoning the garlic butter mixture. I prefer freshly ground black pepper for its aroma.
- Red Pepper Flakes: (Optional) For those who like a little heat, a pinch of red pepper flakes in the garlic butter is fantastic.
Step-by-Step Instructions
Making these homemade cheesy garlic breadsticks is surprisingly simple, and I promise you, the aroma alone will make your kitchen the happiest place on earth! Here’s how I get it done:
- Prepare Your Workspace and Preheat Oven: First things first, I set my oven to a toasty 425°F (220°C). While it’s heating, I line a large baking sheet with parchment paper. This prevents sticking and makes cleanup a breeze. If I’m making a double batch, I prepare two baking sheets.
- Roll Out the Dough: I grab my pizza dough (making sure it’s at room temperature for easy handling) and place it on a lightly floured surface. Using a rolling pin, I roll it into a large rectangle, aiming for about 10×14 inches and roughly ¼-inch thick. It doesn’t have to be perfect; rustic charm is part of the appeal! Then, I carefully transfer the rolled dough to my prepared baking sheet.
- Whip Up the Garlic Butter Spread: In a small, microwave-safe bowl, I melt about ½ cup of unsalted butter. Once melted, I stir in my finely minced fresh garlic (usually 4-5 cloves, because I love garlic!), 1 teaspoon of dried Italian seasoning, ½ teaspoon of salt, and a good pinch of freshly ground black pepper. If I want a little kick, I’ll add ¼ teaspoon of red pepper flakes here too.
- Spread the Garlic Butter: Using a pastry brush (or the back of a spoon if I can’t find my brush!), I evenly spread the fragrant garlic butter mixture over the entire surface of the pizza dough, making sure to go right to the edges. Don’t be shy; this is where a lot of the flavor comes from!
- Layer on the Cheese: Now for the best part! I generously sprinkle 1 ½ cups of shredded low-moisture mozzarella cheese evenly over the garlic butter. If I’m using provolone, I’ll add about ½ cup of that too, scattering it amongst the mozzarella. I make sure the cheese covers the dough right to the edges so every bite is cheesy.
- Cut into Breadsticks: With a pizza cutter or a sharp knife, I carefully cut the dough lengthwise into 1-inch wide strips. Then, I cut those strips in half horizontally, creating perfect breadstick lengths. I don’t separate them on the baking sheet yet; they’ll stay together for baking and can be easily pulled apart afterwards.
- Bake to Golden Perfection: I pop the baking sheet into the preheated oven and bake for 12-18 minutes. I keep a close eye on them; I’m looking for the crust to be beautifully golden brown and the cheese to be bubbly, melted, and slightly browned in spots – that’s where the crispiness lies!
- Finishing Touches: Once they’re out of the oven, I immediately sprinkle them with about ¼ cup of freshly grated Parmesan cheese and a handful of chopped fresh parsley. The residual heat melts the Parmesan just enough. After letting them cool for just a minute or two, I use my pizza cutter or knife again to separate the individual breadsticks.
- Serve Warm: I transfer them to a platter and serve immediately with my favorite marinara sauce for dipping. Enjoy your cheesy, garlicky masterpiece!
Tips & Suggestions
I’ve made these homemade cheesy garlic breadsticks countless times, and over the years, I’ve picked up a few tricks that really elevate them from good to absolutely amazing. Here are my go-to tips and some fun variations you might want to try:
- Room Temperature Dough is Key: This is a simple but crucial tip! Whether you’re using store-bought or homemade dough, letting it sit at room temperature for at least 30 minutes before rolling makes it much more pliable and easier to work with. Cold dough tends to spring back, making it harder to get that perfect rectangle.
- Don’t Skimp on Fresh Garlic: I cannot stress this enough. While garlic powder can work in a pinch, fresh garlic truly makes all the difference in the flavor of these breadsticks. If you’re a serious garlic lover like me, you can even roast a head of garlic beforehand, mash the cloves, and mix that into your butter for a sweeter, milder garlic flavor.
- Shred Your Own Cheese: I always recommend buying a block of low-moisture mozzarella and shredding it yourself. Pre-shredded cheese often contains anti-caking agents that can prevent it from melting as smoothly and evenly as freshly shredded cheese. Trust me, it’s worth the extra minute!
- Crispy Edges are Heavenly: For extra crispy edges on your breadsticks, drizzle a tiny bit of olive oil around the perimeter of your rolled-out dough before adding the garlic butter and cheese. This helps achieve a beautiful golden-brown crispness.
- Experiment with Cheese Blends: While mozzarella is a must for the stretch, don’t be afraid to experiment with other melting cheeses. I sometimes add a touch of smoked provolone for depth, or even a little sharp white cheddar for a tangier profile. A sprinkle of crumbled feta could also add a Mediterranean twist!
- Add a Spicy Kick: If you enjoy a bit of heat, mix a ¼ to ½ teaspoon of red pepper flakes into your garlic butter mixture. It adds a wonderful warmth that complements the garlic and cheese perfectly.
- Herb Power: Beyond Italian seasoning, feel free to get creative with fresh herbs. Fresh oregano or basil, finely chopped, can be sprinkled over the cheese before baking for an extra layer of flavor.
- Serving Suggestions Beyond Marinara: While marinara sauce is the classic pairing, these breadsticks are also fantastic with warm pizza sauce, a creamy alfredo sauce, or even a simple balsamic glaze for dipping. They’re also a phenomenal side for any pasta dish, a hearty soup, or a fresh salad.
- Cut Uniformly: Try to cut your breadsticks into roughly uniform sizes. This ensures they all bake evenly, preventing some from being overdone while others are still soft.
Storage
It’s rare to have leftovers of these glorious homemade cheesy garlic breadsticks, but if you do, I’ve got you covered on how to store and reheat them so they’re almost as good as fresh!
Storing Leftovers
- Refrigeration: Once the breadsticks have cooled completely to room temperature, place them in an airtight container or a resealable plastic bag. They will stay fresh in the refrigerator for 2-3 days. Storing them while warm can create condensation, leading to soggy breadsticks, so always ensure they’re fully cooled.
Reheating
The key to reheating these breadsticks is to bring back their crispiness without drying them out. I find the microwave often makes them soft, so I usually avoid it for best results.
- Oven: This is my preferred method for reheating. Preheat your oven to 350°F (175°C). Place the refrigerated breadsticks directly on a baking sheet (no need for parchment paper again unless you want to). Bake for about 5-10 minutes, or until the cheese is bubbly and the breadsticks are warmed through and crispy again.
- Air Fryer: If you have one, an air fryer is excellent for reheating! Preheat your air fryer to 325°F (160°C). Place the breadsticks in a single layer in the basket, ensuring they don’t overlap. Cook for 3-5 minutes, shaking the basket halfway through, until they are hot and crispy.
Freezing (Baked Breadsticks)
If you want to make a big batch or prepare some for later, these breadsticks freeze wonderfully after baking.
- Freezing Method: Allow the baked breadsticks to cool completely. Arrange them in a single layer on a baking sheet and place the sheet in the freezer for about 1-2 hours, or until they are solid. This “flash freezing” prevents them from sticking together. Once frozen solid, transfer the breadsticks to a freezer-safe bag or an airtight container. They will keep well for up to 1 month.
- Reheating from Frozen: There’s no need to thaw! You can reheat frozen cheesy garlic breadsticks directly in the oven. Preheat your oven to 375°F (190°C) and place the frozen breadsticks on a baking sheet. Bake for 10-15 minutes, or until they are hot, the cheese is melted and bubbly, and the breadsticks are crispy. An air fryer at 350°F (175°C) for 6-8 minutes also works great for frozen ones.
Final Thoughts
There’s something incredibly satisfying about bringing warm, fragrant goodness out of your own kitchen, and I truly believe these Homemade Cheesy Garlic Breadsticks embody that feeling perfectly. From the moment the garlic aroma fills your home to the first bite of warm, gooey cheese and crusty bread, you’ll know exactly why this recipe is a keeper. I hope you’ve enjoyed the journey of creating these delicious treats as much as I do.
These aren’t just any breadsticks; they are your very own creation, bursting with fresh garlic flavor and that irresistible cheesy pull. They elevate any meal, making a simple dinner feel like a special occasion, and they’re simply divine on their own as a snack. Trust me when I say that once you’ve tried making these Homemade Cheesy Garlic Breadsticks, you’ll be hard-pressed to go back to store-bought. So go ahead, savor the moment, and enjoy the incredible results of your culinary efforts!
Irresistible Homemade Cheesy Garlic Breadsticks Recipe
- Total Time: 33 minutes
- Yield: 4 servings
Description
Experience the delight of warm, tender breadsticks dripping with garlicky goodness and loaded with gooey, melted cheese. These homemade cheesy garlic breadsticks are perfect for any occasion and will impress everyone at your table.
Ingredients
- Store-Bought Pizza Dough
- Frozen Pizza Dough
- Homemade Pizza Dough
- Low-Moisture Part-Skim Mozzarella, 1 1/2 cups
- Provolone, 1/2 cup (optional)
- Parmesan Cheese, 1/4 cup (freshly grated)
- Fresh Garlic, 4-6 cloves (minced)
- Garlic Powder, 1 teaspoon (optional)
- Unsalted Butter, 1/2 cup
- Olive Oil (for drizzling)
- Fresh Parsley (chopped)
- Dried Italian Seasoning, 1 teaspoon
- Salt, 1/2 teaspoon
- Black Pepper (freshly ground, to taste)
- Red Pepper Flakes, 1/4 teaspoon (optional)
Instructions
- Prepare Your Workspace and Preheat Oven: Set your oven to 425°F (220°C) and line a large baking sheet with parchment paper.
- Roll Out the Dough: Place the pizza dough on a lightly floured surface and roll it into a large rectangle, about 10×14 inches and 1/4-inch thick. Transfer the rolled dough to the prepared baking sheet.
- Whip Up the Garlic Butter Spread: Melt 1/2 cup of unsalted butter in a small bowl. Stir in minced fresh garlic, 1 teaspoon of dried Italian seasoning, 1/2 teaspoon of salt, and a pinch of freshly ground black pepper. Add red pepper flakes if desired.
- Spread the Garlic Butter: Evenly spread the garlic butter mixture over the entire surface of the pizza dough.
- Layer on the Cheese: Sprinkle 1 1/2 cups of shredded low-moisture mozzarella cheese over the garlic butter. If using provolone, add 1/2 cup scattered among the mozzarella.
- Cut into Breadsticks: Cut the dough lengthwise into 1-inch wide strips, then cut those strips in half horizontally.
- Bake to Golden Perfection: Bake in the preheated oven for 12-18 minutes until the crust is golden brown and the cheese is bubbly.
- Finishing Touches: Sprinkle with 1/4 cup of freshly grated Parmesan cheese and chopped parsley immediately after baking.
- Serve Warm: Transfer to a platter and serve with marinara sauce for dipping.
- Prep Time: 15 mins
- Cook Time: 18 mins
- Category: Appetizer
- Method: Baking
- Cuisine: Italian
Nutrition
- Serving Size: 1 breadstick
- Calories: 250
- Sugar: 1 g
- Sodium: 400 mg
- Fat: 15 g
- Saturated Fat: 8 g
- Unsaturated Fat: 5 g
- Trans Fat: 0 g
- Carbohydrates: 24 g
- Fiber: 1 g
- Protein: 10 g
- Cholesterol: 30 mg
Keywords: For best results, use freshly shredded cheese and fresh garlic. Let the dough sit at room temperature for at least 30 minutes before rolling for easier handling.


Leave a Comment