

Chinese Chicken Balls With Sweet And Sour Sauce
Hello fellow food lovers! Get ready to dive into a truly delightful culinary adventure with one of my absolute favorite dishes: Chinese Chicken Balls With Sweet And Sour Sauce. This isn’t just another recipe; it’s a journey back to the comforting, vibrant flavors of your favorite Chinese takeaway, but made fresh in your own kitchen – and trust me, homemade is always better!
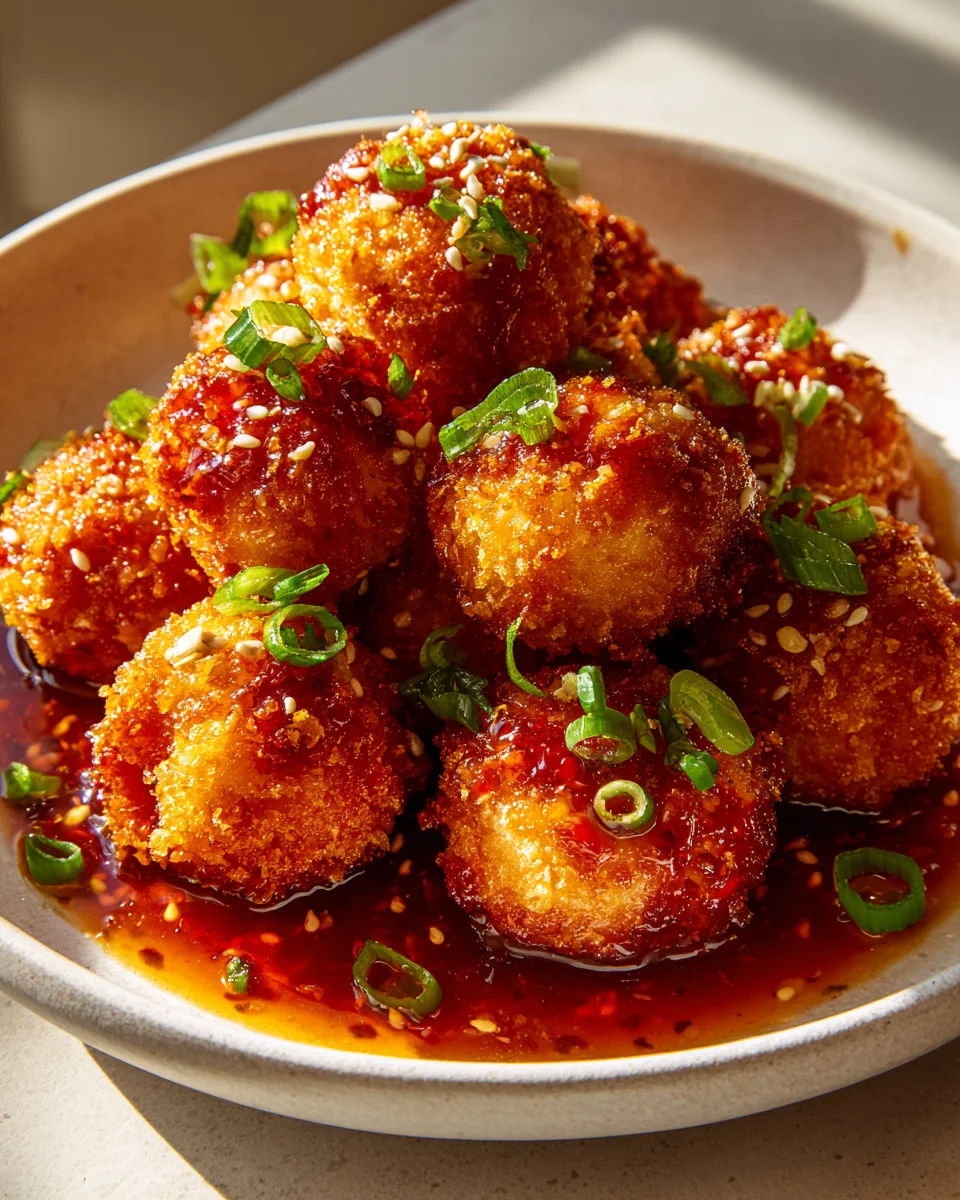
What makes this dish so special, you ask? It’s that irresistible combination of textures and tastes. Imagine perfectly tender, succulent pieces of chicken, encased in a beautifully crisp, golden batter, fried to perfection. But the magic doesn’t stop there! These delightful chicken balls are then generously coated, or served alongside, my vibrant, tangy, and perfectly balanced homemade sweet and sour sauce. It’s a symphony of sweet, sour, and savory notes that dance on your palate, utterly addictive and incredibly satisfying.
You are absolutely going to love making and eating this! It’s a fantastic crowd-pleaser, perfect for a cozy family dinner, a lively gathering with friends, or simply as a treat for yourself. The process is so rewarding, and the end result is a dish that feels both comforting and exciting. Forget those bland, store-bought versions; this recipe will show you how to create an authentic, full-flavored experience that will have everyone asking for seconds. So, let’s get cooking and bring the joy of these amazing Chinese Chicken Balls with Sweet and Sour Sauce right to your dining table!

Welcome to my kitchen! Today, we’re diving into a beloved takeaway classic: Chinese Chicken Balls with Sweet and Sour Sauce. This dish holds a special place in many hearts – the crispy, golden chicken pieces paired with that vibrant, tangy, and sweet sauce is just irresistible. Forget the takeout menu; I’ll show you how to make these incredibly satisfying chicken balls right at home, ensuring they’re just as delicious, if not better, than anything you’d order out. Get ready for some serious flavour!
Ingredient Notes
Crafting the perfect Chinese Chicken Balls with Sweet and Sour Sauce starts with understanding our key ingredients. Each component plays a vital role in achieving that authentic flavour and delightful texture.
- Chicken: For the best chicken balls, I highly recommend using boneless, skinless chicken breast or thigh. Chicken breast will give you a leaner, firmer bite, while thigh meat will be juicier and more tender. Whichever you choose, make sure to cut it into uniform, bite-sized pieces so they cook evenly and are easy to manage.
- The Batter: This is where the magic happens for that signature crispy shell!
- All-Purpose Flour and Cornstarch: The combination of these two is crucial. All-purpose flour provides the bulk, while cornstarch is key for achieving that extra crispy, airy texture.
- Baking Powder: This leavening agent is what gives the batter its delightful puffiness and lightness, preventing it from becoming dense and heavy.
- Egg and Water: These are our binders and adjust the batter’s consistency. Sometimes I even use soda water for an extra boost of crispiness due to the carbonation!
- Seasoning: A simple touch of salt and white pepper, perhaps a tiny pinch of five-spice powder if you’re feeling adventurous, elevates the chicken’s flavour even before it hits the sauce.
- Sweet and Sour Sauce: The vibrant heart of the dish!
- Ketchup: This forms the base of our sauce, providing a rich tomato flavour, sweetness, and that classic reddish hue.
- Rice Vinegar: Essential for the “sour” element. It provides a bright, tangy counterpoint to the sweetness. If you don’t have rice vinegar, a good quality white vinegar can work, though the flavour will be slightly different.
- Sugar: Granulated sugar is standard, but you can also use light brown sugar for a slightly deeper, more caramel-like sweetness. This balances the vinegar beautifully.
- Light Soy Sauce: Adds a crucial layer of umami and saltiness, rounding out the flavour profile. For a gluten-free option, tamari works perfectly.
- Pineapple Juice (or Orange Juice): This is a wonderful addition that brings a fruity sweetness and natural acidity to the sauce, enhancing its complexity.
- Cornstarch Slurry: A simple mix of cornstarch and water, this is what thickens our sauce to that luscious, glossy consistency we all love.
- Optional Aromatics and Vegetables: While not strictly necessary for the sauce itself, I often sauté a little minced garlic and ginger, then add colourful bell peppers (red and green are my favourites!), some sliced onion, and juicy pineapple chunks. They add fantastic texture, freshness, and visual appeal.
- Frying Oil: Choose a neutral-tasting oil with a high smoke point, such as vegetable, canola, or peanut oil, for deep frying.
- Substitutions: While this recipe is for chicken, you could adapt the batter for other proteins. For instance, bite-sized pieces of beef, cut against the grain, would also work beautifully, offering a different but equally delicious experience.
Step-by-Step Instructions
Let’s get cooking! Follow these steps carefully, and you’ll be enjoying fantastic Chinese Chicken Balls in no time.
- Prepare the Chicken: Start by patting your chicken pieces thoroughly dry with paper towels. This is a crucial step as it helps the batter adhere better and ensures a crispier finish. Set aside.
- Make the Batter: In a large mixing bowl, whisk together the flour, cornstarch, baking powder, salt, and white pepper. In a separate bowl, lightly beat the egg with the water. Gradually pour the wet ingredients into the dry ingredients, whisking continuously until you have a smooth batter with no lumps. The consistency should be thick enough to coat the back of a spoon but still pourable – akin to pancake batter.
- Coat the Chicken: Add the prepared chicken pieces to the batter bowl. Stir gently until each piece is fully and evenly coated. I sometimes let it sit for 10-15 minutes at room temperature, but it’s not strictly necessary.
- Prepare the Sweet and Sour Sauce: In a medium saucepan, if you’re using aromatics, heat a tablespoon of oil over medium heat and sauté your minced garlic and ginger for about 30 seconds until fragrant. Then, add the ketchup, rice vinegar, sugar, light soy sauce, pineapple juice, and about half a cup of water. Bring the mixture to a gentle simmer, stirring until the sugar dissolves. If you’re adding bell peppers, onion, and pineapple chunks, stir them in now and cook for 2-3 minutes until slightly tender-crisp. In a small bowl, whisk together 1 tablespoon of cornstarch with 2 tablespoons of cold water to create a slurry. Pour the slurry into the simmering sauce while stirring continuously. Cook for another 1-2 minutes until the sauce thickens and becomes glossy. Remove from heat and keep warm.
- Heat the Oil for Frying: In a deep pot or wok, pour enough neutral oil to reach a depth of about 3 inches. Heat the oil over medium-high heat until it reaches 350-375°F (175-190°C). If you don’t have a thermometer, you can test by dropping a tiny bit of batter into the oil; it should sizzle immediately and float to the surface.
- Fry the Chicken Balls: Carefully drop the batter-coated chicken pieces into the hot oil, one by one. Do not overcrowd the pot; fry in batches to maintain a consistent oil temperature. Overcrowding will lower the oil temperature and result in greasy, soggy chicken. Fry for 4-6 minutes, turning occasionally, until the chicken balls are golden brown and cooked through. The internal temperature should reach 165°F (74°C).
- Drain and Rest: Using a slotted spoon or spider, remove the cooked chicken balls from the oil and transfer them to a wire rack placed over a baking sheet lined with paper towels. This allows excess oil to drain away, keeping them crispy.
- Serve: Once all the chicken is fried, you have two options for serving:
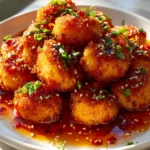
- Tossed: For a classic saucy experience, gently toss the hot chicken balls directly in the sweet and sour sauce just before serving.
- Sauce on the Side: If you prefer to keep the chicken extra crispy, serve the sauce on the side for dipping.
Garnish with some chopped spring onions or a sprinkle of sesame seeds, and serve immediately with steamed rice.
Tips & Suggestions
To truly master your Chinese Chicken Balls with Sweet and Sour Sauce, here are a few insider tips and suggestions I’ve picked up along the way:
- Oil Temperature is Key: I cannot stress this enough! Use a deep-fry thermometer. If the oil is too cold, your chicken balls will absorb too much oil and become greasy. If it’s too hot, the outside will burn before the inside cooks through. Aim for that sweet spot of 350-375°F (175-190°C).
- Don’t Overcrowd the Pot: This is related to oil temperature. Frying in small batches ensures the oil stays hot and the chicken cooks evenly and crisply. Patience is a virtue here!
- The Perfect Batter Consistency: Your batter should be like a thick pancake batter – it needs to be able to cling to the chicken pieces without being so thick that it creates a heavy, doughy crust, or so thin that it just runs off. Adjust with a tiny splash more water or a tablespoon more flour if needed.
- For Extra Crispiness: The Double Fry: If you want truly restaurant-level crispiness, try double frying. Fry the chicken balls once until lightly golden and cooked through. Remove them from the oil and let them rest for a few minutes. Then, increase the oil temperature slightly (to about 380-400°F / 195-205°C) and fry them again for 1-2 minutes until deeply golden brown and super crispy.
- Serve Immediately: Like all fried foods, these chicken balls are at their absolute best when fresh out of the fryer. The crispiness won’t last forever, especially if tossed in the sauce.
- Sauce on the Side for Maximum Crunch: For those who prioritize the crunch of the chicken balls, serving the sweet and sour sauce in a bowl on the side for dipping is the way to go. This prevents the batter from becoming soggy too quickly.
- Personalize Your Sauce: Feel free to adjust the sweet and sour balance to your liking. Add more sugar for sweetness, more vinegar for tang. If you enjoy a bit of heat, a pinch of chili flakes or a tiny dash of sriracha in the sauce works wonderfully.
- Garnish for Flavour and Colour: A sprinkle of toasted sesame seeds, chopped spring onions, or fresh cilantro adds a lovely finish and an extra layer of flavour.
Storage
While these Chinese Chicken Balls are definitely best enjoyed fresh, you might find yourself with some delicious leftovers. Here’s how to store and reheat them to maintain their quality:
- Refrigeration:
- Separate is Best: If possible, store the leftover fried chicken balls and the sweet and sour sauce in separate airtight containers. This helps the chicken balls retain more of their crispiness.
- Combined: If the chicken balls have already been tossed in the sauce, store them together in an airtight container.
- Timeframe: Both the chicken balls and the sauce can be safely stored in the refrigerator for up to 3 days.
- Reheating Chicken Balls (Un-sauced):
- Oven or Air Fryer: For the best results, avoid the microwave! Preheat your oven to 375°F (190°C) or your air fryer to 350°F (175°C). Spread the chicken balls in a single layer on a baking sheet (for the oven) or in the air fryer basket. Heat for 8-12 minutes in the oven, or 5-8 minutes in the air fryer, until they are hot, crispy, and thoroughly reheated.
- Frying Pan: You can also reheat them in a lightly oiled frying pan over medium heat, tossing frequently, until hot and crispy.
- Reheating Sweet and Sour Sauce:
- Stovetop: Gently reheat the sauce in a small saucepan over low to medium heat, stirring occasionally, until it’s warmed through. If it has thickened too much in the fridge, you can whisk in a tablespoon or two of water or pineapple juice to thin it to your desired consistency.
- Microwave: Reheat in a microwave-safe bowl in 30-second intervals, stirring in between, until hot.
- Freezing:
- Un-sauced Chicken Balls: You can freeze the fried chicken balls (without the sauce) for longer storage. Once they’ve cooled completely after frying, arrange them in a single layer on a baking sheet and freeze until solid. Then, transfer them to a freezer-safe bag or container. They can be frozen for up to 2-3 months. Reheat from frozen in the oven or air fryer as described above, adding a few extra minutes to the cooking time.
- Sweet and Sour Sauce: The sauce can also be frozen for up to 2-3 months. Thaw it in the refrigerator overnight, then reheat on the stovetop. The texture might be slightly different after freezing and thawing, but it will still be delicious.
Final Thoughts
And there you have it! We’ve journeyed through the creation of these delightful Chinese Chicken Balls With Sweet And Sour Sauce. I hope you found the process enjoyable and rewarding, and that your kitchen is now filled with an enticing aroma!
What makes this particular recipe a true must-try? It’s the perfect harmony of textures and flavors that sets it apart. You get that satisfyingly crispy exterior on each golden chicken ball, giving way to a wonderfully tender and juicy interior. Then, that vibrant, homemade sweet and sour sauce swoops in with its irresistible balance – not too tart, not too sweet, just perfectly complementing the chicken. It’s a classic for a reason, and making it from scratch truly elevates the experience.
There’s immense satisfaction in bringing such a beloved takeout dish to life in your own kitchen, creating a meal that is both comforting and exciting. Whether you’re serving it up for a weeknight family dinner or a special gathering, I truly believe that once you taste the fresh, vibrant flavors of your homemade Chinese Chicken Balls With Sweet And Sour Sauce, you’ll understand why it’s worth every bit of effort. So go on, give it a try – I promise, your taste buds will thank you for this fantastic homemade feast!
Delicious Chinese Chicken Balls with Sweet & Sour Sauce
- Total Time: 45 minutes
- Yield: 4 servings
Description
Dive into the delightful flavors of homemade Chinese Chicken Balls with a tangy sweet and sour sauce. This dish is a perfect crowd-pleaser that brings the comfort of your favorite takeaway right to your kitchen.
Ingredients
- Boneless, skinless chicken breast or thigh, cut into bite-sized pieces
- All-purpose flour
- Cornstarch
- Baking powder
- Salt
- White pepper
- Egg
- Water
- Ketchup
- Rice vinegar
- Granulated sugar or light brown sugar
- Light soy sauce or tamari for gluten-free option
- Pineapple juice or orange juice
- Cornstarch slurry (1 tablespoon cornstarch mixed with 2 tablespoons water)
- Minced garlic (optional)
- Minced ginger (optional)
- Bell peppers (red and green, optional)
- Sliced onion (optional)
- Juicy pineapple chunks (optional)
- Neutral oil for frying (vegetable, canola, or peanut oil)
Instructions
- Prepare the Chicken: Pat the chicken pieces dry with paper towels and set aside.
- Make the Batter: In a large mixing bowl, whisk together flour, cornstarch, baking powder, salt, and white pepper. In a separate bowl, lightly beat the egg with water, then gradually pour the wet ingredients into the dry ingredients, whisking until smooth.
- Coat the Chicken: Add the chicken pieces to the batter and stir gently until fully coated. Let it sit for 10-15 minutes if desired.
- Prepare the Sweet and Sour Sauce: In a medium saucepan, heat oil and sauté minced garlic and ginger for 30 seconds. Add ketchup, rice vinegar, sugar, light soy sauce, pineapple juice, and half a cup of water. Bring to a simmer, stirring until sugar dissolves. If using, add bell peppers, onion, and pineapple chunks, cooking for 2-3 minutes. Whisk together cornstarch and water to create a slurry, then pour into the sauce while stirring. Cook until thickened and glossy.
- Heat the Oil for Frying: In a deep pot or wok, heat enough oil to reach 3 inches deep until it reaches 350-375°F (175-190°C).
- Fry the Chicken Balls: Drop the batter-coated chicken pieces into the hot oil in batches, frying for 4-6 minutes until golden brown and cooked through. Ensure the internal temperature reaches 165°F (74°C).
- Drain and Rest: Remove the chicken balls from the oil and place them on a wire rack over a baking sheet lined with paper towels to drain excess oil.
- Serve: Toss the chicken balls in the sweet and sour sauce or serve the sauce on the side for dipping. Garnish with chopped spring onions or sesame seeds and serve immediately with steamed rice.
- Prep Time: 15 mins
- Cook Time: 30 mins
- Category: Dinner
- Method: Frying
- Cuisine: Chinese
Nutrition
- Serving Size: 1 bowl
- Calories: 350
- Sugar: 12 g
- Sodium: 700 mg
- Fat: 15 g
- Saturated Fat: 2 g
- Unsaturated Fat: 10 g
- Trans Fat: 0 g
- Carbohydrates: 35 g
- Fiber: 1 g
- Protein: 20 g
- Cholesterol: 70 mg
Keywords: Ensure the oil temperature is correct for frying to avoid greasy chicken. For extra crispiness, consider double frying the chicken balls. Personalize the sauce by adjusting sweetness or adding heat with chili flakes.

Leave a Comment