

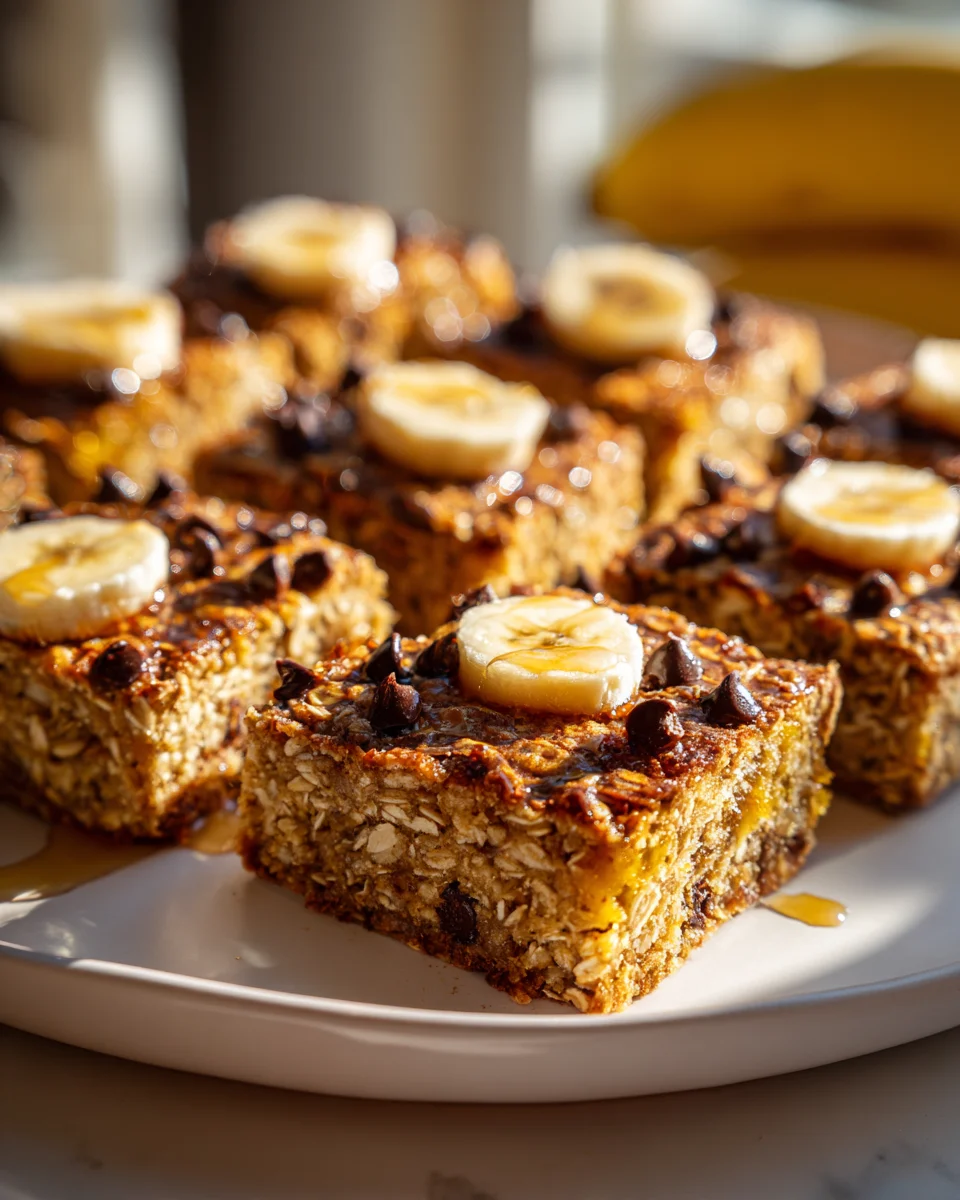
Banana Oatmeal Bars
Oh, Banana Oatmeal Bars! These aren’t just any bars; they’re my go-to for a delicious, wholesome, and incredibly easy snack or breakfast. What makes them so special, you ask? Well, for starters, they’re the perfect solution for those overly ripe bananas sitting on your counter, transforming them into something truly magical. Instead of just another banana bread, these bars offer a delightful chewy texture, packed with the comforting goodness of oats and that unmistakable sweet banana flavor. They’re super simple to whip up, making them a fantastic addition to your meal prep routine.
I know you’re going to absolutely love them because they strike that perfect balance between a satisfying treat and a genuinely nutritious option. They’re naturally sweet, surprisingly filling, and an absolute lifesaver on busy mornings when you need something quick and easy to grab. Plus, they’re incredibly customizable – think a sprinkle of chocolate chips, a handful of chopped nuts, or even some dried cranberries for an extra burst of flavor. This dish is essentially a warm, soft, and slightly chewy baked bar, bursting with the natural sweetness of ripe bananas and the hearty texture of oats, making every bite feel like a cozy hug. Trust me, once you try these, they’ll become a staple in your kitchen!

Ingredient Notes
Creating delicious Banana Oatmeal Bars starts with understanding your ingredients. I find that a little knowledge goes a long way in making these bars perfect every time!
Bananas: The Star of the Show
- Overripe is Best: This is my golden rule! Don’t reach for yellow bananas. Instead, look for those with plenty of brown spots, or even entirely brown. They’re significantly sweeter and much easier to mash, which means less added sugar is needed and a richer banana flavor for your bars. I usually let mine sit on the counter until they’re beyond what I’d want to eat plain.
Oats: The Foundation
- Old-Fashioned Rolled Oats: For that classic chewy texture and hearty feel, I always go for old-fashioned rolled oats. They hold their shape well during baking and give the bars a satisfying bite.
- Quick Oats (Substitution): If you’re in a pinch, quick oats can be used, but be aware they will result in a softer, more uniform bar without as much chewiness. I personally prefer the texture of rolled oats for these.
Sweetener: Just Enough
- Maple Syrup or Honey: I often use a liquid sweetener like maple syrup or honey. They blend easily into the wet ingredients and add a lovely depth of flavor. Adjust the amount based on how ripe your bananas are and your personal preference for sweetness.
- Brown Sugar (Substitution): If you prefer, brown sugar can be used for a classic, caramelized note.
Fat: For Tenderness and Moisture
- Melted Coconut Oil or Unsalted Butter: A little fat is essential for moist, tender bars. I typically use melted coconut oil for a subtle flavor, but unsalted butter works beautifully too, adding a rich, buttery taste. Just make sure it’s melted and slightly cooled before adding to the wet ingredients.
Binder & Leavener: Structure and Lift
- Egg: One large egg helps bind all the ingredients together, providing structure and moisture.
- Flax Egg (Substitution): If you’re looking for a vegan option, I’ve had great success with a ‘flax egg’ (1 tablespoon ground flaxseed meal mixed with 3 tablespoons water, let sit for 5 minutes until gel-like).
- Baking Powder: A touch of baking powder gives these bars a slight lift, preventing them from being too dense.
Flour (Optional, for Structure)
- Whole Wheat or All-Purpose Flour: While these bars are very oat-centric, I sometimes add a small amount of whole wheat or all-purpose flour (often 1/4 to 1/2 cup) to give them a bit more structure and a less crumbly texture, especially if I want them to hold up perfectly for packing in lunchboxes. This is entirely optional!
Flavor Enhancers & Add-ins: Get Creative!
- Vanilla Extract & Cinnamon: These are my must-haves for that warm, comforting banana bread-like aroma and taste. A pinch of salt also helps to balance and enhance all the flavors.
- Chocolate Chips: My absolute favorite add-in! Dark chocolate chips are fantastic, but milk chocolate or white chocolate chips are also great.
- Nuts: Chopped walnuts or pecans add a lovely crunch and earthy flavor.
- Dried Fruit: Raisins, dried cranberries, or chopped dried apricots are wonderful for extra bursts of sweetness and chewiness. I also love shredded coconut!
Step-by-Step Instructions
Making these Banana Oatmeal Bars is truly a simple and satisfying process. Here’s how I get them just right every time:
Step 1: Get Prepared
- Preheat Oven & Line Pan: My first step is always to preheat my oven to 350°F (175°C). Then, I grab an 8×8-inch or 9×9-inch baking pan and line it with parchment paper, leaving an overhang on the sides. This makes lifting the cooled bars out incredibly easy. A little non-stick cooking spray on the exposed pan sides helps too!
Step 2: Combine the Wet Ingredients
- Mash Bananas: In a large mixing bowl, I thoroughly mash the overripe bananas using a fork or a potato masher until they are as smooth as I can get them. A few small lumps are perfectly fine and add character.
- Whisk in Wet Components: To the mashed bananas, I add my chosen liquid sweetener (maple syrup or honey), the slightly cooled melted coconut oil or butter, the egg, and the vanilla extract. I give everything a good whisk until it’s well combined and smooth. This creates the flavorful, moist base for our bars.
Step 3: Mix the Dry Ingredients
- Combine Dry: In a separate medium-sized bowl, I whisk together all the dry ingredients: the old-fashioned rolled oats, the optional flour (if using), baking powder, ground cinnamon, and that crucial pinch of salt. Whisking them separately ensures that everything is evenly distributed before it meets the wet ingredients.
Step 4: Gently Combine & Add Extras
- Fold Wet into Dry: Now, I carefully add the dry oat mixture to the wet banana mixture. Using a spatula, I gently fold the ingredients together until they are just combined. It’s really important not to overmix here; overmixing can lead to tougher bars. Stop mixing as soon as no dry streaks remain.
- Fold in Add-ins: This is where the fun really begins! I gently fold in my chosen add-ins, whether it’s chocolate chips, chopped nuts, dried fruit, or a combination. I make sure they’re evenly distributed throughout the batter.
Step 5: Bake to Perfection
- Spread into Pan: I transfer the mixture into my prepared baking pan and use the back of my spatula or a spoon to spread it out evenly, pressing it down lightly to ensure a compact and uniform layer.
- Bake: Into the preheated oven they go! I bake them for about 25 to 35 minutes. Baking time can vary slightly depending on your oven and the thickness of your bars. I look for the edges to be lightly golden brown and the center to appear set. A toothpick inserted into the center might come out with a few moist crumbs, but shouldn’t be wet.
Step 6: Cool Down (The Hardest Part!)
- Cool Completely: Once baked, I remove the pan from the oven and place it on a wire rack to cool completely in the pan. This step is absolutely critical! The bars are quite delicate when warm and need time to set up properly. If you try to cut them too soon, they’ll likely crumble. I usually give them at least 1-2 hours, or even longer, before attempting to cut them. Once cooled, I use the parchment paper overhang to lift the entire slab of bars out of the pan.
Tips & Suggestions
Over the years of making these Banana Oatmeal Bars, I’ve picked up a few tricks that I love to share to help you achieve the best results and make them your own!
Prioritize Ripe Bananas
- The Key to Flavor: I can’t stress this enough – use very ripe bananas! The browner, the better. They provide natural sweetness and a deep banana flavor that truly makes these bars shine, reducing the need for excessive added sugar. If your bananas aren’t quite ripe enough, you can try baking them on a baking sheet at 300°F (150°C) for 15-20 minutes until their skins turn black – just be careful, they’ll be hot!
Don’t Overmix the Batter
- Gentle Hand: Once you combine the wet and dry ingredients, mix just until everything is moistened. Overmixing can develop the gluten in the oats and optional flour, leading to tougher, less tender bars. I always use a gentle hand with a spatula.
Patience with Cooling
- Resist the Urge: I know it’s tempting to cut into these warm, fragrant bars right out of the oven, but seriously, resist! They need ample time (at least 1-2 hours) to cool completely in the pan on a wire rack. This allows them to firm up and makes them much easier to cut into clean, perfect squares without crumbling. Warm bars will be soft and fall apart.
Customize to Your Heart’s Content
- Endless Possibilities: These bars are incredibly versatile! I often switch up the add-ins depending on what I have on hand or what I’m craving. Beyond chocolate chips and nuts, consider adding:
- A tablespoon of chia seeds or ground flaxseed for an extra nutritional boost.
- A pinch of nutmeg or a dash of ginger for more spice.
- Different types of dried fruit like chopped dates or figs.
- A spoonful of nut butter swirled into the batter for added richness.
This is your chance to get creative and make them uniquely yours!
Adjust Sweetness
- Taste Test: If your bananas aren’t super ripe, or if you simply prefer a sweeter bar, you can always add an extra tablespoon or two of your chosen sweetener to the wet ingredients. Conversely, if your bananas are extremely ripe, you might even reduce the sweetener slightly. I always do a quick taste test of the wet mixture (before adding the egg if you’re concerned about raw egg) to gauge the sweetness.
Serving Suggestions
- Versatile Treat: I love these bars for breakfast with my coffee, as a healthy snack, or even a light dessert. They’re fantastic on their own, but also delicious with a dollop of Greek yogurt, a drizzle of almond butter, or a sprinkle of extra cinnamon. They’re perfect for meal prep or packing into lunchboxes!
Storage
Proper storage is key to keeping your Banana Oatmeal Bars fresh and delicious for as long as possible. Here’s how I store mine:
At Room Temperature
- Short-Term Freshness: If you plan to enjoy your bars within a couple of days, they can be stored at room temperature. After they have completely cooled (this is critical!), I cut them into individual bars. Then, I place them in an airtight container.
- Duration: Stored on the counter in a cool, dry place, they will stay fresh and moist for about 2 to 3 days. Any longer than that, and I tend to move them to the refrigerator to maintain their quality and prevent them from drying out or spoiling, especially in warmer climates.
In the Refrigerator
- Extended Freshness: For longer storage, or if your kitchen runs warm, the refrigerator is your best friend. Once completely cool and cut, I arrange the bars in a single layer in an airtight container. If I need to stack them, I place a piece of parchment paper between the layers to prevent them from sticking together.
- Duration: Stored in the refrigerator, these Banana Oatmeal Bars will stay fresh and delicious for up to 1 week. The cold temperature helps to maintain their moisture and prevents them from spoiling.
- Revival Tip: If you prefer them warm, a quick zap in the microwave for 10-15 seconds can bring them back to a delightful warmth and soften them slightly.
In the Freezer
- Long-Term Solution: These bars freeze beautifully, making them perfect for meal prep and having a healthy snack or breakfast option readily available.
- Preparation for Freezing: After the bars have completely cooled and been cut into individual servings, I wrap each bar tightly in plastic wrap or aluminum foil. This individual wrapping helps prevent freezer burn and makes it easy to grab just one bar at a time.
- Freezer Storage: Once individually wrapped, I place the wrapped bars into a freezer-safe airtight container or a heavy-duty freezer bag. This provides an extra layer of protection against freezer burn.
- Duration: Stored in the freezer, Banana Oatmeal Bars will maintain their quality for up to 3 months.
- Thawing Instructions: When you’re ready to enjoy one, simply remove a bar from the freezer. You can let it thaw at room temperature for an hour or two, or pop it in the microwave for 30-60 seconds (unwrapped, of course) until it’s warmed through and soft. They taste almost as good as fresh from the oven!
Final Thoughts
And there you have it! My absolute favorite recipe for a wholesome and satisfying treat. These Banana Oatmeal Bars truly are a game-changer. I love how simple they are to whip up, yet they deliver such a comforting and delicious experience every single time. Whether you’re grabbing one for a quick breakfast, packing it as a mid-afternoon snack, or even serving it as a healthier dessert, these bars fit the bill perfectly. The natural sweetness of the bananas combined with the hearty oats creates a texture and flavor that’s just irresistible. I really hope you give these Banana Oatmeal Bars a try – I promise, they’ll become a staple in your kitchen!
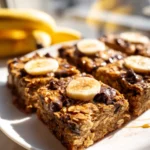
Chewy Banana Oatmeal Bars – Your New Favorite Healthy Treat!
- Total Time: 45 minutes
- Yield: 16 bars 1x
Description
These Chewy Banana Oatmeal Bars are a delicious and wholesome snack that transforms overripe bananas into a chewy, flavorful treat. Perfect for breakfast or a quick snack, they’re customizable and easy to make!
Ingredients
- 3 overripe bananas
- 2 cups old-fashioned rolled oats
- 1/4 to 1/2 cup whole wheat or all-purpose flour (optional)
- 1/4 cup maple syrup or honey
- 1/4 cup melted coconut oil or unsalted butter
- 1 large egg
- 1 teaspoon vanilla extract
- 1 teaspoon baking powder
- 1 teaspoon ground cinnamon
- 1/4 teaspoon salt
- 1/2 cup chocolate chips (optional)
- 1/2 cup chopped nuts (optional)
- 1/2 cup dried fruit (optional)
Instructions
- Preheat the oven to 350°F (175°C) and line an 8×8-inch or 9×9-inch baking pan with parchment paper.
- In a large mixing bowl, mash the overripe bananas until smooth, leaving a few lumps for texture.
- Whisk in the maple syrup or honey, melted coconut oil or butter, egg, and vanilla extract until well combined.
- In a separate bowl, whisk together the rolled oats, optional flour, baking powder, ground cinnamon, and salt.
- Gently fold the dry ingredients into the wet mixture until just combined, being careful not to overmix.
- Fold in any optional add-ins like chocolate chips, nuts, or dried fruit until evenly distributed.
- Transfer the mixture to the prepared baking pan, spreading it out evenly and pressing down lightly.
- Bake for 25 to 35 minutes, or until the edges are lightly golden brown and the center is set.
- Allow the bars to cool completely in the pan on a wire rack for at least 1-2 hours before cutting.
- Prep Time: 15 mins
- Cook Time: 30 mins
- Category: Snack
- Method: Baking
- Cuisine: American
Nutrition
- Serving Size: 1 bar
- Calories: 150
- Sugar: 8 g
- Sodium: 100 mg
- Fat: 6 g
- Saturated Fat: 4 g
- Unsaturated Fat: 2 g
- Trans Fat: 0 g
- Carbohydrates: 22 g
- Fiber: 3 g
- Protein: 3 g
- Cholesterol: 20 mg
Keywords: Use very ripe bananas for the best flavor. You can substitute a flax egg for a vegan option. Customize with your favorite add-ins like nuts, chocolate chips, or dried fruit.
Leave a Comment