

Crispy Sheet Pan Breakfast Burrito Squares
Oh, prepare yourselves, because I am absolutely thrilled to introduce you to a breakfast game-changer: Crispy Sheet Pan Breakfast Burrito Squares! Forget the struggle of rolling individual burritos, the messy fillings, or the sad, soggy tortilla you sometimes get from a microwave re-heat. We’re taking all the glorious flavors you love from a classic breakfast burrito and transforming them into something truly special, something you’re going to crave every single morning.
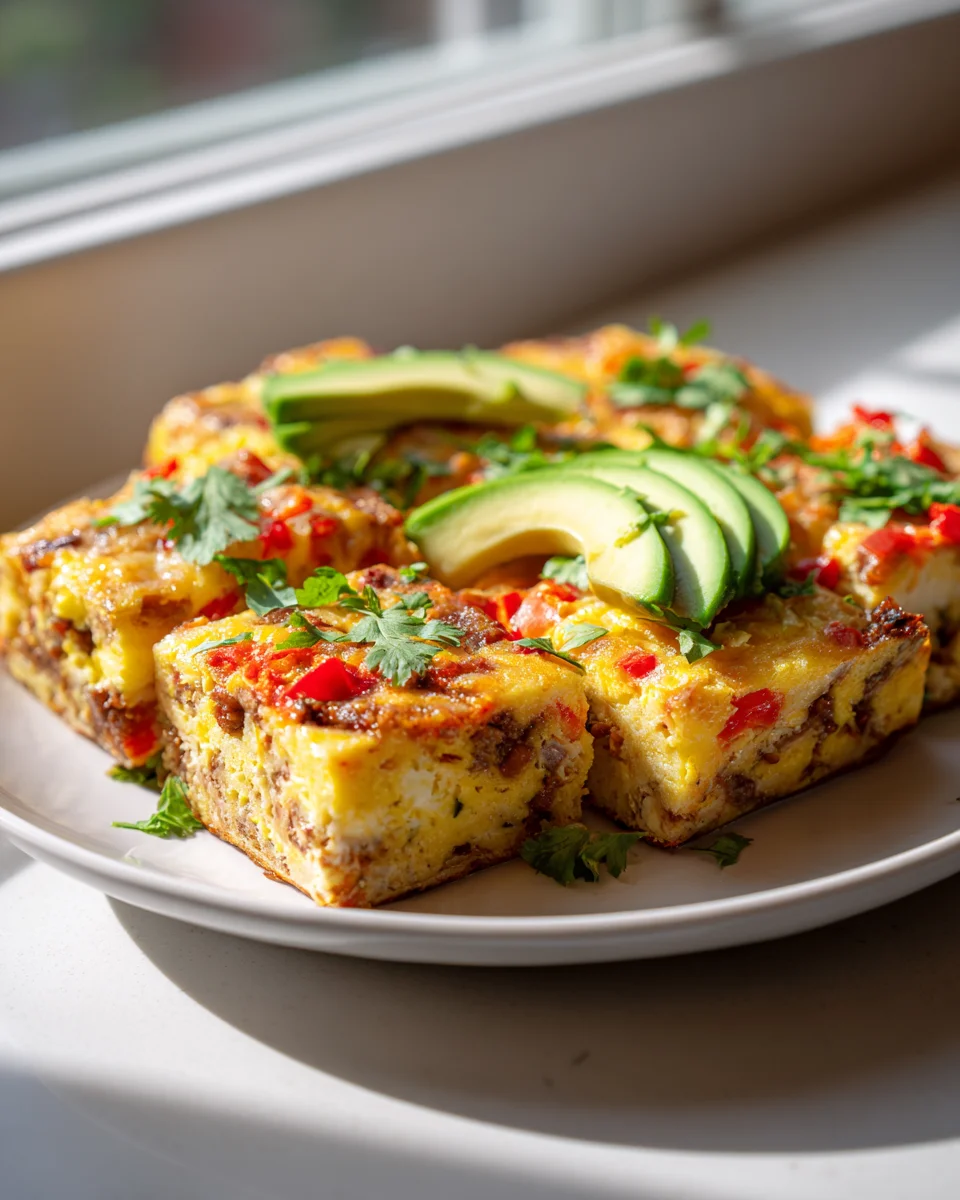
What makes this dish so utterly fantastic? Well, for starters, it’s all in the name: “Crispy.” Imagine perfectly golden-brown tortillas, encasing a hearty, savory filling of fluffy scrambled eggs, well-seasoned beef, melty cheese, and your favorite breakfast veggies and potatoes. The magic happens on a single sheet pan, meaning minimal fuss and easy cleanup – a dream come true for busy mornings or when you’re feeding a hungry crowd. You just layer it up, bake it until beautifully golden, and then cut it into convenient squares, ready for grabbing and going, or savoring leisurely at the table.
This isn’t just a recipe; it’s a brilliant hack for delicious, satisfying breakfast with hardly any effort. It’s perfect for meal prepping ahead of time, making a big batch for Sunday brunch, or simply ensuring you have a wholesome, craveable breakfast ready to go throughout your week. Trust me, once you experience the crispy edges and warm, flavorful center of these squares, your breakfast routine will never be the same!

Ingredient Notes
Creating these Crispy Sheet Pan Breakfast Burrito Squares is an absolute joy, and the beauty is how adaptable they are! Here are the key ingredients I love to use and some fantastic substitutions to fit your pantry and preferences.
- Large Flour Tortillas: These are the foundation of our squares, providing both the crispy top and bottom layers. I find 10-12 inch tortillas work best to minimize gaps on a standard half sheet pan. You’ll need about 8-10 tortillas in total, depending on your pan size. For extra crispiness, look for “burrito size” or “restaurant style” tortillas. If you’re looking for a gluten-free option, many brands offer excellent large gluten-free tortillas that will also crisp up beautifully.
- Eggs: The heart of any breakfast! I use 10-12 large eggs, whisked with a splash of milk or cream for a fluffy texture. Feel free to use egg whites for a lighter option, or a liquid egg substitute. Just ensure you have enough to create a substantial, well-seasoned scramble.
- Ground Beef (Seasoned like Sausage/Chorizo): This is where we get our savory breakfast meat fix. Instead of traditional pork sausage, I love to use lean ground beef. Simply brown about 1 pound of ground beef and season it generously with breakfast sausage spices (like fennel, sage, a touch of red pepper flakes) or chorizo spices (smoked paprika, cumin, oregano, a pinch of cayenne). This gives you incredible flavor while adhering to dietary preferences. You could also use pre-made beef breakfast sausage or a plant-based crumble if you prefer.
- Shredded Potatoes (Hash Browns): For that classic breakfast burrito feel. I usually opt for a 20-30 ounce bag of frozen shredded hash browns, thawed and squeezed of excess moisture. This step is crucial for preventing a soggy bottom layer! If you have leftover cooked diced potatoes or roasted potatoes, they work wonderfully too—just chop them finely.
- Cheese: Oh, the glorious cheese! I typically use 2 cups of shredded Monterey Jack, sharp cheddar, or a Mexican blend. It melts wonderfully and adds incredible flavor. Pepper Jack is a fantastic choice if you like a little heat. Feel free to mix and match your favorites!
- Bell Peppers & Onions: For freshness, color, and a little crunch. One medium onion and one bell pepper (any color!) diced finely and sautéed until tender are perfect. You can also add other veggies like spinach (wilt it first!), mushrooms, or even finely diced zucchini.
- Seasonings: Salt, black pepper, garlic powder, onion powder, and a pinch of cumin are my go-to’s. Adjust to your taste! A dash of hot sauce in the egg mixture can also add a nice kick.
- Olive Oil or Butter: Essential for sautéing our veggies and meat, and for brushing the tortillas to help them get super crispy.
Step-by-Step Instructions
Let’s get those Crispy Sheet Pan Breakfast Burrito Squares assembled! This process is straightforward and so satisfying, especially when you see those golden-brown, crispy edges emerge from the oven.
- Prep Your Filling Ingredients:
- First things first, preheat your oven to 400°F (200°C). Lightly grease a large baking sheet (approximately 13×18 inches) or line it with parchment paper for easier cleanup.
- In a large skillet, brown your 1 pound of ground beef over medium-high heat, breaking it up as it cooks. Drain any excess fat. Add your chosen breakfast sausage or chorizo seasonings (fennel, sage, paprika, cumin, etc.) and cook for another minute until fragrant. Set aside.
- In the same skillet (or clean it first), add a tablespoon of olive oil or butter. Sauté your diced onions and bell peppers until softened, about 5-7 minutes. If using spinach, add it now and cook until wilted. Set these veggies aside with the beef.
- Whisk together your 10-12 large eggs with a splash of milk or cream, salt, pepper, garlic powder, and onion powder until well combined. In the skillet, scramble the eggs over medium heat until they are just set but still a little moist. You don’t want to overcook them, as they’ll continue to cook in the oven.
- If using frozen shredded hash browns, ensure they are thawed and thoroughly squeezed dry to remove as much moisture as possible. This is key for crispiness!
- Assemble the Bottom Layer:
- Arrange 4-5 of your large flour tortillas on the prepared baking sheet, overlapping them slightly to cover the entire bottom of the pan. Don’t worry if there are a few gaps; the filling will hold everything together. You might need to trim one or two tortillas to fit perfectly, or simply layer them strategically.
- Brush the tortillas lightly with a bit of olive oil or melted butter. This helps with the crispiness.
- Layer the Filling:
- Evenly spread the shredded hash browns over the tortilla base. Gently press them down.
- Next, scatter the seasoned ground beef mixture over the hash browns.
- Follow with the sautéed bell peppers and onions (and any other veggies you’re using).
- Then, distribute the scrambled eggs over the vegetables.
- Finally, sprinkle about half of your shredded cheese (about 1 cup) evenly over the entire filling.
- Top and Bake:
- Carefully place the remaining 4-5 tortillas over the filling, again overlapping them slightly to cover everything. Gently press down on the top layer of tortillas to compact the filling.
- Brush the top tortillas generously with olive oil or melted butter. This is crucial for achieving that beautiful golden crisp!
- Bake for 20-25 minutes, or until the top tortillas are golden brown and crispy, and the cheese inside is fully melted and bubbly.
- For an extra crispy top, you can turn on the broiler for the last 1-2 minutes, watching it very carefully to prevent burning.
- Slice and Serve:
- Once baked to crispy perfection, remove the sheet pan from the oven. Let the burrito slab rest for 5-10 minutes before slicing. This allows the layers to set and makes cutting much easier.
- Using a sharp knife, cut the large burrito slab into squares, usually 9-12 squares depending on your desired portion size.
- Serve immediately with your favorite breakfast toppings like salsa, guacamole, sour cream, or extra hot sauce!
Tips & Suggestions
Getting these Crispy Sheet Pan Breakfast Burrito Squares just right involves a few clever tricks. Here are my top tips to ensure yours are absolutely delicious and perfectly crispy every time!
- Moisture Control is King for Crispiness: This is probably the most important tip! Excess moisture leads to a soggy result, not crispy.
- Squeeze those Hash Browns: If using frozen hash browns, thaw them completely and then wring out as much water as possible using a clean kitchen towel or paper towels.
- Don’t Overcook Eggs: Scramble your eggs just until they’re set but still slightly moist. They’ll finish cooking in the oven, and overcooked eggs can release more moisture.
- Drain Meat Thoroughly: After browning your ground beef, drain off all excess fat.
- The Tortilla Brush-Up: Don’t skip brushing your tortillas with olive oil or melted butter, especially the top layer. This fat conducts heat, promoting that beautiful golden-brown color and irresistible crisp texture.
- Press It Down: After laying down the top tortillas, gently press down across the entire surface. This helps compact the filling, ensures good contact between layers, and contributes to a more solid square that holds together well.
- Vary Your Veggies: Feel free to customize your veggies! Cooked mushrooms, corn, black beans, or even roasted sweet potatoes can be fantastic additions. Just make sure any high-water content vegetables (like mushrooms or zucchini) are thoroughly cooked and drained before adding them to prevent sogginess.
- Spice It Up: If you love a kick, consider adding diced jalapeños (fresh or pickled) to your veggie mixture. A dash of cayenne pepper or a pinch of red pepper flakes in the ground beef or egg mixture can also elevate the flavor.
- Cheese Choices: While a classic blend works great, experiment with different cheeses! A sharp white cheddar can add a tangy bite, or a smoked gouda could offer a unique depth of flavor.
- Don’t Rush the Rest: Letting the squares rest for 5-10 minutes after baking is crucial. This allows the cheese and egg to set, making for cleaner cuts and squares that hold their shape better.
- Serving Suggestions: These squares are fantastic on their own, but they truly shine with a variety of toppings. Think fresh pico de gallo, a dollop of sour cream or Greek yogurt, creamy guacamole, a drizzle of your favorite hot sauce, or even a sprinkle of fresh cilantro and a squeeze of lime juice.
Storage
One of the best things about these Crispy Sheet Pan Breakfast Burrito Squares is how well they store, making them perfect for meal prep or quick weekday breakfasts. You’ll thank yourself later!
- Refrigeration: Once your squares have cooled completely to room temperature, place them in an airtight container. They will keep beautifully in the refrigerator for up to 3-4 days.
- Reheating for Best Results: To bring back some of that wonderful crispiness, I highly recommend reheating the squares in a toaster oven or a regular oven.
- Toaster Oven/Oven: Place the squares on a baking sheet and reheat at 350°F (175°C) for about 10-15 minutes, or until heated through and the tortillas are crisp again. This is my preferred method for maintaining texture.
- Microwave: While convenient, the microwave will soften the tortillas, losing that desired crispiness. If you’re in a pinch, microwave for 1-2 minutes until heated through.
- Freezing: These squares are excellent for freezing!
- Once completely cool, wrap individual squares tightly in plastic wrap, then place them in a freezer-safe bag or airtight container. They can be frozen for up to 2-3 months.
- To reheat from frozen, you have a couple of options:
- Oven/Toaster Oven (Recommended): Remove the plastic wrap and place the frozen square on a baking sheet. Bake at 375°F (190°C) for 20-25 minutes, or until heated through and crispy. You might want to cover it loosely with foil for the first half of the baking to prevent over-browning, then remove the foil to crisp up the last few minutes.
- Microwave then Oven/Toaster Oven: For a quicker reheat, microwave the frozen square for 1-2 minutes to defrost, then transfer to a toaster oven or oven to crisp up for 5-10 minutes.
Final Thoughts
And there you have it – your ultimate guide to creating the most incredibly satisfying Crispy Sheet Pan Breakfast Burrito Squares! I truly believe this recipe is a game-changer for anyone looking to elevate their breakfast or brunch game with minimal fuss. The magic of these squares lies in that unbeatable, golden-brown crispiness achieved right on the sheet pan, perfectly encasing all your favorite savory fillings. They’re not just delicious; they’re convenient for feeding a crowd, perfect for meal prep, and unbelievably easy to serve. Get ready to impress yourself and everyone else with these delightful, perfectly portioned Crispy Sheet Pan Breakfast Burrito Squares. I promise, they’re going to become a staple in your kitchen!

Quick & Easy Crispy Sheet Pan Breakfast Burrito Squares
- Total Time: 40 minutes
- Yield: 9-12 servings 1x
Description
Transform your breakfast routine with these Crispy Sheet Pan Breakfast Burrito Squares, featuring all your favorite breakfast flavors in a convenient, easy-to-prepare format. Perfect for meal prep or feeding a crowd, these squares are crispy, savory, and utterly satisfying!
Ingredients
- 8–10 large flour tortillas (10–12 inch)
- 10–12 large eggs
- 1 pound ground beef (seasoned like sausage/chorizo)
- 20–30 ounces frozen shredded potatoes (hash browns), thawed and squeezed of excess moisture
- 2 cups shredded Monterey Jack, sharp cheddar, or Mexican blend cheese
- 1 medium onion, diced
- 1 bell pepper, diced
- Salt
- Black pepper
- Garlic powder
- Onion powder
- Cumin
- Olive oil or butter
Instructions
- Preheat your oven to 400°F (200°C). Lightly grease a large baking sheet (approximately 13×18 inches) or line it with parchment paper for easier cleanup.
- In a large skillet, brown your 1 pound of ground beef over medium-high heat, breaking it up as it cooks. Drain any excess fat. Add your chosen breakfast sausage or chorizo seasonings (fennel, sage, paprika, cumin, etc.) and cook for another minute until fragrant. Set aside.
- In the same skillet, add a tablespoon of olive oil or butter. Sauté your diced onions and bell peppers until softened, about 5-7 minutes. If using spinach, add it now and cook until wilted. Set these veggies aside with the beef.
- Whisk together your 10-12 large eggs with a splash of milk or cream, salt, pepper, garlic powder, and onion powder until well combined. In the skillet, scramble the eggs over medium heat until they are just set but still a little moist.
- Ensure the frozen shredded hash browns are thawed and thoroughly squeezed dry to remove as much moisture as possible.
- Arrange 4-5 of your large flour tortillas on the prepared baking sheet, overlapping them slightly to cover the entire bottom of the pan. Brush the tortillas lightly with a bit of olive oil or melted butter.
- Evenly spread the shredded hash browns over the tortilla base. Gently press them down.
- Scatter the seasoned ground beef mixture over the hash browns.
- Follow with the sautéed bell peppers and onions (and any other veggies you're using).
- Distribute the scrambled eggs over the vegetables.
- Sprinkle about half of your shredded cheese (about 1 cup) evenly over the entire filling.
- Carefully place the remaining 4-5 tortillas over the filling, overlapping them slightly to cover everything. Gently press down on the top layer of tortillas to compact the filling.
- Brush the top tortillas generously with olive oil or melted butter. Bake for 20-25 minutes, or until the top tortillas are golden brown and crispy, and the cheese inside is fully melted and bubbly.
- For an extra crispy top, you can turn on the broiler for the last 1-2 minutes, watching it very carefully to prevent burning.
- Once baked to crispy perfection, remove the sheet pan from the oven. Let the burrito slab rest for 5-10 minutes before slicing.
- Using a sharp knife, cut the large burrito slab into squares, usually 9-12 squares depending on your desired portion size.
- Serve immediately with your favorite breakfast toppings like salsa, guacamole, sour cream, or extra hot sauce!
- Prep Time: 15 mins
- Cook Time: 25 mins
- Category: Breakfast
- Method: Baking
- Cuisine: American
Nutrition
- Serving Size: 1 square
- Calories: 350
- Sugar: 2 g
- Sodium: 600 mg
- Fat: 20 g
- Saturated Fat: 10 g
- Unsaturated Fat: 8 g
- Trans Fat: 0 g
- Carbohydrates: 30 g
- Fiber: 3 g
- Protein: 15 g
- Cholesterol: 200 mg
Keywords: Ensure to squeeze out excess moisture from the hash browns for crispiness. Brush tortillas with olive oil or melted butter for a golden finish. Customize the veggies and cheese to your liking!


Leave a Comment