

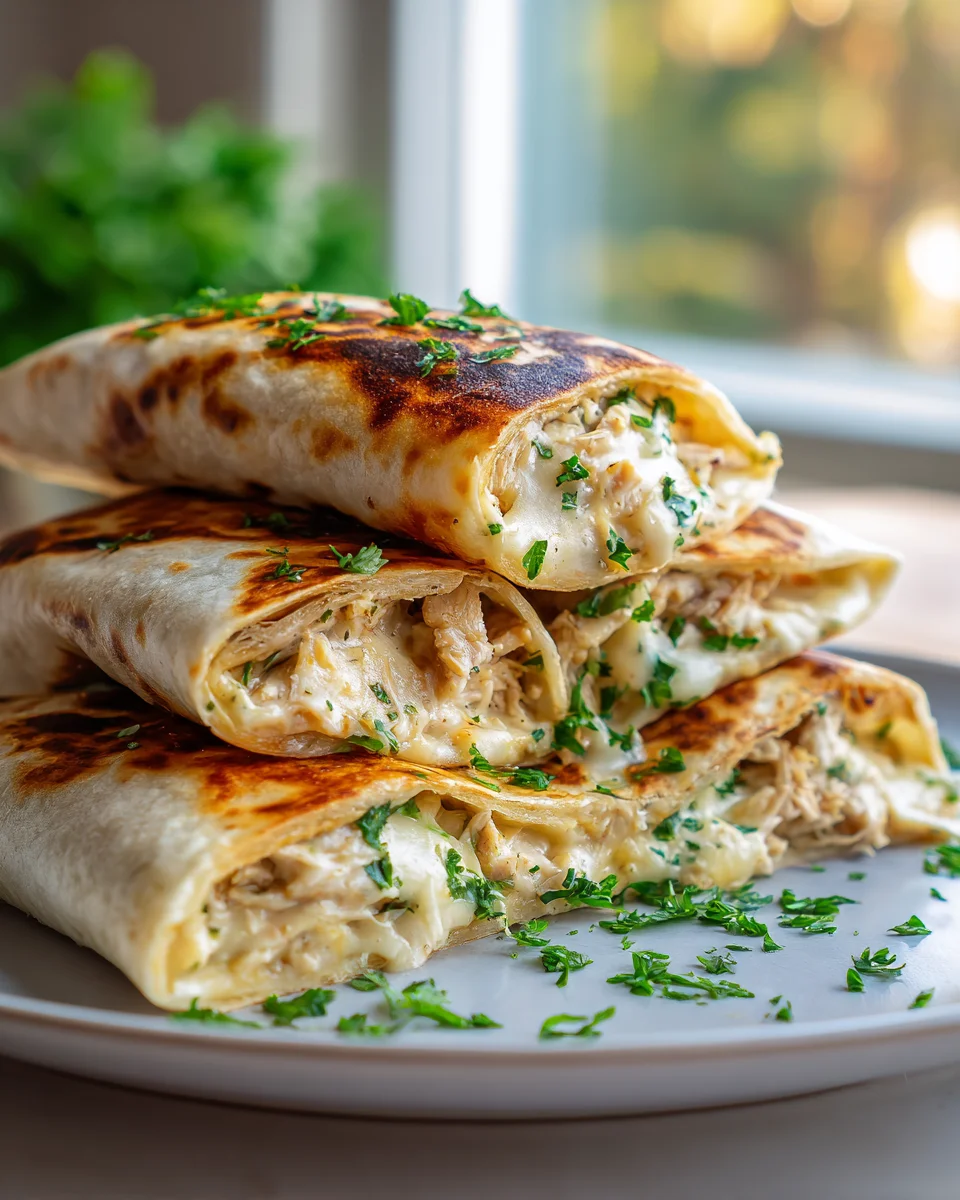
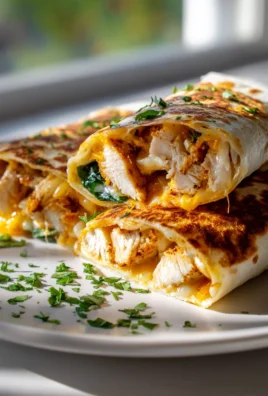
Cheesy Garlic Chicken Wraps
Oh boy, have I got a treat for you! We’re talking about Cheesy Garlic Chicken Wraps, and trust me, this isn’t just another weeknight dinner; it’s an experience. What makes this recipe so incredibly special is that perfect trifecta of gooey cheese, pungent garlic, and succulent chicken, all hugged snugly in a warm tortilla. It’s comfort food taken to a whole new level of deliciousness, without the fuss!
You are absolutely going to love these wraps because they hit all the right notes: they’re incredibly flavorful, satisfyingly hearty, and surprisingly quick to put together. Imagine tender pieces of chicken, smothered in a dreamy, creamy garlic cheese sauce, then tucked into a soft wrap with your favorite fresh toppings. It’s the kind of meal that feels indulgent but is totally doable, whether you’re rushing on a Tuesday or settling in for a cozy Friday night. Get ready to fall in love with your new go-to!

Ingredient Notes
When it comes to crafting the perfect Cheesy Garlic Chicken Wraps, every ingredient plays a star role. I find that quality ingredients truly elevate this simple dish from good to absolutely delicious. Here’s what I typically reach for and some thoughts on substitutions:
- Chicken: For these wraps, I love using boneless, skinless chicken breasts. They’re lean and cook quickly. I usually dice them into small, bite-sized pieces, about half an inch, so they integrate beautifully into the cheesy filling. If you prefer a richer flavor, boneless, skinless chicken thighs work wonderfully too. For a tasty alternative, thinly sliced sirloin beef or even ground beef can be used – just make sure it’s cooked thoroughly and seasoned well.
- Garlic: This is arguably the most important flavor! Fresh garlic is non-negotiable for me in Cheesy Garlic Chicken Wraps. I mince at least 4-6 cloves, sometimes more if I’m feeling extra bold. The aromatic pungency of fresh garlic truly makes the filling sing. Garlic powder simply won’t give you the same depth of flavor, so try to stick to fresh if you can.
- Cheese: We need cheese that melts beautifully and brings a lovely stretch. My go-to is a mix of shredded low-moisture mozzarella for its incredible melt and a sharp cheddar for added flavor. Sometimes I’ll throw in a bit of Monterey Jack for extra creaminess. Pre-shredded cheese works in a pinch, but I always recommend shredding your own from a block – it melts smoother and tastes fresher.
- Cream Cheese: This is my secret weapon for the irresistibly creamy, rich texture of the filling. A block of full-fat cream cheese, softened at room temperature, blends in seamlessly to create that luxurious base for the chicken and other cheeses. If you’re looking for a slightly lighter option, a good quality sour cream or even Greek yogurt can be used, but note that the texture will be a little different and less dense.
- Tortillas/Wraps: Large, soft flour tortillas are perfect for wrapping up all that cheesy chicken goodness. I usually go for the “burrito-sized” ones (around 10-12 inches) as they hold a generous amount of filling without tearing. Whole wheat tortillas or gluten-free alternatives can also be used if preferred. Just be sure they’re pliable enough to roll without cracking.
- Butter & Olive Oil: I like to use a combination for cooking the chicken and starting the cheesy sauce. Butter adds fantastic flavor, especially when sautéing garlic, while a touch of olive oil helps prevent scorching and adds a subtle richness.
- Seasonings: Beyond salt and freshly ground black pepper, I usually add a pinch of onion powder and sometimes a sprinkle of dried parsley or chives to my chicken as it cooks. These simple additions enhance the overall savory profile without overpowering the star flavors.
Step-by-Step Instructions
Ready to get cooking? These Cheesy Garlic Chicken Wraps come together quicker than you might think, making them perfect for a weeknight meal or a casual gathering. Follow these steps for delicious results:
- Prepare Your Chicken: Start by patting your boneless, skinless chicken breasts dry with paper towels. This helps them brown nicely. Dice the chicken into small, uniform ½-inch pieces. Season them generously with salt, freshly ground black pepper, and a pinch of onion powder. Set aside.
- Cook the Chicken: Heat a large skillet or non-stick pan over medium-high heat. Add a tablespoon of olive oil. Once shimmering, add the diced chicken in a single layer, making sure not to overcrowd the pan. Cook for 5-7 minutes, stirring occasionally, until the chicken is golden brown and cooked through. Remove the cooked chicken from the skillet and set it aside on a plate.
- Start the Cheesy Garlic Sauce: Reduce the heat to medium. Add 2 tablespoons of unsalted butter to the same skillet. Once the butter is melted and sizzling, add your minced fresh garlic. Sauté for about 1 minute until fragrant, being careful not to burn it. Burnt garlic can turn bitter.
- Melt in the Cream Cheese: Add an 8-ounce block of softened cream cheese to the skillet with the garlic. Stir continuously with a spatula or wooden spoon, breaking it down, until it’s smooth and fully melted into a creamy base. This usually takes 2-3 minutes.
- Incorporate the Shredded Cheese: Once the cream cheese is smooth, gradually add your shredded mozzarella and cheddar cheese to the skillet. Stir constantly until all the cheese has melted completely and you have a wonderfully smooth, glossy, and stretchy cheesy sauce. If the sauce seems too thick, you can add a tablespoon or two of milk or chicken broth to reach your desired consistency.
- Combine Chicken and Cheese: Return the cooked chicken to the skillet with the cheesy garlic sauce. Stir everything together until the chicken pieces are evenly coated in the rich, savory sauce. Taste and adjust seasonings if necessary – you might need a little more salt or pepper.
- Warm the Tortillas: While the filling is hot, warm your large flour tortillas. You can do this quickly in a dry skillet over medium heat for about 15-20 seconds per side until pliable, or microwave them in stacks of 3-4 for 20-30 seconds. Warm tortillas are much easier to roll without tearing.
- Assemble the Wraps: Lay a warm tortilla flat on a clean surface. Spoon about ½ to ¾ cup of the cheesy garlic chicken filling onto the center of the tortilla, leaving space around the edges. Fold in the sides of the tortilla, then tightly roll it up from the bottom, creating a secure wrap. Repeat with the remaining tortillas and filling.
- Optional Crisping Step (Highly Recommended!): For an extra layer of deliciousness, lightly pan-fry the assembled wraps. Heat a clean skillet over medium heat with a tiny bit of olive oil or butter. Place the wraps seam-side down in the skillet and cook for 2-3 minutes per side until golden brown and slightly crispy. This also helps to seal the wraps and warm them through perfectly. Serve immediately!
Tips & Suggestions
These Cheesy Garlic Chicken Wraps are fantastic on their own, but with a few simple tips and creative suggestions, you can truly make them your own and elevate the experience. Here are some of my favorite ways to enhance this dish:
- Amp Up the Garlic Flavor: If you’re a true garlic fiend like me, consider roasting a head of garlic beforehand. Mash the soft, sweet roasted garlic cloves and stir them into the cheesy sauce along with the fresh minced garlic. It adds an incredible depth of flavor that’s less pungent and more nuanced.
- Add a Touch of Spice: For those who love a little kick, a pinch of red pepper flakes stirred into the chicken as it cooks, or into the cheesy sauce, adds a lovely warmth. A dash of your favorite hot sauce or a swirl of sriracha in the filling can also really wake up the flavors.
- Fresh Herb Power: Don’t underestimate the power of fresh herbs! Finely chopped fresh parsley or chives stirred into the finished filling just before serving, or sprinkled over the top, brightens the entire dish and adds a beautiful pop of color and freshness.
- Perfect Your Roll: Rolling a tight wrap is key to preventing spillage. Don’t overfill your tortillas. Once you’ve placed the filling, fold the two opposite sides inward over the filling, then starting from the bottom, roll upward, keeping it as snug as possible.
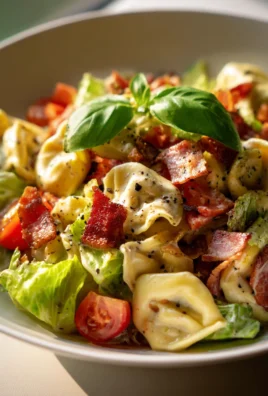
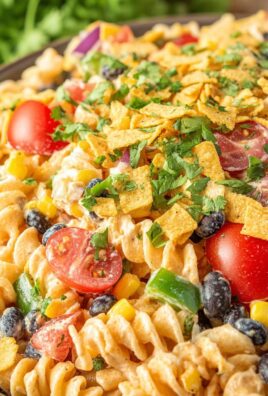
- Serving Suggestions: These wraps are hearty enough to be a meal on their own. However, they pair wonderfully with a simple side salad dressed with a light vinaigrette to cut through the richness. A bowl of warm tomato soup or a creamy roasted red pepper dip on the side for dipping can also be a delightful addition.
- Make it a Bowl: If you’re cutting down on carbs or just prefer a different presentation, turn this into a “Cheesy Garlic Chicken Bowl.” Serve the delicious chicken filling over a bed of fluffy rice, quinoa, or even a generous helping of steamed broccoli or spinach.
- Experiment with Cheeses: While mozzarella and cheddar are classics, don’t hesitate to experiment! A touch of smoked gouda, gruyere, or even pepper jack (for that spicy kick) can introduce exciting new flavor profiles to your wraps.
- Crisping is Crucial: Seriously, don’t skip the optional pan-frying step! That golden-brown, slightly crispy exterior on the tortilla makes all the difference in texture and adds another layer of deliciousness that you simply won’t get from just rolling them. An air fryer can also do a great job here – just a few minutes at 375°F (190°C) until golden.
Storage
Having Cheesy Garlic Chicken Wraps ready to go is a lifesaver for busy days. Proper storage ensures you can enjoy your delicious creation for a few days, or even prep parts of it ahead of time. Here’s how I typically handle storage:
- For Leftover Cooked Wraps:
- Refrigeration: If you have leftover assembled and cooked wraps, allow them to cool completely to room temperature. Once cool, place them in an airtight container. They will keep well in the refrigerator for up to 3 days. I usually separate them with parchment paper if stacking to prevent sticking.
- Reheating: For the best results when reheating, I highly recommend using a toaster oven, air fryer, or a conventional oven.
- Oven/Toaster Oven: Preheat to 350°F (175°C). Place the wraps on a baking sheet and heat for 10-15 minutes, or until warmed through and the tortillas are crisp again. This method helps maintain that lovely crispy exterior.
- Air Fryer: Preheat to 325°F (160°C). Air fry for 5-7 minutes, flipping halfway, until hot and crispy.
- Microwave: While convenient, microwaving will make the tortillas soft and potentially a bit chewy. If using a microwave, heat for 30-60 seconds per wrap, or until warmed through.
- Make-Ahead (Filling Only):
- One of my favorite meal prep hacks is to make the cheesy garlic chicken filling ahead of time. Cook the chicken and prepare the cheesy sauce as per the instructions, then combine them.
- Refrigeration: Allow the filling to cool completely. Transfer it to an airtight container and store it in the refrigerator for up to 3-4 days.
- Assembly Later: When you’re ready to eat, simply reheat the filling gently in a saucepan over low heat, stirring occasionally, until hot and melty. Warm your tortillas, assemble the wraps, and then proceed with the optional crisping step. This ensures fresh, perfectly warm wraps every time without the tortillas getting soggy from pre-assembly.
- Freezing (Filling Only):
- While I don’t recommend freezing already assembled wraps (the tortillas can get soggy and the texture changes upon thawing), the cheesy garlic chicken filling freezes surprisingly well!
- Freezing Process: Allow the cooked filling to cool completely. Transfer it to a freezer-safe airtight container or heavy-duty freezer bag, pressing out as much air as possible. It can be stored in the freezer for up to 2-3 months.
- Thawing and Reheating: When you want to use it, thaw the frozen filling overnight in the refrigerator. Reheat gently in a saucepan over low heat, adding a splash of milk or chicken broth if needed to restore its creamy consistency. Once hot, you can proceed to assemble and crisp your fresh wraps.
Final Thoughts
I genuinely hope you’re as excited about these Cheesy Garlic Chicken Wraps as I am! I truly believe this recipe is an absolute must-try for anyone looking for a quick, flavorful, and incredibly satisfying meal. The magic truly happens with that perfect trifecta of succulent chicken, aromatic garlic, and gooey, melted cheese, all lovingly nestled within a soft wrap. Whether you’re whipping them up for a speedy weeknight dinner, a delightful lunch, or even a fun gathering, these Cheesy Garlic Chicken Wraps are guaranteed to impress. Trust me, once you experience their deliciousness, they’re sure to become a beloved staple in your kitchen!

Quick Cheesy Garlic Chicken Wraps: Your New Family Favorite
- Total Time: 45 minutes
- Yield: 4 servings 1x
Description
These Cheesy Garlic Chicken Wraps are a delightful combination of gooey cheese, pungent garlic, and succulent chicken, all wrapped in a warm tortilla. Perfect for a quick weeknight dinner or a cozy gathering, they are sure to become a family favorite.
Ingredients
- 1 pound boneless, skinless chicken breasts
- 4–6 cloves fresh garlic, minced
- 1 cup shredded low-moisture mozzarella cheese
- 1 cup shredded sharp cheddar cheese
- 8 ounces full-fat cream cheese, softened
- 4 large flour tortillas (burrito-sized, around 10–12 inches)
- 2 tablespoons unsalted butter
- 1 tablespoon olive oil
- Salt, to taste
- Freshly ground black pepper, to taste
- Pinch of onion powder
- Optional: sprinkle of dried parsley or chives
Instructions
- Start by patting your boneless, skinless chicken breasts dry with paper towels. Dice the chicken into small, uniform ½-inch pieces. Season them generously with salt, freshly ground black pepper, and a pinch of onion powder. Set aside.
- Heat a large skillet or non-stick pan over medium-high heat. Add a tablespoon of olive oil. Once shimmering, add the diced chicken in a single layer, making sure not to overcrowd the pan. Cook for 5-7 minutes, stirring occasionally, until the chicken is golden brown and cooked through. Remove the cooked chicken from the skillet and set it aside on a plate.
- Reduce the heat to medium. Add 2 tablespoons of unsalted butter to the same skillet. Once the butter is melted and sizzling, add your minced fresh garlic. Sauté for about 1 minute until fragrant, being careful not to burn it.
- Add an 8-ounce block of softened cream cheese to the skillet with the garlic. Stir continuously with a spatula or wooden spoon, breaking it down, until it's smooth and fully melted into a creamy base. This usually takes 2-3 minutes.
- Once the cream cheese is smooth, gradually add your shredded mozzarella and cheddar cheese to the skillet. Stir constantly until all the cheese has melted completely and you have a wonderfully smooth, glossy, and stretchy cheesy sauce. If the sauce seems too thick, you can add a tablespoon or two of milk or chicken broth to reach your desired consistency.
- Return the cooked chicken to the skillet with the cheesy garlic sauce. Stir everything together until the chicken pieces are evenly coated in the rich, savory sauce. Taste and adjust seasonings if necessary.
- While the filling is hot, warm your large flour tortillas. You can do this quickly in a dry skillet over medium heat for about 15-20 seconds per side until pliable, or microwave them in stacks of 3-4 for 20-30 seconds.
- Lay a warm tortilla flat on a clean surface. Spoon about ½ to ¾ cup of the cheesy garlic chicken filling onto the center of the tortilla, leaving space around the edges. Fold in the sides of the tortilla, then tightly roll it up from the bottom, creating a secure wrap. Repeat with the remaining tortillas and filling.
- For an extra layer of deliciousness, lightly pan-fry the assembled wraps. Heat a clean skillet over medium heat with a tiny bit of olive oil or butter. Place the wraps seam-side down in the skillet and cook for 2-3 minutes per side until golden brown and slightly crispy. Serve immediately!
- Prep Time: 15 mins
- Cook Time: 30 mins
- Category: Dinner
- Method: Cooking
- Cuisine: American
Nutrition
- Serving Size: 1 wrap
- Calories: 600
- Sugar: 2 g
- Sodium: 800 mg
- Fat: 35 g
- Saturated Fat: 15 g
- Unsaturated Fat: 10 g
- Trans Fat: 0 g
- Carbohydrates: 40 g
- Fiber: 3 g
- Protein: 30 g
- Cholesterol: 100 mg
Keywords: Consider roasting a head of garlic for a sweeter flavor, adding red pepper flakes for spice, or using fresh herbs like parsley or chives for brightness. Don't skip the optional pan-frying step for a crispy exterior.
Leave a Comment