

Japanese Cotton Cheesecake
Oh, prepare yourselves, because you’re about to embark on a truly delightful baking adventure! Today, we’re diving headfirst into the magical world of Japanese Cotton Cheesecake. If you’ve ever found yourself dreaming of a dessert that’s impossibly light, jiggly, and melts in your mouth like a sweet cloud, then my friend, you’ve come to the right place. This isn’t just any cheesecake; it’s a culinary experience that redefines what a cheesecake can be.
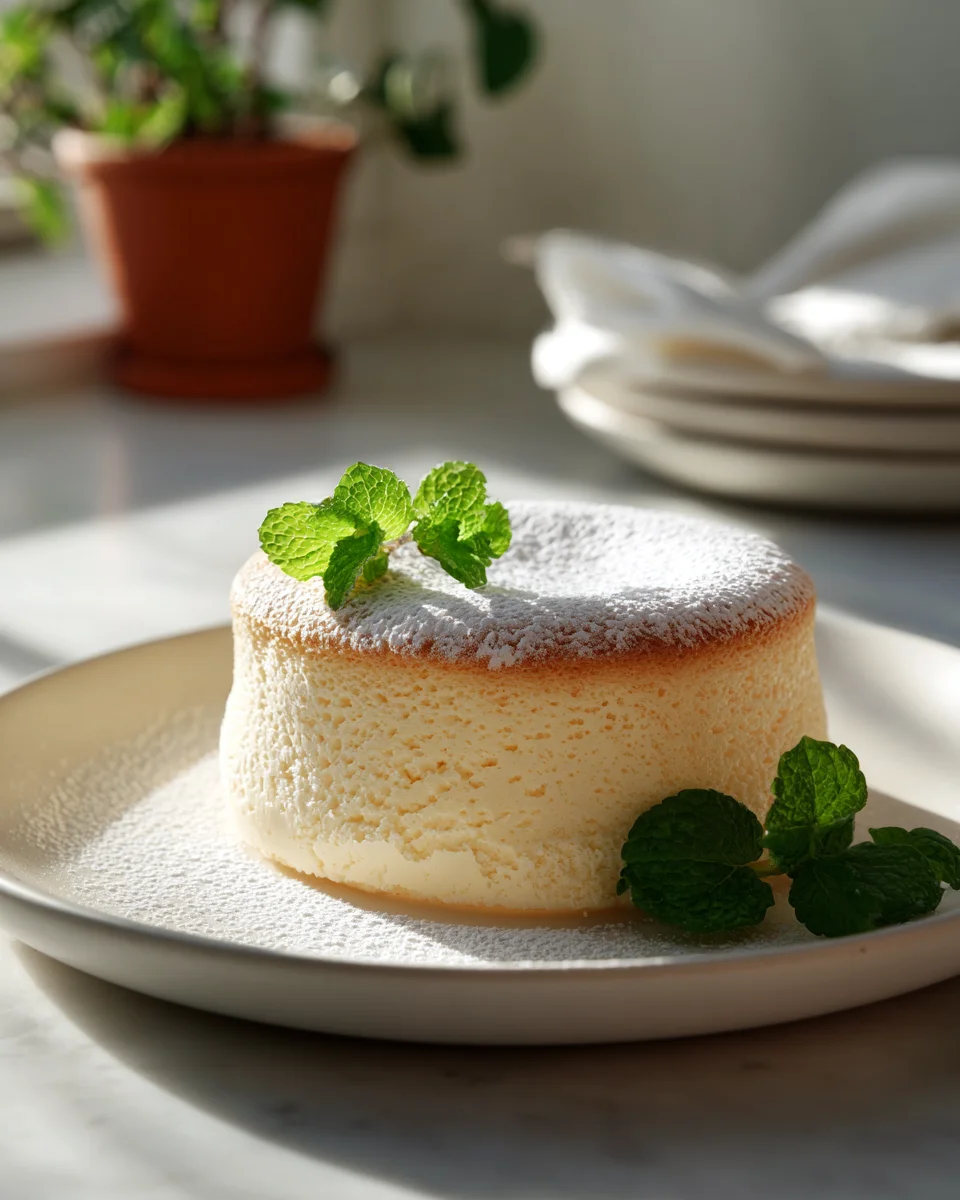
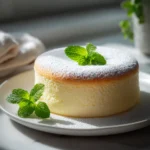
What makes this particular recipe so incredibly special, you ask? It’s all about that ethereal texture! Unlike its denser, richer American counterparts, our Japanese Cotton Cheesecake boasts a delicate, airy crumb that’s incredibly moist and incredibly fluffy. It has a gentle wobble that’s just mesmerizing, and each bite feels like a whisper of creamy sweetness. You’ll absolutely love how satisfying it is to pull this beautifully golden, tall cheesecake out of the oven, knowing you’ve created something so elegant and unique. It’s a show-stopper that’s sure to impress everyone at your table!
At its heart, this dish is a marvel of baking science and artistry. It’s a baked cheesecake that achieves its signature cloud-like texture through a unique method: incorporating a carefully whipped meringue and baking it in a water bath. This combination ensures a slow, gentle cook that prevents cracking and creates that signature bouncy, melt-in-your-mouth consistency. It’s rich enough to satisfy your dessert cravings but light enough that you’ll always want just one more slice. Get ready to enjoy a subtly sweet masterpiece that’s surprisingly simple to master with our step-by-step guide!

Ingredient Notes
Creating that signature jiggly, melt-in-your-mouth texture of a Japanese Cotton Cheesecake really comes down to a few key ingredients and how we treat them. I’ve found that using high-quality ingredients makes all the difference in achieving that perfectly light and fluffy result. Here’s what you’ll need and some thoughts on substitutions:
- Cream Cheese: This is the star of our show! I always opt for full-fat cream cheese, preferably a good quality block type, not the spreadable kind from a tub. It needs to be at room temperature, which is crucial for a smooth, lump-free batter. If your cream cheese is cold, it will be hard to incorporate properly, leading to a lumpy batter and potentially a denser cake. There isn’t really a good substitute for cream cheese in this recipe if you want the classic flavor and texture.
- Eggs: You’ll need large eggs, separated into yolks and whites. The egg yolks are incorporated into the cream cheese batter, adding richness and helping with emulsification. The egg whites are whipped into a delicate meringue, which is where the “cotton” texture comes from. Make sure your egg whites are absolutely free of any yolk or grease, otherwise, they won’t whip up properly.
- Milk: I prefer using whole milk for its richness, which contributes to a more tender and flavorful cake. It helps create a smooth batter base. You could use 2% milk if that’s what you have on hand, but whole milk truly gives the best result. For an even richer cake, some people substitute a portion of the milk with heavy cream, but I find whole milk to be perfect for the classic cotton texture.
- Unsalted Butter: This provides moisture and richness. Like the cream cheese, it should be at room temperature or gently melted. Using unsalted butter allows us to control the salt content in the recipe.
- Cake Flour: This is a secret weapon for achieving a super tender, delicate crumb. Cake flour has a lower protein content than all-purpose flour, which means less gluten development and a softer cake. If you don’t have cake flour, you can make a reasonable substitute: for every 1 cup of cake flour, use ¾ cup all-purpose flour plus 2 tablespoons cornstarch. Sift them together several times to combine thoroughly.
- Granulated Sugar: We’ll use this in two places: a small amount in the cream cheese batter and the majority for the meringue. Fine granulated sugar is ideal for the meringue as it dissolves quickly, creating a stable, glossy meringue.
- Lemon Juice or Cream of Tartar: A small amount added to the egg whites helps stabilize the meringue, allowing it to whip up higher and hold its structure better. White vinegar can also be used as an alternative.
Step-by-Step Instructions
Making a Japanese Cotton Cheesecake might seem intimidating, but I promise, if you follow these steps carefully, you’ll be rewarded with a truly incredible dessert. The key is gentle handling and precise temperatures.
- Prepare Your Pan: First things first, get your baking pan ready. I use an 8-inch round springform pan. Line the bottom with parchment paper and grease the sides. For a traditional look and easier removal, I also like to line the sides with a strip of parchment paper that extends a couple of inches above the rim. This helps the cake rise without sticking. Wrap the outside of the pan securely with two layers of heavy-duty aluminum foil to prevent water from the water bath seeping in.
- Preheat Oven & Water Bath: Preheat your oven to 325°F (160°C). Fill a larger roasting pan (or any oven-safe pan that your cheesecake pan will fit into) with about an inch of hot water. This will be your water bath, or bain-marie, and it’s essential for even, gentle baking. Place it in the oven while it preheats.
- Prepare the Cream Cheese Batter: In a large heatproof bowl, combine the room-temperature cream cheese, milk, and butter. Place this bowl over a pot of simmering water (a double boiler setup), ensuring the bottom of the bowl doesn’t touch the water. Stir gently until the mixture is smooth and melted. Remove from heat and let it cool slightly.
- Add Egg Yolks and Dry Ingredients: Once the cream cheese mixture has cooled slightly, whisk in the egg yolks one at a time until fully incorporated. Then, sift in the cake flour (or your substitute) and a small amount of granulated sugar. Whisk gently until just combined and smooth. Be careful not to overmix at this stage; overmixing can develop gluten and make your cake tough. Set aside.
- Make the Meringue: In a separate, very clean, and dry bowl, beat the egg whites with an electric mixer on medium speed. Once they become foamy, add the lemon juice (or cream of tartar). Gradually add the remaining granulated sugar, a spoonful at a time, while continuing to beat on medium-high speed. Continue beating until you reach soft peaks. The meringue should be glossy and hold its shape but still be slightly pliable, not stiff and dry. Over-whipped meringue can be difficult to fold and result in a dry cake.
- Fold the Meringue into the Batter: This is a delicate step! Take about a third of your meringue and gently fold it into the cream cheese mixture using a spatula. Use a cutting and folding motion, trying not to deflate the meringue. Once mostly combined, add the remaining meringue in two additions, continuing to fold gently until no streaks of white remain and the batter is light and airy. Be patient and gentle – this is crucial for the “cotton” texture.
- Pour and Bake: Pour the cheesecake batter into your prepared pan. Gently tap the pan on the counter a few times to release any large air bubbles. Carefully place the cheesecake pan into the hot water bath in the preheated oven.
- Bake Slowly: Bake for 30 minutes at 325°F (160°C). After 30 minutes, reduce the oven temperature to 285°F (140°C) and continue baking for another 60-70 minutes, or until the top is golden brown and the cheesecake is puffed. The center should still have a slight jiggle. Resist the urge to open the oven door during baking, especially in the first hour.
- Cooling Process: Once baked, turn off the oven and prop the oven door open slightly (about 1 inch) with a wooden spoon. Let the cheesecake cool slowly inside the oven for at least 1 hour. This gradual cooling prevents cracking and major shrinking. After an hour, remove the cheesecake from the oven and the water bath, and let it cool completely on a wire rack at room temperature.
- Chill: Once completely cooled, cover the cheesecake with plastic wrap and refrigerate for at least 4 hours, or preferably overnight, before serving. This allows the flavors to meld and the texture to set perfectly.
Tips & Suggestions
Achieving that iconic jiggly, light-as-air Japanese Cotton Cheesecake is all about technique and a little patience. Here are my top tips to help you nail it every time:
- Room Temperature Ingredients are Non-Negotiable: I can’t stress this enough! Cream cheese, butter, and milk all need to be at room temperature to ensure a smooth, lump-free batter. Cold ingredients will make your batter clumpy, affecting the final texture.
- Don’t Overmix: Once you add the flour, mix just until combined. Overmixing develops gluten, which can lead to a dense, chewy cake instead of a light, cottony one. Similarly, when folding in the meringue, be as gentle as possible to retain all that precious air.
- Perfect Meringue is Key: Your meringue should be whipped to soft peaks – glossy, holds its shape, but still soft. If it’s too stiff, it’ll be hard to fold into the batter and can make your cake dry. If it’s too soft, your cake won’t rise as much. Ensure your egg whites are free of any fat or yolk.
- The Water Bath is Your Friend: Baking in a water bath (bain-marie) is essential for Japanese Cotton Cheesecake. It creates a moist, gentle baking environment, preventing cracks and ensuring the cake cooks evenly and slowly, resulting in that incredibly smooth, custard-like texture. Make sure your springform pan is well-wrapped in foil to prevent water seepage!
- Low and Slow Baking: This cheesecake is baked at a lower temperature for a longer time than traditional cheesecakes. This slow bake allows the cake to rise gradually and achieve that delicate, airy structure without drying out or cracking.
- Patience During Cooling: Resist the urge to pull your cheesecake out of the oven immediately. The gradual cooling process inside the oven with the door ajar is vital to prevent drastic temperature changes that can cause the cake to deflate rapidly or crack.
- Parchment Paper Lining: Lining both the bottom and sides of your springform pan with parchment paper is a game-changer. It makes removing the delicate cheesecake incredibly easy and helps ensure those perfectly smooth, straight sides.
- Oven Thermometer: Ovens can be notoriously inaccurate. Using an independent oven thermometer will ensure you’re baking at the precise temperatures required for this delicate cake.
- Sift Your Dry Ingredients: Always sift your flour and any other dry ingredients. This not only removes lumps but also aerates them, which contributes to a lighter crumb.
Storage
Once you’ve gone through the effort of creating this beautiful Japanese Cotton Cheesecake, you’ll want to make sure you store it properly to maintain its exquisite texture and flavor. It actually tastes even better after a night in the fridge!
- Refrigeration: This cheesecake must be stored in the refrigerator due to its dairy and egg content. Once it’s completely cooled to room temperature, cover it loosely with plastic wrap or place it in an airtight container. An airtight container is ideal as it prevents the cake from absorbing any fridge odors and keeps it from drying out. It will stay fresh and delicious for 3-5 days in the fridge.
- Freezing: If you want to enjoy your cheesecake later, it freezes quite well! I recommend slicing it into individual portions first. Wrap each slice tightly in plastic wrap, then place them in an airtight freezer-safe container or a freezer bag. It can be frozen for up to 1 month. To thaw, simply transfer a slice to the refrigerator overnight, or for a quicker thaw, leave it at room temperature for an hour or two.
- Serving: While delicious straight from the fridge, I find that Japanese Cotton Cheesecake is at its absolute best when allowed to sit at room temperature for about 15-30 minutes before serving. This slight warming allows the delicate flavors and textures to truly shine, making it even more melt-in-your-mouth.
Final Thoughts
And there you have it! I truly hope you’ve enjoyed the delightful journey to creating your very own Japanese Cotton Cheesecake. This isn’t just any dessert; it’s a culinary masterpiece that promises an experience unlike any other. Its ethereal lightness, the signature jiggly texture, and that melt-in-your-mouth tenderness are what set the Japanese Cotton Cheesecake apart from traditional cheesecakes. It’s pure cloud-like perfection, leaving a delicate, subtly sweet flavour that’s simply irresistible. I promise you, the effort is incredibly rewarding, and tasting this incredibly fluffy cake is a moment of pure bliss. So go ahead, treat yourself and your loved ones to this unique dessert – it’s an absolute must-try that will surely impress!
Authentic Japanese Cotton Cheesecake: Fluffy & Light Recipe
- Total Time: 2 hours
- Yield: 8 servings 1x
Description
Experience the ethereal lightness of Japanese Cotton Cheesecake, a dessert that melts in your mouth like a sweet cloud. This fluffy and jiggly cheesecake is a culinary masterpiece that will impress everyone at your table.
Ingredients
- 8 oz full-fat cream cheese, at room temperature
- 4 large eggs, separated into yolks and whites
- 1/2 cup whole milk
- 1/4 cup unsalted butter, at room temperature or gently melted
- 1 cup cake flour
- 3/4 cup granulated sugar, divided
- 1 tablespoon lemon juice or cream of tartar
Instructions
- Prepare Your Pan: Line the bottom of an 8-inch round springform pan with parchment paper and grease the sides. Wrap the outside of the pan securely with two layers of heavy-duty aluminum foil.
- Preheat Oven & Water Bath: Preheat your oven to 325°F (160°C) and fill a larger roasting pan with about an inch of hot water.
- Prepare the Cream Cheese Batter: In a large heatproof bowl, combine the cream cheese, milk, and butter. Place over a pot of simmering water and stir until smooth and melted. Remove from heat and let cool slightly.
- Add Egg Yolks and Dry Ingredients: Whisk in the egg yolks one at a time, then sift in the cake flour and a small amount of sugar. Whisk gently until just combined.
- Make the Meringue: In a clean bowl, beat the egg whites until foamy. Add lemon juice and gradually add the remaining sugar while beating until soft peaks form.
- Fold the Meringue into the Batter: Gently fold a third of the meringue into the cream cheese mixture, then add the remaining meringue in two additions until no streaks remain.
- Pour and Bake: Pour the batter into the prepared pan and tap to release air bubbles. Place the pan in the water bath and bake for 30 minutes.
- Bake Slowly: Reduce the oven temperature to 285°F (140°C) and continue baking for another 60-70 minutes until the top is golden brown and the center has a slight jiggle.
- Cooling Process: Turn off the oven and prop the door open slightly. Let the cheesecake cool inside for at least 1 hour, then remove and cool completely on a wire rack.
- Chill: Once cooled, cover with plastic wrap and refrigerate for at least 4 hours or overnight before serving.
- Prep Time: 30 mins
- Cook Time: 90 mins
- Category: Dessert
- Method: Baking
- Cuisine: Japanese
Nutrition
- Serving Size: 1 slice
- Calories: 250
- Sugar: 15 g
- Sodium: 200 mg
- Fat: 15 g
- Saturated Fat: 8 g
- Unsaturated Fat: 5 g
- Trans Fat: 0 g
- Carbohydrates: 20 g
- Fiber: 0 g
- Protein: 6 g
- Cholesterol: 100 mg
Keywords: Ensure all ingredients are at room temperature for a smooth batter. Be gentle when folding in the meringue to maintain the airy texture.
Leave a Comment