

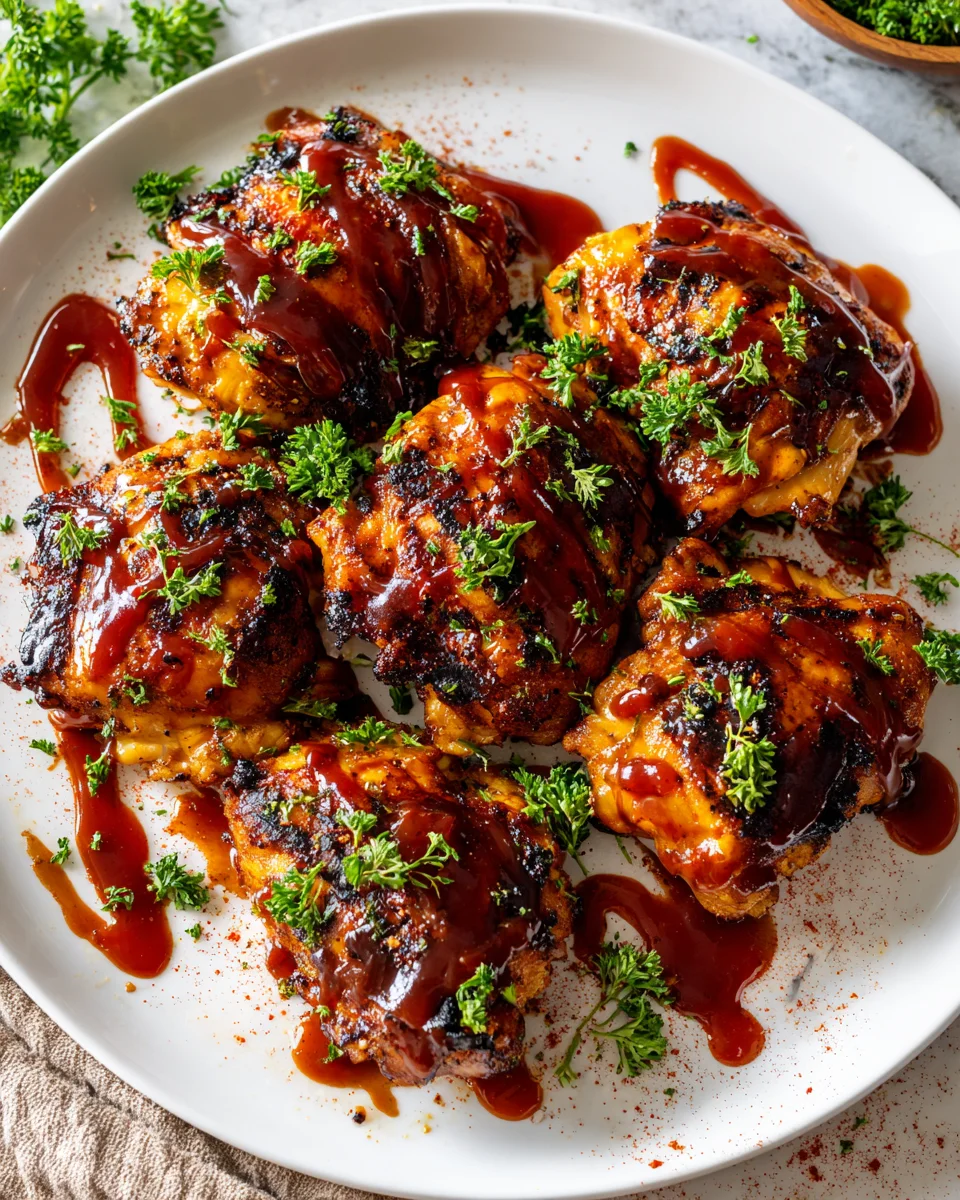
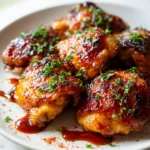
Caramelized Bbq Chicken Thighs In The Oven
Oh, prepare yourselves, because I am absolutely thrilled to share one of my all-time favorite, no-fuss recipes that delivers big on flavor: the Caramelized Bbq Chicken Thighs In The Oven. If you’re anything like me, you crave those deeply satisfying, sticky-sweet and savory BBQ flavors, but maybe don’t always have a grill handy or the time to stand over one. That’s precisely what makes this recipe so incredibly special!
You’re going to fall head over heels for this dish, I promise. Imagine perfectly tender, juicy chicken thighs, baked to perfection in your oven, until their skin is beautifully crispy and coated in a bubbling, finger-licking good BBQ sauce that has caramelized into a glorious, sticky glaze. It’s that irresistible combination of sweet, smoky, and tangy, all cooked to a melt-in-your-mouth tenderness without any fuss. This isn’t just another chicken dinner; it’s a weeknight revelation that tastes like you spent hours, when in reality, your oven does most of the hard work. Get ready for a simple yet spectacular meal that’s guaranteed to become a family favorite!

Ingredient Notes
Oh, I’m so excited to share all about my favorite way to make caramelized BBQ chicken thighs right in your oven! This dish is a true crowd-pleaser, and understanding the ingredients is the first step to success. While the recipe itself is straightforward, a few key components make all the difference in achieving that perfectly sticky, flavorful glaze.
Key Ingredients
- Chicken Thighs: For the absolute best results and that gorgeous caramelization, I always recommend using bone-in, skin-on chicken thighs. The skin renders beautifully, contributing to a wonderfully crispy texture, and the bone helps keep the meat incredibly juicy. You’ll want about 2.5-3 pounds, depending on how many you’re serving.
- Your Favorite BBQ Sauce: This is where the magic really happens! Choose a good quality BBQ sauce that you genuinely love. Whether you prefer a smoky, sweet, tangy, or even a spicy variety, it will define the flavor profile of your dish. I usually go for a classic sweet and smoky sauce for that perfect balance.
- Brown Sugar (or Honey/Maple Syrup): To really push that caramelization factor, a little extra sweetness goes a long way. Brown sugar adds a lovely molasses note and helps the sauce thicken and become incredibly sticky and glossy.
- Olive Oil: A light coating of olive oil helps the seasonings adhere to the chicken and contributes to that initial crisping of the skin before the sauce goes on.
- Spices: My go-to blend includes garlic powder, onion powder, smoked paprika (for an extra layer of BBQ flavor!), salt, and freshly ground black pepper. These seasonings create a fantastic base flavor for the chicken before the BBQ sauce takes over.
Substitutions
- Chicken Thighs: If you prefer boneless, skinless chicken thighs, go for it! Just be aware that the cooking time will be slightly shorter, and you might miss out on some of that crispy skin, though the caramelization on the meat itself will still be fantastic. Chicken drumsticks are also a great alternative, offering a similar cooking profile to bone-in thighs. If you’re using chicken breast, I’d suggest cutting it into thicker strips or using bone-in, skin-on breasts, as they tend to dry out more easily. Always monitor the internal temperature.
- BBQ Sauce: Feel free to experiment! If you’re feeling adventurous, you could even make your own BBQ sauce from scratch. Different brands and regional styles offer unique flavors, so don’t be afraid to try something new.
- Brown Sugar: Honey or maple syrup can be excellent substitutes, providing a similar sweet stickiness and aiding in the caramelization. They also impart their own distinct flavor notes, which can be a fun twist!
- Spices: Don’t have smoked paprika? Regular paprika works just fine. You could also try a pre-made BBQ rub blend if you have a favorite on hand. Just be mindful of the salt content if your rub already contains it.
Step-by-Step Instructions
Getting these caramelized BBQ chicken thighs just right in the oven involves a few simple, yet crucial, steps. The key is building layers of flavor and ensuring that the chicken cooks perfectly while the sauce transforms into a beautiful, sticky glaze. Follow along, and you’ll have a show-stopping meal ready in no time!
- Preheat Your Oven & Prep Your Pan: First things first, preheat your oven to 400°F (200°C). This temperature is ideal for getting the chicken thighs cooked through and the skin nice and crisp before we add the sauce. Line a baking sheet with parchment paper or foil for easier cleanup – trust me, caramelized BBQ sauce can be a sticky business! For even crispier skin all around, I often place an oven-safe wire rack on top of the lined baking sheet.
- Prepare the Chicken: Pat the chicken thighs thoroughly dry with paper towels. This step is incredibly important for achieving crispy skin and allowing the seasonings to adhere better. Excess moisture prevents browning. Next, trim off any large pieces of excess fat from the chicken thighs, but don’t remove all of it; some fat is essential for flavor and juiciness.
- Season the Chicken: In a large bowl, drizzle the chicken thighs with a tablespoon of olive oil. Sprinkle generously with garlic powder, onion powder, smoked paprika, salt, and black pepper. Use your hands to massage the seasonings into the chicken, ensuring every piece is well coated, especially under the skin if you can.
- Initial Bake (No Sauce Yet!): Arrange the seasoned chicken thighs in a single layer on your prepared baking sheet (or on the wire rack). Make sure there’s a little space between each piece for even cooking. Pop them into the preheated oven and bake for 25-30 minutes. This initial bake helps to render out some of the fat, crisp up the skin, and partially cook the chicken before we introduce the sweet BBQ sauce. This prevents the sauce from burning too quickly.
- Prepare the Caramelizing Sauce: While the chicken is in its initial bake, combine your chosen BBQ sauce with the brown sugar (or honey/maple syrup) in a small bowl. Stir well until the sugar is dissolved and the sauce is thoroughly mixed. This extra sweetness is our secret weapon for that irresistible caramelization.
- Brush with BBQ Sauce & Continue Baking: After the initial 25-30 minutes, carefully remove the chicken from the oven. Generously brush the tops and sides of each chicken thigh with your prepared BBQ sauce mixture. Return the chicken to the oven and continue baking for another 15-20 minutes, or until the internal temperature of the chicken reaches 165°F (74°C) using a meat thermometer inserted into the thickest part of the thigh, avoiding the bone.
- Achieve Ultimate Caramelization: During this final baking phase, I like to baste the chicken with more sauce every 5-7 minutes. This helps build up layers of that sticky, glossy glaze. If you want an even deeper caramelization and a slight char, you can turn on the broiler for the last 2-3 minutes. Keep a very close eye on it, as the sugar in the sauce can burn quickly under the broiler!
- Rest and Serve: Once the chicken is beautifully caramelized and cooked through, remove it from the oven. Let the chicken rest on the baking sheet for 5-10 minutes before serving. This resting period allows the juices to redistribute, resulting in incredibly moist and tender chicken.
Tips & Suggestions
I’ve made these caramelized BBQ chicken thighs countless times, and over the years, I’ve picked up a few tricks that really elevate the dish. These tips will help you achieve the best flavor, texture, and that gorgeous sticky glaze every single time!
- Patting Dry is Crucial: I can’t stress this enough! Always pat your chicken thighs thoroughly dry with paper towels before seasoning. Removing excess moisture is the secret to crispy skin and allows for better browning and caramelization.
- Don’t Sauce Too Early: This is a common mistake! If you apply the BBQ sauce at the very beginning of the cooking process, the sugars in the sauce will likely burn before the chicken is fully cooked through. The two-stage baking method (initial bake, then sauce) ensures the chicken cooks properly and the sauce caramelizes beautifully without scorching.
- Use a Wire Rack: For even crispier skin and caramelization all around, place your chicken thighs on an oven-safe wire rack set over a foil-lined baking sheet. This allows air to circulate around the chicken and prevents it from sitting in rendered fat, promoting a crispier exterior.
- Internal Temperature is Key: Always use a meat thermometer to ensure your chicken is safely cooked. Insert it into the thickest part of the thigh, avoiding the bone, until it reads 165°F (74°C). This guarantees safety and ensures your chicken is perfectly juicy.
- Basting for Layers of Flavor: Don’t be shy with the basting! Brushing the chicken with additional BBQ sauce every 5-7 minutes during the final baking stage builds up those beautiful, glossy layers of caramelized flavor.
- Broil for Extra Char: If you love a slightly charred, extra-sticky finish, turn on your broiler for the last 2-3 minutes of cooking. Watch it very carefully, as the high heat can burn the sugar in the sauce quickly. You just want a little extra sizzle and deep color.
- Experiment with BBQ Sauce Flavors: While I have my go-to, don’t be afraid to try different types of BBQ sauce! A spicier sauce can add a nice kick, or a vinegar-based one can offer a tangy counterpoint. The possibilities are endless!
- Rest Your Chicken: It might be tempting to dig in right away, but allowing the chicken to rest for 5-10 minutes after it comes out of the oven lets the juices redistribute throughout the meat, resulting in a much more tender and moist bite.
- Serving Suggestions: These caramelized BBQ chicken thighs are incredibly versatile! I love serving them with classic comfort sides like creamy mashed potatoes, fresh coleslaw, buttery corn on the cob, or a simple green salad to cut through the richness.
Storage
One of the great things about these caramelized BBQ chicken thighs is how well they store, making them perfect for meal prep or enjoying delicious leftovers. Here’s how I typically handle them:
- Refrigeration: Once the chicken has cooled completely to room temperature (usually within 1-2 hours of cooking), transfer any leftovers to an airtight container. They will keep beautifully in the refrigerator for 3-4 days.
- Freezing: If you’ve made a larger batch, these chicken thighs freeze exceptionally well. Again, ensure they are completely cool. You can wrap individual thighs tightly in plastic wrap and then foil, or place them in a freezer-safe bag or airtight container. They will maintain their quality in the freezer for up to 2-3 months. When you’re ready to enjoy them, thaw overnight in the refrigerator.
- Reheating:
- Oven (Recommended): My preferred method for reheating is the oven, as it helps maintain some of that delicious crispy skin and sticky glaze. Preheat your oven to 300°F (150°C). Place the chicken thighs on a baking sheet and heat for 15-20 minutes, or until warmed through. This lower temperature prevents the sauce from burning while the chicken reheats.
- Microwave: For a quicker option, you can reheat individual portions in the microwave. Place a thigh on a microwave-safe plate, cover it loosely, and heat on medium power for 1-2 minutes, checking and flipping halfway, until hot. Be aware that the skin might not be as crispy as when reheated in the oven, but the flavor will still be fantastic.
Final Thoughts
So there you have it! My absolute favorite way to achieve succulent, flavor-packed chicken without firing up the grill. I truly believe that these Caramelized Bbq Chicken Thighs In The Oven are a game-changer for weeknight dinners and special occasions alike. The magic truly happens in the oven, where that sticky-sweet BBQ sauce transforms into a beautiful, glossy caramelization, locking in all the juices and creating an irresistible crust. The ease of preparation combined with the incredible depth of flavor makes these Caramelized Bbq Chicken Thighs In The Oven an undeniable crowd-pleaser. Trust me, once you experience the tender, juicy results and that unforgettable caramelized finish, you’ll be adding this recipe to your regular rotation. Go on, give these incredible Caramelized Bbq Chicken Thighs In The Oven a try – your taste buds will thank you!
Juicy Caramelized BBQ Chicken Thighs: Easy Oven Recipe
- Total Time: 1 hour
- Yield: 4 servings 1x
Description
Experience the irresistible combination of sweet, smoky, and tangy flavors with these juicy caramelized BBQ chicken thighs. Perfectly tender and coated in a sticky glaze, this easy oven recipe is a weeknight favorite that the whole family will love.
Ingredients
- 2.5–3 pounds bone-in, skin-on chicken thighs
- Your favorite BBQ sauce
- Brown sugar (or honey/maple syrup)
- Olive oil
- Garlic powder
- Onion powder
- Smoked paprika
- Salt
- Freshly ground black pepper
Instructions
- Preheat your oven to 400°F (200°C) and line a baking sheet with parchment paper or foil.
- Pat the chicken thighs thoroughly dry with paper towels and trim off any large pieces of excess fat.
- Drizzle the chicken thighs with a tablespoon of olive oil and sprinkle generously with garlic powder, onion powder, smoked paprika, salt, and black pepper. Massage the seasonings into the chicken.
- Arrange the seasoned chicken thighs in a single layer on the prepared baking sheet and bake for 25-30 minutes.
- While the chicken is baking, combine your chosen BBQ sauce with the brown sugar (or honey/maple syrup) in a small bowl and stir until the sugar is dissolved.
- After the initial bake, remove the chicken from the oven and brush the tops and sides with the BBQ sauce mixture. Return to the oven and continue baking for another 15-20 minutes, or until the internal temperature reaches 165°F (74°C).
- Baste the chicken with more sauce every 5-7 minutes during the final baking phase for extra caramelization. Optionally, turn on the broiler for the last 2-3 minutes for a deeper char.
- Once cooked through, remove the chicken from the oven and let it rest for 5-10 minutes before serving.
- Prep Time: 15 mins
- Cook Time: 45 mins
- Category: Dinner
- Method: Baking
- Cuisine: American
Nutrition
- Serving Size: 1 thigh
- Calories: 320
- Sugar: 10 g
- Sodium: 600 mg
- Fat: 20 g
- Saturated Fat: 5 g
- Unsaturated Fat: 15 g
- Trans Fat: 0 g
- Carbohydrates: 14 g
- Fiber: 0 g
- Protein: 25 g
- Cholesterol: 100 mg
Keywords: Patting the chicken dry is crucial for crispy skin. Don't sauce too early to prevent burning. Use a wire rack for even crispiness, and always check the internal temperature for safety.

Leave a Comment