

Ingredients Crack Green Beans are not just a side dish; they are a culinary phenomenon that consistently steals the show at any meal. Have you ever served a vegetable side that elicited gasps of delight and prompted requests for a second, then third, helping? That’s precisely the magic we’re delving into today. I’m thrilled to share with you the secrets behind this unbelievably addictive recipe, a dish so universally beloved it earned its telling moniker for a reason.
For generations, green beans have graced our tables, but this particular preparation elevates the humble legume to superstar status. While it might not boast ancient origins, its widespread popularity in modern home cooking and potlucks speaks volumes about its undeniable appeal. It embodies the essence of transforming simple garden staples into something extraordinary, making it a go-to for family dinners and festive gatherings alike. It’s a testament to how clever seasoning and a touch of savory goodness can create an unforgettable experience.
Why Everyone Craves These Green Beans
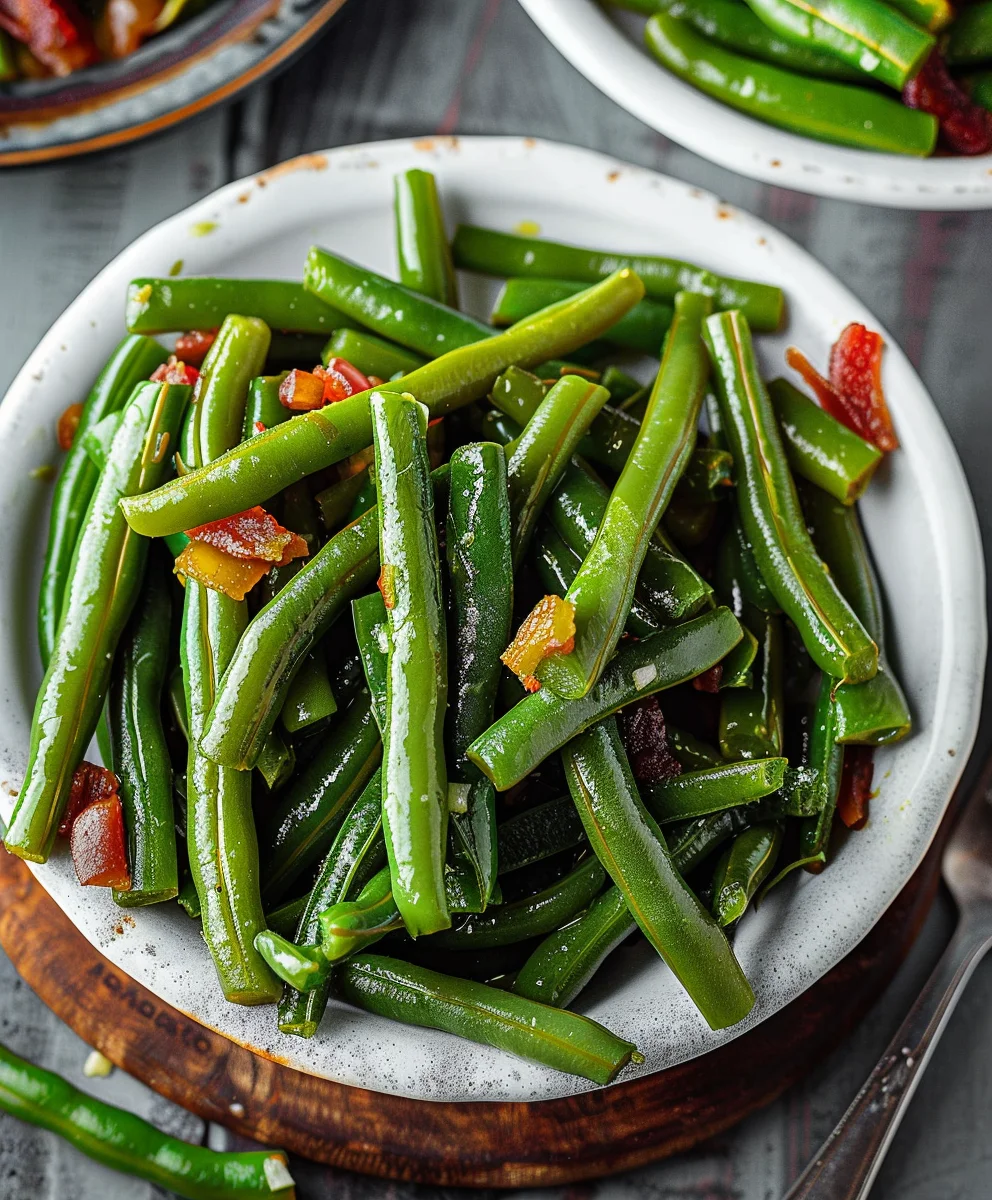
The allure lies in a harmonious blend of textures and tastes: tender-crisp green beans infused with a savory, garlicky, and slightly sweet umami punch that leaves you craving more. It’s incredibly convenient to prepare, yet delivers a gourmet flavor profile that complements virtually any main course. Once you experience the irresistible charm of these Ingredients Crack Green Beans, you’ll understand why they vanish from the serving dish so quickly. Prepare yourself for compliments, and perhaps, a few jealous inquiries about your culinary wizardry!

Ingredients:
Gathering the right ingredients for crack green beans is the first crucial step to creating this absolutely addictive side dish. Trust me, once you taste these, you’ll understand why they earn the name “crack” green beans! I always make sure to select the freshest produce and high-quality bacon for the best possible outcome. Here’s everything you’ll need:
- Fresh Green Beans: 2 pounds, crisp and vibrant. Look for beans that snap easily when bent. I find that French green beans (haricots verts) also work wonderfully here if you prefer a slightly thinner, more tender bean, though standard green beans hold up beautifully to the baking process. Ensure they are washed thoroughly and trimmed of their tough ends.
- Thick-Cut Bacon: 8-10 slices. Using thick-cut bacon is key because it renders a good amount of fat, which we’ll use for flavor, and provides substantial crispy bits to mix in with the beans. Avoid overly thin bacon, as it tends to disappear too much.
- Light Brown Sugar: 1/2 cup, firmly packed. This is one of the stars of our irresistible glaze, providing a deep, molasses-rich sweetness that caramelizes beautifully in the oven.
- Unsalted Butter: 1/4 cup (4 tablespoons), melted. Butter adds a luscious richness and helps the glaze adhere perfectly to every single bean, enhancing the overall flavor profile.
- Fresh Garlic: 3-4 cloves, minced. Fresh garlic is non-negotiable for its aromatic depth and pungent kick that beautifully balances the sweetness of the brown sugar. Avoid garlic powder if you can; fresh truly makes a difference here.
- Low-Sodium Soy Sauce: 2 tablespoons. This ingredient is a secret weapon, adding a profound umami note and savory depth that beautifully complements the sweetness and smokiness, preventing the glaze from being cloyingly sweet. Low-sodium is preferred to control the overall saltiness, as bacon and potential added salt will also contribute.
- Apple Cider Vinegar: 1 tablespoon. A touch of acidity is vital to cut through the richness and sweetness of the glaze, brightening all the flavors and making the dish more complex and balanced. It really makes everything pop!
- Red Pepper Flakes: 1/2 teaspoon (optional). If you enjoy a very subtle warmth and a hint of spice, a dash of red pepper flakes adds a fantastic dimension without making the dish overtly hot. Feel free to adjust to your preference or omit entirely.
- Freshly Ground Black Pepper: 1/2 teaspoon. Freshly ground pepper offers a pungent counterpoint to the sweet and savory elements.
- Kosher Salt: 1/4 teaspoon, or to taste. Remember that bacon and soy sauce contribute significant saltiness, so I always recommend starting with a small amount and adjusting at the end if needed. Taste before adding more!
Preparing Your Green Beans and Bacon: The Foundation of Flavor
Alright, let’s get down to business! This first phase is all about getting our primary ingredients for crack green beans ready for their transformation. Taking the time here ensures consistent cooking and maximum flavor development.
-
Preheat Your Oven and Prep Your Baking Dish:
First things first, I always preheat my oven to 375°F (190°C). This allows the oven to come to a steady temperature while I’m doing my prep, ensuring even cooking. Next, I grab a large baking dish – usually a 9×13-inch rectangular one, or sometimes a slightly larger roasting pan if I’m making a double batch. Line it with parchment paper for easier cleanup, if you wish. I often skip this step if I’m confident in my dish’s non-stick properties, but it’s a great tip if you’re worried about sticky glaze!
-
Prepare the Green Beans:
Now, let’s talk about those beautiful green beans. I start by rinsing the two pounds of fresh green beans under cool water to remove any dirt or debris. Then comes the trimming. I meticulously snap or cut off the tough stem ends of each bean. You don’t necessarily need to trim the wispy tail end, but some people prefer a tidier look. The goal here is consistency: ensure all beans are roughly similar in length to promote even cooking. If you have any exceptionally long beans, you can cut them in half to match the others. Once trimmed, I set them aside in a colander to drain any excess water. They’re ready to absorb all that amazing flavor we’re about to build!
-
Cook the Bacon to Crispy Perfection:
This step is absolutely crucial for building flavor and texture. I lay the 8-10 slices of thick-cut bacon in a single layer in a large skillet or frying pan. I prefer to use a pan that’s heavy-bottomed to ensure even cooking. Cook the bacon over medium heat, turning occasionally, until it’s wonderfully crispy. This usually takes about 8-12 minutes, depending on your stove and the thickness of the bacon. As it cooks, watch for that beautiful golden-brown color and listen for the sizzling to subside as the moisture cooks out. Once crispy, I transfer the bacon to a plate lined with paper towels to drain excess fat. This keeps it nice and crunchy. Do NOT discard the bacon fat! We’re going to reserve about 2 tablespoons of that flavorful bacon grease in the skillet. This rendered fat is a foundational component of our glaze and imparts incredible depth to our crack green beans.
-
Chop the Crispy Bacon:
Once the bacon has cooled slightly and is easier to handle, I coarsely chop it into bite-sized pieces. I’m aiming for roughly 1/2-inch to 1-inch pieces. These little nuggets of smoky, salty crunch are going to be mixed throughout our green beans, adding an amazing textural contrast and burst of flavor in every spoonful. Set the chopped bacon aside for later.
Crafting the Irresistible Glaze: The Secret Sauce for Crack Green Beans
This is where the magic truly happens! The glaze is what transforms simple green beans into something extraordinarily flavorful and addictive. Every single component in this blend of ingredients for crack green beans plays a vital role in creating that perfect balance of sweet, savory, tangy, and smoky. Pay close attention to these steps to ensure your glaze is absolutely perfect.
-
Mince the Garlic:
While the bacon is cooking or cooling, I quickly mince the 3-4 cloves of fresh garlic. I aim for a very fine mince so that the garlic flavor is evenly distributed without any large, overpowering chunks. Using a garlic press works wonderfully here, or a sharp chef’s knife. Fresh garlic truly brings a vibrant aroma and taste that complements the rich glaze beautifully.
-
Begin Building the Glaze Base:
Remember those 2 tablespoons of reserved bacon fat in the skillet? This is where they shine! Over medium-low heat, I add the minced garlic to the bacon fat in the skillet. Sauté the garlic for about 30-60 seconds, just until it becomes fragrant. Be very careful not to burn the garlic, as burnt garlic turns bitter and will ruin the delicate balance of our glaze. It should smell sweet and aromatic, not acrid.
-
Melt in the Butter:
After the garlic is fragrant, I add the 1/4 cup (4 tablespoons) of unsalted butter to the skillet with the garlic and bacon fat. I let it melt slowly, stirring gently, allowing all these rich flavors to meld together. The butter adds another layer of velvety richness to our glaze, ensuring a luxurious mouthfeel.
-
Incorporate the Sweet and Savory Elements:
Once the butter is fully melted, I stir in the 1/2 cup of packed light brown sugar. I continue stirring until the sugar is completely dissolved into the butter and bacon fat mixture, creating a smooth, glossy base. Then, I pour in the 2 tablespoons of low-sodium soy sauce and the 1 tablespoon of apple cider vinegar. This is where the glaze starts to smell absolutely incredible! The soy sauce adds that essential umami depth, while the apple cider vinegar provides a much-needed acidic tang to cut through the sweetness and richness, making the overall flavor profile more complex and bright.
-
Season the Glaze:
Finally, I add the seasonings to the glaze. This includes 1/2 teaspoon of freshly ground black pepper and, if I’m feeling a little adventurous, 1/2 teaspoon of red pepper flakes for a subtle kick. I whisk everything together thoroughly until the glaze is smooth, uniform, and slightly thickened. Give it a quick taste! Remember, the bacon and soy sauce contribute salt, so I rarely add much additional salt at this stage, but a tiny pinch of kosher salt (about 1/4 teaspoon) can be added if it feels like it needs a slight boost. This incredibly fragrant and delicious glaze is now ready to coat our green beans.
Assembling and Baking to Perfection: Bringing Our Crack Green Beans to Life
With our green beans prepped, bacon crispy, and glaze perfected, it’s time to bring all these wonderful ingredients for crack green beans together. This is the stage where everything combines and transforms into that utterly irresistible side dish in the oven.
-
Combine Green Beans and Glaze:
I take the trimmed green beans and place them directly into the large baking dish or roasting pan. Then, I pour that glorious, warm glaze evenly over all the green beans. Using a pair of tongs or a large spoon, I gently toss the beans, making sure every single green bean is thoroughly coated in the glaze. This thorough coating is paramount, as it ensures maximum flavor in every bite. I want to see that glossy glaze clinging to each bean!
-
Add the Bacon:
Now, it’s time for the bacon! I sprinkle the chopped crispy bacon evenly over the glazed green beans. I usually do another quick gentle toss at this point to integrate some of the bacon into the beans, but I also like to leave some on top so it gets extra crispy during baking. This layering of flavors and textures is what makes these green beans so special.
-
Spread Evenly in Baking Dish:
Once everything is combined, I spread the green beans in a single, even layer in the baking dish. This isn’t just for aesthetics; an even layer promotes consistent cooking and allows the glaze to caramelize beautifully around all the beans. If the beans are piled too high, they’ll steam rather than roast, and we want that lovely roasted, slightly caramelized texture.
-
Bake Until Tender and Caramelized:
I carefully place the baking dish into the preheated 375°F (190°C) oven. The baking time typically ranges from 20 to 30 minutes. After about 15 minutes, I usually give the beans a gentle stir to redistribute the glaze and bacon, ensuring even caramelization. I continue baking until the green beans are tender-crisp – they should still have a slight bite but be soft enough to eat comfortably. You’ll also notice the glaze thickening and caramelizing around the beans, turning a deeper, richer brown. The bacon bits on top might also get a little extra crisp. Keep an eye on them during the last 5-10 minutes to prevent over-browning of the glaze.
-
Rest and Serve:
Once the crack green beans are perfectly cooked, I carefully remove the dish from the oven. I let them rest for about 5 minutes before serving. This brief resting period allows the glaze to set slightly and the flavors to fully meld. During this time, the scent that fills my kitchen is simply intoxicating! I give them one final gentle stir before transferring them to a serving dish. These incredibly flavorful green beans are now ready to be devoured!
Serving Suggestions and Variations: Enhancing Your Crack Green Beans Experience
These crack green beans are fantastic just as they are, hot out of the oven, but there are always ways to elevate them further or adapt them to your specific tastes. Their versatility is one of their greatest strengths, making them a perfect accompaniment to almost any meal.
-
Perfect Pairings:
I find that these green beans are an exceptional side dish for a wide variety of main courses. They pair beautifully with roasted chicken, pork loin, grilled steak, or even a simple weeknight meatloaf. The balance of sweet, savory, and smoky flavors makes them a star alongside richer proteins. They also shine brightly during holiday meals, often stealing the show from more traditional vegetable offerings. I particularly love serving them alongside a creamy mashed potato or a fluffy rice pilaf, as their intense flavor provides a lovely contrast to milder starch-based sides.
-
Spice It Up (or Down!):
If you’re a fan of a little more heat, don’t hesitate to increase the amount of red pepper flakes in the glaze. I sometimes add a full teaspoon for a noticeable kick. Alternatively, a tiny pinch of cayenne pepper can also be incorporated. If you prefer no heat at all, simply omit the red pepper flakes entirely. The beauty of this recipe is its adaptability to your personal spice tolerance.
-
Add a Nutty Crunch:
For an extra layer of texture and flavor, I occasionally sprinkle toasted slivered almonds or chopped pecans over the green beans during the last 5 minutes of baking, or right before serving. The warmth of the nuts adds a delightful crunch and a subtle earthy note that complements the other flavors wonderfully. Just be sure to toast them lightly beforehand to bring out their full aroma.
-
Cheese, Please!:
While not traditional, a sprinkle of freshly grated Parmesan cheese or crumbled feta cheese just before serving can add a fantastic salty, tangy dimension to these green beans. The sharp notes of the cheese can beautifully cut through the richness of the glaze, adding another layer of complexity. I particularly enjoy a hint of Parmesan with the savory undertones.
-
Herbaceous Freshness:
To add a final touch of freshness, I sometimes garnish the finished dish with a sprinkle of fresh chopped parsley or chives. The bright, herbaceous notes provide a lovely visual contrast and a burst of clean flavor that lightens the dish slightly. This is especially nice if you’re serving them for a more formal occasion.
-
Make Ahead and Reheating Tips:
One of the best things about these crack green beans is that they can be partially prepared in advance. You can cook the bacon and make the glaze a day ahead and store them separately in the refrigerator. When you’re ready to bake, simply combine all the ingredients and follow the baking instructions. For reheating leftovers, I usually place them back in a baking dish and warm them in a preheated oven at 300°F (150°C) for about 10-15 minutes, or until heated through. This helps maintain the texture better than microwave reheating. You can also gently warm them in a skillet on the stovetop over medium-low heat, stirring occasionally. These tips ensure that even leftovers are just as delightful as the fresh batch!
Conclusion:
I truly hope you’re as excited to try this incredible recipe as I am to share it with you! If there’s one dish I insist you add to your culinary repertoire, it’s this one. Why is it a must-try, you ask? Because it effortlessly transforms humble green beans into something truly extraordinary – a side dish so addictively flavorful, so perfectly seasoned, and with just the right texture that it often steals the show from the main course. We’re talking about a dish that promises a delightful crunch, followed by a savory explosion of garlic and spices, all wrapped around the natural freshness of crisp green beans. It’s simple enough for a busy weeknight yet sophisticated enough to grace your most special holiday table. The secret lies in the masterful blend of seasonings that create that irresistible “crack” effect – making every bite utterly craveable. Trust me when I say, once you taste these, you’ll understand why I’m so enthusiastic.
Elevate Your Meal: Serving Suggestions
The versatility of this dish is another reason it’s a personal favorite. These perfectly seasoned green beans make an outstanding accompaniment to almost any protein. Imagine them alongside a succulent roasted chicken, a perfectly grilled steak, or flaky baked salmon. They cut through richness beautifully, adding a bright, zesty counterpoint to heartier meals. For a vegetarian feast, they pair wonderfully with a hearty grain bowl or a lentil shepherd’s pie. Planning a holiday spread? These will undoubtedly be the first side dish to disappear from the buffet, offering a vibrant green pop and an unforgettable flavor that guests will rave about. They even stand alone as a fantastic, healthy snack if you find yourself reaching for something savory and satisfying.
Unleash Your Creativity: Exciting Variations
While the core recipe for these green beans is phenomenal on its own, I always encourage you to make it your own! Here are a few ideas to get your creative juices flowing:
- Spice It Up: If you love a little extra kick, a pinch more red pepper flakes, or even a dash of smoked paprika, can add an exciting depth and warmth.
- Herbal Infusion: Fresh herbs are always a welcome addition. A sprinkle of chopped fresh parsley, dill, or a sprig of thyme added in the last few minutes of cooking can brighten the flavors even further.
- Crunch Factor: For an additional layer of texture, consider tossing in some toasted slivered almonds, pecans, or even crispy fried onions just before serving.
- Cheesy Goodness: A light dusting of freshly grated Parmesan or a crumble of feta cheese adds a lovely savory, tangy note that complements the green beans wonderfully.
- Lemon Zest: A final squeeze of fresh lemon juice or a dash of lemon zest before serving can really lift all the flavors, adding a vibrant brightness.
- Bacon Bits: For those who enjoy a richer, meatier flavor, crispy cooked bacon bits folded in at the end are always a crowd-pleaser.
Don’t be afraid to experiment with these suggestions, or come up with your own unique twists. The beauty of these Ingredients Crack Green Beans is their robust flavor profile that can stand up to, and be enhanced by, thoughtful additions.
Your Turn: Try It and Share!
Now, it’s your turn! I genuinely hope you’ll take the plunge and whip up a batch of these extraordinary green beans in your own kitchen. I promise you, the aroma alone will be enough to get your mouth watering. This isn’t just another side dish; it’s a culinary experience that will impress your family, delight your friends, and most importantly, satisfy your own cravings for something truly delicious. Once you’ve made them, I would absolutely love to hear about your experience! Did you stick to the original recipe, or did you try one of my variations? Perhaps you invented your own unique spin? Please, share your stories, your photos, and your feedback. Your insights are invaluable and help our community grow. Don’t wait – gather your ingredients and get ready to enjoy one of the most irresistible green bean dishes you’ll ever make. Happy cooking, and I can’t wait to hear from you!

Crack Green Beans Recipe
These Crack Green Beans are a culinary phenomenon, a universally beloved side dish so addictive it consistently steals the show at any meal. Infused with a savory, garlicky, and slightly sweet umami punch, they transform humble green beans into an unforgettable experience.
Ingredients
-
5 cans cut green beans, drained
-
8 slices Beef Bacon, cooked and chopped
-
⅔ cup Light Brown Sugar
-
¾ cup Unsalted Butter, melted
-
1 ½ tsp Fresh Garlic, minced
-
2 Tbsp Low-Sodium Soy Sauce
-
1 Tbsp Apple Cider Vinegar
-
½ tsp Red Pepper Flakes (optional)
-
½ tsp Freshly Ground Black Pepper
-
¼ tsp Kosher Salt, or to taste
Instructions
-
Step 1
Preheat oven to 375°F (190°C). Prepare a large baking dish (9×13 inch). Cook 8 slices of Beef Bacon until crispy. Remove bacon, chop into bite-sized pieces, and set aside. Reserve 2 tablespoons of bacon fat in the skillet. -
Step 2
In the skillet with reserved bacon fat, sauté 1 ½ tsp minced garlic over medium-low heat for 30-60 seconds until fragrant. Do not burn. -
Step 3
Add ¾ cup melted unsalted butter to the skillet. Stir in ⅔ cup light brown sugar until dissolved. Stir in 2 Tbsp low-sodium soy sauce and 1 Tbsp apple cider vinegar. Add ½ tsp black pepper and ½ tsp red pepper flakes (optional). Whisk until smooth. Taste and add ¼ tsp kosher salt if needed. -
Step 4
Drain 5 cans of cut green beans and place them in the prepared baking dish. Pour the warm glaze over the beans and toss to coat thoroughly. Sprinkle the chopped crispy beef bacon over the glazed green beans and toss gently. Spread the beans in a single, even layer. -
Step 5
Bake for 20-30 minutes, or until tender-crisp and the glaze is caramelized. Stir once after 15 minutes to ensure even cooking. Remove from oven, let rest 5 minutes, then stir gently before serving.
Important Information
Nutrition Facts (Per Serving)
It is important to consider this information as approximate and not to use it as definitive health advice.
Allergy Information
Please check ingredients for potential allergens and consult a health professional if in doubt.


Leave a Comment