

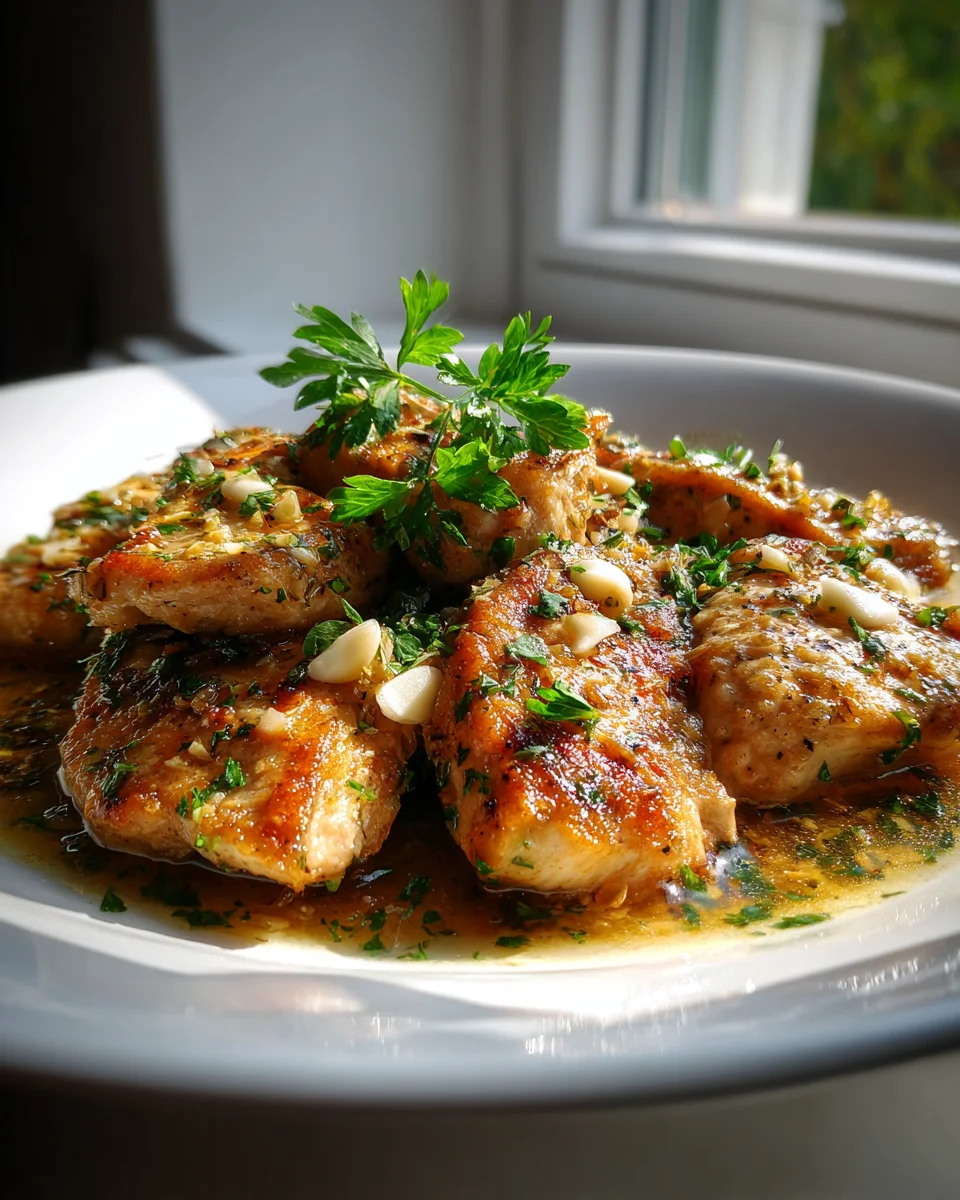
Garlic Chicken Recipe With Crispy Edges (skillet Method)
I am so excited to share my secret weapon for a truly satisfying weeknight dinner that tastes like you spent hours in the kitchen. This isn’t just any chicken recipe; it’s the Garlic Chicken Recipe With Crispy Edges (skillet Method), and it’s about to become a staple in your home. What makes this recipe truly special, you ask? Well, it’s all in the name! We’re talking perfectly seared chicken, generously infused with aromatic garlic, boasting those irresistible, golden-brown crispy edges that only a hot skillet can deliver. You’re going to absolutely love how incredibly simple it is to achieve such a spectacular meal. In just one pan, you’ll transform humble chicken pieces into tender, juicy perfection with that fantastic textural contrast that makes every bite exciting. It’s quick, it’s bursting with flavor, and it brings that comforting, gourmet touch right to your dinner table without any fuss. Get ready to experience chicken like never before!

Welcome to my kitchen! If you’re anything like me, you appreciate a weeknight meal that’s packed with flavor, satisfying, and doesn’t require a mountain of dishes. This Garlic Chicken Recipe with Crispy Edges, made using the skillet method, hits all those marks and then some. It’s become a go-to in my house, and I’m so excited to share it with you. We’re talking tender, juicy chicken infused with aromatic garlic, boasting those irresistible golden-brown, crispy edges that make every bite a delight. The beauty of the skillet method is its efficiency and the incredible crust it develops on the chicken. Let’s get cooking!
Ingredient Notes
To achieve the best results for our Garlic Chicken with Crispy Edges, understanding a few key ingredients and potential substitutions will set you up for success. I always aim for quality and freshness here, as they really shine through.
- Chicken: For this recipe, I highly recommend using boneless, skinless chicken thighs. Their slightly higher fat content keeps them incredibly juicy and forgiving, even with high-heat searing, which is essential for those crispy edges. They also develop a fantastic sear. If you prefer chicken breasts, that’s absolutely fine! I suggest cutting them into 1-inch thick pieces or pounding them evenly to about ½ to ¾ inch thickness. This ensures they cook through quickly and evenly without drying out, allowing those edges to crisp up nicely.
- Fresh Garlic: This is our star! Don’t skimp here. Freshly minced garlic provides an unparalleled depth of flavor. I usually use about 6-8 cloves, but if you’re a garlic fiend like me, feel free to add a couple more! Pre-minced garlic in a jar can be used in a pinch, but the flavor won’t be quite as vibrant.
- High-Smoke Point Oil: To get those beautiful crispy edges, we need a good searing oil. I usually reach for olive oil, avocado oil, or grapeseed oil. These can handle the higher heat required without smoking excessively or imparting off-flavors. Avoid butter for the initial sear, as it tends to burn at high temperatures.
- Chicken Broth: This forms the base of our simple, savory garlic sauce. I prefer low-sodium chicken broth so I can control the seasoning myself. If you don’t have broth, water with a dissolved bouillon cube works too.
- A Touch of Acidity: A splash of apple cider vinegar or fresh lemon juice at the end brightens up the entire dish, cutting through the richness and enhancing the garlic flavor. It’s a small addition that makes a big difference!
- Seasonings: Beyond salt and freshly ground black pepper, I sometimes like to add a pinch of smoked paprika for a subtle smoky note and a dash of onion powder to complement the garlic. These are optional but highly recommended for an extra layer of flavor.
- Fresh Parsley or Chives: A sprinkle of fresh, chopped herbs at the end adds a pop of color and freshness. It’s the perfect garnish.
Step-by-Step Instructions
Creating this Garlic Chicken with Crispy Edges is straightforward, but a few key steps will ensure those perfectly seared, flavorful results. Follow these instructions, and you’ll be enjoying a fantastic meal in no time!
- Prepare the Chicken: First things first, pat your chicken pieces thoroughly dry with paper towels. This is a critical step for achieving those crispy edges – moisture prevents searing. Season both sides generously with salt, black pepper, and any optional seasonings like smoked paprika or onion powder.
- Heat the Skillet: Place a large, heavy-bottomed skillet (cast iron or stainless steel works best) over medium-high heat. Add your chosen high-smoke point oil (about 1-2 tablespoons) and let it get shimmering hot. You want to see wisps of smoke, but not heavy smoke.
- Sear the Chicken: Carefully place the chicken pieces in the hot skillet in a single layer, ensuring not to overcrowd the pan. If necessary, work in batches. Allow the chicken to sear undisturbed for 4-6 minutes, or until a deep golden-brown crust forms on the bottom and the edges begin to look crispy. Resist the urge to move it too soon!
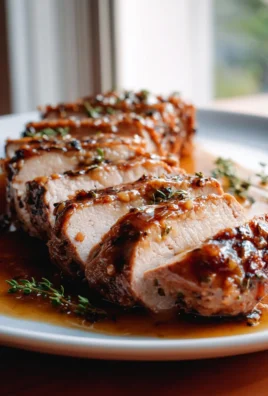
- Flip and Finish Searing: Flip the chicken pieces and sear the other side for another 4-6 minutes, until beautifully golden-brown and cooked through. The internal temperature should reach 165°F (74°C). Once cooked, transfer the chicken to a plate and tent loosely with foil to keep warm and allow it to rest. This helps keep the chicken juicy.
- Sauté the Garlic: Reduce the heat to medium-low. If the pan looks dry, add another teaspoon of oil. Add the minced garlic to the skillet and sauté for just 30-60 seconds, stirring constantly, until fragrant. Be careful not to burn it – burnt garlic is bitter!
- Build the Sauce: Pour in the chicken broth, scraping up any browned bits (fond) from the bottom of the pan with a wooden spoon. Those bits are packed with flavor! Let the broth simmer for 2-3 minutes, allowing it to reduce slightly and thicken.
- Finish the Sauce: Remove the skillet from the heat. Stir in the apple cider vinegar or lemon juice. Taste the sauce and adjust seasonings if needed.
- Combine and Serve: Return the rested chicken pieces to the skillet, spooning the garlic sauce over them to coat. Garnish with fresh chopped parsley or chives. Serve immediately and enjoy those delightful crispy edges!
Tips & Suggestions
To truly master this Garlic Chicken with Crispy Edges, here are some of my favorite tips and suggestions that make all the difference:
- The Dry Chicken Secret: I cannot stress enough how important it is to thoroughly pat your chicken dry with paper towels before seasoning and searing. Any moisture on the surface will steam the chicken instead of searing it, preventing those beautiful, crispy edges from forming.
- Hot Skillet, Don’t Overcrowd: Start with a hot skillet and enough oil. When you add the chicken, ensure it’s in a single layer with some space between each piece. Overcrowding the pan will drop the temperature too quickly, leading to steaming rather than searing. If your skillet isn’t large enough, work in batches. Patience is key!
- Mind the Garlic: Garlic burns quickly, and burnt garlic tastes bitter. Add it to the pan only after you’ve seared the chicken and the heat has been reduced. Sauté it for just a minute or less until it’s fragrant, then immediately add the broth to prevent burning.
- Choose Your Skillet Wisely: A heavy-bottomed skillet is your best friend here. Cast iron or a good quality stainless steel skillet distributes heat evenly and retains it well, which is crucial for a consistent sear and those coveted crispy edges.
- Don’t Forget to Rest: After searing, transfer the chicken to a plate and tent it with foil while you make the sauce. This resting period allows the juices to redistribute throughout the meat, ensuring every bite is tender and moist.
- Serving Suggestions: This garlic chicken is incredibly versatile. It pairs wonderfully with creamy mashed potatoes, fluffy rice (white or brown), a simple pasta tossed with olive oil, or a side of steamed green beans or asparagus. For a low-carb option, cauliflower rice or zucchini noodles are excellent choices.
- Add Some Heat: For a little kick, sprinkle in a pinch of red pepper flakes with the garlic.
- Herb Variations: While parsley is classic, feel free to experiment with other fresh herbs like thyme or oregano, added with the garlic or as a garnish.
Storage
Once you’ve enjoyed your delicious Garlic Chicken with Crispy Edges, you might have some leftovers, or you might even be preparing a batch for future meals. Proper storage is key to maintaining its flavor and freshness.
- Cooling: First, allow any leftover chicken to cool down to room temperature within two hours of cooking. Don’t leave it out longer than this for food safety reasons.
- Refrigeration: Transfer the cooled garlic chicken and any remaining sauce to an airtight container. It will keep well in the refrigerator for up to 3-4 days. The crispy edges might soften a little in the fridge due to moisture, but the flavor will still be fantastic.
- Freezing: This dish freezes quite well! Place the cooled chicken and sauce in a freezer-safe airtight container or heavy-duty freezer bag. Label it with the date. It can be stored in the freezer for up to 2-3 months. When you’re ready to eat, thaw it overnight in the refrigerator.
- Reheating:
- For Best Crispy Edges (Oven/Toaster Oven): To try and regain some of that crispiness, preheat your oven to 350°F (175°C). Place the chicken in a single layer on a baking sheet, ideally on a wire rack to allow air circulation. Reheat for 10-15 minutes, or until heated through.
- For Quick Reheating (Skillet/Microwave): You can gently reheat the chicken in a skillet over medium-low heat with a little extra broth or water, just until warmed through. This will keep it moist but won’t restore crispiness. For the quickest option, a microwave works, but the chicken may become slightly less tender and definitely won’t be crispy. Heat in short bursts, stirring the sauce occasionally, until hot.
Final Thoughts
I truly believe that if you’re searching for a dinner that impresses with both incredible flavor and satisfying texture, then the Garlic Chicken Recipe With Crispy Edges (skillet Method) is an absolute must-try. There’s an undeniable magic in how a simple skillet transforms tender chicken into a masterpiece with perfectly golden-brown, crispy edges, all infused with that irresistible garlic aroma. It’s not just a meal; it’s an experience that brings comfort and joy to your table, proving that quick and easy can also mean profoundly delicious. I promise you, once you taste those crispy bits combined with the juicy, garlicky chicken, this dish will quickly earn a permanent spot in your rotation!

Best Crispy Garlic Chicken Skillet Recipe (Easy Method)
- Total Time: 45 minutes
- Yield: 4 servings 1x
Description
This Garlic Chicken Recipe With Crispy Edges is a weeknight dinner that delivers incredible flavor and texture with minimal effort. Enjoy tender, juicy chicken infused with aromatic garlic and perfectly crispy edges, all made in one skillet!
Ingredients
- boneless, skinless chicken thighs
- 6–8 cloves of fresh garlic, minced
- 1–2 tablespoons high-smoke point oil (olive oil, avocado oil, or grapeseed oil)
- low-sodium chicken broth
- splash of apple cider vinegar or fresh lemon juice
- salt
- freshly ground black pepper
- pinch of smoked paprika (optional)
- dash of onion powder (optional)
- fresh parsley or chives, chopped (for garnish)
Instructions
- Pat your chicken pieces thoroughly dry with paper towels. Season both sides generously with salt, black pepper, and any optional seasonings like smoked paprika or onion powder.
- Place a large, heavy-bottomed skillet over medium-high heat. Add your chosen high-smoke point oil and let it get shimmering hot.
- Carefully place the chicken pieces in the hot skillet in a single layer, ensuring not to overcrowd the pan. Allow the chicken to sear undisturbed for 4-6 minutes, or until a deep golden-brown crust forms.
- Flip the chicken pieces and sear the other side for another 4-6 minutes, until beautifully golden-brown and cooked through. Transfer the chicken to a plate and tent loosely with foil to keep warm.
- Reduce the heat to medium-low. If the pan looks dry, add another teaspoon of oil. Add the minced garlic to the skillet and sauté for 30-60 seconds, stirring constantly, until fragrant.
- Pour in the chicken broth, scraping up any browned bits from the bottom of the pan. Let the broth simmer for 2-3 minutes, allowing it to reduce slightly and thicken.
- Remove the skillet from the heat. Stir in the apple cider vinegar or lemon juice. Taste the sauce and adjust seasonings if needed.
- Return the rested chicken pieces to the skillet, spooning the garlic sauce over them to coat. Garnish with fresh chopped parsley or chives. Serve immediately.
- Prep Time: 15 mins
- Cook Time: 30 mins
- Category: Dinner
- Method: Skillet
- Cuisine: American
Nutrition
- Serving Size: 1 piece of chicken with sauce
- Calories: 350
- Sugar: 0 g
- Sodium: 600 mg
- Fat: 20 g
- Saturated Fat: 3 g
- Unsaturated Fat: 15 g
- Trans Fat: 0 g
- Carbohydrates: 5 g
- Fiber: 0 g
- Protein: 30 g
- Cholesterol: 100 mg
Keywords: Thoroughly pat your chicken dry before seasoning to achieve crispy edges. Use a heavy-bottomed skillet for even heat distribution, and don’t overcrowd the pan while searing.


Leave a Comment