

Ad Bloody Severed Finger Hot Dogs For Halloween is precisely the show-stopping, delightfully gruesome dish you need to elevate your spooky celebrations this year! As we step into the most enchantingly eerie season, it’s time to embrace culinary creativity that’s both delicious and delightfully unsettling. Forget intricate, time-consuming recipes that leave you more frazzled than frightful; this clever concoction delivers maximum ghoulish impact with minimal effort, perfectly embodying the playful horror that defines Halloween.
The Ultimate Halloween Party Gag – That Tastes Great!
There’s a wonderful cultural tradition surrounding Halloween where food becomes a canvas for imaginative, often comically macabre, art. This recipe taps directly into that spirit, transforming a beloved comfort food into a surprisingly realistic and utterly amusing centerpiece. People absolutely adore this dish because it hits all the right notes: the nostalgic comfort of a classic hot dog, a truly impressive visual gag that never fails to elicit gasps and giggles, and the sheer convenience of its preparation. Guests, particularly the younger ones, will marvel at the uncanny resemblance to actual severed fingers, while secretly relishing the familiar taste of a perfectly cooked hot dog.
I know you’ll find that crafting these Ad Bloody Severed Finger Hot Dogs For Halloween is not just incredibly simple, but also an immensely fun activity, making them an ideal choice for any haunted gathering or family fright night. Get ready to impress and gross out your guests in the best possible way!

Ingredients:
- 10-12 High-Quality Hot Dogs: I always recommend using a good brand that plumps up nicely when cooked. All-beef hot dogs tend to have the best texture for sculpting into fingers. You can also opt for chicken or plant-based versions if you prefer, just be mindful of their texture when scoring.
- 1 Can (8 oz) Refrigerated Crescent Roll Dough or Puff Pastry: This is our “skin” for the fingers. Crescent roll dough is super easy to work with and bakes up deliciously flaky, but puff pastry offers a slightly more rustic, crinkled “skin” effect which can be wonderfully grotesque for our theme. One can of crescent rolls typically contains 8 perforated triangles, which is perfect for 8 hot dogs. If using puff pastry, you’ll need one sheet.
- 1/4 of a Medium White or Yellow Onion: This is for our “fingernails”! White onions tend to be crisper and more translucent, giving a really creepy, realistic nail effect. You could also use small slices of a firm white cheese like provolone or mozzarella if you’re not a fan of onion, but I find the onion adds a fantastic bite and visual.
- 1 Large Egg: We’ll use this for an egg wash to give our dough a beautiful golden-brown finish and a slight sheen, making our “fingers” look even more eerily realistic.
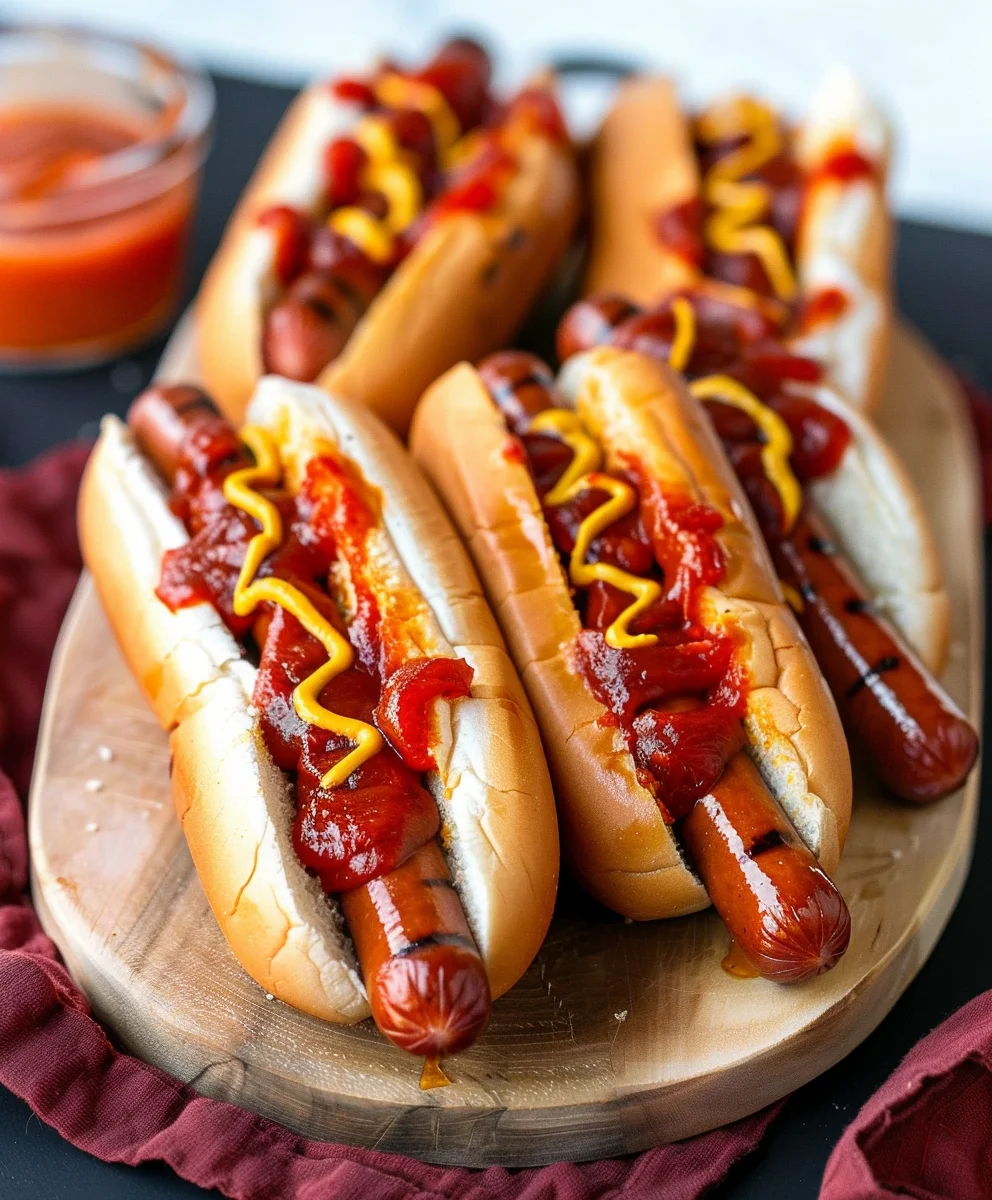
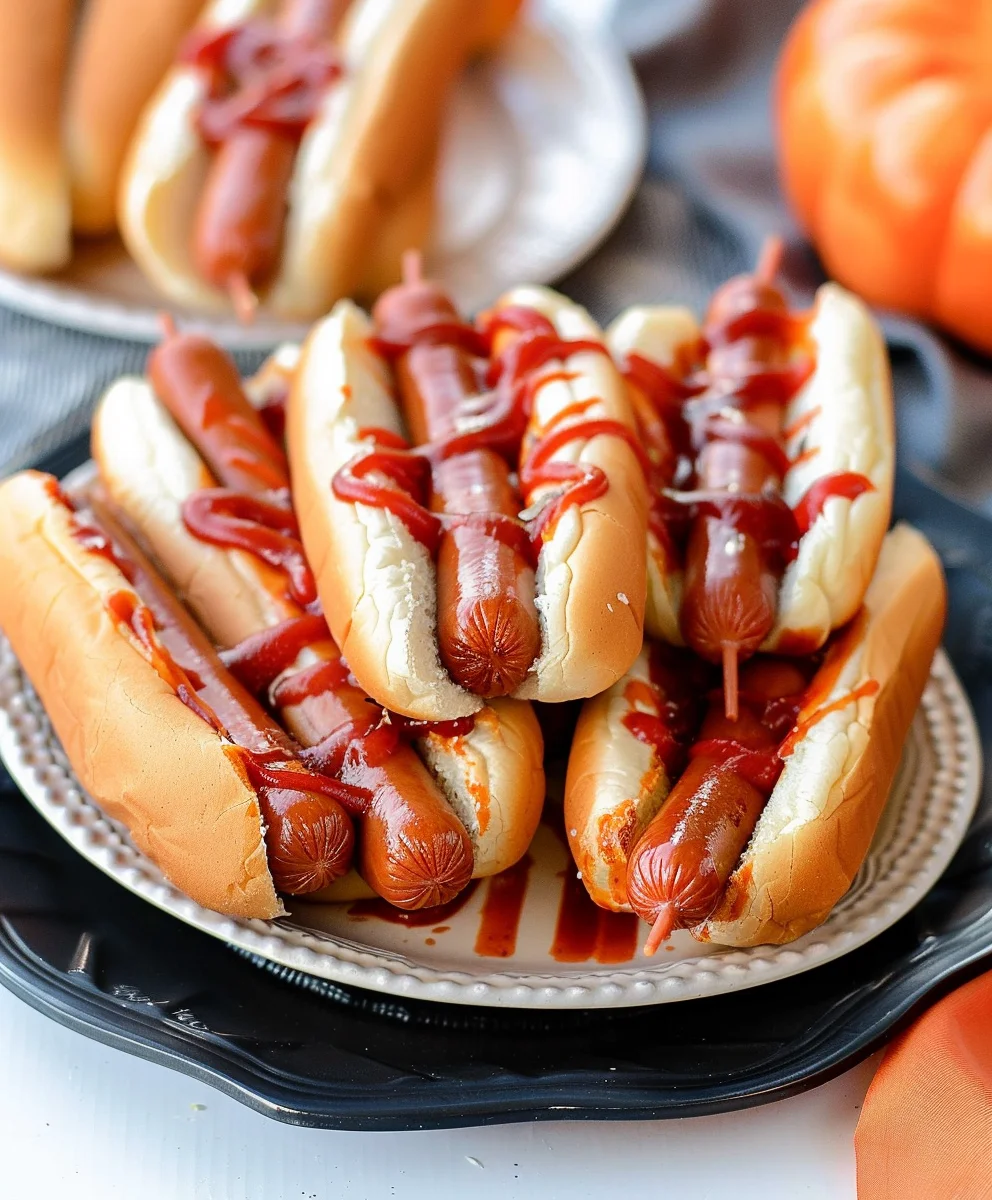
- 2-3 Tablespoons Ketchup: This is absolutely essential for our “blood”! Don’t skimp here; we want plenty of gore. You might even consider a spicy ketchup or sriracha for an extra kick and a more vibrant “blood” color.
- Optional: Yellow Mustard or Other Condiments: For dipping or adding more detail to your gruesome display. A little dab of mustard near the “severed” end can add another layer of gruesome color, almost like pus or tissue fluid – but let’s keep it tasty!
- Optional: Hot Dog Buns: If you plan to serve these as individual sandwiches rather than just on a platter. Soft, plain buns work best so as not to distract from our main attraction.
- Optional: Sesame Seeds: If you’re using puff pastry, a sprinkle of sesame seeds on top before baking can add a unique, slightly textured “skin” look, or you can use them on the buns for a classic touch.
- Optional: Food-Safe Red Gel or Icing: For an even more intense, sticky blood effect. This can be used in conjunction with or instead of ketchup for specific artistic touches.
Preparing Your Spooky Finger Hot Dogs
- Preheat Your Oven: First things first, let’s get our oven ready to transform these humble ingredients into something truly monstrous! Preheat your oven to 375°F (190°C). While it’s heating up, line a baking sheet with parchment paper or a silicone baking mat. This will prevent sticking and make cleanup a breeze, because nobody wants a sticky mess after handling severed fingers.
- Sculpting the Hot Dogs into Fingers: Now for the fun, slightly macabre part! Take each hot dog and, using a small, sharp knife (a paring knife works wonderfully), gently make three or four shallow horizontal cuts across the middle section of the hot dog. These cuts will represent the knuckles of our severed fingers. Be careful not to cut too deep – we just want to score the surface so that when the hot dog cooks, these areas expand slightly, creating a really convincing, knobby knuckle effect. Think of where your own finger bends; that’s where you want these little lines. I like to make them slightly uneven to add to the realism. Some fingers might have more prominent knuckles than others, just like real hands.
- Creating the “Severed” End: For an even more gruesome effect, you can trim one end of each hot dog slightly unevenly. This isn’t strictly necessary, as the dough will cover most of it, but a jagged edge can add to the “freshly severed” illusion when it peeks out. Alternatively, for the end where the “fingernail” will be, make a small, shallow cut, about a quarter of an inch deep, where you intend to place the nail. This will create a tiny pocket for our onion or cheese nail.
Crafting the Edible Fingernails
-
Preparing the Onion Fingernails: This step is where our fingers truly come to life – or rather, to death! Take your quarter of an onion and very carefully slice it into super thin, small, slightly curved pieces. You want these to be roughly the shape and size of a human fingernail, scaled down for our hot dog fingers. Aim for pieces that are about 1/2 inch to 3/4 inch long and just a bit wider than the end of your hot dog. The thinner you slice them, the more translucent and realistic they’ll look after baking.
Pro Tip: To get that perfect curved nail shape, try slicing the onion along its natural curves. If you find flat pieces, you can gently trim them. Remember, hands aren’t perfect, so slight variations in nail size and shape will only enhance the spooky authenticity of our “Ad Bloody Severed Finger Hot Dogs For Halloween”.
-
Attaching the Fingernails: Now, let’s attach these gruesome little details. Gently press one of your carefully cut onion “fingernails” onto one end of each scored hot dog. Position it so that the rounded edge of the onion is pointing towards the middle of the hot dog, leaving the flat or jagged edge at the very tip. If you made a small cut as suggested in step 3, tuck the very end of the onion slice into that pocket. It might feel a bit delicate, but a gentle press should secure it enough for the next step.
If you’re using cheese, use tiny, thin slices and shape them similarly. The cheese will melt slightly during baking, which can also create an interesting, slightly deformed nail effect. I personally love the crispness and visual of the onion, but cheese is a great alternative for picky eaters.
Wrapping Our Ghastly Digits with Dough
-
Preparing the Dough “Skin”: If you’re using crescent roll dough, unroll the can and separate the dough into its individual triangles. For puff pastry, unroll the sheet and gently flatten it a bit more if needed. We need strips for wrapping, so whether it’s crescent rolls or puff pastry, cut the dough into long, thin strips, about 1/2 inch wide and several inches long. The number of strips you need will depend on how many hot dogs you’re making, but generally, one crescent roll triangle can be cut into 2-3 strips, or a full puff pastry sheet can yield enough for 10-12 hot dogs.
The Key to a Gnarly Look: Don’t worry too much about perfectly uniform strips. Slightly uneven or jagged edges will actually contribute to the creepy, scarred “skin” appearance of our severed fingers.
-
Wrapping Each Hot Dog: This is where the magic really happens to transform a simple hot dog into a truly convincing, albeit horrifying, finger.
Start at the end of the hot dog opposite the “fingernail.” Take one strip of dough and gently but firmly press it onto the hot dog to secure the starting point. Then, begin wrapping the dough around the hot dog, working your way towards the fingernail.
Technique for Realism: As you wrap, try to leave small gaps or slightly overlap the dough strips unevenly. This will create a textured, wrinkled effect that mimics real skin. When you reach the areas where you made the “knuckle” cuts earlier, wrap the dough a little more loosely or even skip a tiny section to allow those knuckle marks to show through and really puff up. You want the dough to adhere but not be pulled too tightly, as it needs room to expand.
Leaving Space for the Nail: When you get to the fingernail end, make sure to stop wrapping the dough just before the onion or cheese nail. You want to leave the “fingernail” completely exposed, with the dough ending right at its base, creating a distinct cuticle line. This is crucial for the visual impact of our “Ad Bloody Severed Finger Hot Dogs For Halloween.” Pinch the end of the dough strip firmly onto the hot dog to seal it in place.
Repeat this process for all of your hot dogs, ensuring each one looks like a unique, gruesome digit.
- The Egg Wash: In a small bowl, whisk your large egg with about a tablespoon of water or milk until well combined. This is our egg wash. Using a pastry brush, gently and evenly brush the egg wash over all the exposed dough on each wrapped hot dog. The egg wash will give our “fingers” a beautiful golden-brown color and a slight sheen as they bake, making them look even more appetizingly disturbing. If you decided to add sesame seeds for texture, now is the time to sprinkle them lightly over the egg-washed dough.
- Arranging on the Baking Sheet: Carefully transfer your wrapped hot dog “fingers” to the prepared baking sheet, making sure they are spaced at least an inch apart to allow for even baking and proper air circulation. We want them to crisp up nicely, not steam.
The Baking Process for Perfectly Gruesome Fingers
-
Baking Time: Place your baking sheet with the terrifying digits into your preheated oven. Bake for 12-15 minutes, or until the crescent roll dough or puff pastry is puffed up, deeply golden brown, and cooked through. The hot dogs themselves will also heat up and plump, which will further enhance the knuckle effect.
Keep a Close Eye: Ovens can vary, so start checking around the 10-minute mark. You want the dough to be fully cooked and golden, but not burnt. The onion fingernails might become slightly translucent or even char a tiny bit at the edges, which only adds to the realism of a well-aged, creepy finger.
- Cooling Down (Slightly): Once baked to perfection, carefully remove the baking sheet from the oven. Let the “fingers” cool on the baking sheet for about 5 minutes. They will be very hot, and this slight cooling period also helps the dough set, making them easier to handle for the final gory touches.
Assembling the Bloody Scene: The Finishing Touches
-
The Blood (Ketchup Application): Now for the grand finale – adding the “blood” to our “Ad Bloody Severed Finger Hot Dogs For Halloween.” This is where you can truly let your inner horror artist shine!
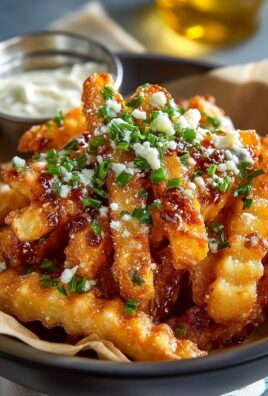
Take your ketchup (or sriracha/red gel) and think about where a severed finger would bleed. I like to squeeze a generous dollop of ketchup onto the “severed” end of each hot dog, letting it drip down slightly. You can also artfully drizzle thin lines of ketchup along the sides of the fingers, making it look like fresh wounds or old, dried blood. A small squeeze near the base of the “fingernail” can also be quite effective, making it look like the nail has been ripped out or is freshly torn.
Vary the Bloodstains: Don’t make every finger identical! Some might have a heavy pool of blood, others just a few drips, and some might even look like they’re still actively oozing. This variation adds to the overall horrifying tableau. If using red food gel, you can use a toothpick to create very fine, delicate blood trails or congealed clots.
Serving Up Your Horrifying Creation
-
Presentation is Key: These “Ad Bloody Severed Finger Hot Dogs For Halloween” are meant to be a showstopper!
You can arrange them artfully on a platter, perhaps with some extra pools of ketchup strategically placed around them. For an even more unsettling display, consider using a cutting board for serving, as if they’ve just been… prepared.
If you’re serving them in hot dog buns, gently place a “finger” into each bun. You can add more ketchup inside the bun for an extra bloody bite.
-
Creative Serving Suggestions:
- The “Body Part” Platter: Serve them alongside other Halloween treats like “eyeball” meatballs, “maggot” rice, or “brain” cauliflower.
- Dipping Sauces: Offer a variety of dipping sauces on the side. While ketchup is our primary “blood,” a creamy white sauce (like ranch or aioli) can look like pus or bone marrow, adding another layer of gross-out fun. Green sauces (like pesto or avocado ranch) can resemble decaying flesh or gangrene.
- Garnish for Gore: A sprinkle of finely chopped parsley or cilantro can surprisingly look like stray hair or moss, adding an unexpected layer of macabre detail.
- Atmosphere: Dim the lights, put on some spooky sound effects, and watch your guests react with delightful horror to your culinary creation.
These “Bloody Severed Finger Hot Dogs For Halloween” are always a huge hit, not just for their taste but for the sheer delight (and disgust!) they bring. Enjoy watching your friends and family bravely (or squeamishly) dig into these deliciously creepy treats! They are best served warm, but are still quite palatable at room temperature, making them perfect for a Halloween party spread.
<h2>Conclusion:</h2>
<p>Well, there you have it! I truly hope you’re feeling inspired and a little bit deliciously devious after exploring this recipe with me. From the moment I first envisioned these gruesome yet incredibly tasty treats, I knew they would be a game-changer for any Halloween gathering. <strong>This isn’t just a recipe; it’s an experience, a conversation starter, and quite frankly, a masterpiece of edible horror fun.</strong> What makes these hot dogs a definite must-try is their incredible ability to shock and delight simultaneously. The visual impact is undeniably chilling – those perfectly sculpted, skin-peeled “fingers” with just the right touch of “blood” sauce are guaranteed to elicit gasps and giggles in equal measure. But beyond the ghoulish appearance, you’re still getting the comforting, familiar taste of a perfectly cooked hot dog, elevated by your choice of toppings and sauces. It’s the ultimate blend of spooky aesthetics and crowd-pleasing flavor, making it perfect for both adults who appreciate the macabre and kids who love a good fright (and a delicious snack!).</p>
<p>I’ve found that the simple joy of watching people react to these is half the fun. They’re surprisingly easy to prepare, despite their intricate look, meaning you can whip up a batch without stress, leaving you more time to enjoy the festivities. Imagine the scene: your guests gathering, their eyes widening as they spot the platter, followed by a moment of hesitation, then a burst of laughter as they realize the culinary trickery at play. That’s the magic of this dish, and it’s why I’m so passionate about sharing it with you. <strong>It’s about crafting memories, one severed hot dog finger at a time.</strong></p>
<h4>Serving Suggestions and Spooky Variations</h4>
<p>To make your Halloween spread truly unforgettable, consider how you’ll present and pair these frightful fingers. I love serving them piled high on a dark, rustic platter, perhaps nestled among some dried leaves or plastic spiders to enhance the creepy vibe. For sides, think about complementing the theme: crispy sweet potato fries that resemble stray bones, or a “graveyard” dip (guacamole with crushed black tortilla chip “dirt” and vegetable “gravestones”) would be fantastic. A witch’s brew punch, brimming with dry ice fog and gummy worms, would be the perfect accompanying beverage to wash down these eerie eats. You could also offer a condiment bar with various “blood” options – beyond ketchup, think sriracha for a spicy kick, BBQ sauce for a smoky depth, or even a deep red beet hummus for a healthier (but still gruesome) dip.</p>
<p>Don’t be afraid to experiment with variations either! For a truly ghastly touch, you could use different types of sausages – perhaps a darker blood sausage or even a chicken sausage for a paler, more unsettling ‘flesh’ tone. If you’re catering to vegetarian or vegan guests, plant-based hot dogs work wonderfully with the same carving technique, proving that no one has to miss out on the fun. For an extra touch of realism, try adding a sliver of onion or almond as a “fingernail” on the tip of each hot dog before cooking. Or, for a truly charred, zombie-like effect, you can briefly torch the ‘skin’ with a kitchen blowtorch (carefully!) after they’re cooked. <strong>The possibilities for creepy customization are endless, limited only by your imagination!</strong></p>
<h4>Your Turn to Conjure Some Culinary Frights!</h4>
<p>Now that you have all the tips, tricks, and inspiration you need, I genuinely hope you take the plunge and try making these <strong>Ad Bloody Severed Finger Hot Dogs For Halloween</strong> yourself. I promise you, they will be the undisputed star of your spooky feast. There’s nothing more satisfying than seeing your culinary creations bring joy (and a little bit of delightful dread) to your loved ones. Once you’ve conjured your own batch, I would absolutely love to hear about your experience! Did your guests scream? Did they laugh? Did they devour them all in minutes? <strong>Please, share your photos and stories!</strong> I’m always thrilled to see how your unique touches and creativity transform these recipes. Don’t hesitate to share any clever variations or serving suggestions you come up with too – we’re all part of this fun, food-loving community. Happy haunting, and most importantly, happy cooking!</p>
Bloody Severed Finger Beef Hot Dogs for Halloween Fun
Elevate your Halloween celebrations with these delightfully gruesome and delicious Bloody Severed Finger Beef Hot Dogs! This clever concoction offers maximum ghoulish impact with minimal effort, transforming a beloved comfort food into a surprisingly realistic and amusing centerpiece, perfect for spooky parties.
Ingredients
-
10-12 high-quality beef hot dogs
-
1 can (8 oz) refrigerated crescent roll dough or puff pastry
-
1/4 medium white or yellow onion, thinly sliced (optional, for fingernails)
-
1 large egg
-
1 tbsp water
-
2-3 tbsp ketchup
-
Hot dog buns, optional
-
Yellow mustard or other condiments, optional
-
Sesame seeds, optional
-
Food-safe red gel or icing, optional
Instructions
-
Step 1
Preheat oven to 375°F (190°C). Line a baking sheet with parchment paper or a silicone baking mat. -
Step 2
Sculpt each hot dog: make 3-4 shallow horizontal cuts across the middle for knuckles. For a ‘severed’ effect, you can trim one end unevenly. For the ‘fingernail’ end, make a small, shallow cut for placement. -
Step 3
Prepare onion fingernails: slice 1/4 onion into thin, small, slightly curved pieces. Gently press one onion ‘fingernail’ onto one end of each scored hot dog, positioning the rounded edge towards the middle and tucking the flat edge into the cut if made. -
Step 4
Wrap hot dogs with dough: unroll crescent roll dough and separate into triangles, or unroll puff pastry. Cut dough into 1/2-inch wide strips. Starting opposite the ‘fingernail’ end, wrap each hot dog with a dough strip. Leave small gaps for knuckles and stop dough just before the onion ‘fingernail’, leaving it exposed. Pinch dough to secure. -
Step 5
Apply egg wash: whisk 1 large egg with 1 tbsp water. Brush over all exposed dough. Sprinkle with optional sesame seeds if desired. -
Step 6
Bake for 12-15 minutes, or until dough is puffed, deeply golden brown, and cooked through. Let cool on the baking sheet for about 5 minutes. -
Step 7
Add ‘blood’: generously squeeze ketchup onto the ‘severed’ end of each hot dog, letting it drip. Artfully drizzle thin lines along the sides, or near the base of the ‘fingernail’ for a gruesome effect. Use optional red food gel for more intense ‘blood’. -
Step 8
Serve warm: arrange artfully on a platter with extra ketchup pools, or place in hot dog buns. Offer optional dipping sauces like mustard, ranch, or pesto for added fun and gore.
Important Information
Nutrition Facts (Per Serving)
It is important to consider this information as approximate and not to use it as definitive health advice.
Allergy Information
Please check ingredients for potential allergens and consult a health professional if in doubt.
Leave a Comment