

Cauldron Cookies. The very name conjures images of bubbling concoctions and ancient spells, yet the reality is far more delicious and enchantingly accessible! I’m absolutely delighted to invite you into my kitchen today to discover the magic behind these remarkably delightful treats. While they might not trace their lineage directly back to a medieval witch’s pantry, these cookies certainly carry a whimsical spirit, often associated with festive, magical gatherings, particularly around autumn or for themed parties. They are more than just a dessert; they are an experience, inviting a touch of fantasy into your everyday.
People adore these unique Cauldron Cookies for their irresistible combination of rich, deep flavors and a wonderfully chewy texture that simply melts in your mouth. They often feature dark chocolate, a hint of spice, and sometimes even unexpected inclusions that make each bite an adventure.
They’re comforting, intriguing, and undeniably satisfying, making them a perfect treat for sharing or simply indulging yourself.
Prepare to be spellbound by their charm!

Ingredients:
-
For the Cauldron Cookies:
- 1 ½ cups (180g) all-purpose flour – I always make sure it’s freshly measured and light for the best texture in our Cauldron Cookies.
- ¾ cup (75g) unsweetened cocoa powder (Dutch-processed for a darker, richer color is my secret!) – this is what gives our Cauldron Cookies their mysterious, dark appearance.
- 1 teaspoon baking soda – essential for that perfect lift and chewiness.
- ½ teaspoon fine sea salt – balances the sweetness and enhances all the chocolatey goodness.
- 1 cup (226g) unsalted butter, softened to room temperature – this is absolutely crucial! Softened butter creams beautifully with sugar, creating that airy base we need.
- 1 cup (200g) granulated sugar – for sweetness and structure.
- ¾ cup (150g) light brown sugar, packed – adds moisture and a lovely caramel note that complements the deep chocolate.
- 2 large eggs, at room temperature – helps bind everything together and adds richness.
- 2 teaspoons pure vanilla extract – enhances all the flavors beautifully.
- 1 cup (170g) chocolate chips or chunks (dark chocolate or semi-sweet) – optional, but I love adding an extra burst of chocolatey surprise within each Cauldron Cookie.
-
For the Bubbling Potion Glaze:
- 2 cups (240g) powdered sugar (confectioners’ sugar), sifted – sifting is key for a super smooth, lump-free glaze.
- 3-4 tablespoons milk or heavy cream – start with 3 and add more a tiny bit at a time until you reach your desired consistency.
- ½ teaspoon almond extract (or mint extract, for an extra ‘potion’ flavor!) – this gives our glaze a lovely, distinct aroma.
- Gel food coloring (vibrant green, purple, or even a spooky orange) – this is where the magic happens! We’re aiming for that bubbling cauldron effect.
- Assorted sprinkles (sugar pearls, nonpareils, edible glitter) – for that extra touch of enchantment and sparkle on our Cauldron Cookies.
Gathering Our Magical Ingredients
- Before we dive into the delightful world of Cauldron Cookie crafting, I always like to set myself up for success. First things first, let’s preheat our oven to a cozy 350°F (175°C). While the oven is warming up, I line two large baking sheets with parchment paper or silicone baking mats. This simple step is a game-changer for preventing sticking and ensuring our Cauldron Cookies bake evenly and slide off effortlessly. Trust me, nobody wants a sticky situation when the magic is brewing!
- Now, let’s prepare our dry ingredients. In a medium-sized bowl, I carefully whisk together the all-purpose flour, ensuring it’s light and aerated. Then, I add the unsweetened cocoa powder, making sure there are no lumps to mar our perfect Cauldron Cookies – a well-mixed cocoa powder means a beautiful, uniform dark color. Next comes the baking soda, which will give our cookies that lovely lift, and a pinch of fine sea salt to balance all the rich flavors. I continue to whisk these dry ingredients thoroughly until they are uniformly combined and appear as a dark, inviting blend, setting them aside for later. This step ensures that every bite of our Cauldron Cookies will have the right balance of leavening and seasoning.
Crafting the Cauldron Cookie Dough
- In a large mixing bowl, either using a stand mixer fitted with the paddle attachment or a hand mixer, I begin by creaming together our softened unsalted butter with both the granulated sugar and the light brown sugar. I beat these ingredients on medium speed for about 3 to 5 minutes, or until the mixture becomes wonderfully light, fluffy, and pale in color. This aeration process is paramount – it incorporates air into the butter and sugar, which contributes significantly to the tender texture of our finished Cauldron Cookies. Scrape down the sides of the bowl occasionally to ensure everything is thoroughly combined and no sugar bits are left behind.
- Once our butter and sugar mixture is perfectly fluffy, I crack in the two large eggs, one at a time, beating well after each addition. It’s important to let each egg fully incorporate before adding the next. After the eggs are mixed in, I pour in the pure vanilla extract. I continue to beat the mixture on medium speed for another minute or so, until everything looks smooth, glossy, and beautifully emulsified. The mixture might look a little curdled after adding the first egg, but don’t worry, it will come together as you continue to beat and add the second egg. This creates a stable, rich base for our Cauldron Cookies.
- Now comes the marriage of our wet and dry ingredients. With the mixer on low speed, I gradually add the whisked dry ingredients to the wet mixture, a third at a time. I mix only until just combined – overmixing at this stage is the enemy of tender cookies! Overworking the flour can develop too much gluten, resulting in tough Cauldron Cookies. The moment I see no more streaks of flour, I stop the mixer. If I’m adding chocolate chips or chunks, I gently fold them in by hand with a spatula at this point. This ensures they are evenly distributed without overworking the dough. The dough for our Cauldron Cookies should be thick, dark, and wonderfully fragrant.
- To ensure our Cauldron Cookies hold their shape beautifully and develop a deeper flavor, I always recommend chilling the dough. I cover the bowl tightly with plastic wrap and refrigerate it for at least 30 minutes, or even up to 2 hours. This chilling period is not just a suggestion, it’s a vital step for our Cauldron Cookies! It allows the butter to firm up, preventing the cookies from spreading too much in the oven, and gives the flavors a chance to meld together, resulting in a more complex and satisfying taste.
Baking Our Enchanted Treats
- Once our dough is nicely chilled and firm, I retrieve it from the refrigerator. If it’s been chilling for a longer period, I might let it sit out for 5-10 minutes to make it a little easier to scoop. Having our prepared baking sheets ready from step 1 is incredibly helpful here.
- Using a medium cookie scoop (about 1.5 to 2 tablespoons in size), I scoop generous mounds of dough and place them onto the prepared baking sheets, ensuring they are about 2 inches apart. It’s important to give them space to spread and prevent them from merging into one giant Cauldron Cookie blob. For an extra touch of magic and to ensure a perfect round shape, I sometimes gently roll each scooped ball of dough between my palms before placing it on the sheet. This also helps to compact the dough slightly, which can improve the cookie’s texture.
- I place one baking sheet at a time into our preheated 350°F (175°C) oven. I bake the Cauldron Cookies for about 10 to 12 minutes. The exact baking time can vary slightly depending on your oven, so I keep a close eye on them. The edges should be set, but the centers should still look slightly soft and gooey – this is the secret to a perfectly chewy Cauldron Cookie! For even baking, I often rotate the baking sheet halfway through the baking time. Do not overbake them! Overbaked Cauldron Cookies lose their magical chewiness and can become dry.
- Once the Cauldron Cookies are out of the oven, I let them cool on the baking sheet for just 5 minutes. They are quite delicate when hot, and this short cooling period allows them to firm up slightly. After 5 minutes, I carefully transfer them to a wire rack to cool completely. Allowing them to cool completely on a wire rack is essential before glazing. If they’re still warm, our potion glaze will simply melt right off, and we can’t have that! We want our Cauldron Cookies to be perfectly cool so the glaze adheres beautifully.
Conjuring the Potion Glaze
- While our Cauldron Cookies are cooling, it’s time to whip up our mystical “bubbling potion” glaze! In a medium bowl, I start by sifting the powdered sugar. Don’t skip this step! Powdered sugar often has small lumps, and sifting ensures our glaze will be wonderfully smooth and easy to work with, giving our Cauldron Cookies a flawless finish.
- To the sifted powdered sugar, I gradually add 3 tablespoons of milk or heavy cream and the almond (or mint) extract. I start whisking with a fork or a small whisk, slowly incorporating the liquid. I continue to mix until the glaze is smooth and lump-free. The consistency we’re aiming for is thick enough to coat the back of a spoon but thin enough to drip slowly off. If it’s too thick, I add a tiny bit more milk, literally half a teaspoon at a time, until it reaches the desired consistency. If it accidentally becomes too thin, I can always sift in a little more powdered sugar. This ensures our Cauldron Cookies will have a beautifully flowing, yet substantial, glaze.
- Now for the fun part – bringing our potion to life! I add a few drops of my chosen gel food coloring (I love a vibrant green or deep purple for that true cauldron effect!). I stir well, adding more drops if needed, until I achieve a rich, intense color. Gel food coloring is superior here because it delivers intense color without thinning the glaze too much. We want a striking color that truly transforms our dark Cauldron Cookies into something magical. I stir until the color is completely uniform, ensuring every Cauldron Cookie gets an even coat of enchanting hue.
Adorning Our Cauldron Cookies
- Once the Cauldron Cookies are completely cool, it’s time to glaze them. There are a couple of ways to do this. For a full coverage look, I like to gently dip the top of each Cauldron Cookie into the bowl of glaze, allowing any excess to drip back into the bowl. Alternatively, for a more rustic or drizzled look, I might use a spoon to spread a dollop of glaze onto each cookie, or even drizzle it artistically. Work quickly but carefully! The glaze can start to set relatively fast. I ensure each Cauldron Cookie gets a generous, even coating of our vibrant potion.
- Immediately after glazing each Cauldron Cookie, while the glaze is still wet and tacky, I sprinkle them generously with our assorted sprinkles, sugar pearls, or edible glitter. This is the trick to making them stick! If you wait too long, the glaze will set, and your sprinkles will just bounce off. I love how the sparkle contrasts with the dark Cauldron Cookie base and the vibrant glaze, making them look truly enchanted. Let your imagination run wild here – the more magical, the better!
- Finally, I place the adorned Cauldron Cookies back on the wire rack and let the glaze set completely. This can take anywhere from 30 minutes to a couple of hours, depending on the humidity in your kitchen and the thickness of your glaze. Once the glaze is firm to the touch, our Cauldron Cookies are ready to be devoured! I store any leftover Cauldron Cookies in an airtight container at room temperature for up to 3-4 days. They taste wonderful, and the glaze helps keep them fresh and moist. These Cauldron Cookies are more than just a treat; they’re a little piece of edible magic!

Conclusion:
Well, my fellow kitchen adventurers, we’ve reached the grand finale of our culinary quest, and I truly hope you’re feeling as excited as I am about the prospect of bringing these incredible treats to life in your own home. If you’ve been searching for a cookie recipe that’s truly out of the ordinary, one that promises both a delightful baking experience and an unforgettable taste, then consider your search officially over. These aren’t just any cookies; they are an invitation to infuse a little magic into your everyday, a chance to create something truly special with your own two hands.
So, why are these Cauldron Cookies an absolute must-try? It’s simple, really. They stand apart from the crowd with their unique charm and perfectly balanced flavors. Imagine biting into a cookie that boasts a delightfully crisp edge, a wonderfully chewy center, and a depth of flavor that is both comforting and intriguing. Each bite offers a harmonious blend of sweetness with subtle, unexpected notes that tantalize the palate, ensuring that these cookies are anything but mundane. They have a certain whimsy about them, a playful appeal that makes them perfect for various occasions, from a cozy afternoon snack to a show-stopping dessert at a themed gathering. They possess a visual allure that instantly sparks joy and curiosity, inviting everyone to discover the magic within. I truly believe that once you’ve experienced the enchantment of baking and tasting these, they’ll earn a permanent spot in your recipe collection.
When it comes to serving these bewitching bites, the possibilities are as endless as your imagination. Picture these enchanting treats gracing your dessert table at a festive autumn gathering or a whimsical Halloween party, nestled beside a steaming mug of spiced apple cider or a rich, dark hot cocoa. They’re also an absolutely splendid companion to your morning coffee or afternoon tea, adding a touch of sophisticated comfort to your routine. For a truly decadent experience, try serving them warm with a scoop of vanilla bean ice cream, allowing the cookie’s warmth to gently melt the ice cream into a luscious, creamy puddle. They also make an absolutely delightful, heartfelt gift. Imagine wrapping a handful of these beautiful Cauldron Cookies in a charming box or a clear cellophane bag, tied with a festive ribbon, to present to friends, family, or even a gracious host. They are a thoughtful, homemade gesture that truly speaks volumes and is guaranteed to bring a smile to anyone’s face. Their unique character makes them a memorable offering, much more exciting than your average cookie.
Casting Your Own Culinary Spell: Serving Suggestions and Variations
But don’t stop there! This recipe is a fantastic canvas for your own culinary creativity. If you’re feeling adventurous, consider a few delightful variations to truly make these your own. For a darker, more intensely flavored cookie, you could swap out a portion of the all-purpose flour for a good quality dark cocoa powder, deepening the chocolate notes and giving them an even more mysterious appearance. A tiny pinch of cayenne pepper or a dash of chili powder in the dough can introduce a subtle, warming heat that provides a surprising and incredibly delicious contrast to the sweetness, transforming them into truly “spiced” Cauldron Cookies. For those who adore texture, try folding in some chopped nuts, like pecans or walnuts, or even some candied ginger for an extra layer of flavor and chewiness. And let’s talk about presentation! While the original design is charming, don’t hesitate to experiment with different colors for your icing or drizzles. Imagine vibrant greens and purples for a classic spooky vibe, or perhaps autumnal oranges and deep browns for a cozy harvest celebration. Edible glitter, sparingly dusted over the still-wet icing, can add a truly magical shimmer that will make these cookies sparkle with enchantment. You could also try adding a few drops of food coloring to the dough itself for an even more dramatic visual impact. The beauty of this recipe is its flexibility, allowing you to tailor it to your personal taste and the occasion at hand.
I genuinely can’t wait for you to experience the sheer delight of baking and, more importantly, tasting these extraordinary treats. Please, gather your ingredients, set aside some time for a little kitchen enchantment, and prepare to be utterly charmed by the process. This isn’t just about following a recipe; it’s about embracing the joy of creation and the satisfaction of sharing something delicious with those you love. And once you’ve pulled your own magical batch of Cauldron Cookies from the oven, bubbling with success and smelling absolutely divine, I would absolutely love to hear about your experience! Did you stick faithfully to the original recipe, or did you conjure up some unique variations of your own? What did your family and friends think? Did they guess the secret ingredient that makes these so special? Please, share your stories, your photos, and your triumphs with me. Your feedback is truly invaluable, and it’s wonderful to build a community of enthusiastic bakers who are all exploring the magic of food together. Happy baking, my friends, and may your kitchen be filled with wonderful aromas and even more wonderful memories!
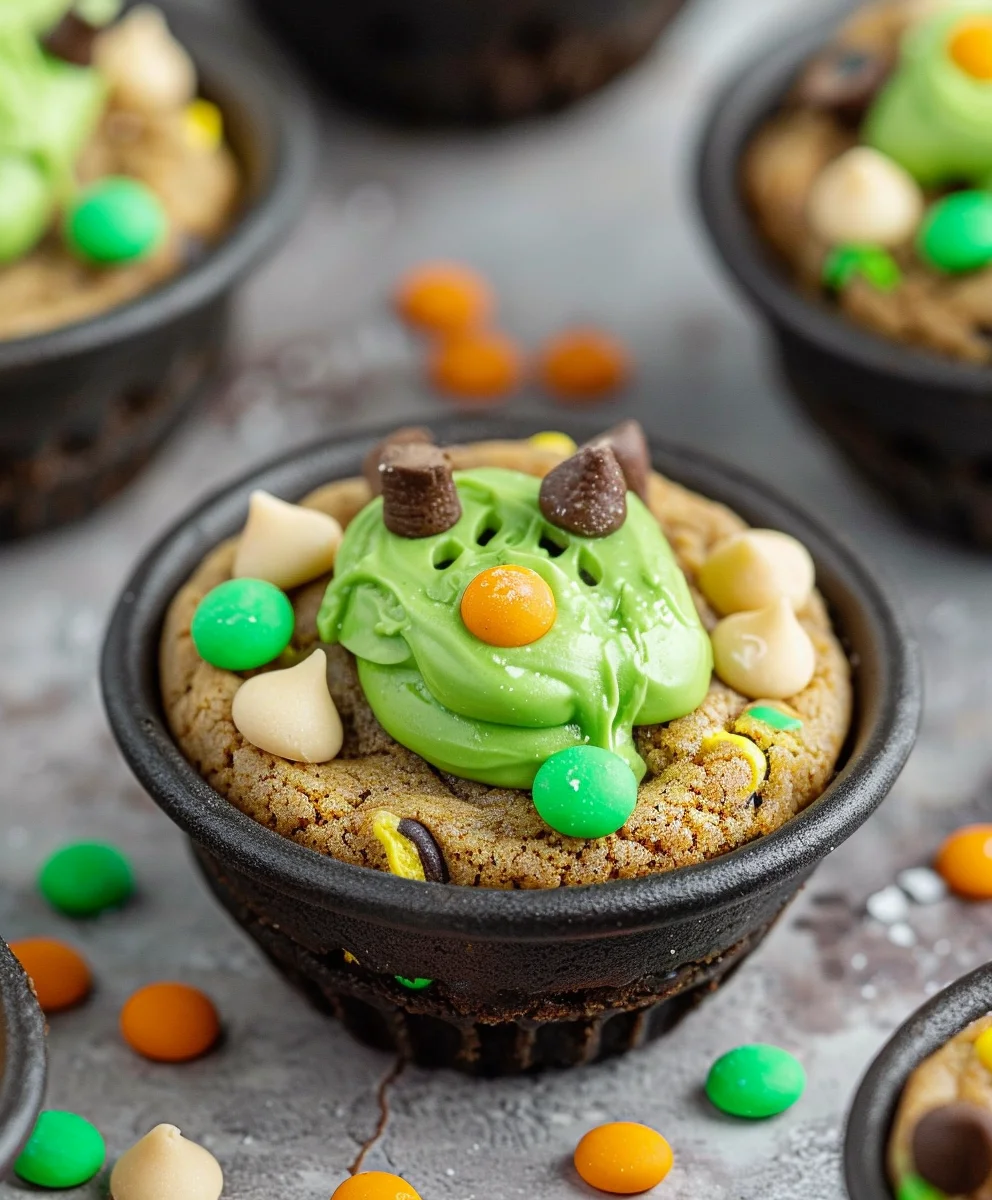
Cauldron Cookies
Spooky, delicious, and easy Cauldron Cookies, perfect for festive, magical gatherings. These treats feature rich, deep flavors, a wonderfully chewy texture, and a whimsical spirit, easily made from a cake mix base.
Ingredients
-
1 (15.25 ounce) box Devil’s Food cake mix
-
2 large eggs
-
1/2 cup canola or vegetable oil
-
Black food coloring (optional)
-
1 cup unsalted butter, softened
-
3 cups powdered sugar
-
1 teaspoon vanilla extract
-
1/2 teaspoon salt
-
1-3 tablespoons milk
-
Green food coloring
-
Round green sprinkles
-
Halloween sprinkles
-
Candy eyeballs
-
Pretzel sticks
Instructions
-
Step 1
Preheat oven to 350°F (175°C) and line two large baking sheets with parchment paper or silicone mats. -
Step 2
In a large mixing bowl, combine the Devil’s Food cake mix, 2 large eggs, 1/2 cup canola or vegetable oil, and optional black food coloring. Mix well until a thick, uniform dough forms. -
Step 3
Scoop rounded tablespoons of dough onto the prepared baking sheets, spacing them about 2 inches apart. Bake for 10 to 12 minutes, or until the edges are set but the centers still look slightly soft. Do not overbake. -
Step 4
Let cookies cool on the baking sheets for 5 minutes before carefully transferring them to a wire rack to cool completely. Ensure cookies are fully cooled before glazing. -
Step 5
In a medium bowl, beat the softened unsalted butter until creamy. Gradually add the powdered sugar, vanilla extract, and salt. Add milk, 1 tablespoon at a time, beating until the glaze is smooth and spreadable. Stir in green food coloring until a vibrant green color is achieved. -
Step 6
Once cookies are completely cool, spread a generous amount of green glaze onto the top of each cookie. Immediately adorn with round green sprinkles, Halloween sprinkles, candy eyeballs, and a broken pretzel stick (for the ‘cauldron handle’) while the glaze is still wet and tacky. -
Step 7
Place adorned Cauldron Cookies back on the wire rack and allow the glaze to set completely (30 minutes to 2 hours). Store leftover cookies in an airtight container at room temperature for up to 3-4 days.
Important Information
Nutrition Facts (Per Serving)
It is important to consider this information as approximate and not to use it as definitive health advice.
Allergy Information
Please check ingredients for potential allergens and consult a health professional if in doubt.


Leave a Comment