

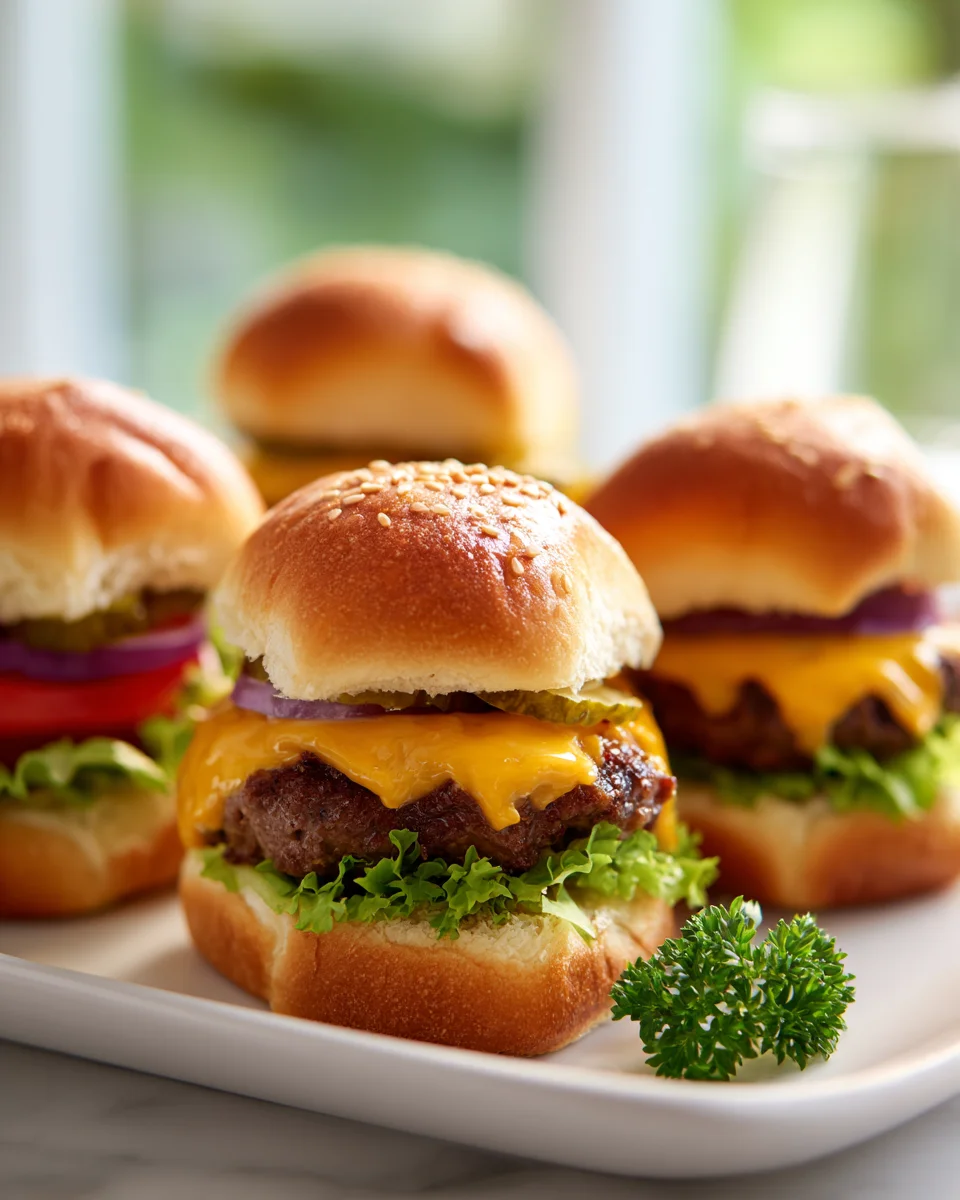
Cheeseburger Sliders With Hawaiian Rolls (oven Method)
Oh, prepare yourselves, because Cheeseburger Sliders With Hawaiian Rolls (oven Method) is one of my absolute favorite recipes to pull out when I need something guaranteed to be a massive hit! What makes these sliders so incredibly special, you ask? Well, imagine taking all the glorious, savory flavor of a classic cheeseburger, perfectly miniaturizing it into a delightful bite-sized package, and then nestling it within the sweet, irresistibly soft embrace of a golden Hawaiian roll. It’s truly a match made in food heaven!
You are going to absolutely love how unbelievably easy these are to whip up, especially with our super convenient oven method. Forget about individually grilling or flipping dozens of tiny beef patties; with this recipe, you simply assemble them quickly, pop them into the oven, and let the magic happen. They emerge beautifully golden, with gooey melted cheese cascading over savory seasoned ground beef, all complemented by that unmistakable hint of sweetness from the rolls. Every bite is pure comfort and joy!
These Cheeseburger Sliders are an instant crowd-pleaser, perfect for game day, a casual family dinner, a potluck, or really any gathering where you want to serve something delicious, fun, and satisfying without all the fuss. Get ready to impress everyone with these warm, comforting, and utterly irresistible mini cheeseburgers – I promise they’ll be begging for the recipe!

Ingredient Notes
Making cheeseburger sliders with Hawaiian rolls is one of my favorite ways to feed a crowd, or just treat my family to a fun meal! The simplicity of the oven method combined with the inherent deliciousness of the ingredients makes this recipe a true winner. Let’s talk about what makes these sliders sing!
Ground Beef: For these sliders, I typically go for an 80/20 ground beef. The little bit of fat content keeps the patties juicy and flavorful, which is exactly what you want in a mini burger. You could opt for leaner ground beef if you prefer, but you might want to add a touch more seasoning to really amp up the flavor. Before cooking, I season my ground beef simply with salt, black pepper, garlic powder, and a little onion powder. This forms a fantastic base for our mini burgers.
Hawaiian Rolls: These are non-negotiable for this recipe, in my humble opinion! Their signature sweetness and incredibly soft, pillowy texture are what elevate these sliders from good to absolutely amazing. They hold up well to the beef and cheese without getting too soggy, and they toast beautifully in the oven. The sweetness provides a lovely contrast to the savory beef and tangy pickles.
Cheese: When it comes to cheeseburger sliders, classic American cheese slices are often my go-to. They melt wonderfully and give you that iconic, gooey cheeseburger experience. However, don’t feel limited! Cheddar (mild or sharp), provolone, or even a Monterey Jack would work beautifully here. I’ve even used a blend of cheddar and mozzarella for an extra cheesy pull. Just ensure you use a cheese that melts smoothly.
Butter & Seasoning for Rolls: A simple melted butter mixture brushed over the top of the rolls before baking is what gives them that gorgeous golden crust and extra layer of flavor. I like to mix in a bit of garlic powder, dried parsley, and sometimes a dash of Worcestershire sauce (which is alcohol-free) into my melted butter. This adds a savory, umami punch that really enhances the overall taste.
Condiments & Toppings: While the core ingredients are crucial, don’t forget your favorite cheeseburger fixings! Sliced dill pickles are a must for that tangy crunch, but you could also add thinly sliced red onion, a touch of ketchup, mustard, or even a special sauce. I prefer to add these after baking, so the sliders don’t get soggy in the oven, but some people like to layer them right in.
Step-by-Step Instructions
Alright, let’s get those delicious cheeseburger sliders into the oven! This method is super straightforward and perfect for a fuss-free meal.
- Preheat Your Oven: First things first, get your oven ready. I usually set mine to 350°F (175°C). While it’s heating, grab a 9×13 inch baking dish; this is the perfect size for a standard pack of Hawaiian rolls.
- Prepare the Beef Patties: In a large bowl, gently mix your ground beef with salt, black pepper, garlic powder, and onion powder. You don’t want to overmix, as this can make the patties tough. Divide the seasoned beef into 12 small, thin patties, roughly the size of your Hawaiian rolls – maybe just a touch wider, as they will shrink slightly when cooked.
- Cook the Beef Patties (Quick Sear): Heat a large skillet over medium-high heat. Add your patties to the hot skillet and cook for about 2-3 minutes per side, just until they are browned and mostly cooked through. They don’t need to be fully cooked at this stage, as they’ll finish cooking in the oven. This quick sear adds great flavor and helps prevent soggy rolls. Remove the patties from the skillet and set them aside on a plate lined with a paper towel to drain any excess grease.
- Slice the Rolls: Carefully slice the entire package of Hawaiian rolls horizontally in half, keeping all the top halves connected and all the bottom halves connected. You want to make one clean cut right through the middle. Place the bottom half of the rolls in your prepared baking dish.
- Assemble the Sliders: Arrange the cooked beef patties evenly over the bottom half of the rolls. Don’t worry if they don’t cover every inch; we’re going for deliciousness, not perfection! Next, place a slice of cheese over each beef patty (or tear larger slices to fit). If you’re using pickles or other toppings that can withstand baking, you can add them now, but I prefer to add them fresh after baking.
- Add the Top Layer: Carefully place the top half of the Hawaiian rolls back over the cheese and patties, completing your slider sandwiches.
- Prepare the Butter Topping: In a small bowl, melt 1/4 cup of unsalted butter. Stir in 1 teaspoon of garlic powder, 1/2 teaspoon of dried parsley, and a dash of Worcestershire sauce (if using). This mixture is going to make your rolls incredibly savory and give them a beautiful golden crust.
- Brush and Cover: Generously brush the melted butter mixture over the top of the assembled sliders. Be sure to get it into all the cracks and crevices. Cover the baking dish tightly with aluminum foil.
- Bake the Sliders: Pop the covered baking dish into your preheated oven. Bake for 15 minutes. The foil helps to steam the sliders, ensuring the cheese melts perfectly and the rolls get warm and soft without drying out.
- Uncover and Finish Baking: After 15 minutes, remove the foil. Return the sliders to the oven and bake for another 5-10 minutes, or until the tops of the rolls are golden brown and the cheese is bubbly and completely melted. Keep a close eye on them during this stage to prevent burning.
- Serve Immediately: Once they’re out of the oven, let them cool for just a minute or two before slicing them into individual sliders. Serve them hot with your favorite condiments on the side. Enjoy!
Tips & Suggestions
To really nail your cheeseburger sliders and make them the star of any gathering, I’ve picked up a few tricks over the years that I’m happy to share with you:
- Don’t Overwork the Meat: When you’re mixing your ground beef with seasonings, be gentle. Overworking the meat can lead to tough, dense patties, and we want tender, juicy little burgers! Mix just until everything is combined.
- Patties are Key: Make your beef patties slightly thinner than you think they need to be, and a little wider than the base of the rolls. This accounts for shrinkage during cooking and ensures you get meat in every bite without them being too bulky for the slider size. The initial sear on the patties is crucial for developing flavor and preventing the sliders from becoming soggy during the oven bake.
- Press Down Gently: Before you put the sliders in the oven, after you’ve placed the top rolls on, give them a gentle press down with the palm of your hand. This helps to compact them slightly, making them easier to cut and ensuring the cheese melts evenly into the beef and rolls.
- Vary Your Cheese: While American cheese is a classic for a reason, don’t be afraid to experiment! Provolone, pepper jack for a little kick, or even thinly sliced smoked gouda can add a fantastic twist to your sliders.
- Elevate the Butter Topping: Beyond garlic and parsley, consider adding a tiny pinch of dried onion flakes or a sprinkle of poppy seeds to your melted butter for an extra layer of texture and flavor on the rolls. A dash of your favorite savory spice blend can also work wonders.
- Add Toppings After Baking: For the best texture, I highly recommend adding fresh toppings like lettuce, tomato slices, or raw onion after the sliders come out of the oven. This keeps them crisp and fresh. Pickles are sometimes okay to bake in, but for max crunch, add them fresh too.
- Prepare Ahead: You can assemble these sliders up to a few hours in advance, cover them tightly with plastic wrap, and refrigerate. When you’re ready to bake, pull them out of the fridge about 30 minutes beforehand to come closer to room temperature, then proceed with the brushing and baking steps. This is a lifesaver for parties!
- Serve with a Side: These cheeseburger sliders are fantastic on their own, but they’re even better with a side of crispy oven fries, a simple green salad, or some creamy coleslaw.
Storage
It’s rare to have leftovers of these delicious cheeseburger sliders, but if you do, here’s how to store them to keep them tasting great for another meal!
Refrigeration: Allow any leftover sliders to cool completely to room temperature. This is important to prevent condensation, which can make them soggy. Once cooled, place them in an airtight container or wrap them tightly in aluminum foil or plastic wrap. Store them in the refrigerator for up to 2-3 days.
Reheating: For the best results, I always recommend reheating these sliders in the oven. Preheat your oven to 300°F (150°C). Place the leftover sliders in a baking dish, cover them loosely with aluminum foil (this helps prevent them from drying out), and bake for 10-15 minutes, or until they are warmed through and the cheese is melted and gooey again. If you prefer a crispier roll, you can remove the foil for the last few minutes of reheating.
You can also reheat them in the microwave, but be aware that the rolls might not be as soft, and the texture can become a bit chewy. Microwave on medium power for 30-60 seconds, or until heated through.
Final Thoughts
And there you have it, my friends! We’ve just unlocked the secret to a truly irresistible treat with these incredible Cheeseburger Sliders With Hawaiian Rolls (oven Method). I honestly can’t get enough of how effortlessly delicious this recipe is. The magic really happens when those sweet, soft Hawaiian rolls perfectly hug the savory seasoned beef and gooey melted cheese, all baked together into golden perfection in your oven. It’s the kind of dish that disappears from the platter almost as quickly as you make it!
Whether you’re hosting a game night, planning a party, or simply looking for a fun and easy weeknight dinner, the Cheeseburger Sliders With Hawaiian Rolls (oven Method) are an absolute game-changer. They’re miniature in size but huge on flavor and convenience, making them a guaranteed crowd-pleaser every single time. Trust me, once you try this method, you’ll wonder how you ever lived without this brilliant little recipe. So go ahead, gather your ingredients, and prepare to delight everyone (including yourself!) with these phenomenal sliders!

Cheeseburger Sliders: Easy Oven Recipe with Hawaiian Rolls
- Total Time: 45 minutes
- Yield: 12 sliders 1x
Description
These Cheeseburger Sliders with Hawaiian Rolls are a delicious and easy way to serve a crowd. Enjoy the savory flavor of classic cheeseburgers in a fun, bite-sized package!
Ingredients
- 1 lb 80/20 ground beef
- Salt
- Black pepper
- 1 tsp garlic powder
- 1 tsp onion powder
- 12 Hawaiian rolls
- 12 slices American cheese (or cheddar, provolone, or Monterey Jack)
- 1/4 cup unsalted butter
- 1 tsp garlic powder (for butter topping)
- 1/2 tsp dried parsley
- Dash of Worcestershire sauce (optional)
- Sliced dill pickles
- Thinly sliced red onion (optional)
- Ketchup (optional)
- Mustard (optional)
- Special sauce (optional)
Instructions
- Preheat your oven to 350°F (175°C).
- In a large bowl, gently mix your ground beef with salt, black pepper, garlic powder, and onion powder. Divide the seasoned beef into 12 small, thin patties.
- Heat a large skillet over medium-high heat. Add your patties to the hot skillet and cook for about 2-3 minutes per side until browned and mostly cooked through. Remove the patties from the skillet and set aside.
- Carefully slice the entire package of Hawaiian rolls horizontally in half, keeping all the top halves connected and all the bottom halves connected. Place the bottom half of the rolls in your prepared baking dish.
- Arrange the cooked beef patties evenly over the bottom half of the rolls. Place a slice of cheese over each beef patty.
- Carefully place the top half of the Hawaiian rolls back over the cheese and patties.
- In a small bowl, melt 1/4 cup of unsalted butter. Stir in 1 teaspoon of garlic powder, 1/2 teaspoon of dried parsley, and a dash of Worcestershire sauce if using.
- Generously brush the melted butter mixture over the top of the assembled sliders. Cover the baking dish tightly with aluminum foil.
- Bake the covered baking dish in your preheated oven for 15 minutes.
- After 15 minutes, remove the foil and bake for another 5-10 minutes until the tops of the rolls are golden brown and the cheese is bubbly and melted.
- Let them cool for a minute or two before slicing them into individual sliders. Serve hot with your favorite condiments on the side.
- Prep Time: 15 mins
- Cook Time: 30 mins
- Category: Dinner
- Method: Baking
- Cuisine: American
Nutrition
- Serving Size: 1 slider
- Calories: 250
- Sugar: 2 g
- Sodium: 450 mg
- Fat: 15 g
- Saturated Fat: 7 g
- Unsaturated Fat: 6 g
- Trans Fat: 0 g
- Carbohydrates: 20 g
- Fiber: 1 g
- Protein: 12 g
- Cholesterol: 40 mg
Keywords: Don't overwork the meat when mixing. Make patties slightly thinner than you think they need to be to account for shrinkage during cooking. Add fresh toppings like lettuce and tomato after baking for the best texture.


Leave a Comment