

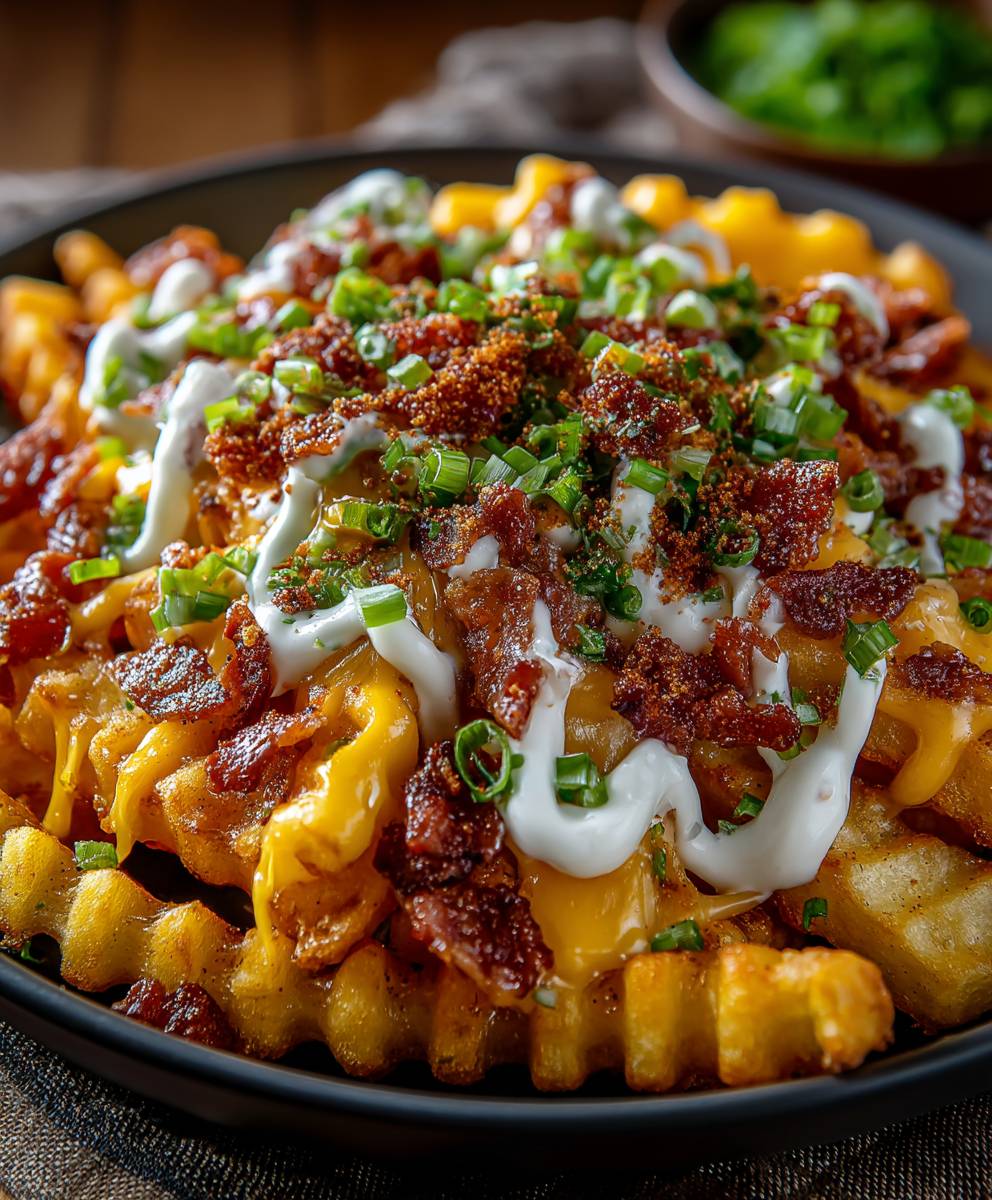
Cheesy Loaded Fries: Prepare to meet your new favorite comfort food! Imagine crispy, golden fries smothered in a blanket of melted cheese and piled high with your favorite toppings. This isn’t just a side dish; it’s a complete experience, a symphony of textures and flavors that will have you craving more with every single bite.
While the exact origins of loaded fries are a bit hazy, their popularity exploded in the latter half of the 20th century, evolving from simple cheese fries to the decadent creations we know and love today. They represent a celebration of indulgence, a perfect marriage of American fast-food staples with endless customization possibilities. Think of them as a blank canvas for your culinary creativity!
What makes cheesy loaded fries so irresistible? It’s the perfect combination of textures – the satisfying crunch of the fries, the gooey melt of the cheese, and the burst of flavor from the toppings. They’re also incredibly convenient and customizable. Whether you’re looking for a quick and easy snack, a crowd-pleasing appetizer, or a fun and satisfying meal, loaded fries always deliver. Plus, who can resist the allure of perfectly cooked fries drenched in cheese? Get ready to elevate your fry game!

Ingredients:
- 2 large russet potatoes, peeled and cut into ½-inch thick fries
- 2 tablespoons olive oil
- 1 teaspoon garlic powder
- 1 teaspoon onion powder
- 1 teaspoon smoked paprika
- ½ teaspoon salt
- ¼ teaspoon black pepper
- 8 ounces cheddar cheese, shredded
- 4 ounces Monterey Jack cheese, shredded
- 4 slices bacon, cooked and crumbled
- ½ cup sour cream
- ¼ cup chopped green onions
- Optional toppings: jalapenos, ranch dressing, BBQ sauce
Preparing the Fries:
- Soak the fries: After cutting the potatoes into fries, place them in a large bowl filled with cold water. Let them soak for at least 30 minutes, or up to 2 hours. This step is crucial for removing excess starch, which will result in crispier fries. I find that the longer they soak, the better the texture.
- Preheat the oven: Preheat your oven to 400°F (200°C). While the oven is heating, you can prepare the fries for baking.
- Dry the fries thoroughly: Drain the fries and pat them completely dry with paper towels. This is another key step for achieving crispy fries. Any excess moisture will steam the fries in the oven instead of allowing them to crisp up. I usually use several layers of paper towels and press down firmly to remove as much water as possible.
- Season the fries: In a large bowl, toss the dried fries with olive oil, garlic powder, onion powder, smoked paprika, salt, and pepper. Make sure the fries are evenly coated with the oil and spices. I like to use my hands to ensure that every fry is well seasoned.
- Arrange on a baking sheet: Spread the seasoned fries in a single layer on a large baking sheet. Avoid overcrowding the pan, as this will also prevent the fries from crisping properly. If necessary, use two baking sheets. I recommend lining the baking sheet with parchment paper for easy cleanup.
Baking the Fries:
- Bake the fries: Bake the fries for 20 minutes, then flip them and bake for another 15-20 minutes, or until they are golden brown and crispy. The baking time may vary depending on your oven, so keep an eye on them. I usually check them after 15 minutes on the second side and adjust the time accordingly.
- Check for doneness: To check if the fries are done, pierce one with a fork. It should be tender on the inside and crispy on the outside. If they are not crispy enough, you can bake them for a few more minutes.
Preparing the Cheese Sauce (Optional, but highly recommended for extra cheesiness):
While the fries are baking, you can prepare a simple cheese sauce to pour over them before adding the shredded cheese. This will make them extra gooey and delicious.
- 2 tablespoons butter
- 2 tablespoons all-purpose flour
- 1 ½ cups milk
- 4 ounces cheddar cheese, shredded
- Salt and pepper to taste
- Melt the butter: In a medium saucepan, melt the butter over medium heat.
- Whisk in the flour: Whisk in the flour and cook for 1-2 minutes, stirring constantly, to create a roux. This will help thicken the sauce.
- Gradually add the milk: Gradually whisk in the milk, a little at a time, until the mixture is smooth and there are no lumps.
- Simmer the sauce: Bring the sauce to a simmer, stirring constantly, and cook for 5-7 minutes, or until it has thickened slightly.
- Add the cheese: Remove the saucepan from the heat and stir in the shredded cheddar cheese until it is melted and smooth.
- Season the sauce: Season the cheese sauce with salt and pepper to taste.
Assembling the Loaded Fries:
- Add cheese to the fries: Once the fries are baked, remove them from the oven and immediately sprinkle them with the shredded cheddar cheese and Monterey Jack cheese. If you made the cheese sauce, pour it over the fries before adding the shredded cheese.
- Melt the cheese: Return the baking sheet to the oven and bake for 2-3 minutes, or until the cheese is melted and bubbly. You can also use the broiler for a minute or two, but watch them carefully to prevent the cheese from burning. I prefer the broiler method for a quick and easy melt.
- Add the toppings: Remove the loaded fries from the oven and top with the crumbled bacon, sour cream, and chopped green onions.
- Serve immediately: Serve the cheesy loaded fries immediately while they are hot and the cheese is melted and gooey.
Tips for the Best Cheesy Loaded Fries:
- Use the right potatoes: Russet potatoes are the best choice for fries because they are high in starch and low in moisture, which results in crispy fries.
- Don’t skip the soaking step: Soaking the fries in cold water is essential for removing excess starch and achieving crispy fries.
- Dry the fries thoroughly: Make sure the fries are completely dry before seasoning them, as any excess moisture will prevent them from crisping up.
- Don’t overcrowd the baking sheet: Spread the fries in a single layer on the baking sheet to ensure that they crisp up properly.
- Use high-quality cheese: Use high-quality cheddar cheese and Monterey Jack cheese for the best flavor and melting properties.
- Add your favorite toppings: Feel free to customize the toppings to your liking. Some other great options include jalapenos, ranch dressing, BBQ sauce, and chili.
- Serve immediately: Cheesy loaded fries are best served immediately while they are hot and the cheese is melted and gooey.
Variations:
- Chili Cheese Fries: Top the fries with chili instead of bacon.
- Pulled Pork Fries: Top the fries with pulled pork and BBQ sauce.
- Buffalo Chicken Fries: Top the fries with shredded buffalo chicken and ranch dressing.
- Pizza Fries: Top the fries with pizza sauce, mozzarella cheese, and pepperoni.
- Garlic Parmesan Fries: Toss the baked fries with garlic butter and grated Parmesan cheese.
Make Ahead Tips:
While cheesy loaded fries are best served fresh, you can prepare some of the components ahead of time to save time later.
- Cut the fries: You can cut the potatoes into fries and soak them in water up to 24 hours in advance. Store them in the refrigerator in a bowl of cold water.
- Cook the bacon: You can cook the bacon and crumble it up to 2 days in advance. Store it in an airtight container in the refrigerator.
- Shred the cheese: You can shred the cheese up to 3 days in advance. Store it in an airtight container in the refrigerator.
- Make the cheese sauce: You can make the cheese sauce up to 2 days in advance. Store it in an airtight container in the refrigerator. Reheat it gently over low heat, stirring frequently, until it is smooth and creamy. You may need to add a little milk to thin it out.
Storage and Reheating:
Cheesy loaded fries are best eaten immediately, but if you have leftovers, you can store them in an airtight container in the refrigerator for up to 2 days. To reheat them, spread them out on a baking sheet and bake at 350°F (175°C) for 10-15 minutes, or until they are heated through. The fries will not be as crispy as they were when they were first made, but they will still be delicious. You can also reheat them in the microwave, but they will be even less crispy.
Nutritional Information (Approximate, per serving):
Please note that the nutritional information is an estimate and may vary depending on the specific ingredients used and portion sizes.
- Calories: 600-800
- Fat: 40-50g
- Saturated Fat: 20-30g
- Cholesterol: 100-150mg
- Sodium: 800-1200mg
- Carbohydrates: 50-70g
- Fiber: 5-8g
- Sugar: 5-10g
- Protein: 20-30g
Why This Recipe Works:
This recipe for cheesy loaded fries works because it focuses on creating crispy fries as the foundation. The soaking process removes excess starch, and thorough drying ensures they bake
Conclusion:
This isn’t just another fries recipe; it’s a flavor explosion waiting to happen! Seriously, these Cheesy Loaded Fries are the ultimate comfort food, perfect for game night, a casual get-together, or even just a treat-yourself kind of evening. The combination of crispy fries, gooey cheese, and all those delicious toppings creates a symphony of textures and tastes that will leave you wanting more. I know I always do!
But what truly makes these fries a must-try is their versatility. Feel free to get creative with your toppings! While I’ve suggested a classic combination of bacon, cheddar, and green onions, the possibilities are endless.
Serving Suggestions and Variations:
* Spice it up: Add some diced jalapeños or a sprinkle of red pepper flakes for a fiery kick. A drizzle of sriracha mayo would also be amazing!
* Go Mediterranean: Top your fries with feta cheese, olives, sun-dried tomatoes, and a dollop of tzatziki sauce.
* Pulled Pork Paradise: Swap the bacon for tender, smoky pulled pork and add a drizzle of barbecue sauce.
* Vegetarian Delight: Load up your fries with black beans, corn, salsa, guacamole, and a dollop of sour cream.
* Breakfast for Dinner: Crumble some breakfast sausage on top, add a fried egg, and drizzle with hollandaise sauce.
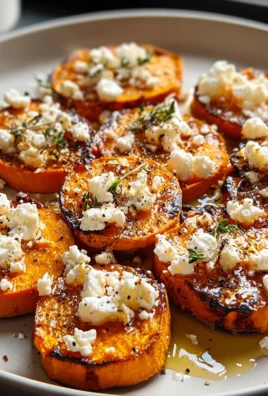
* Sweet and Savory: Try sweet potato fries as the base and top with goat cheese, caramelized onions, and a balsamic glaze.
Don’t be afraid to experiment and find your perfect combination! You can even set up a toppings bar and let everyone customize their own Cheesy Loaded Fries. It’s a guaranteed crowd-pleaser.
I truly believe that this recipe is a winner. It’s easy to follow, quick to prepare, and incredibly satisfying. Plus, it’s a great way to use up leftover ingredients in your fridge.
So, what are you waiting for? Grab your potatoes, gather your toppings, and get ready to indulge in the most amazing fries you’ve ever tasted. I’m confident that these Cheesy Loaded Fries will become a new favorite in your household.
And now for the most important part: I want to hear from you! Once you’ve tried this recipe, please share your experience in the comments below. What toppings did you use? What did you think of the flavor? Did you make any modifications? I’m always eager to learn from your culinary adventures and see how you’ve put your own spin on this classic dish. Your feedback is invaluable and helps me improve my recipes for everyone. Happy cooking, and happy eating! I can’t wait to hear all about your cheesy, loaded fry creations! Let me know if you have any questions, too. I’m here to help!
Cheesy Loaded Fries: The Ultimate Guide to Deliciousness
Crispy oven-baked fries loaded with cheddar and Monterey Jack cheese, crispy bacon, sour cream, and green onions. Perfect for a game day snack or a fun family treat!
Ingredients
Instructions
Recipe Notes
- Soaking the fries is crucial for removing excess starch and achieving crispy fries.
- Make sure the fries are completely dry before seasoning them.
- Don’t overcrowd the baking sheet.
- Use high-quality cheese for the best flavor and melting properties.
- Customize the toppings to your liking.

Leave a Comment