

Chocolate Blossom Cookies are truly a timeless classic that brings joy to every occasion. Imagine biting into a perfectly chewy, intensely chocolatey cookie, crowned with a soft, melty chocolate kiss right in its center. It’s a combination that has charmed generations, becoming a staple on holiday platters and a beloved treat at bake sales across the country. While their peanut butter cousins often steal the spotlight, I believe these chocolate variations offer an equally delightful, rich, and utterly irresistible experience that stands proudly on its own.
Why We Adore These Iconic Treats
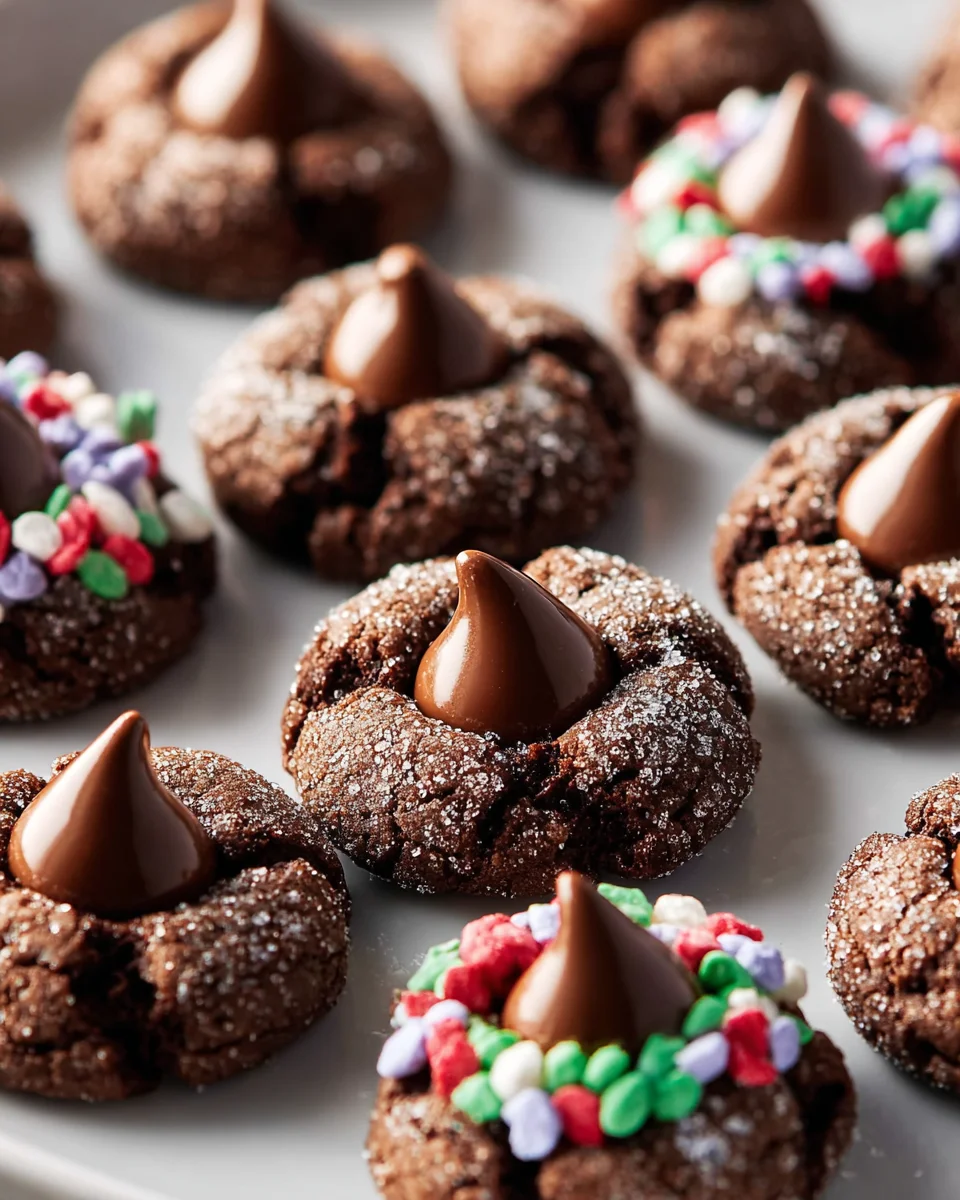
The allure of Chocolate Blossom Cookies lies not just in their exquisite flavor, but also in their nostalgic charm. For many, they evoke cherished memories of childhood baking with family or the excitement of finding one on a festive plate. Their unique “blossom” appearance, with the chocolate candy nestled atop, makes them incredibly appealing and instantly recognizable. People absolutely adore them for their contrasting textures – the slightly crisp edge, the tender crumb, and the smooth, melting chocolate center that provides the perfect sweet finish. They’re relatively simple to make, yet always impress, proving that sometimes, the simplest pleasures are indeed the best.

Ingredients:
- 1 cup (2 sticks) unsalted butter, softened to room temperature
- ¾ cup granulated sugar, plus extra for rolling
- ½ cup packed light brown sugar
- 2 large eggs, at room temperature
- 1 teaspoon pure vanilla extract
- 1 ¾ cups all-purpose flour
- ¾ cup unsweetened cocoa powder (Dutch-processed for a darker, milder chocolate flavor is preferred)
- 1 teaspoon baking soda
- ½ teaspoon salt
- 1 bag (approx. 9-10 ounces) Hershey’s Kisses or other desired chocolate candies (about 48-50 pieces), unwrapped
Preparing the Chocolate Cookie Dough
- Before you begin your chocolate blossom cookies journey, gather all your ingredients. It’s a wonderful habit to get into, often called “mise en place,” and it truly makes the baking process so much smoother and more enjoyable. Make sure your butter and eggs are at room temperature. This is crucial for a perfectly emulsified dough, meaning your ingredients will blend together beautifully without separating, resulting in a tender, consistent cookie. If your butter isn’t soft enough, you can cut it into smaller pieces and let it sit for a bit, or gently microwave it in 5-second bursts until pliable, but not melted.
- In a large mixing bowl, using either a stand mixer fitted with the paddle attachment or a hand mixer, cream together the softened unsalted butter, ¾ cup of granulated sugar, and ½ cup of light brown sugar. You’ll want to beat this mixture on medium-high speed for about 3 to 4 minutes. The goal here is to achieve a light, fluffy, and pale-yellow consistency. This creaming process incorporates air into the butter and sugar, which is essential for the texture of your finished chocolate blossom cookies. Don’t rush this step; it’s fundamental to a soft and chewy cookie. Scrape down the sides of the bowl midway through to ensure everything is evenly combined.
- Once your butter and sugar mixture is perfectly fluffy, it’s time to add the eggs. Add them one at a time, beating well after each addition. This ensures that each egg is fully incorporated into the mixture. After the eggs, stir in the pure vanilla extract. Vanilla enhances the chocolate flavor beautifully, making your chocolate blossom cookies even more irresistible. Continue beating on medium speed until the mixture is cohesive and smooth, again scraping down the sides of the bowl as needed. The mixture might look a little curdled after adding the first egg, but it will come together as you add the second.
- In a separate medium bowl, whisk together the dry ingredients: the all-purpose flour, unsweetened cocoa powder, baking soda, and salt. Whisking ensures that these ingredients are evenly distributed, especially the leavening agent (baking soda), which will help your chocolate blossom cookies rise perfectly. If you’re using Dutch-processed cocoa, you’ll notice a darker hue and a slightly less bitter chocolate flavor compared to natural cocoa. Both work, but Dutch-processed often gives a richer color and smoother taste for these types of cookies.
- Gradually add the dry ingredients to the wet ingredients, mixing on low speed until just combined. It’s vitally important not to overmix the dough at this stage. Overmixing develops the gluten in the flour too much, which can lead to tough, dense chocolate blossom cookies instead of the soft, tender ones we’re aiming for. Stop mixing as soon as you no longer see streaks of dry flour. The dough will be thick and rich.
- Cover the bowl with plastic wrap and refrigerate the chocolate cookie dough for at least 30 minutes, or up to 2 hours. Chilling the dough is a critical step for these chocolate blossom cookies. It helps the butter solidify, which prevents the cookies from spreading too much in the oven, ensuring they maintain their shape. It also allows the flavors to meld together and makes the dough much easier to handle when rolling. You can even make the dough a day ahead and store it in the refrigerator.
Rolling and Preparing for Baking
- While your dough is chilling, preheat your oven to 375°F (190°C). Line two large baking sheets with parchment paper. Parchment paper is a baker’s best friend; it prevents sticking and makes cleanup a breeze. It also helps with even baking. Unwrap all of your Hershey’s Kisses or other chocolate candies and set them aside. You’ll want these ready to go as soon as the cookies come out of the oven.
- Place about ½ cup of granulated sugar in a shallow bowl. This sugar will be used to roll your chocolate blossom cookies, giving them a delightful sparkly crust and a touch of extra sweetness that contrasts beautifully with the rich chocolate.
- Once the dough has chilled sufficiently, remove it from the refrigerator. Scoop out rounded tablespoons of dough. I find a small cookie scoop (about 1.5-inch diameter) is perfect for this, ensuring uniform cookie size, which leads to even baking. Roll each portion of dough between your palms to form a smooth ball, approximately 1 inch in diameter.
- Roll each chocolate cookie dough ball generously in the granulated sugar, ensuring it’s completely coated. The sugar adds a lovely sparkle and a slight crunch to the exterior of the chocolate blossom cookies, making them visually appealing and texturally interesting.
- Place the sugar-coated dough balls onto the prepared baking sheets, leaving about 2 inches of space between each cookie. Remember, these cookies will spread a little, so giving them ample space prevents them from merging into one giant cookie. Don’t crowd the baking sheet; if you have too many cookies on one sheet, it can affect how they bake due to steam build-up.
Baking the Chocolate Blossom Cookies
- Bake the chocolate blossom cookies one sheet at a time in your preheated oven for 8 to 10 minutes. The exact baking time can vary slightly depending on your oven, so keep an eye on them. You’re looking for cookies that are set around the edges but still appear slightly soft in the center. The centers will firm up as they cool. They won’t spread a lot, thanks to the chilling, but they will puff up nicely. Do not overbake these cookies, or they will lose their signature soft and chewy texture. They should look slightly puffed and a little cracked on top.
- As soon as you remove the baking sheet from the oven, immediately press one unwrapped Hershey’s Kiss or chocolate candy into the center of each warm cookie. Press firmly enough so that the candy is securely seated in the cookie, but not so hard that the cookie cracks apart completely. The residual heat from the freshly baked chocolate blossom cookies will gently melt the chocolate candy, making it soft and gooey. If you wait too long, the cookies will cool and harden, and the candy won’t adhere or melt properly.
Cooling and Finishing Touches
- Allow the cookies to cool on the baking sheet for about 5 minutes after pressing in the candies. This initial cooling period allows the cookies to set up a bit more and prevents them from breaking when you transfer them. It also gives the chocolate candy a chance to start melting and melding with the cookie.
- After 5 minutes, carefully transfer the chocolate blossom cookies to a wire rack to cool completely. This is a crucial step for preventing soggy bottoms, as air circulation around the entire cookie allows them to cool evenly. The chocolate candies will continue to soften and then firm up as they cool. If you like a slightly firmer chocolate center, you can even pop the cooled cookies into the refrigerator for 10-15 minutes after the chocolate has fully set.
-
Tips for the Perfect Chocolate Blossom Cookies:
- Room Temperature Ingredients: I cannot stress this enough! Butter and eggs at room temperature ensure a smooth, emulsified dough and a tender cookie texture.
- Don’t Overmix: As mentioned, overmixing develops gluten, leading to tough cookies. Mix only until ingredients are just combined.
- Chilling is Key: Don’t skip the chilling step. It prevents spreading and makes the dough easier to handle. For an even firmer dough or if you’re baking in a warm kitchen, you can chill for longer.
- Even Scooping: Use a cookie scoop to ensure all your chocolate blossom cookies are the same size. This guarantees they bake evenly, so you don’t have some burnt and some underdone.
- Timing is Everything for the Kiss: Press those chocolate candies in immediately after baking. If they cool too much, the chocolate won’t melt properly and stick.
- Quality Cocoa: Using a good quality cocoa powder, especially Dutch-processed, will significantly impact the depth and richness of your chocolate blossom cookies.
-
Variations to Experiment With:
- Different Kisses: While Hershey’s Kisses are classic, don’t be afraid to try other flavors! Hugs (white chocolate), dark chocolate Kisses, caramel-filled Kisses, or even peppermint Kisses during the holidays can add a wonderful twist to your chocolate blossom cookies. You could also use mini peanut butter cups for a delightful chocolate-peanut butter combination.
- Extract Adventures: A touch of almond extract instead of, or in addition to, vanilla extract can add a delightful complexity. Peppermint extract is fantastic for a holiday version, especially with a peppermint Kiss! Orange extract could also brighten up the chocolate flavor.
- Spiced Chocolate: A pinch of cinnamon, chili powder, or even a tiny amount of cayenne pepper can elevate the chocolate flavor to something truly sophisticated and unexpected. Start small and taste your dough (before adding eggs, for safety) if you’re unsure.
- Rolling Options: Instead of just granulated sugar, you could roll the dough balls in a mix of granulated sugar and a touch of cinnamon, or even in colorful sprinkles before baking for a festive look. Some bakers like to roll in powdered sugar after rolling in granulated sugar for a “snow-capped” effect, but for these chocolate blossom cookies, the granulated sugar provides a nice contrast and sparkle.
- Miniature Marvels: Make smaller cookies by using a teaspoon of dough instead of a tablespoon. Adjust baking time accordingly (likely 6-8 minutes). These are perfect for dessert platters or if you want to stretch your batch further.
- Storing Your Chocolate Blossom Cookies: These cookies are best enjoyed within 3-4 days of baking. Store them in an airtight container at room temperature. To prevent the chocolate kisses from sticking to each other, you can place a piece of parchment paper between layers of cookies. If your kitchen is very warm, you might consider storing them in the refrigerator, but allow them to come to room temperature for the best texture and flavor before serving. For longer storage, chocolate blossom cookies freeze exceptionally well for up to 2-3 months. Place them in a single layer on a baking sheet to freeze solid, then transfer them to an airtight freezer-safe container or bag. Thaw at room temperature before serving.
Conclusion:
Well, my friends, we’ve reached the sweet end of our journey through this delightful recipe, and I hope you’re feeling as inspired as I am to get baking! What truly makes these cookies a non-negotiable addition to your baking repertoire isn’t just their stunning appearance, but the absolute joy they bring with every single bite. We’re talking about a cookie that masterfully balances a rich, deep chocolate base with the luscious, melty surprise of a chocolate kiss at its heart. It’s a combination that’s both classic and utterly irresistible, promising to become an instant favorite in your household. Imagine biting into a cookie that’s perfectly soft and chewy, yielding just enough to reveal that warm, creamy chocolate center – pure bliss, right?
I genuinely believe that these aren’t just any cookies; they are an experience. They are the kind of treat that brings people together, sparking smiles and happy memories. From the moment the aroma fills your kitchen to the first appreciative hum from someone enjoying a freshly baked one, these Chocolate Blossom Cookies are designed to deliver pure happiness. They are surprisingly simple to make, yet possess an elegance that makes them suitable for any occasion, whether it’s a casual weeknight dessert, a festive holiday gathering, or a thoughtful gift for a loved one. The simple act of pressing that chocolate kiss into the warm cookie dough transforms a humble treat into a work of edible art, and trust me, the reward for that small effort is immense. You’ll find yourself reaching for this recipe again and again because of their consistent deliciousness and how effortlessly they impress.
Serving Up Sweetness: My Favorite Ways to Enjoy and Experiment
Now that you’re practically drooling, let’s talk about how to make these delightful cookies even more special. While they are absolutely phenomenal straight from the cooling rack, still warm and gooey, a tall glass of cold milk is their quintessential companion. The milky coolness provides the perfect contrast to the rich chocolate, making for an unforgettable snack. For an adult twist, I love serving them alongside a steaming mug of black coffee or a delicate cup of herbal tea – the flavors truly complement each other beautifully.
But why stop there? These cookies are incredibly versatile! For a dessert platter that truly shines, arrange them artfully with some fresh berries, a dollop of whipped cream, or even a scoop of vanilla bean ice cream. Consider them the star of your next cookie exchange; they always disappear first! If you’re feeling adventurous, don’t hesitate to experiment with different types of chocolate kisses. Imagine using caramel-filled kisses for a gooey, buttery surprise, or perhaps white chocolate kisses for a visual contrast and a sweeter profile. For the festive season, you could even press in peppermint bark kisses for a holiday twist, or sprinkle the warm cookies with a pinch of sea salt to enhance the chocolate’s depth. A touch of orange zest in the dough would also provide a beautiful bright note, or you could add finely chopped nuts for extra texture. The possibilities are truly endless, and each variation simply adds another layer of personalized magic to your batch of cookies.
Your Turn to Bake and Share!
So, what are you waiting for? I wholeheartedly encourage you to carve out some time in your schedule, gather your ingredients, and immerse yourself in the delightful process of baking these sensational cookies. You’ll find the experience to be incredibly rewarding, from mixing the dough to the moment those perfect blossom shapes emerge from the oven. Don’t be shy about making them your own with some of the variations I suggested, or even coming up with your unique twist!
Once you’ve experienced the pure joy of biting into your very own freshly baked batch, I would absolutely love to hear all about it! Did you use a different kind of chocolate kiss? Did your family rave about them? How did they fare at your latest gathering? Please, share your baking triumphs, your photos, and your invaluable feedback with me. Your experiences not only inspire me but also help our wonderful community of home bakers. Let’s celebrate the simple, profound pleasure that comes from creating something truly delicious from scratch. Go forth, bake some magic, and let these incredible Chocolate Blossom Cookies bring a little extra sweetness into your life and the lives of those you love. Happy baking!
Chocolate Blossom Cookies
A timeless classic, these chocolate blossom cookies feature a chewy, intensely chocolatey base crowned with a soft, melty chocolate kiss. A delightful, rich, and utterly irresistible treat for any occasion.
Ingredients
Instructions
Important Information
Nutrition Facts (Per Serving)
It is important to consider this information as approximate and not to use it as definitive health advice.
Allergy Information
Please check ingredients for potential allergens and consult a health professional if in doubt.


Leave a Comment