

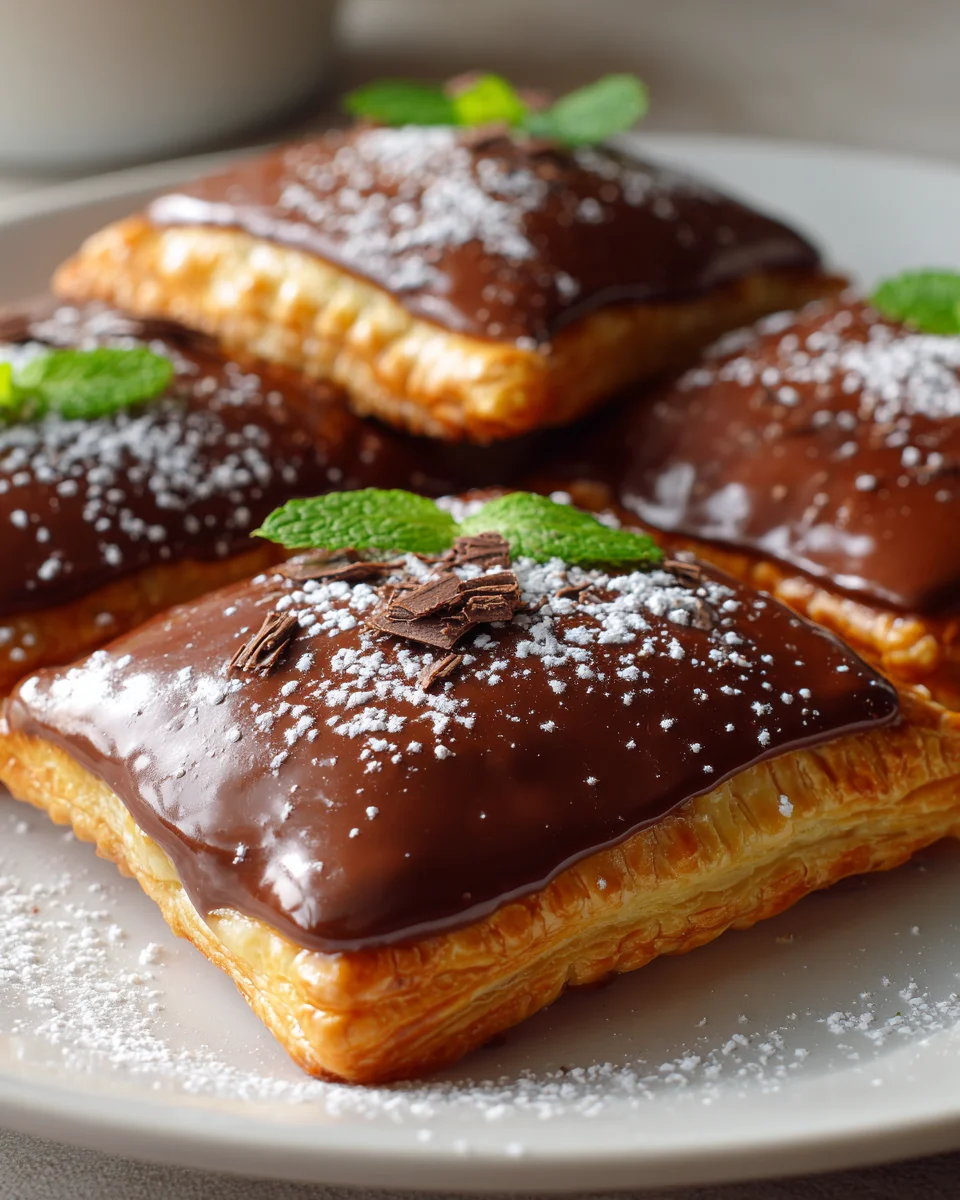
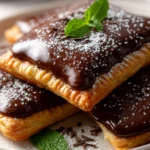
Chocolate Fudge Pop Tarts
Chocolate Fudge Pop Tarts – Get ready to redefine your concept of a toaster pastry! I know, I know, the store-bought version holds a special place in many hearts, but trust me when I say we’re about to embark on a journey that will blow those nostalgic memories right out of the water. What makes my homemade Chocolate Fudge Pop Tarts truly special? It’s the difference between a quickly toasted snack and a truly luxurious, made-with-love confection. We’re talking about a tender, golden, and genuinely flaky pastry that gives way to an explosion of warm, intensely rich, and gooey chocolate fudge – none of that thin, barely-there filling you might be used to!
You, my friend, are going to absolutely love making (and devouring!) these because they offer the ultimate comfort food experience with a gourmet twist. Imagine waking up to the smell of freshly baked pastries, or surprising your loved ones with a breakfast treat that feels like it came from a fancy bakery, but truly showcases your own culinary magic. They’re perfect for a decadent breakfast, a satisfying afternoon pick-me-up, or even a unique dessert that will have everyone asking for seconds. Plus, the sheer joy of creating something so utterly delicious from scratch is incredibly rewarding.
So, let me give you a quick peek at what awaits. We’ll be crafting a buttery, homemade pastry dough from scratch, rolling it out to perfection, and then sandwiching a generous portion of our luscious, deep chocolate fudge filling between two layers. These little pockets of joy are then carefully baked until golden and flaky, and finished with a sweet, elegant glaze that complements the rich chocolate beautifully. Get ready for a truly elevated take on a classic!

Ingredient Notes
Crafting homemade Chocolate Fudge Pop Tarts means you have full control over the quality and richness of every single bite. While they might seem like a project, using the right ingredients makes all the difference. Here’s what I recommend to achieve that nostalgic, comforting flavor we all adore, with a gourmet twist.
- For the Pastry Dough:
- Store-Bought Pie Crust: To keep things simple and delicious, I often reach for a good quality, store-bought refrigerated pie crust. You’ll need two rolls, which typically yield about 6-8 Pop Tarts. Look for an all-butter crust if possible; it offers unparalleled flakiness and flavor.
- Homemade Dough (Optional): If you’re feeling ambitious, a classic all-butter pie dough recipe works wonderfully here. Just be sure to chill it thoroughly before rolling.
- Gluten-Free Option: Many excellent gluten-free pie crusts are available in stores now, or you can use your favorite gluten-free pastry recipe.
- For the Chocolate Fudge Filling:
- Unsweetened Cocoa Powder: This is the heart of our fudge. I prefer Dutch-processed cocoa for its darker color and smoother, less acidic chocolate flavor, but natural unsweetened cocoa works too.
- Granulated Sugar: Essential for sweetness and creating that fudgy texture.
- Whole Milk (or Cream): Provides the necessary liquid for a rich, creamy fudge. For a dairy-free alternative, full-fat coconut milk or a good quality plant-based milk (like oat or cashew milk) can be substituted.
- Unsalted Butter: Adds richness and helps the fudge set up beautifully.
- Vanilla Extract: A touch enhances all the chocolatey goodness.
- Salt: Just a pinch balances the sweetness and deepens the chocolate flavor.
- Chocolate Chips (Optional): A handful of semi-sweet or dark chocolate chips melted into the hot fudge filling at the end takes the richness factor over the top.
- For the Chocolate Glaze:
- Powdered Sugar (Confectioners’ Sugar): Creates a smooth, thick glaze.
- Unsweetened Cocoa Powder: For that essential chocolate flavor in the glaze.
- Milk (or Cream): Just a tablespoon or two to thin the glaze to a spreadable consistency. Again, plant-based milks work perfectly for a dairy-free option.
- Vanilla Extract: A small amount adds depth.
- Sprinkles (Optional): Because what’s a Pop Tart without sprinkles?
- Egg Wash (Optional):
- An egg whisked with a tablespoon of water or milk helps the two pastry layers stick together and gives the Pop Tarts a beautiful golden sheen when baked. If you prefer to skip it, water or milk brushed along the edges can also help seal.
Step-by-Step Instructions
Get ready to transform simple ingredients into these incredible Chocolate Fudge Pop Tarts! This process is so rewarding, and soon your kitchen will smell absolutely divine.
- Prepare Your Pastry Dough:
- If using store-bought pie crusts, take them out of the refrigerator about 10-15 minutes before you start, so they’re easier to unroll without cracking.
- Carefully unroll both pie crusts onto a lightly floured surface.
- Using a sharp knife or a pastry wheel, trim the rounded edges to create even rectangles. Then, cut each large rectangle into 3×5-inch smaller rectangles. You should get about 4 rectangles per pie crust, totaling 8 rectangles. I recommend using a ruler to keep them consistent – it makes assembly easier!
- Place half of these rectangles onto a baking sheet lined with parchment paper. These will be the bottom crusts.
- Make the Chocolate Fudge Filling:
- In a small saucepan, combine the cocoa powder, granulated sugar, whole milk (or chosen alternative), unsalted butter, vanilla extract, and a pinch of salt.
- Heat over medium-low heat, whisking constantly, until the butter is melted and the mixture is smooth.
- Continue to cook, stirring frequently, for about 5-7 minutes, until the mixture thickens to a consistency similar to pudding. It should coat the back of a spoon.
- Remove from heat. If using chocolate chips, stir them in now until fully melted and smooth.
- Let the fudge filling cool down for at least 15-20 minutes. It should be warm but not piping hot, and it will thicken further as it cools. A cooler filling is easier to work with and less likely to make your pastry soggy.
- Assemble the Pop Tarts:
- Spoon about 1.5 to 2 tablespoons of the cooled chocolate fudge filling onto the center of each of the bottom pastry rectangles you placed on the baking sheet. Leave a clear ½-inch border around all sides of the filling.
- In a small bowl, whisk together the egg with a tablespoon of water or milk to create an egg wash.
- Lightly brush the exposed pastry borders around the fudge filling with the egg wash (or water/milk if skipping the egg). This acts as a ‘glue’ to seal the top and bottom layers.
- Carefully place the remaining pastry rectangles over the fudge-topped ones, aligning the edges as best as you can.
- Using the tines of a fork, gently press down around all four edges of each Pop Tart to seal them securely. This also creates that classic Pop Tart crimped edge.
- With a small fork or a toothpick, gently prick the top of each Pop Tart a few times. This allows steam to escape during baking and prevents the pastry from puffing up excessively.
- Bake the Pop Tarts:
- Preheat your oven to 375°F (190°C).
- Bake the assembled Pop Tarts for 18-22 minutes, or until the pastry is golden brown and flaky. The filling might be slightly bubbly.
- Carefully remove the baking sheet from the oven and let the Pop Tarts cool on the baking sheet for 5 minutes before transferring them to a wire rack to cool completely. They must be completely cool before glazing.
- Prepare and Glaze:
- While the Pop Tarts are cooling, prepare the chocolate glaze. In a small bowl, whisk together the powdered sugar, cocoa powder, 1 tablespoon of milk (or chosen alternative), and vanilla extract. Add more milk, a tiny bit at a time, until you reach a smooth, spreadable consistency.
- Once the Pop Tarts are fully cooled, spread a thin layer of the chocolate glaze over the top of each one.
- If desired, immediately sprinkle with your favorite colorful or chocolate sprinkles before the glaze sets.
- Allow the glaze to set for about 15-20 minutes before serving. Enjoy your homemade Chocolate Fudge Pop Tarts!
Tips & Suggestions
Making homemade Chocolate Fudge Pop Tarts is incredibly fun, and these little tricks will help you achieve perfection every time:
- Keep Your Dough Cold: Pastry dough works best when it’s cold. If you find your dough getting too warm and sticky while you’re working with it, pop the whole baking sheet with the cut pastry rectangles into the fridge for 10-15 minutes. This helps maintain flakiness.
- Don’t Overfill: It’s tempting to load them up with fudge, but too much filling will make sealing difficult and can cause leaks during baking. Stick to the recommended 1.5-2 tablespoons.
- Cool the Fudge Completely: A warm filling will make your pastry soggy and harder to handle. Ensure your fudge is at least room temperature, or even slightly chilled, before assembling your Pop Tarts. It will be thicker and much easier to work with.
- Seal Them Securely: The egg wash (or water) and the fork crimp are crucial for preventing your delicious fudge from bubbling out during baking. Press firmly but gently.
- Even Baking: If your oven tends to bake unevenly, rotate your baking sheet halfway through the baking time for uniformly golden Pop Tarts.
- Flavor Boosters: For an extra layer of flavor in your fudge filling, consider adding a tiny pinch of instant espresso powder. It won’t make your Pop Tarts taste like coffee, but it will deepen and enhance the chocolate flavor wonderfully.
Storage
Once you’ve made these delightful Chocolate Fudge Pop Tarts, you’ll want to keep them fresh so you can enjoy them for days!
- Room Temperature: Store cooled and glazed Pop Tarts in an airtight container at room temperature for up to 2-3 days. They’re fantastic straight out of the container or warmed slightly in a toaster oven for a few minutes.
- Refrigeration: If your kitchen is particularly warm, or if you prefer them a bit firmer, you can store them in an airtight container in the refrigerator for up to 5 days.
- Freezing: Unbaked Pop Tarts can be frozen! Assemble them completely, then freeze them solid on a baking sheet. Once frozen, transfer to a freezer-safe bag or container for up to 1 month. Bake directly from frozen, adding a few extra minutes to the baking time. Baked Pop Tarts can also be frozen, wrapped individually, for up to 1 month. Thaw at room temperature or reheat gently.
Final Thoughts
And there you have it! I truly hope you’ve embarked on the delicious journey of creating these incredible Chocolate Fudge Pop Tarts. For me, this recipe is an absolute must-try because it takes a beloved nostalgic treat and elevates it to an entirely new level of homemade deliciousness. There’s just something incredibly satisfying about biting into a warm, flaky crust that yields to a rich, gooey chocolate fudge filling, far superior to anything you can pull from a box. These aren’t just any Pop Tarts; these Chocolate Fudge Pop Tarts are a comforting, decadent experience that proves homemade truly is best. I promise, your taste buds will thank you for the effort. Go on, treat yourself and your loved ones to this delightful indulgence!
Irresistible Homemade Chocolate Fudge Pop Tarts
- Total Time: 52 minutes
- Yield: 8 servings 1x
Description
These homemade Chocolate Fudge Pop Tarts redefine the classic toaster pastry with a rich chocolate filling and flaky pastry. Perfect for breakfast or dessert, they offer a gourmet twist on a nostalgic favorite.
Ingredients
- 2 rolls Store-Bought Pie Crust
- Homemade Dough (Optional)
- Gluten-Free Pie Crust (Optional)
- 1/2 cup Unsweetened Cocoa Powder
- 1/2 cup Granulated Sugar
- 1/2 cup Whole Milk (or Cream)
- 1/4 cup Unsalted Butter
- 1 teaspoon Vanilla Extract
- Pinch of Salt
- Chocolate Chips (Optional)
- 1 cup Powdered Sugar (Confectioners' Sugar)
- 1/4 cup Unsweetened Cocoa Powder
- 1–2 tablespoons Milk (or Cream)
- 1 teaspoon Vanilla Extract
- Sprinkles (Optional)
- 1 Egg (Optional)
- 1 tablespoon Water or Milk (for Egg Wash)
Instructions
- Prepare Your Pastry Dough: If using store-bought pie crusts, take them out of the refrigerator about 10-15 minutes before you start, so they're easier to unroll without cracking. Carefully unroll both pie crusts onto a lightly floured surface. Using a sharp knife or a pastry wheel, trim the rounded edges to create even rectangles. Then, cut each large rectangle into 3×5-inch smaller rectangles. You should get about 4 rectangles per pie crust, totaling 8 rectangles. Place half of these rectangles onto a baking sheet lined with parchment paper. These will be the bottom crusts.
- Make the Chocolate Fudge Filling: In a small saucepan, combine the cocoa powder, granulated sugar, whole milk (or chosen alternative), unsalted butter, vanilla extract, and a pinch of salt. Heat over medium-low heat, whisking constantly, until the butter is melted and the mixture is smooth. Continue to cook, stirring frequently, for about 5-7 minutes, until the mixture thickens to a consistency similar to pudding. Remove from heat. If using chocolate chips, stir them in now until fully melted and smooth. Let the fudge filling cool down for at least 15-20 minutes.
- Assemble the Pop Tarts: Spoon about 1.5 to 2 tablespoons of the cooled chocolate fudge filling onto the center of each of the bottom pastry rectangles. Leave a clear ½-inch border around all sides of the filling. In a small bowl, whisk together the egg with a tablespoon of water or milk to create an egg wash. Lightly brush the exposed pastry borders around the fudge filling with the egg wash. Carefully place the remaining pastry rectangles over the fudge-topped ones, aligning the edges as best as you can. Using the tines of a fork, gently press down around all four edges of each Pop Tart to seal them securely. With a small fork or a toothpick, gently prick the top of each Pop Tart a few times.
- Bake the Pop Tarts: Preheat your oven to 375°F (190°C). Bake the assembled Pop Tarts for 18-22 minutes, or until the pastry is golden brown and flaky. Carefully remove the baking sheet from the oven and let the Pop Tarts cool on the baking sheet for 5 minutes before transferring them to a wire rack to cool completely.
- Prepare and Glaze: While the Pop Tarts are cooling, prepare the chocolate glaze. In a small bowl, whisk together the powdered sugar, cocoa powder, 1 tablespoon of milk (or chosen alternative), and vanilla extract. Add more milk, a tiny bit at a time, until you reach a smooth, spreadable consistency. Once the Pop Tarts are fully cooled, spread a thin layer of the chocolate glaze over the top of each one. If desired, immediately sprinkle with your favorite colorful or chocolate sprinkles before the glaze sets. Allow the glaze to set for about 15-20 minutes before serving.
- Prep Time: 30 mins
- Cook Time: 22 mins
- Category: Breakfast/Dessert
- Method: Baking
- Cuisine: American
Nutrition
- Serving Size: 1 Pop Tart
- Calories: 250
- Sugar: 20 g
- Sodium: 150 mg
- Fat: 10 g
- Saturated Fat: 5 g
- Unsaturated Fat: 3 g
- Trans Fat: 0 g
- Carbohydrates: 35 g
- Fiber: 1 g
- Protein: 3 g
- Cholesterol: 20 mg
Keywords: Keep your dough cold for best results, don't overfill the pastries, and ensure the fudge is completely cooled before assembly. Seal the edges securely to prevent filling leaks during baking.

Leave a Comment