

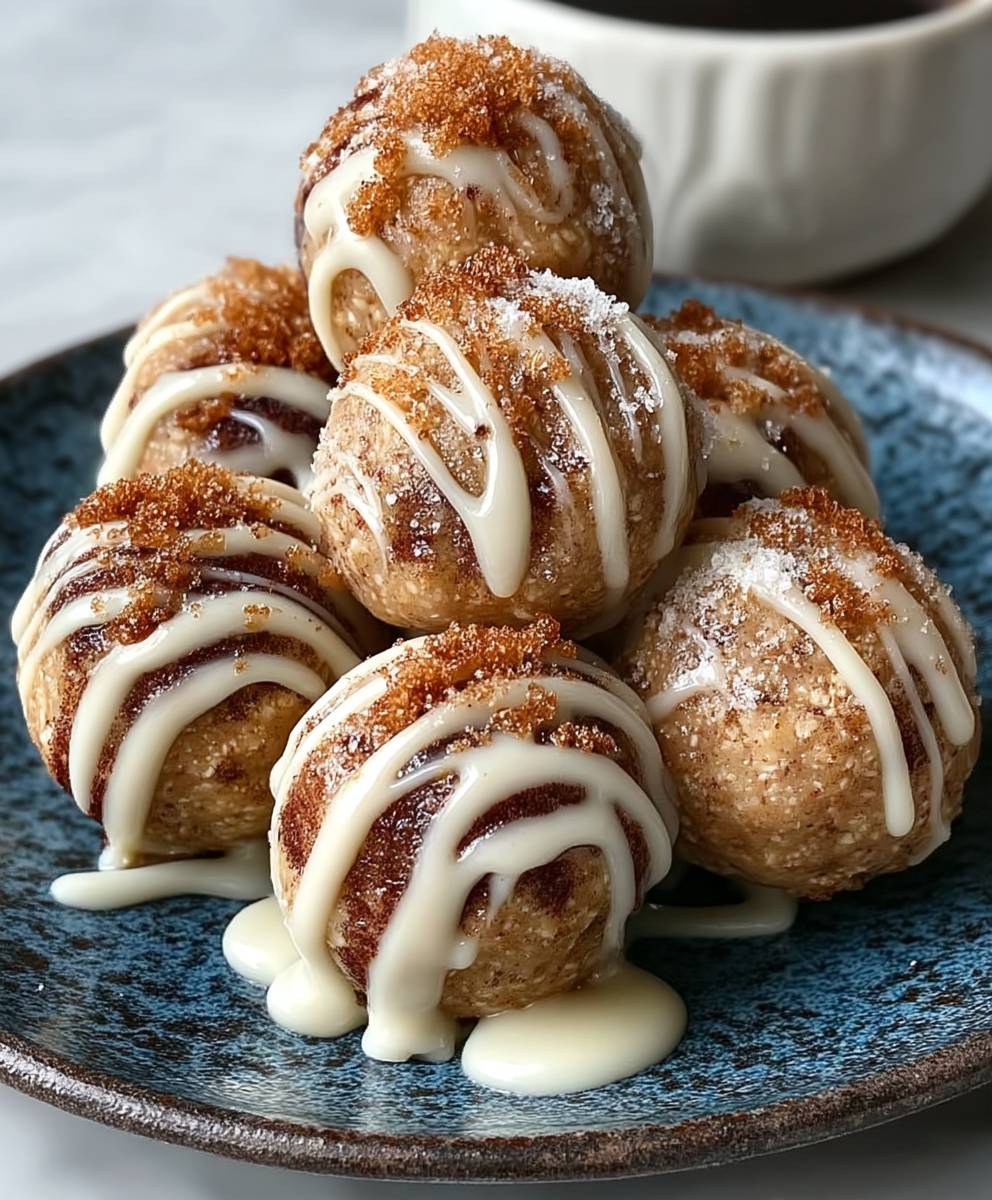
Cinnamon Roll Protein Bites: Craving the comforting warmth of a cinnamon roll but need a protein boost to power through your day? Look no further! These delightful little bites capture the essence of a classic cinnamon roll in a convenient, healthy, and utterly irresistible package. Forget the guilt and embrace a treat that nourishes your body while satisfying your sweet tooth.
The allure of cinnamon rolls is deeply rooted in our collective love for cozy indulgence. Originating in Northern Europe, these sweet, spiced rolls have become a beloved staple in bakeries and homes worldwide. The combination of warm cinnamon, sweet icing, and soft, pillowy dough is simply irresistible. But let’s be honest, traditional cinnamon rolls aren’t exactly known for their health benefits.
That’s where these Cinnamon Roll Protein Bites come in! They offer the same comforting flavors you adore, but with a significant protein boost to keep you feeling full and energized. People love this dish because it’s a perfect blend of taste and convenience. They’re incredibly easy to make, require minimal ingredients, and are perfect for a quick breakfast, post-workout snack, or a healthy dessert. The soft, chewy texture combined with the sweet cinnamon swirl makes each bite a truly satisfying experience. Get ready to revolutionize your snacking game with these guilt-free delights!

Ingredients:
- 1 cup rolled oats
- 1/2 cup vanilla protein powder (whey or plant-based)
- 1/4 cup unsweetened applesauce
- 1/4 cup milk (dairy or non-dairy)
- 2 tablespoons maple syrup (or honey)
- 1 tablespoon coconut oil, melted
- 1 teaspoon ground cinnamon
- 1/2 teaspoon vanilla extract
- 1/4 teaspoon ground nutmeg
- Pinch of salt
Optional Add-ins:
- 1/4 cup chopped walnuts or pecans
- 1/4 cup raisins or dried cranberries
- 2 tablespoons chia seeds or flax seeds
- Sugar-free sweetener to taste (if needed)
Cream Cheese Glaze (Optional):
- 2 ounces cream cheese, softened
- 2 tablespoons milk (dairy or non-dairy)
- 1 tablespoon maple syrup (or honey)
- 1/2 teaspoon vanilla extract
- Powdered sweetener to taste (optional)
Instructions:
Preparing the Protein Bite Mixture:
- Combine Dry Ingredients: In a large mixing bowl, add the rolled oats, vanilla protein powder, cinnamon, nutmeg, and salt. Whisk these dry ingredients together thoroughly to ensure the spices and protein powder are evenly distributed. This step is crucial for a consistent flavor throughout the protein bites.
- Add Wet Ingredients: In the same bowl, pour in the unsweetened applesauce, milk, maple syrup (or honey), melted coconut oil, and vanilla extract. Make sure the coconut oil is completely melted but not too hot, as it could affect the protein powder.
- Mix Well: Use a sturdy spoon or spatula to mix all the ingredients together until a thick, sticky dough forms. It’s important to mix well to ensure all the dry ingredients are fully incorporated into the wet ingredients. Don’t be afraid to get your hands in there if needed to really bring it all together! The mixture should be moist enough to hold its shape when pressed. If it seems too dry, add a tablespoon of milk at a time until you reach the desired consistency. If it seems too wet, add a tablespoon of rolled oats at a time.
- Incorporate Optional Add-ins (if using): If you’re using any optional add-ins like chopped nuts, raisins, chia seeds, or flax seeds, now is the time to gently fold them into the dough. Distribute them evenly throughout the mixture. This adds extra texture and nutritional value to your protein bites.
- Taste and Adjust: Give the mixture a taste and adjust the sweetness if needed. If you prefer a sweeter bite, add a little sugar-free sweetener, maple syrup, or honey. Remember that the protein powder itself might already contribute some sweetness.
- Chill the Dough (Optional but Recommended): Cover the bowl with plastic wrap or a lid and refrigerate the dough for at least 30 minutes. This chilling time allows the oats to absorb the moisture, making the dough easier to handle and roll into bites. It also helps the flavors meld together. While this step is optional, I highly recommend it for the best results.
Forming the Protein Bites:
- Prepare Your Workspace: Line a baking sheet with parchment paper or a silicone baking mat. This will prevent the protein bites from sticking and make cleanup a breeze.
- Scoop and Roll: Using a spoon or a small cookie scoop, scoop out portions of the dough. Roll each portion between your palms to form a small, round bite. Aim for consistent sizes so they cook evenly. I usually aim for about 1-inch diameter bites.
- Place on Baking Sheet: Place the rolled protein bites onto the prepared baking sheet, leaving a little space between each one. This allows for proper air circulation during baking.
Baking the Protein Bites:
- Preheat Oven: Preheat your oven to 350°F (175°C). Make sure your oven is properly preheated before placing the protein bites inside.
- Bake: Place the baking sheet in the preheated oven and bake for 10-12 minutes, or until the protein bites are lightly golden brown around the edges. Keep a close eye on them, as baking times may vary depending on your oven. You want them to be firm but still slightly soft in the center.
- Cool: Remove the baking sheet from the oven and let the protein bites cool on the baking sheet for a few minutes before transferring them to a wire rack to cool completely. This prevents them from sticking and allows them to firm up further.
Preparing the Cream Cheese Glaze (Optional):
- Soften Cream Cheese: Ensure your cream cheese is softened to room temperature before starting the glaze. This will prevent lumps and ensure a smooth, creamy consistency.
- Combine Ingredients: In a small bowl, combine the softened cream cheese, milk, maple syrup (or honey), and vanilla extract.
- Mix Well: Use a whisk or an electric mixer to beat the ingredients together until smooth and creamy. If the glaze is too thick, add a little more milk, one teaspoon at a time, until you reach the desired consistency. If it’s too thin, add a little powdered sweetener.
- Taste and Adjust: Taste the glaze and adjust the sweetness to your liking. Add powdered sweetener if needed.
Assembling and Serving:
- Drizzle with Glaze (Optional): Once the protein bites are completely cooled, you can drizzle them with the cream cheese glaze. You can use a spoon, a fork, or a piping bag for a more decorative look.
- Let Glaze Set (Optional): If you’ve glazed the protein bites, let the glaze set for a few minutes before serving. This will prevent it from being too messy.
- Serve: Serve the protein bites immediately or store them in an airtight container in the refrigerator for up to a week. They’re a perfect snack, pre- or post-workout fuel, or a healthy dessert option.
Tips and Variations:
- Protein Powder Choice: The type of protein powder you use will affect the flavor and texture of the protein bites. Whey protein tends to be sweeter and can sometimes make the bites a bit drier. Plant-based protein powders can sometimes have a slightly earthy flavor, so choose one that you enjoy.
- Nut Butter Addition: For a richer flavor and added protein, try adding 1-2 tablespoons of your favorite nut butter (peanut butter, almond butter, cashew butter) to the dough.
- Chocolate Chips: Add 1/4 cup of mini chocolate chips to the dough for a chocolatey twist.
- Spice Variations: Experiment with different spices like ginger, cardamom, or pumpkin pie spice.
- Storage: Store the protein bites in an airtight container in the refrigerator for up to a week. They can also be frozen for longer storage.
- No-Bake Option: If you prefer a no-bake option, you can skip the baking step and simply chill the formed protein bites in the refrigerator for at least 30 minutes to firm them up. They will be softer and chewier than the baked version.
Conclusion:
So, there you have it! These Cinnamon Roll Protein Bites are truly a game-changer. They’re quick, easy, packed with protein, and deliver that comforting cinnamon roll flavor we all crave, without the guilt or the hours spent in the kitchen. Honestly, what’s not to love?
I know what you might be thinking: “Another protein bite recipe? What makes this one special?” Well, it’s the perfect balance of textures and flavors. The soft, chewy base, the warm cinnamon spice, and that hint of sweetness all come together to create a truly satisfying bite. Plus, the added protein keeps you feeling full and energized, making them the perfect pre- or post-workout snack, or even a healthy dessert option.
But the best part? These little bites are incredibly versatile! Feel free to experiment with different variations to suit your own taste preferences. For a richer flavor, try using brown butter instead of regular melted butter. Or, if you’re feeling adventurous, add a handful of chopped pecans or walnuts for some extra crunch.
Here are a few serving suggestions to get you started:
* Enjoy them straight from the fridge for a cool and refreshing treat.
* Warm them up slightly in the microwave for a gooey, melt-in-your-mouth experience.
* Serve them with a dollop of Greek yogurt or a drizzle of honey for an extra touch of sweetness.
* Pack them in your lunchbox for a healthy and convenient snack on the go.
* Bring them to your next potluck or gathering – they’re always a crowd-pleaser!
And if you’re looking to elevate these bites even further, consider making a simple cream cheese glaze. Just whisk together some softened cream cheese, powdered sugar, and a splash of milk until smooth and creamy. Drizzle it over the bites and let it set for a few minutes before serving. Trust me, it takes them to a whole new level of deliciousness!
I truly believe that these Cinnamon Roll Protein Bites are a must-try for anyone who loves cinnamon rolls but wants a healthier and more convenient option. They’re perfect for busy mornings, afternoon slumps, or late-night cravings. They are also a great way to get your kids to eat more protein!
So, what are you waiting for? Grab your ingredients and get baking! I promise you won’t be disappointed. And once you’ve tried them, I’d love to hear what you think! Share your photos and feedback in the comments below. Let me know if you made any variations or added any special ingredients. I’m always looking for new ideas and inspiration!
I’m confident that this recipe will become a staple in your kitchen. It’s simple, delicious, and satisfying – everything you could want in a healthy snack. So go ahead, give it a try, and let me know what you think. Happy baking! I can’t wait to see your creations! Don’t forget to tag me in your photos on social media so I can see your amazing Cinnamon Roll Protein Bites!
Cinnamon Roll Protein Bites: The Ultimate No-Bake Recipe
Easy, delicious protein bites with oats, protein powder, and optional add-ins. Great for a healthy snack or workout fuel!
Ingredients
Instructions
Recipe Notes
- The type of protein powder you use will affect the flavor and texture of the protein bites.
- For a richer flavor, add 1-2 tablespoons of your favorite nut butter to the dough.
- Add 1/4 cup of mini chocolate chips to the dough for a chocolatey twist.
- Experiment with different spices like ginger, cardamom, or pumpkin pie spice.
- Store the protein bites in an airtight container in the refrigerator for up to a week. They can also be frozen for longer storage.
- For a no-bake option, skip the baking step and simply chill the formed protein bites in the refrigerator for at least 30 minutes to firm them up.


Leave a Comment