

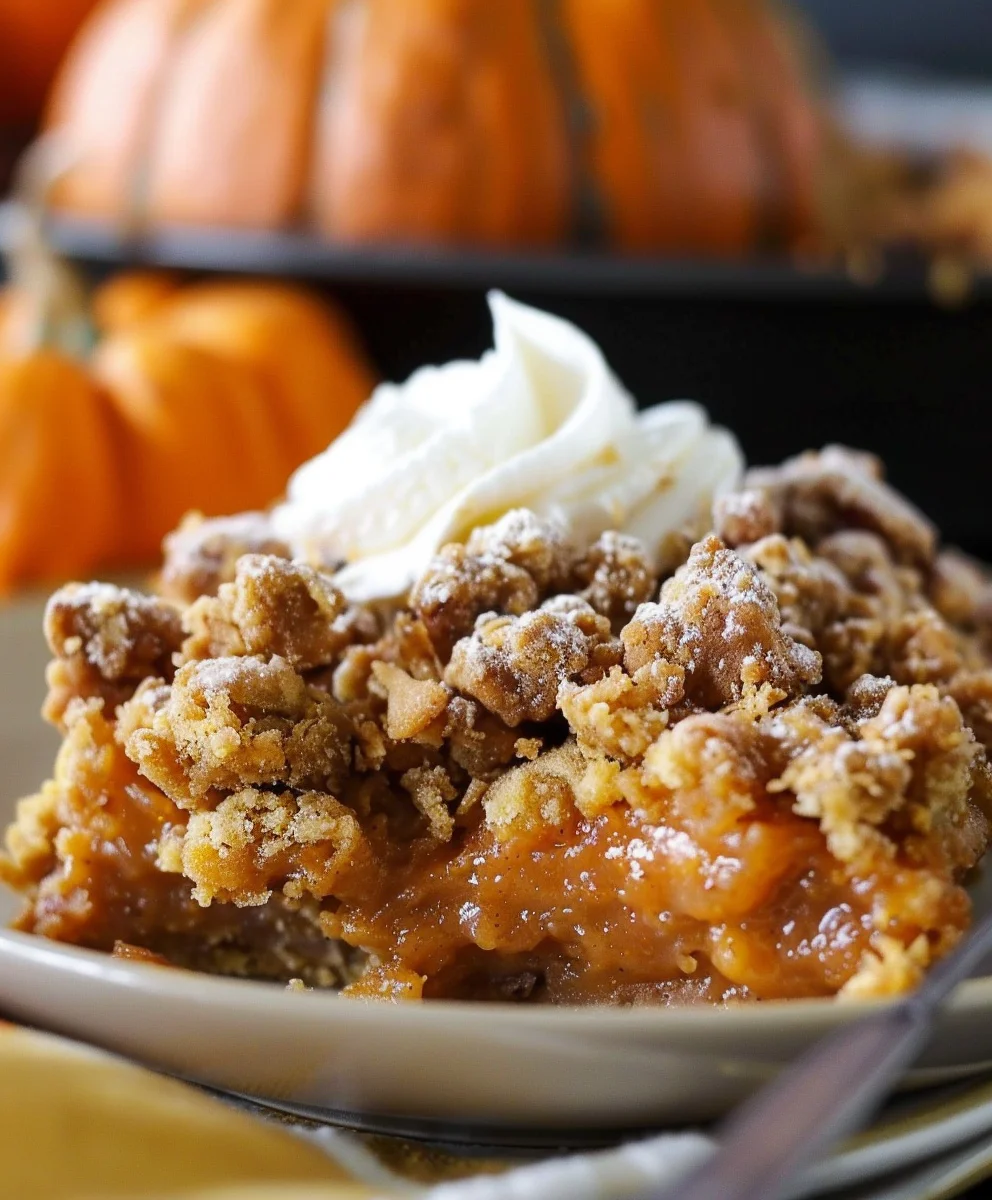
Pumpkin Pie Crisp offers the ultimate autumnal dessert experience, bringing together the beloved, comforting flavors of classic pumpkin pie with an irresistible, buttery, crumble topping. Imagine sinking your spoon into a luscious, warmly spiced pumpkin filling that’s perfectly smooth and sweet, then encountering a golden-brown, oat-infused streusel that provides an exquisite crunch. This isn’t just a dessert; it’s a celebration of fall, a harmonious blend of textures and tastes that will captivate your senses. While traditional pumpkin pie has been a staple on holiday tables for generations, symbolizing harvest and gratitude, our innovative Pumpkin Pie Crisp provides a delightful and often simpler alternative that still captures all that nostalgic charm.
People adore this dish because it delivers all the familiar, heartwarming essence of pumpkin pie without the fuss of a traditional crust, making it surprisingly convenient for busy hosts. It’s the ideal bake for family gatherings, potlucks, or simply a cozy evening at home, promising pure comfort and joy in every generous scoop. Get ready to fall in love with your new favorite seasonal treat!

Ingredients:
- For the Creamy Pumpkin Pie Filling:
- 1 (15-ounce) can pure pumpkin puree (not pumpkin pie filling) – I always make sure to grab the pure stuff for the freshest flavor!
- 1 cup granulated sugar – Just the right amount of sweetness to complement the pumpkin.
- 1 teaspoon ground cinnamon – For that classic, warm spice note.
- ½ teaspoon ground ginger – A little zing to brighten the flavor profile.
- ¼ teaspoon ground cloves – Adds a deep, aromatic complexity.
- ¼ teaspoon ground nutmeg – Because no pumpkin pie is complete without it!
- ½ teaspoon salt – A tiny bit makes all the flavors pop. Don’t skip this, it’s a secret weapon!
- 2 large eggs, lightly beaten – These are our binders, giving the filling its smooth texture.
- 1 (12-ounce) can evaporated milk – This gives the pie its signature creamy, rich consistency.
- 1 teaspoon vanilla extract – A touch of vanilla always enhances sweet dishes.
- For the Irresistible Crisp Topping:
- 1 cup all-purpose flour – The base for our lovely, crumbly topping.
- ½ cup packed light brown sugar – Adds a molasses-rich sweetness and chewiness.
- ½ cup old-fashioned rolled oats – These provide a wonderful texture and nutty flavor to the crisp. Quick oats are fine in a pinch, but rolled oats truly shine here.
- 1 teaspoon ground cinnamon – Echoes the spices in the pumpkin for a cohesive flavor.
- ¼ teaspoon salt – Balances the sweetness in the topping.
- ½ cup (1 stick) unsalted butter, very cold and cut into small pieces – Keeping it cold is key for that perfect crumbly texture!
- ½ cup chopped pecans or walnuts (optional, but highly recommended for an extra crunch!) – I love the added texture and nutty flavor these bring.
- For Serving (Optional, but Oh So Good!):
- Whipped cream, for dolloping generously – A cloud of creamy goodness is the perfect companion.
- Vanilla ice cream – Warm pumpkin crisp with melting vanilla ice cream? Yes, please!
- A dusting of extra cinnamon or nutmeg – For a beautiful finish and an extra hint of spice.
Preparing the Velvety Pumpkin Pie Filling:
-
Preheat and Prep Your Dish:
Before we dive into mixing, let’s get our oven ready. Preheat your oven to 350°F (175°C). This ensures a consistent baking environment from the moment our crisp goes in. A properly preheated oven is essential for even baking and for the pumpkin filling to set correctly. Next, grab a 9×13 inch baking dish. I usually give mine a light spray with non-stick cooking spray, just to be absolutely sure nothing sticks, although with this recipe, it’s generally not a huge issue thanks to the moisture in the filling. Taking a moment to set up your workspace now will make the whole cooking process smoother and more enjoyable, I promise!
-
Combine the Wet and Sweet:
In a large mixing bowl, gently combine the entire 15-ounce can of pure pumpkin puree with the 1 cup of granulated sugar. I like to use a sturdy whisk or a rubber spatula for this initial mix. Stir diligently until the sugar is fully incorporated into the pumpkin and the mixture looks smooth and slightly glossy. You want to make sure there are no grainy bits of sugar left visible; this ensures a perfectly smooth filling later on, free of any gritty texture. This initial step is crucial for developing the base sweetness and the foundation for the silky texture of your pumpkin layer. Don’t rush this – a well-mixed base makes all the difference!
-
Infuse with Warm Spices and Salt:
Now it’s time to add the heart and soul of our pumpkin pie flavor! Stir in the 1 teaspoon of ground cinnamon, ½ teaspoon of ground ginger, ¼ teaspoon of ground cloves, ¼ teaspoon of ground nutmeg, and ½ teaspoon of salt. These specific spices create that quintessential, comforting pumpkin spice aroma and taste we all adore. Mix these aromatic spices thoroughly into the pumpkin-sugar mixture until they are completely integrated and the color is uniform. Take your time here; you want every spoonful of your Pumpkin Pie Crisp to be bursting with that classic, comforting flavor. The salt, though a small amount, is incredibly important as it acts as a flavor enhancer, amplifying all the other spices and preventing the filling from tasting flat or overly sweet. It’s truly a secret weapon in many sweet dishes!
-
Add Eggs for Structure:
Gently whisk in the 2 lightly beaten large eggs. The eggs are absolutely essential in this recipe, acting as our primary binding agents. They provide structure, richness, and help the filling to set beautifully as it bakes, giving us that lovely, creamy, custardy texture we all adore in a traditional pumpkin pie. Make sure they are fully incorporated, but try not to overmix at this stage, as excessive whisking can introduce too much air. We’re aiming for a smooth, uniform consistency where the eggs are completely blended into the pumpkin mixture, ready for the next creamy addition.
-
Achieve Ultimate Creaminess with Evaporated Milk and Vanilla:
Finally, pour in the entire 12-ounce can of evaporated milk and the 1 teaspoon of vanilla extract. Mix everything together until the filling is completely smooth, homogeneous, and wonderfully creamy. The evaporated milk is key to that signature, dense, yet silky texture that distinguishes a truly great pumpkin pie filling. It’s what gives our Pumpkin Pie Crisp its luxurious mouthfeel and rich consistency. Take a moment to appreciate the beautiful, inviting orange hue and the wonderful, warm aroma already wafting from your bowl – your kitchen is about to smell incredible! Your pumpkin pie filling is now perfectly prepared and ready to be poured into the prepared baking dish. Don’t worry if it still seems a little liquidy; it will firm up perfectly in the oven as it bakes.
Crafting the Irresistible Crisp Topping:
-
Combine the Dry Topping Ingredients:
In a separate, medium-sized bowl, we’ll begin building our crisp topping, which provides a delightful textural contrast to the smooth pumpkin. Whisk together the 1 cup of all-purpose flour, ½ cup of packed light brown sugar, ½ cup of old-fashioned rolled oats, 1 teaspoon of ground cinnamon, and ¼ teaspoon of salt. Take a moment to break up any lumps in the brown sugar with your fingers or the whisk to ensure it’s evenly distributed throughout the dry mixture. The old-fashioned rolled oats are crucial here; they provide that wonderful chewy texture and hearty crunch that contrasts so beautifully with the smooth pumpkin filling. Quick oats can work in a pinch, but for the best texture, rolled oats are superior. A good whisking now ensures all these dry ingredients are perfectly mingled, setting the stage for a uniformly delicious and perfectly spiced topping.
-
Incorporate the Cold Butter for Crumbly Perfection:
Now for the star of the crisp topping: the butter! Add the ½ cup (1 stick) of very cold, unsalted butter, which you’ve cut into small, ½-inch pieces, to the dry ingredient mixture. This step is where the magic happens for achieving that classic, irresistible crumbly texture. You have a few options for incorporating the butter: you can use a pastry blender, two knives, or even your fingertips. My personal preference is to use my fingertips, gently rubbing and pinching the butter into the flour mixture. The key is to work quickly, minimizing the heat transfer from your hands, so the butter stays as cold as possible. You’re aiming for a mixture that resembles coarse crumbs, with some pieces of butter still visible, ranging from pea-sized to small lentil-sized. These small pockets of butter will create steam as they melt in the oven, resulting in that wonderfully flaky and crisp texture. Do not overmix! Overmixing will develop the gluten in the flour too much and melt the butter, resulting in a tough, less crumbly topping. We want that delightful, rustic texture, so stop as soon as you reach the desired consistency.
-
Add Optional Nuts for Extra Crunch and Flavor:
If you’re using them (and I highly recommend you do for an extra layer of texture and depth!), now is the time to stir in your ½ cup of chopped pecans or walnuts. Gently fold them into the crumb mixture using a spoon or spatula. The nuts add an extra layer of crunch, a lovely nutty flavor, and a bit more substance to our crisp topping, making each bite even more satisfying and complex. If you’re not a fan of nuts, or if you have allergies, feel free to omit them – your pumpkin crisp will still be absolutely delicious! Just give it a quick mix to ensure they are evenly distributed throughout the crumb topping. Your crisp topping should now look wonderfully crumbly and inviting, just waiting to crown our vibrant pumpkin filling.
Assembling and Baking Your Divine Pumpkin Pie Crisp:
-
Layer the Pumpkin Filling:
Carefully pour the creamy pumpkin pie filling you prepared earlier into your prepped 9×13 inch baking dish. Use a rubber spatula or the back of a spoon to gently spread it evenly across the bottom of the dish, creating a smooth, level layer. This forms the luxurious, spiced foundation of our Pumpkin Pie Crisp. You want the pumpkin layer to be as consistent in thickness as possible, as this ensures it bakes evenly and provides a uniform experience in every single bite. Take a moment to admire that vibrant, inviting orange color – it’s already looking incredibly tempting, and we haven’t even baked it yet!
-
Crown with the Crisp Topping:
Now, for the glorious grand finale – the topping! Evenly sprinkle the crumbly crisp mixture you just made over the entire surface of the pumpkin filling. Try your best to distribute it as uniformly as possible, aiming to cover every inch of that beautiful pumpkin layer. This ensures that every single serving gets a generous, delightful helping of the crunchy, sweet, and spiced topping. It’s truly a texture explosion! Do not press the topping down; we want it to remain light and airy so it can bake up into a truly crisp and golden crust. The more loosely it’s applied, the more delightfully crunchy and distinct it will become. This contrast between the smooth, velvety pumpkin and the crisp, buttery topping is precisely what makes this dessert so incredibly special and utterly irresistible.
-
The First Bake for Golden Perfection:
Place the baking dish carefully into your preheated 350°F (175°C) oven. We’ll start by baking the Pumpkin Pie Crisp for about 25-30 minutes. During this initial phase, several wonderful things are happening: the pumpkin filling will begin to gently set around the edges, and the crisp topping will start to toast, turning a beautiful light golden brown and becoming wonderfully aromatic. Keep a close eye on the edges of the topping; we want it to be nicely golden, but absolutely not burnt. Oven temperatures can vary, so if you notice the topping browning too quickly before the filling is fully set, you can loosely tent the dish with aluminum foil for the remainder of the baking time to prevent over-browning.
-
Lower Temperature for the Final Set and Deep Crispness:
After the first 25-30 minutes, reduce the oven temperature to 325°F (160°C). This slightly lower temperature is crucial for ensuring the pumpkin filling cooks through to the center without over-browning or drying out the topping. Continue baking for an additional 30-40 minutes, or until the pumpkin filling is fully set and the topping is deeply golden, incredibly fragrant, and feels very crisp to the touch. How do you know when it’s truly done? You can gently jiggle the dish; the center of the pumpkin filling should be mostly firm with only a slight, very subtle jiggle remaining, much like a perfectly set custard. A thin knife inserted into the center of the pumpkin filling should come out mostly clean. The crisp topping should be a rich, golden-brown and feel firm when lightly tapped. Don’t rush this final stage! A properly set filling is absolutely key to the overall success and delightful texture of your Pumpkin Pie Crisp. The aroma filling your kitchen will be absolutely incredible – a true sign that something delicious is ready for its grand debut!
Serving Suggestions and Enjoying Your Pumpkin Pie Crisp:
-
The Importance of Cooling:
Once your Pumpkin Pie Crisp emerges from the oven, bubbling gently at the edges and boasting a glorious golden crust, it will smell absolutely heavenly. The temptation to dive in immediately will be immense! However, resist that urge for just a little while longer. It’s crucial to let the crisp cool completely on a wire rack for at least 2-3 hours, or even longer, until it reaches room temperature. I know, the wait can feel excruciating, but this cooling period is vital. It allows the pumpkin filling to finish setting and firm up properly, ensuring you get clean, beautiful squares or scoops, rather than a runny, messy puddle. While it’s tempting to serve it warm straight away, a fully cooled crisp holds its shape much better and allows the intricate flavors of the pumpkin and spices to truly meld and deepen. Think of it like a fine stew or curry – it often tastes even better the next day after the flavors have had time to fully develop!
-
The Ultimate Warm-Up (Optional):
While it’s perfectly delicious and satisfying at room temperature, many people, myself included, love Pumpkin Pie Crisp served warm, as it enhances the spices and brings out the comforting quality of the dessert. If you’ve cooled it completely and later decide you want to enjoy it warm, simply pop individual servings into the microwave for 30-60 seconds, or until heated through. If you have a larger portion or the entire dish of leftovers, place it back into a preheated 300°F (150°C) oven for about 15-20 minutes, until just heated through. The gentle warmth truly enhances the aromatic spices and makes the crisp topping even more invitingly crunchy. There’s something truly comforting and wonderfully nostalgic about a warm dessert on a chilly autumn or winter evening!
-
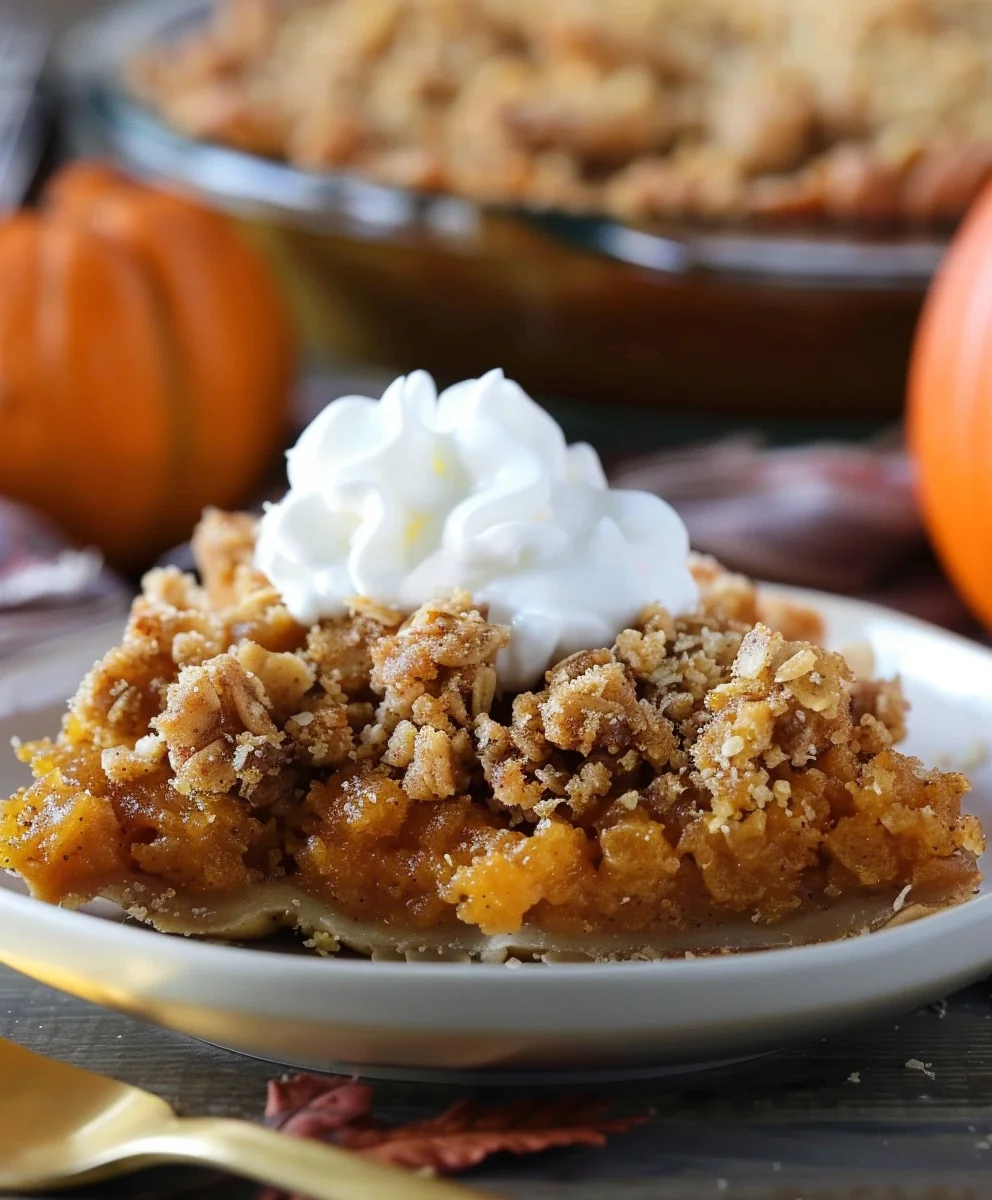
Elevate Your Serving Experience:
Now for the absolute best part – serving and indulging! Once your Pumpkin Pie Crisp is cooled (or gently warmed to your preference), cut it into generous squares. This dessert is fantastic and satisfying on its own, but it truly becomes an extraordinary treat with a few simple additions that elevate the experience. My absolute favorite way to serve it is with a big, luscious dollop of freshly made whipped cream. The light, airy texture and subtle sweetness of the cream provide a beautiful, refreshing contrast to the rich, dense, and spiced pumpkin filling. Alternatively, a generous scoop of premium vanilla bean ice cream melting slowly over the warm crisp is pure bliss, creating a delightful hot-and-cold sensation that is simply divine. For an extra touch of elegance and an additional hint of warming spice, a small dusting of extra ground cinnamon or nutmeg over the whipped cream or ice cream always looks and tastes wonderful. You could even drizzle a tiny bit of high-quality caramel sauce for an added layer of decadence, though I often find it’s perfect as is. Each spoonful is a symphony of creamy, crunchy, sweet, and spiced flavors – a true celebration of autumn and a dessert that everyone will adore!
-
Storing Leftovers:
Should you miraculously have any leftovers (which rarely happens in my house when I make this!), proper storage is key to keeping it delicious. Store the Pumpkin Pie Crisp tightly covered with plastic wrap or transferred to an airtight container in the refrigerator. It will keep beautifully and maintain its fantastic flavor for 3-4 days. Please note that the crisp topping might lose a tiny bit of its initial crispness over time in the fridge due to moisture, but the flavors will remain absolutely wonderful. You can enjoy it cold straight from the fridge for a quick treat, or reheat individual portions as mentioned above for that warm, comforting experience. This makes it a perfect make-ahead dessert for entertaining, holiday gatherings, or simply to enjoy throughout the week as a delightful indulgence.
Conclusion:
And there you have it, friends! We’ve journeyed through the simple steps to create a dessert that, I promise you, will become an instant favorite in your household. This isn’t just another sweet treat; it’s a celebration of comfort, a symphony of textures, and a warm hug in every spoonful. I truly believe this recipe for our luscious Pumpkin Pie Crisp is an absolute game-changer. What makes it so utterly irresistible, you ask? Well, it’s that magical marriage of the silken, spiced pumpkin filling – reminiscent of your most cherished pumpkin pie – beautifully contrasted with a gloriously golden, buttery, and unbelievably crunchy streusel topping. Forget the fuss of pie crusts; here, we embrace the ease and deliciousness of a crisp, delivering all the beloved flavors without any of the extra stress. It’s perfect for those bustling holiday gatherings, a cozy autumn evening, or even just a spontaneous weeknight craving for something truly special. The balance of sweet and spice, the creamy and the crisp, makes it an experience that transcends the ordinary dessert.
The beauty of this particular dessert also lies in its incredible versatility. While it’s undeniably divine on its own, I have some personal recommendations to elevate your experience even further. My absolute go-to serving suggestion is a generous scoop of good quality vanilla bean ice cream, melting ever so slightly into the warm crisp, creating a delightful hot-and-cold sensation that is simply out of this world. But don’t stop there! Imagine a dollop of freshly whipped cream, perhaps infused with a hint of maple syrup or a dash of cinnamon, perched atop your serving. For those who love an extra touch of decadence, a drizzle of warm caramel sauce or a sprinkle of toasted pecans or walnuts can add another layer of flavor and texture that’s truly remarkable. And if you’re feeling adventurous, consider a few delightful variations: try adding a tablespoon of dark rum or bourbon to your pumpkin mixture for a sophisticated depth, or experiment with different spice blends – a touch of cardamom or ground ginger can introduce exciting new nuances to the classic pumpkin flavor profile. You can even bake this in individual ramekins for perfectly portioned, personal desserts, making it ideal for entertaining.
Make It Your Own!
This recipe is designed to be adaptable, to encourage your own culinary creativity. Feel free to adjust the spice levels to your preference – perhaps a little extra nutmeg if you love its warmth, or a touch more ginger for a zesty kick. The streusel topping is also a playground for experimentation; add some rolled oats for a chewier texture, or finely chopped nuts right into the mix for an added crunch from within. Don’t be afraid to make it your own; cooking should always be an expression of your unique taste. The joy of creating something delicious with your own hands is truly unparalleled.
Now, it’s your turn! I’ve poured my heart into sharing this fantastic recipe with you, and my greatest wish is for you to experience the pure joy of making and tasting this incredible dessert for yourselves. Please, please don’t hesitate to give this Pumpkin Pie Crisp a try in your own kitchen. I promise you won’t regret it. It’s a dish that embodies the spirit of comfort and deliciousness, perfect for sharing with loved ones or savoring all by yourself. Once you’ve whipped up your own batch, I would absolutely love to hear all about your experience. Did you add any fun twists? What was your favorite part? Did your family rave about it as much as mine does? Share your thoughts, your photos, and your triumphs in the comments below! Your feedback and shared experiences are what truly make this culinary journey so rewarding for me. Let’s build a community of enthusiastic bakers and delicious memories, one amazing recipe at a time. Happy baking, everyone!
Delicious Pumpkin Pie Crisp
This Pumpkin Pie Crisp offers the ultimate autumnal dessert experience, bringing together the beloved, comforting flavors of classic pumpkin pie with an irresistible, buttery crumble topping. It delivers all the familiar, heartwarming essence of pumpkin pie without the fuss of a traditional crust.
Ingredients
-
1 (15 oz) can pumpkin puree
-
1 cup granulated sugar
-
3 large eggs
-
2 teaspoons pumpkin pie spice
-
½ teaspoon salt
-
2 teaspoons vanilla extract
-
⅔ cup heavy cream
-
2 cups all-purpose flour
-
1 ½ cups granulated sugar
-
2 teaspoons cinnamon
-
½ teaspoon salt
-
12 tablespoons (1 1/2 sticks) unsalted butter, melted
Instructions
-
Step 1
Preheat oven to 350°F (175°C). Lightly grease a 9×13 inch baking dish. -
Step 2
In a large bowl, combine pumpkin puree with 1 cup granulated sugar, 2 teaspoons pumpkin pie spice, and ½ teaspoon salt. Whisk in 3 large eggs, then stir in ⅔ cup heavy cream and 2 teaspoons vanilla extract until smooth. -
Step 3
In a separate bowl, whisk together 2 cups all-purpose flour, 1 ½ cups granulated sugar, 2 teaspoons cinnamon, and ½ teaspoon salt. Pour in 12 tablespoons melted unsalted butter and mix until coarse crumbs form. -
Step 4
Pour the pumpkin filling into the prepared baking dish, spreading evenly. -
Step 5
Evenly sprinkle the crisp topping over the pumpkin filling; do not press down. -
Step 6
Bake at 350°F (175°C) for 25-30 minutes. Then reduce oven temperature to 325°F (160°C) and bake for an additional 30-40 minutes, until the filling is set and the topping is golden and crisp. -
Step 7
Cool completely on a wire rack for at least 2-3 hours. Serve warm or at room temperature, optionally with whipped cream or vanilla ice cream. Store leftovers covered in the refrigerator for 3-4 days.
Important Information
Nutrition Facts (Per Serving)
It is important to consider this information as approximate and not to use it as definitive health advice.
Allergy Information
Please check ingredients for potential allergens and consult a health professional if in doubt.


Leave a Comment