

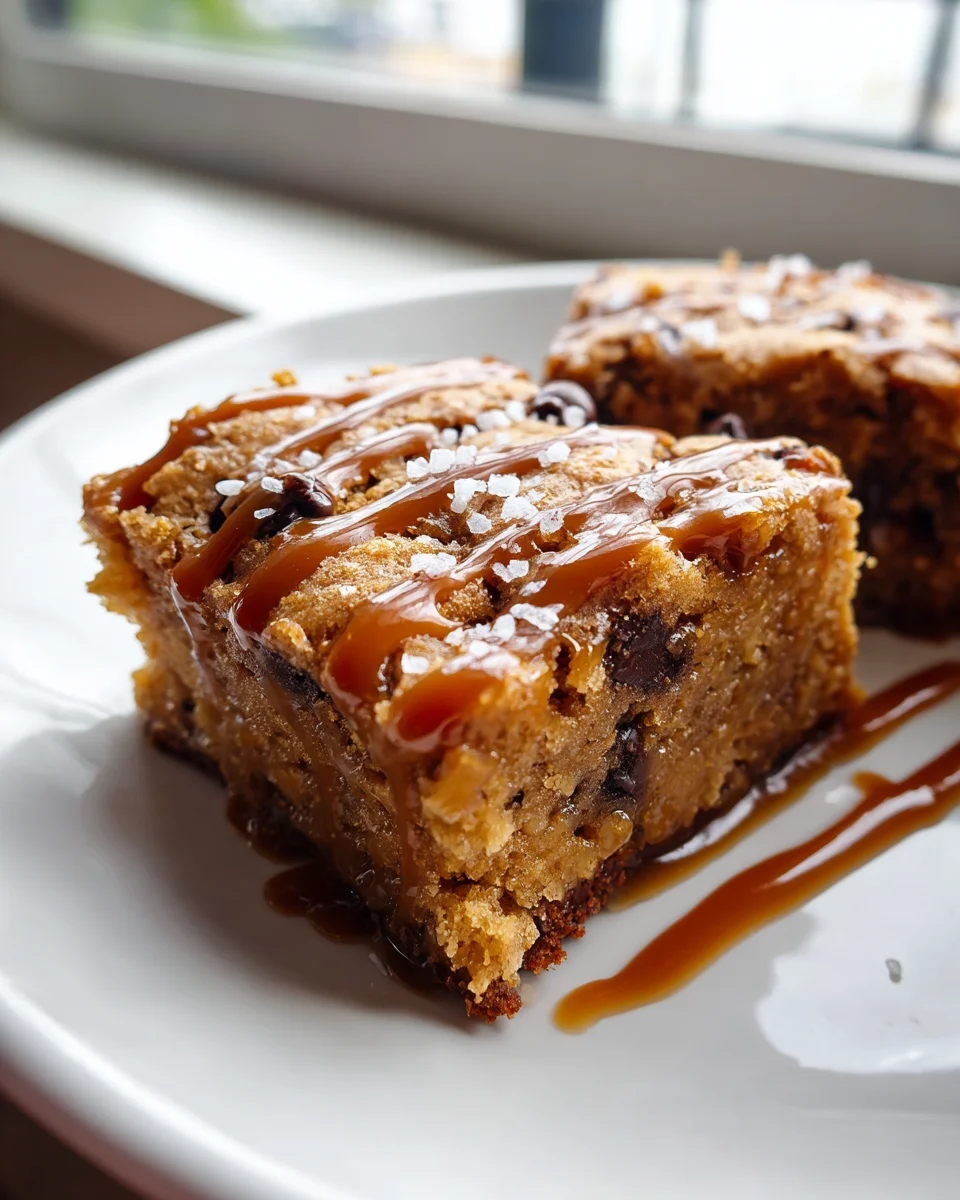
Easy Caramel Cookie Bars
Oh boy, do I have a treat for you today! There are some days when you just need a little something sweet, something comforting, and something that feels utterly decadent without requiring an entire afternoon in the kitchen. That’s exactly where my Easy Caramel Cookie Bars shine!
What makes these bars so incredibly special? It’s the magical combination of simplicity and pure indulgence. We’re talking about a rich, buttery cookie base that’s perfectly chewy, topped with a luscious, gooey layer of golden caramel. Sometimes I like to add a sprinkle of sea salt or a drizzle of chocolate on top for that extra wow factor, but honestly, they’re perfect just as they are. This isn’t just another dessert; it’s a hug in bar form, promising serious flavor with minimal fuss.
You’re going to absolutely love these because they deliver on every front: they’re incredibly straightforward to make, meaning less stress for you, and the payoff is huge. Imagine sinking your teeth into that soft cookie and sweet, melted caramel – it’s pure bliss! They’re perfect for sharing at a gathering, bringing to a potluck, or simply enjoying with a cup of coffee or tea on a quiet evening. Get ready to bake up a batch of happiness that will have everyone asking for the recipe!

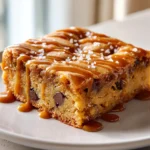
Easy Caramel Cookie Bars
Oh, you are in for a treat with these Easy Caramel Cookie Bars! This recipe is a true crowd-leaser, bringing together a chewy, buttery cookie base, a gooey, luscious caramel center, and a delightful crumble topping. It’s like all the best parts of a chocolate chip cookie and a decadent caramel candy got together and had a glorious baby, all in one easy-to-make bar. Forget complicated desserts; these bars are designed for maximum flavor with minimum fuss, making them perfect for potlucks, parties, or just a cozy night in. I promise, once you try them, they’ll become a staple in your baking repertoire!
Ingredient Notes
Crafting the perfect Easy Caramel Cookie Bars starts with understanding your ingredients. While this recipe is incredibly forgiving, a few key components really shine. Here’s what you’ll need and some thoughts on substitutions:
-
All-Purpose Flour:
This forms the backbone of our cookie base and crumble. I always use unbleached all-purpose flour for a good, consistent texture. If you’re looking for a gluten-free option, a 1:1 gluten-free baking blend that contains xanthan gum usually works beautifully here. Just be aware that the texture might be slightly different, perhaps a touch more crumbly, but still delicious!
-
Granulated Sugar & Light Brown Sugar:
The combination of both sugars gives these bars their perfect balance of sweetness and chewiness. Granulated sugar provides crispness, while brown sugar adds moisture, depth of flavor (thanks to the molasses), and that characteristic chew. If you only have one type, you can use all granulated sugar for a slightly crispier bar, or all brown sugar for a chewier, more intensely flavored bar. Dark brown sugar can also be used for an even richer, more molasses-like taste.
-
Unsalted Butter:
Butter is essential for that rich, buttery cookie flavor and tender texture. I always recommend unsalted butter so you can control the salt content precisely. If you only have salted butter, simply omit the added salt in the recipe. Make sure your butter is softened to room temperature for creaming with the sugars; this creates a lighter, airier dough. For a dairy-free option, a good quality plant-based butter alternative can be used, though the flavor profile might shift slightly.
-
Eggs:
Eggs act as a binder, provide structure, and add moisture to our cookie dough. Make sure they are at room temperature as well, as this helps them emulsify better with the butter and sugar, leading to a smoother dough. I haven’t found a great egg substitute that yields the exact same results for this specific bar, so I recommend sticking with fresh eggs if possible.
-
Vanilla Extract:
A good quality pure vanilla extract is non-negotiable for me! It elevates all the other flavors in the cookie dough. Don’t skimp here. An imitation vanilla will still work, but you’ll notice a difference in the depth of flavor.
-
Baking Soda & Salt:
Baking soda helps the bars rise slightly and contributes to that tender texture. Salt balances the sweetness and enhances all the other flavors, so don’t leave it out!
-
Soft Caramel Candies:
This is the star of the show for the gooey center! I find that individually wrapped soft caramels (like Kraft Caramels) work best. You’ll need to unwrap quite a few, but it’s worth the effort. Alternatively, you can use a jar of good quality dulce de leche, though it might be a bit thinner and less intensely chewy than melted caramels.
-
Heavy Cream (or Milk):
To melt the caramels into a smooth, pourable sauce, you’ll need a splash of heavy cream. This ensures your caramel layer stays wonderfully soft and gooey, even after baking. Whole milk can be substituted if you don’t have heavy cream, but the caramel might be slightly less rich.
-
Optional Mix-ins:
While not strictly necessary, I sometimes love to add a cup of chocolate chips or chopped toasted pecans to the cookie dough for extra texture and flavor. A sprinkle of flaky sea salt over the caramel before baking is also a fantastic way to enhance the sweetness!
Step-by-Step Instructions
Ready to create some magic? These Easy Caramel Cookie Bars come together in just a few simple steps. Follow along, and you’ll have a delicious treat ready to devour in no time!
-
Prepare Your Pan:
First things first, preheat your oven to 350°F (175°C). Line a 9×13-inch baking pan with parchment paper, leaving an overhang on the sides. This “sling” will make it incredibly easy to lift the entire batch of bars out of the pan once they’re cooled. Lightly grease the parchment paper for good measure.
-
Cream Butter and Sugars:
In a large mixing bowl, using an electric mixer, cream together the softened unsalted butter, granulated sugar, and light brown sugar until the mixture is light and fluffy. This usually takes about 2-3 minutes. Don’t rush this step, as it incorporates air into the dough, leading to a tender cookie base.
-
Add Wet Ingredients:
Beat in the eggs one at a time, mixing well after each addition. Scrape down the sides of the bowl as needed to ensure everything is fully incorporated. Then, stir in the pure vanilla extract.
-
Combine Dry Ingredients:
In a separate medium bowl, whisk together the all-purpose flour, baking soda, and salt. Make sure there are no lumps.
-
Combine Wet and Dry:
Gradually add the dry ingredients to the wet ingredients, mixing on low speed until just combined. Be careful not to overmix the dough, as this can develop the gluten too much and result in tough bars. A few streaks of flour are okay; you’ll finish mixing by hand.
-
Form the Base Layer:
Divide the cookie dough. You’ll want to use about two-thirds of the dough for the bottom layer. Press this portion evenly into the bottom of your prepared 9×13-inch pan. I find it easiest to lightly flour my hands or use a piece of plastic wrap to help press the dough smoothly without it sticking.
-
Par-Bake the Base (Optional but Recommended):
For a truly sturdy base that won’t absorb too much caramel, I like to par-bake this bottom layer for about 10-12 minutes, or until the edges are lightly golden. This isn’t strictly necessary, but it helps create a distinct layer. Remove from the oven.
-
Prepare the Caramel Layer:
While the base is par-baking or cooling slightly, unwrap all your soft caramel candies and place them in a microwave-safe bowl with the heavy cream. Microwave in 30-second intervals, stirring well after each, until the caramels are completely melted and smooth. This usually takes 1.5 to 2 minutes. Alternatively, you can melt them over a double boiler on the stovetop.
-
Assemble the Bars:
Pour the warm, melted caramel evenly over the par-baked cookie base in the pan.
-
Add the Crumble Topping:
Take the remaining one-third of cookie dough. Using your fingers, crumble it evenly over the caramel layer. Don’t worry about perfect coverage; the “crumble” look is part of its charm!
-
Bake to Perfection:
Return the pan to the preheated oven and bake for another 20-25 minutes, or until the top cookie layer is golden brown and the caramel is bubbly around the edges. The center may still look a little soft, but it will set as it cools.
-
Cool Completely:
This is arguably the most crucial step! Let the bars cool completely in the pan on a wire rack before attempting to cut them. This can take at least 2-3 hours, or even longer. If you try to cut them while warm, the caramel will be too runny, and it will be a gooey mess (though a delicious one!).
-
Cut and Serve:
Once fully cooled, use the parchment paper overhang to lift the entire slab of bars out of the pan. Place it on a cutting board and cut into squares or rectangles using a sharp knife. Enjoy your delicious Easy Caramel Cookie Bars!
Tips & Suggestions
Making Easy Caramel Cookie Bars is already a breeze, but a few extra tips can elevate them from great to absolutely phenomenal. Here are some of my favorite suggestions to ensure your bars are perfect every time:
-
Don’t Overbake:
This is perhaps the most important tip for achieving chewy, tender cookie bars. Keep a close eye on your bars during the final bake. You’re looking for the top cookie layer to be golden brown, and the caramel to be bubbly around the edges. The center might still look a little soft when you pull them out, and that’s exactly what you want! They will continue to set as they cool, resulting in that perfectly gooey caramel and soft cookie texture. Overbaking will lead to a dry cookie and a hard caramel layer.
-
Cooling is Key:
I cannot stress this enough – patience is a virtue when it comes to cutting these bars! Allowing them to cool completely (and I mean completely!) is essential. The caramel needs ample time to set up. If you cut them while warm, the caramel will ooze out, and you’ll have a sticky, unmanageable mess. For the cleanest cuts, you can even chill them in the refrigerator for 30-60 minutes after they’ve cooled to room temperature.
-
Achieving Smooth Caramel:
When melting your caramels, make sure to stir frequently. If using a microwave, stop and stir every 30 seconds to prevent scorching. If melting on the stovetop, use low heat and stir continuously. Adding the heavy cream (or milk) helps thin the caramel to a pourable consistency, ensuring an even layer without making it too stiff once cooled.
-
Perfectly Flat Base:
When pressing the bottom cookie dough layer into the pan, a trick I often use is to place a piece of plastic wrap or another piece of parchment paper over the dough and then use the bottom of a flat glass or a measuring cup to press it down evenly. This ensures a uniform base for your caramel.
-
Sea Salt Flakes:
For an extra gourmet touch, a sprinkle of flaky sea salt (like Maldon) over the warm caramel layer just before adding the crumble topping is divine. The salt beautifully contrasts and enhances the sweetness of the caramel and chocolate, creating that coveted salted caramel flavor.
-
Mix-in Marvels:
Feel free to get creative with your cookie dough!
- Chocolate Chips: Stir in a cup of mini chocolate chips, milk chocolate chips, or dark chocolate chips into the cookie dough for an extra layer of chocolatey goodness.
- Nuts: Toasted chopped pecans or walnuts add a lovely crunch and nutty flavor. Fold them into the cookie dough or sprinkle them over the caramel.
- Toffee Bits: For even more caramel flavor and texture, mix in some toffee bits into the cookie dough.
-
Pan Size Matters:
Stick to a 9×13-inch baking pan for this recipe. Using a smaller pan will result in much thicker bars that will require a longer baking time and a higher chance of the edges being overbaked while the center is still underdone. A larger pan might yield thinner bars that cook too quickly and become dry.
-
Serving Suggestions:
These bars are fantastic on their own, but they’re also wonderful served slightly warm with a scoop of vanilla bean ice cream. For an extra treat, drizzle a little extra caramel sauce or melted chocolate over the top!
Storage
You’ve put in the effort to make these delightful Easy Caramel Cookie Bars, so let’s make sure they stay fresh and delicious for as long as possible! Proper storage is key, especially with a gooey caramel layer involved.
-
Room Temperature Storage:
Once your Easy Caramel Cookie Bars are completely cooled and cut, your best bet for short-term storage is an airtight container at room temperature. Place a piece of parchment paper or wax paper between layers of bars if you’re stacking them to prevent them from sticking together. Stored this way, they will remain wonderfully fresh, soft, and chewy for up to 3-4 days. The caramel will stay perfectly gooey, and the cookie base will retain its tender texture.
-
Refrigeration:
If you prefer a firmer bar, or if your kitchen is particularly warm, you can store these caramel cookie bars in an airtight container in the refrigerator. This will extend their freshness for up to a week. However, be aware that chilling the bars will make the caramel layer quite firm and chewy, and the cookie base will be denser. I personally prefer them at room temperature for that ultimate gooey experience. If you do refrigerate them, I recommend letting them sit out for 15-20 minutes at room temperature before serving to allow the caramel to soften slightly.
-
Freezing for Longer Storage:
These Easy Caramel Cookie Bars freeze beautifully, making them an excellent candidate for meal prep or if you want to save some for a rainy day!
- Cool Completely: Ensure the bars are completely cooled before freezing.
- Cut into Portions: Cut the bars into individual squares or your desired serving sizes.
- Flash Freeze (Optional but Recommended): Place the individual bars on a baking sheet lined with parchment paper, making sure they aren’t touching. Freeze for about 30-60 minutes, or until solid. This prevents them from sticking together when you package them.
- Wrap Securely: Once flash-frozen (or if skipping that step), wrap each bar tightly in plastic wrap, then place the wrapped bars in a heavy-duty freezer-safe bag or an airtight container. If using a container, place a piece of parchment paper between layers to prevent sticking.
- Freezer Life: Stored properly, the bars will last in the freezer for up to 2-3 months.
- Thawing: When you’re ready to enjoy, simply remove the desired number of bars from the freezer and let them thaw at room temperature for an hour or two. You can also pop them in the microwave for 10-20 seconds for a quick warm-up if you like a warm, extra gooey caramel center!
-
Preventing Sticking:
Whether storing at room temperature, in the fridge, or freezing, the caramel layer can be prone to sticking to other bars or the container itself. Always use parchment paper or wax paper between layers when stacking. This simple step will save you a lot of frustration when you go to retrieve a bar!
Final Thoughts
And there you have it! I truly believe my Easy Caramel Cookie Bars are more than just a dessert; they’re a promise of pure, unadulterated joy in every bite. This recipe isn’t just easy, it’s a brilliant way to bring together the comforting chewiness of a cookie with the luxurious, melt-in-your-mouth goodness of caramel. I know you’re going to fall in love with how simple it is to create something so incredibly delicious and utterly irresistible. Whether you’re making them for a special occasion, a potluck, or just to treat yourself, these Easy Caramel Cookie Bars are guaranteed to be a spectacular hit that will have everyone asking for the recipe. Go on, give them a try – your taste buds will thank you!
Easy Caramel Cookie Bars Recipe – Quick & Delicious Treat
- Total Time: 45 minutes
- Yield: 12 servings 1x
Description
These Easy Caramel Cookie Bars combine a chewy, buttery cookie base with a gooey caramel center, making them a perfect treat for any occasion. Simple to make and utterly indulgent, they’re sure to become a favorite in your baking repertoire!
Ingredients
- 2 1/4 cups all-purpose flour
- 1/2 teaspoon baking soda
- 1/2 teaspoon salt
- 1/2 cup granulated sugar
- 1/2 cup light brown sugar
- 1 cup unsalted butter, softened
- 2 large eggs, at room temperature
- 1 teaspoon pure vanilla extract
- 1 cup soft caramel candies (like Kraft Caramels), unwrapped
- 1/4 cup heavy cream (or milk)
- Optional: 1 cup chocolate chips or chopped toasted pecans
- Optional: Flaky sea salt for topping
Instructions
- Preheat your oven to 350°F (175°C). Line a 9×13-inch baking pan with parchment paper, leaving an overhang on the sides, and lightly grease the parchment paper.
- In a large mixing bowl, cream together the softened unsalted butter, granulated sugar, and light brown sugar until light and fluffy, about 2-3 minutes.
- Beat in the eggs one at a time, mixing well after each addition. Stir in the pure vanilla extract.
- In a separate medium bowl, whisk together the all-purpose flour, baking soda, and salt until there are no lumps.
- Gradually add the dry ingredients to the wet ingredients, mixing on low speed until just combined. A few streaks of flour are okay.
- Divide the cookie dough, using about two-thirds for the bottom layer. Press this portion evenly into the bottom of the prepared pan.
- For a sturdier base, par-bake the bottom layer for about 10-12 minutes until lightly golden. Remove from the oven.
- While the base is cooling, unwrap the soft caramel candies and place them in a microwave-safe bowl with the heavy cream. Microwave in 30-second intervals, stirring until completely melted and smooth.
- Pour the warm, melted caramel evenly over the par-baked cookie base in the pan.
- Crumble the remaining one-third of cookie dough evenly over the caramel layer.
- Return the pan to the oven and bake for another 20-25 minutes until the top layer is golden brown and the caramel is bubbly around the edges.
- Let the bars cool completely in the pan on a wire rack for at least 2-3 hours before cutting. Use the parchment paper overhang to lift the bars out of the pan and cut into squares or rectangles.
- Prep Time: 15 mins
- Cook Time: 30 mins
- Category: Dessert
- Method: Baking
- Cuisine: American
Nutrition
- Serving Size: 1 bar
- Calories: 250
- Sugar: 18 g
- Sodium: 150 mg
- Fat: 12 g
- Saturated Fat: 7 g
- Unsaturated Fat: 4 g
- Trans Fat: 0 g
- Carbohydrates: 34 g
- Fiber: 1 g
- Protein: 2 g
- Cholesterol: 40 mg
Keywords: For the best texture, ensure all ingredients are at room temperature. You can substitute gluten-free flour for all-purpose flour and use dairy-free butter for a dairy-free version. Adding a sprinkle of flaky sea salt on top enhances the flavor.


Leave a Comment