

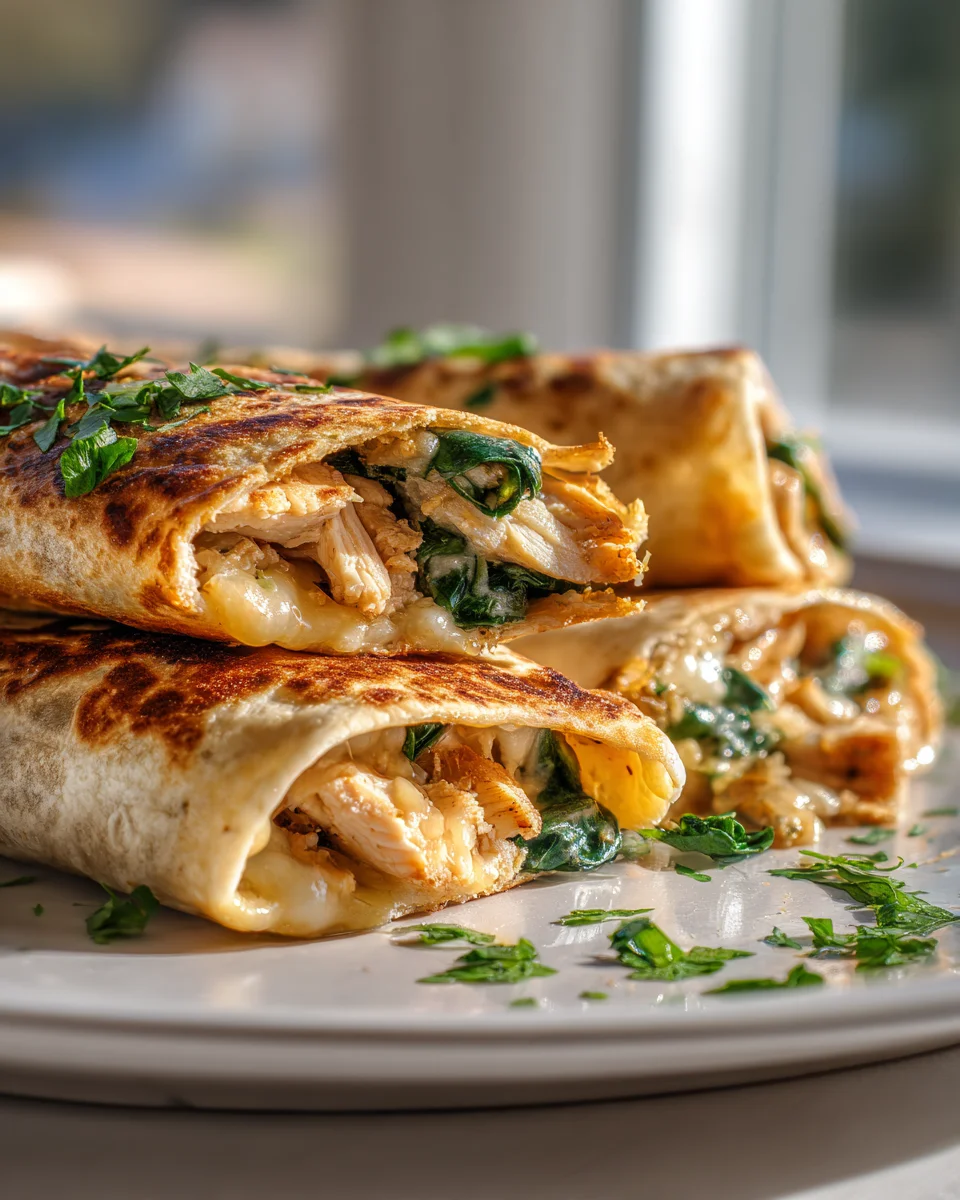
Cheesy Chicken Garlic Wraps
Cheesy Chicken Garlic Wraps are about to become your new favorite go-to for a ridiculously delicious and incredibly satisfying meal! I absolutely adore how these wraps perfectly combine tender, savory chicken with the irresistible kick of garlic and a generous hug of melted cheese, all tucked into a soft tortilla. What makes these so special, you ask? It’s that magical trinity of flavors—the pungent, aromatic garlic mingling with the creamy, salty cheese, beautifully complementing the juicy chicken. You’ll love these because they’re not just unbelievably quick to whip up, making them perfect for busy weeknights or a speedy lunch, but they’re also packed with so much flavor in every single bite. Imagine a warm, flavorful bundle that delivers comfort and excitement all at once. Trust me, these aren’t just wraps; they’re a flavor explosion waiting to happen!

Ingredient Notes
Crafting the perfect Cheesy Chicken Garlic Wraps starts with selecting the right ingredients. I always find that using fresh, good quality components makes all the difference in achieving that irresistible flavor and texture. Here’s a breakdown of what you’ll need and some tips for substitutions.
- Chicken: For these wraps, I prefer using boneless, skinless chicken breasts or thighs. About 1 to 1.5 pounds will yield enough filling for a good batch. You’ll want it cooked and shredded or finely diced. My go-to method is often poaching or baking the chicken ahead of time, then shredding it with two forks once cooled slightly. This ensures it’s tender and ready to absorb all the delicious garlic and cheese flavors. If you’re short on time, rotisserie chicken is an absolute lifesaver – just shred it and you’re good to go!
- Cheese: This is where the “cheesy” in Cheesy Chicken Garlic Wraps really shines! I typically use a generous mix of shredded low-moisture mozzarella for its excellent melt and mild flavor, combined with a sharp cheddar for a punchier taste. A blend of Monterey Jack, Colby, or even a little bit of cream cheese mixed into the filling can also add fantastic creaminess and richness. Always go for block cheese that you shred yourself if possible; it melts smoother and tastes fresher than pre-shredded options, which often contain anti-caking agents.
- Garlic: The “garlic” component is non-negotiable! Freshly minced garlic is paramount here. I usually recommend about 4-6 cloves, depending on their size and your love for garlic. You can never really have too much in my opinion! If you’re in a pinch, good quality garlic powder can work, but it won’t quite deliver that pungent, aromatic punch of fresh garlic.
- Tortillas/Wraps: Standard 8 to 10-inch flour tortillas are ideal for these wraps. They’re pliable enough to fold without tearing and crisp up beautifully when cooked. Whole wheat tortillas are a great alternative if you’re looking for a bit more fiber and a nuttier flavor. You could also try low-carb tortillas, just be mindful that their texture might vary slightly when cooking.
- Fat for Cooking: A little butter or olive oil is essential for toasting the wraps to golden perfection. I often use a mix of both for flavor and heat tolerance.
- Seasonings: Beyond garlic, simple seasonings like salt, freshly ground black pepper, onion powder, and a touch of dried Italian herbs (oregano, basil) elevate the flavor profile of the chicken filling. A pinch of red pepper flakes can also add a subtle warmth if you like a little kick.
- Optional Creamy Binder: Sometimes, to make the filling extra moist and bind everything together beautifully, I’ll add a tablespoon or two of cream cheese, sour cream, or even a splash of chicken broth to the mixture. This isn’t strictly necessary but definitely enhances the overall texture.
Step-by-Step Instructions
Making these Cheesy Chicken Garlic Wraps is a fun and surprisingly simple process. Here’s how I bring them to life in my kitchen, ensuring every wrap is packed with flavor and perfectly golden brown.
- Prepare Your Chicken (if not already done): If you’re starting with raw chicken, season your boneless, skinless chicken breasts or thighs with a pinch of salt and pepper. You can bake them at 375°F (190°C) for 20-25 minutes until cooked through, or poach them gently in simmering water for about 15-20 minutes. Once cooked, let the chicken cool slightly, then shred it thoroughly using two forks, or dice it into small, even pieces. Aim for about 2-3 cups of cooked chicken.
- Prepare the Filling: In a medium-sized mixing bowl, combine the shredded or diced cooked chicken. Add your generous amount of freshly minced garlic (I usually start with 4-5 cloves and adjust to taste), along with your shredded cheeses (typically 1.5 to 2 cups of mozzarella and cheddar blend). Season the mixture with about 1/2 teaspoon of onion powder, 1/4 teaspoon of dried Italian herbs, and salt and freshly ground black pepper to taste. If you’re using an optional creamy binder like cream cheese or sour cream, add 1-2 tablespoons now and mix well. Stir everything together until all ingredients are evenly distributed and the chicken is coated. The warmth of the chicken can sometimes start to soften the cheese, which is a good thing!
- Assemble the Wraps: Lay a tortilla flat on a clean surface. Scoop about 1/3 to 1/2 cup of the cheesy chicken garlic filling onto the center of the tortilla, shaping it into a log horizontally. Don’t overfill, or it will be hard to roll! Fold the bottom edge of the tortilla up and over the filling, tucking it in snugly. Then, fold in the sides towards the center. Finally, roll the tortilla tightly from the bottom up until you have a compact wrap. Repeat this process with the remaining tortillas and filling.
- Cook the Wraps: Heat a large non-stick skillet or griddle over medium heat. Add about 1 tablespoon of butter or olive oil, or a combination, ensuring the pan is well coated. Once the butter is melted and slightly sizzling (or oil is shimmering), carefully place 2-3 wraps seam-side down in the pan, ensuring not to overcrowd it. Cook for 3-5 minutes per side, or until the tortillas are golden brown and crispy, and the cheese inside is fully melted and oozy. You might need to adjust the heat to prevent burning while ensuring thorough cooking.
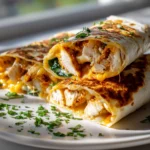
- Serve Immediately: Transfer the cooked wraps to a cutting board. I often slice them in half diagonally before serving. They are best enjoyed hot and fresh, when the cheese is at its melting peak!
Tips & Suggestions
These Cheesy Chicken Garlic Wraps are wonderfully versatile, and over time I’ve picked up a few tricks that really make them shine. Here are some of my favorite tips and suggestions to elevate your wrap game!
- Experiment with Cheese Blends: Don’t be afraid to mix and match your cheeses! While mozzarella and cheddar are fantastic, Monterey Jack, Gruyere, or even a touch of smoked gouda can introduce exciting new flavor dimensions. For an extra creamy filling, stirring in a tablespoon or two of softened cream cheese before assembly works wonders.
- Amp up the Garlic Factor: If you’re a true garlic lover, consider lightly brushing the outside of the tortillas with garlic-infused olive oil before cooking, or even adding a tiny pinch of garlic powder directly into the butter/oil in the pan.
- Add Veggies for Flavor and Nutrition: These wraps are excellent for incorporating hidden vegetables. Finely diced sautéed bell peppers, onions, spinach (squeezed dry), or even a tablespoon of sun-dried tomatoes (chopped) can be mixed into the chicken filling. Just make sure any added veggies are cooked and excess moisture removed to prevent a soggy filling.
- Spice It Up: For those who enjoy a little heat, a pinch of red pepper flakes in the chicken filling or a dash of your favorite hot sauce drizzled inside before rolling will add a welcome kick.
- Serve with Dipping Sauces: While delicious on their own, these wraps are fantastic with a complementary dipping sauce. My go-to options include a zesty marinara, cool ranch dressing, a creamy garlic aioli, or even a simple sour cream and chive dip.
- Make Ahead Option (Filling): The chicken and cheese filling can be prepared a day in advance and stored in an airtight container in the refrigerator. This makes assembling the wraps on a busy weeknight incredibly quick and easy. Just let the filling come closer to room temperature before filling the tortillas for easier handling.
- Alternative Cooking Methods:
- Baking: For a slightly lighter option or to cook a larger batch at once, you can bake the wraps. After assembling, brush the tops with a little olive oil or melted butter and bake at 400°F (200°C) for 15-20 minutes, flipping halfway, until golden and crispy.
- Air Fryer: An air fryer works wonderfully for super crispy wraps! Place 1-2 wraps in the air fryer basket (don’t overcrowd), lightly mist with cooking spray, and cook at 375°F (190°C) for 7-10 minutes, flipping halfway, until golden brown and the cheese is melted.
- Perfect Pairing: These wraps pair beautifully with a fresh green salad, a cup of tomato soup, or some simple roasted vegetables for a complete meal.
Storage
Having leftover Cheesy Chicken Garlic Wraps is a rare occurrence in my house, but when it does happen, or if I’m planning to make a batch ahead, proper storage is key to maintaining their deliciousness.
- Storing Cooked Wraps:
- Refrigerator: Once the cooked wraps have cooled completely to room temperature, place them in an airtight container. They will keep well in the refrigerator for up to 2-3 days. Storing them in a single layer or with parchment paper between layers can help prevent them from sticking together.
- Reheating: For best results, I always recommend reheating these wraps in a pan on the stovetop over medium-low heat until they’re warmed through and re-crisped. The oven or air fryer also works well for reheating, bringing back some of that desired crispiness (350°F/175°C for 8-12 minutes, or until hot). The microwave can be used, but the wraps might lose some of their crisp texture and become softer.
- Storing the Filling:
- Refrigerator: The prepared cheesy chicken garlic filling can be stored separately in an airtight container in the refrigerator for up to 3 days. This is a fantastic meal prep hack for quick assembly later in the week.
- Freezing (Cooked Wraps):
- You can freeze cooked Cheesy Chicken Garlic Wraps, though I find they are best enjoyed fresh. To freeze, allow them to cool completely. Wrap each individual wrap tightly in plastic wrap, then place them in a freezer-safe bag or container. They can be frozen for up to 1 month.
- Reheating from Frozen: To reheat, you can either thaw them in the refrigerator overnight and then follow the stovetop or oven reheating instructions, or you can reheat them directly from frozen in a preheated oven (around 375°F/190°C for 20-25 minutes, or until heated through and crispy). An air fryer also works well for reheating from frozen, usually around 10-15 minutes at 350°F/175°C.
Final Thoughts
I truly believe that these Cheesy Chicken Garlic Wraps are about to become a new favorite in your kitchen!
From the first bite, you’ll understand why I’m so excited about them. The tender, savory chicken, the irresistible punch of garlic, and that glorious melted cheese, all perfectly nestled in a soft wrap – it’s a symphony of flavors and textures that’s both comforting and incredibly satisfying.
Whether you’re looking for a quick and easy weeknight dinner, a delightful lunch, or even a fantastic appetizer to share, these Cheesy Chicken Garlic Wraps hit all the right notes. They’re simple to make, yet deliver complex, delicious results that will impress everyone. I just know you’re going to love them as much as I do!
Easy Cheesy Chicken Garlic Wraps Recipe – So Flavorful!
- Total Time: 35 minutes
- Yield: 4 servings 1x
Description
Cheesy Chicken Garlic Wraps are a delicious and satisfying meal that combines tender chicken, aromatic garlic, and melted cheese in a soft tortilla. Perfect for busy weeknights or a quick lunch, these wraps are a flavor explosion waiting to happen!
Ingredients
- 1 to 1.5 pounds boneless, skinless chicken breasts or thighs
- 4–6 cloves freshly minced garlic
- 1.5 to 2 cups shredded low-moisture mozzarella cheese
- 1.5 to 2 cups shredded sharp cheddar cheese
- Standard 8 to 10-inch flour tortillas
- Butter or olive oil for cooking
- Salt to taste
- Freshly ground black pepper to taste
- 1/2 teaspoon onion powder
- 1/4 teaspoon dried Italian herbs (oregano, basil)
- Pinch of red pepper flakes (optional)
- 1–2 tablespoons cream cheese or sour cream (optional)
Instructions
- Prepare Your Chicken (if not already done): Season your boneless, skinless chicken breasts or thighs with a pinch of salt and pepper. Bake at 375°F (190°C) for 20-25 minutes or poach in simmering water for about 15-20 minutes until cooked through. Let the chicken cool slightly, then shred it using two forks or dice it into small pieces.
- Prepare the Filling: In a medium-sized mixing bowl, combine the shredded or diced cooked chicken with freshly minced garlic, shredded cheeses, onion powder, dried Italian herbs, salt, and pepper. If using a creamy binder, add it now and mix well until all ingredients are evenly distributed.
- Assemble the Wraps: Lay a tortilla flat on a clean surface. Scoop about 1/3 to 1/2 cup of the cheesy chicken garlic filling onto the center of the tortilla, shaping it into a log. Fold the bottom edge of the tortilla up over the filling, tuck it in, fold in the sides, and roll tightly from the bottom up.
- Cook the Wraps: Heat a large non-stick skillet over medium heat with butter or olive oil. Place 2-3 wraps seam-side down in the pan and cook for 3-5 minutes per side until golden brown and crispy.
- Serve Immediately: Transfer the cooked wraps to a cutting board and slice them in half diagonally before serving. Enjoy hot and fresh!
- Prep Time: 15 mins
- Cook Time: 20 mins
- Category: Dinner
- Method: Cooking
- Cuisine: American
Nutrition
- Serving Size: 1 wrap
- Calories: 450
- Sugar: 2 g
- Sodium: 800 mg
- Fat: 25 g
- Saturated Fat: 10 g
- Unsaturated Fat: 12 g
- Trans Fat: 0 g
- Carbohydrates: 35 g
- Fiber: 2 g
- Protein: 30 g
- Cholesterol: 90 mg
Keywords: Experiment with different cheese blends for unique flavors. You can also add finely diced sautéed vegetables to the filling for extra nutrition. For a lighter option, try baking or using an air fryer to cook the wraps.

Leave a Comment