

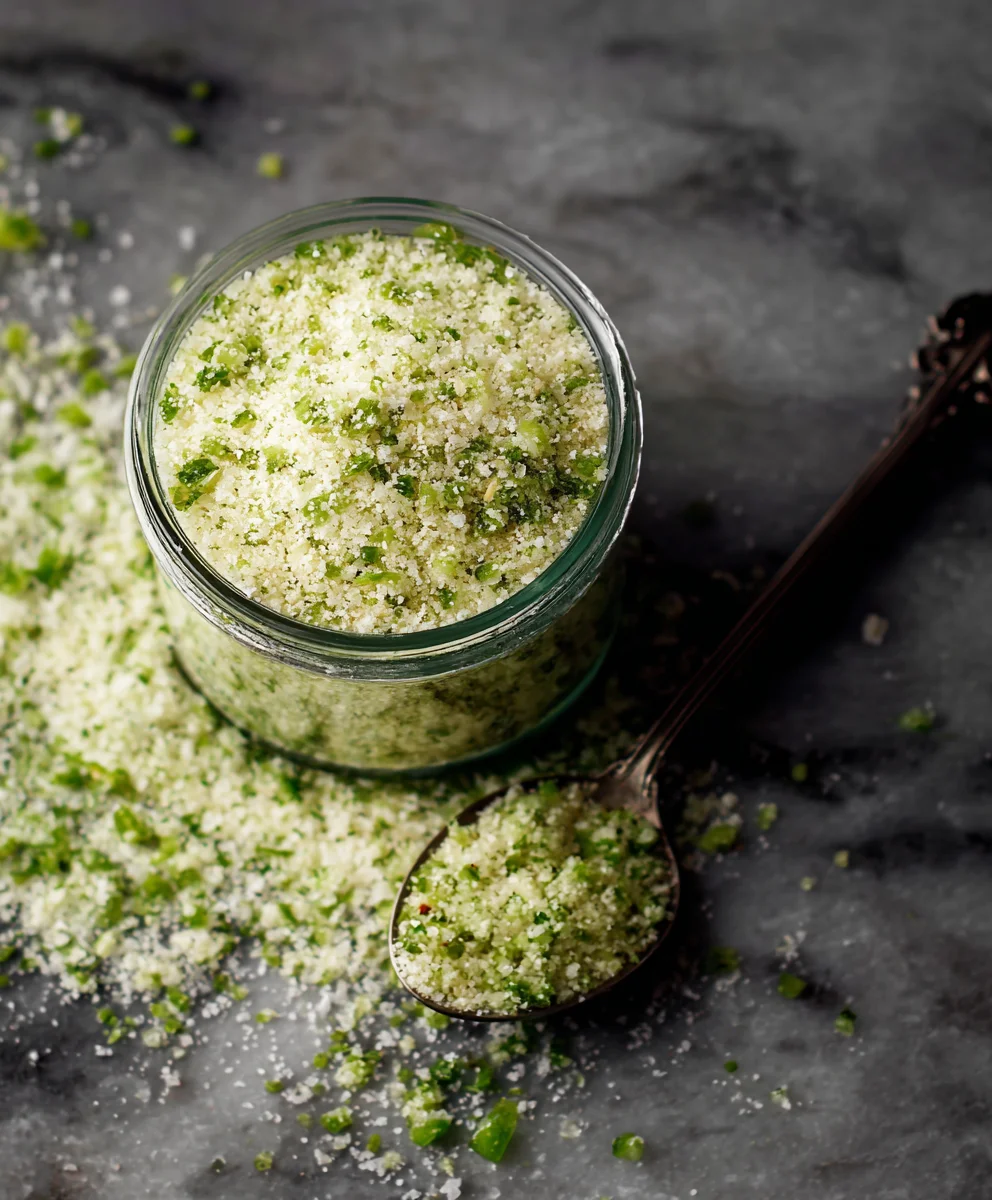
Jalapeno Salt is more than just a seasoning; it’s a culinary secret weapon that effortlessly elevates almost any dish it graces. Imagine a vibrant kick, a subtle warmth, and a burst of fresh flavor that awakens your palate and transforms the mundane into the magnificent. From a simple fried egg to grilled corn, from rimming a zesty margarita glass to seasoning roasted vegetables, homemade Jalapeno Salt is truly transformative. It’s the perfect marriage of earthy sea salt and the distinct, moderately spicy zest of fresh jalapenos.
While the precise origins of this specific blend might be modern, the venerable practice of infusing salt with herbs and spices dates back centuries, a testament to humanity’s enduring quest for enhanced flavors and preservation. Chili peppers themselves, integral to countless cuisines worldwide, have been a cherished staple for millennia, celebrated for their unique capsaicin kick. I find that crafting your own Jalapeno Salt is incredibly satisfying, not just for the unparalleled fresh taste but also for the control you gain over its potency and texture. It’s an accessible way to introduce a gourmet touch to your everyday cooking, making ordinary meals feel extraordinary. Once you experience the bright, spicy notes of this freshly prepared condiment, you’ll wonder how you ever managed without it.

Ingredients:
- For the Spicy Lemon Herb Roasted Chicken:
- 1 whole chicken (approximately 3.5-4 pounds), preferably pasture-raised, spatchcocked (butterflied) or cut into pieces – opting for a spatchcocked chicken ensures even cooking and super crispy skin!
- 2 tablespoons olive oil, plus more for drizzling – a good quality extra virgin olive oil makes a difference.
- 2 tablespoons fresh lemon juice (from about 1 large lemon) – for that bright, zesty counterpoint.
- 1 tablespoon fresh rosemary, finely chopped – its piney notes pair beautifully with chicken.
- 1 tablespoon fresh thyme, finely chopped – adds a subtle, earthy fragrance.
- 1 teaspoon dried oregano – a classic, robust herb for Mediterranean flair.
- 1.5 teaspoons Jalapeno Salt (our star ingredient for that incredible kick and nuanced flavor; feel free to adjust to your personal spice preference – remember, you can always add more!)
- 1 teaspoon black pepper, freshly ground – for a fresh, pungent heat.
- 1/2 teaspoon garlic powder – for an all-encompassing garlic flavor without raw garlic burning.
- Pinch of red pepper flakes (optional, for an extra fiery boost) – for the true spice lovers.
- 1 whole lemon, sliced into thin rounds for roasting – these become wonderfully tender and aromatic in the oven.
- 4-5 sprigs of fresh rosemary and thyme (for the roasting pan) – to infuse the entire dish with more vibrant herb flavors.
- For the Crispy Roasted Potatoes:
- 2 pounds small new potatoes or Yukon Gold potatoes, quartered or halved if small – their waxy texture holds up well to roasting and crisps beautifully.
- 2 tablespoons olive oil – essential for crisping and flavor.
- 1 teaspoon garlic powder – for consistent garlic flavor on every potato piece.
- 1/2 teaspoon paprika (smoked paprika works beautifully here, adding a smoky depth) – for color and a subtle warmth.
- 1/2 teaspoon black pepper, freshly ground – to complement the other seasonings.
- 1/2 teaspoon sea salt (or to taste) – always important for bringing out the natural flavors of the potatoes.
- Optional: a sprinkle of Jalapeno Salt for an extra layer of heat and unique flavor towards the end of cooking – for those who like their potatoes with a spicy edge!
- For the Fresh Green Bean Almondine:
- 1 pound fresh green beans, trimmed – look for vibrant, firm beans.
- 2 tablespoons unsalted butter – for richness and a lovely golden finish.
- 2 cloves garlic, minced – fresh garlic adds a bright, aromatic punch.
- 1/4 cup slivered almonds, lightly toasted – for essential crunch and nutty flavor.
- 1 tablespoon fresh lemon juice – to brighten the dish and balance the richness.
- Salt and freshly ground black pepper to taste – fundamental for seasoning.
- Optional Garnishes:
- Fresh parsley, chopped – for a final touch of color and freshness.
- Extra lemon wedges – for serving, allowing guests to add more zest if desired.
Prepping the Chicken & Vegetables: The Foundation of Flavor
Hello, fellow food enthusiasts! Today, we’re embarking on a culinary adventure that promises to deliver an explosion of flavors, all centered around our amazing Jalapeno Salt. Before we dive into the cooking, proper preparation is absolutely key to ensuring every bite of our Spicy Lemon Herb Roasted Chicken, Crispy Potatoes, and Fresh Green Bean Almondine is simply perfect. Trust me, a little extra effort now pays huge dividends in flavor later!
-
Prepare the Chicken:
First things first, let’s get our chicken ready. If you purchased a whole chicken, I highly recommend spatchcocking it (butterflying it by removing the backbone). This method allows the chicken to cook more evenly, significantly reduces cooking time, and results in wonderfully crispy skin across the entire bird. If you’re not comfortable doing this yourself, your butcher can often do it for you, or you can opt for pre-cut chicken pieces like bone-in thighs and drumsticks, adjusting cooking times accordingly. Once spatchcocked, the most critical step for crispy skin is to pat the chicken incredibly dry with paper towels. This step is crucial for achieving that coveted crispy skin! Moisture on the surface is the enemy of crispiness, so don’t skip it and be thorough.
In a small bowl, whisk together the 2 tablespoons of olive oil, 2 tablespoons of fresh lemon juice, finely chopped fresh rosemary, finely chopped fresh thyme, dried oregano, 1.5 teaspoons of our fabulous Jalapeno Salt, freshly ground black pepper, and garlic powder. If you’re feeling adventurous and want an extra kick that truly emphasizes the “spicy” in our chicken, now is the time to add that pinch of red pepper flakes. This vibrant concoction is going to be our flavor powerhouse for the chicken, providing a beautiful balance of citrus, herbs, and a distinctive warmth. The amount of Jalapeno Salt suggested here provides a noticeable but not overwhelming heat for most palates, but please feel free to dial it up or down based on your personal preference. Remember, you can always add more later, but you can’t take it away once it’s on!
Place the thoroughly dried chicken on a large baking sheet, preferably one lined with parchment paper for easier cleanup, or directly on a wire rack set over a baking sheet. Using your hands, generously rub the herb and spice mixture all over the chicken, making sure to get it under the skin where possible, especially on the breast meat, to ensure the flavors penetrate deeply. This direct contact with the meat guarantees every forkful will be infused with our amazing seasoning. Arrange the lemon slices and the extra sprigs of fresh rosemary and thyme directly on the baking sheet around and under the chicken. These aromatics will infuse the entire dish with a wonderful fragrance as it roasts, adding another layer of complexity to the flavor profile, marrying perfectly with the Jalapeno Salt.
-
Prepare the Potatoes:
While the chicken is marinating ever so slightly, let’s turn our attention to the potatoes. Wash the potatoes thoroughly, removing any dirt, and then either quarter them if they are larger, or halve them if they are smaller new potatoes. The goal is to have relatively uniform pieces (about 1.5-inch chunks) so they cook evenly and crisp up at roughly the same rate. In a large bowl, toss the prepared potatoes with 2 tablespoons of olive oil, garlic powder, paprika (smoked paprika adds a lovely depth and rustic color), black pepper, and sea salt. Ensure all the potatoes are well-coated; you want every surface to have contact with the seasoning and oil to achieve that coveted crispy exterior. Give them a good toss with your hands to make sure no piece is left unseasoned. This meticulous coating is what will give us those irresistible, perfectly seasoned roasted potatoes.
-
Combine for Roasting:
Now, this is where the magic starts to happen! You have a couple of options here depending on your oven space and preference. You can roast the chicken and potatoes on separate baking sheets if your oven space allows, which can be ideal for maximizing crispiness. However, my preferred method for convenience and allowing the flavors to meld beautifully is to arrange them on the same large baking sheet. If using a single sheet, push the seasoned chicken to one side and scatter the seasoned potatoes around the other side. Try not to overcrowd the pan; air circulation is absolutely essential for both crispy chicken skin and perfectly browned, tender potatoes. If your baking sheet seems too full, it’s always better to use two sheets to ensure everything cooks properly and crisps up instead of steaming, which would lead to soggy results. Drizzle a tiny bit more olive oil over the potatoes if they look a little dry, ensuring they have enough fat to get beautifully golden.
At this point, you can cover the chicken and potatoes loosely and let them sit at room temperature for about 20-30 minutes while your oven preheats; this helps them cook more evenly and often results in a better texture. Alternatively, if you’re prepping ahead, you can refrigerate them for up to 2 hours. Just ensure they come closer to room temperature before heading into the hot oven.
Roasting the Chicken & Potatoes: Achieving Golden Perfection
Get ready for your kitchen to smell absolutely divine! Roasting is a relatively hands-off process once everything is in the oven, but a few key techniques will elevate your dish from good to absolutely spectacular. We’re aiming for incredibly tender chicken with crispy, golden skin, and potatoes that are perfectly roasted – fluffy on the inside and beautifully golden brown and crunchy on the outside.
-
Preheat the Oven:
Preheat your oven to a robust 425°F (220°C). A higher temperature at the start helps achieve that initial sear and crispiness on both the chicken skin and the potato exteriors. Make sure your oven has reached the target temperature fully before putting anything inside; patience here is a virtue! Rushing this step can lead to less-than-crispy results, so give your oven ample time to heat up completely.
-
Initial Roast:
Carefully transfer your baking sheet(s) with the chicken and potatoes into the preheated oven. Position them on the middle rack for even heat distribution. Roast for 20 minutes at this higher temperature. During this initial phase, the intense heat will begin to render the fat in the chicken skin, starting the crisping process, and initiate the browning of the potatoes. You’ll likely hear some delightful sizzling as the flavors begin to develop!
-
Lower Temperature & Continue Roasting:
After the initial 20 minutes, reduce the oven temperature to 375°F (190°C). Continue to roast for another 35-45 minutes. During this extended roasting time, you’ll want to gently toss the potatoes every 15 minutes or so to ensure even browning and crisping on all sides. Use a spatula to lift and turn them, allowing all surfaces to get contact with the hot pan. For the chicken, if you’re using a single large piece (spatchcocked), it’s generally fine to leave it undisturbed, allowing the skin to crisp. However, if you’re roasting individual chicken pieces, you might want to carefully flip them halfway through this stage to promote even cooking and crisping. The aromas emanating from your oven will be intoxicating, thanks in no small part to the aromatic herbs, zesty lemon, and the subtle, spicy kick of the Jalapeno Salt infused throughout the chicken, creating an inviting culinary perfume.
-
Check for Doneness:
The total roasting time for a 3.5-4 pound spatchcocked chicken is typically around 55-65 minutes, but this can vary based on your oven, the exact size of your chicken, and whether it was at room temperature initially. The most reliable way to check for doneness is to use an instant-read meat thermometer. Insert the thermometer into the thickest part of the thigh, making sure to avoid touching the bone, as bones will give a misleading higher temperature. The chicken is fully cooked and safe to eat when it reaches an internal temperature of 165°F (74°C). The juices should also run clear when you pierce the thigh with a knife. For the potatoes, they should be fork-tender on the inside and beautifully golden brown and crispy on the outside. If the chicken is done but the potatoes need a bit more time to reach peak crispiness, you can carefully remove the chicken to a carving board to rest, and return the potatoes to the oven for an additional 5-10 minutes, perhaps even bumping the temperature back up to 400°F (200°C) for a final burst of crispiness. This flexibility ensures both components are perfect.
-
Rest the Chicken:
Once the chicken is cooked through and reaches the target internal temperature, transfer it to a large carving board or platter. Loosely tent it with aluminum foil and let it rest for at least 10-15 minutes. This resting period is incredibly important! It allows the juices, which have migrated to the center of the meat during cooking, to redistribute throughout the entire bird. This ensures every bite is incredibly tender, moist, and flavorful. Resist the urge to cut into it immediately; your patience will be rewarded with a much more delicious and less dry result. While the chicken rests, the potatoes can finish up if needed, or simply stay warm in the turned-off oven, soaking up all the delicious residual heat.
Preparing the Green Bean Almondine: A Fresh & Vibrant Side
While our gorgeous chicken is resting and the potatoes are achieving their final crisp, let’s quickly whip up a fresh and vibrant side dish that perfectly complements the rich flavors of our main course. This Green Bean Almondine is simple, elegant, and adds a wonderful texture and color contrast, providing a refreshing break from the robust chicken and potatoes.
-
Blanch the Green Beans:
Bring a medium pot of generously salted water to a rolling boil. While the water heats, prepare an ice bath (a large bowl filled with ice and water). Once the water is vigorously boiling, add the trimmed fresh green beans and cook for 3-5 minutes, or until they are bright green and crisp-tender. We don’t want them mushy or overcooked; aim for a slight bite and vibrant color! Immediately drain the green beans using a colander and transfer them to the ice bath. This “shocking” process rapidly stops the cooking, preserves their beautiful vibrant color, and maintains their crisp, fresh texture. Once thoroughly cooled in the ice bath, drain them again and pat them very dry with paper towels. Excess water will dilute the flavor and prevent proper sautéing.
-
Toast the Almonds:
In a small dry skillet (no oil needed here) over medium-low heat, add the slivered almonds. Toast them, stirring frequently with a wooden spoon or spatula, for 3-5 minutes until they are lightly golden brown and wonderfully fragrant. Be very careful not to burn them, as almonds can go from perfectly toasted to burnt very quickly! Their oils release beautifully when toasted, enhancing their natural nuttiness. Once toasted to your liking, immediately remove them from the skillet and set aside on a plate to cool; they will continue to toast in the hot pan if left there.
-
Sauté and Finish:
In the same skillet (no need to clean it – those nutty bits add flavor!), melt the 2 tablespoons of unsalted butter over medium heat. Once the butter is melted and slightly foamy, add the minced garlic and sauté for about 30 seconds until fragrant, being careful not to brown or burn it, as burnt garlic tastes bitter. Add the blanched and thoroughly dried green beans to the skillet. Toss them gently to coat in the butter and garlic mixture, and warm them through for 2-3 minutes, allowing them to absorb those lovely flavors. Just before serving, stir in the toasted slivered almonds and the fresh lemon juice. This lemon juice brightens the entire dish, cutting through the richness of the butter. Season with salt and freshly ground black pepper to taste. For an adventurous twist, a tiny pinch of Jalapeno Salt could even be added here for a very subtle, zesty warmth that echoes the main dish, but typically I keep this side a little milder to provide a harmonious balance to the more robust chicken.
Assembling & Serving: The Grand Finale
The moment has arrived! All your hard work and patience are about to culminate in a truly spectacular meal. Get ready to present a dish that’s not only visually appealing but also bursting with flavor, from the zesty, spicy chicken to the comforting, crispy potatoes and the fresh, vibrant green beans. This is where your culinary masterpiece truly shines!
-
Carve the Chicken:
After its well-deserved rest, carve your beautiful Spicy Lemon Herb Roasted Chicken. You can either cut it into individual pieces (breasts, thighs, drumsticks, wings) or, if spatchcocked, simply cut it into larger serving portions, following the natural lines of the bird. Arrange the carved chicken pieces dramatically on a large serving platter, making sure that glorious, crispy, golden-brown skin is visible and inviting! The aroma alone, infused with our signature Jalapeno Salt, will have everyone salivating.
-
Arrange the Sides:
Scoop the golden-brown, crispy roasted potatoes onto the platter alongside the chicken. Their gorgeous browning and varied textures will make them irresistible, a perfect foil to the tender chicken. Then, spoon the vibrant Green Bean Almondine onto the platter as well, allowing its fresh color and toasted nuttiness to pop against the richer tones of the chicken and potatoes. Drizzle any glorious pan juices from the chicken over the meat for an extra burst of flavor and moisture. These juices will be infused with the wonderful essence of our Jalapeno Salt, lemon, and herbs, creating a rich, aromatic sauce that elevates every bite.
-
Garnish & Serve:
Garnish the entire platter generously with chopped fresh parsley and extra lemon wedges. These not only add a final touch of color and visual appeal but also provide a fresh, herbaceous counterpoint that brightens the whole dish and offers a palate cleanser. You can even offer a small bowl of extra Jalapeno Salt on the side for those who love to customize their spice level with an additional sprinkle – it’s a fantastic finishing touch for any adventurous eater! Serve immediately and prepare for rave reviews. This meal is perfect for a cozy family dinner, a special occasion with friends, or simply when you want to treat yourself to something truly extraordinary and flavorful. Enjoy every delicious, spice-kissed bite, savoring the unique blend of heat and herbs brought to you by our amazing Jalapeno Salt!
Conclusion:
If you’ve followed along with our recipe, you’ve just unlocked a world of flavor that will undoubtedly revolutionize your pantry. I truly believe that making your own seasonings is one of the most rewarding culinary endeavors, and this recipe for homemade spiced salt is a shining example. It’s not just about creating a condiment; it’s about crafting an experience, a little sprinkle of magic that elevates everyday dishes into something extraordinary. This isn’t just another item to tick off your cooking list; it’s an invitation to explore bolder tastes and take pride in what you create from scratch. The sheer satisfaction of using your own handcrafted seasoning, knowing exactly what went into it, is unparalleled.
Why is this recipe an absolute must-try? For starters, the depth of flavor you achieve simply cannot be replicated by store-bought alternatives. The fresh, vibrant kick of the peppers, perfectly balanced with the savory crunch of the salt, creates a symphony on your palate. It’s spicy, yes, but it’s also incredibly aromatic and complex, far beyond a simple heat. It transforms from being just an ingredient to being a star player in your kitchen arsenal. Moreover, the process itself is surprisingly straightforward, debunking the myth that gourmet ingredients must be difficult to prepare. You’ll be amazed at how easily you can produce something so impactful with just a few simple steps and readily available ingredients. It’s an empowering feeling to know you can control the intensity, the specific pepper profile, and the overall quality of your seasonings. Forget bland meals; this is your ticket to a flavor fiesta that’s always just a pinch away.
Now, let’s talk about the endless possibilities once you have your batch of this incredible salt. Your homemade Jalapeno Salt is far more versatile than you might initially imagine. Imagine starting your day with perfectly seasoned scrambled eggs, each bite bursting with a delightful warmth. Or perhaps you’re grilling some chicken breasts for dinner; a generous rub of this flavored salt will infuse them with an unforgettable zesty, spicy note that will have everyone asking for your secret. It’s a game-changer for roasted vegetables – think crispy potatoes, sweet corn on the cob, or even tender asparagus spears. A sprinkle before roasting brings out their natural sweetness while adding an exciting kick. Don’t stop there! Elevate your movie night popcorn from mundane to magnificent, rim your next margarita glass for an unexpected fiery twist, or give your avocado toast a vibrant upgrade. It’s also fantastic on tacos, burritos, quesadillas, and pretty much any Mexican-inspired dish you can think of. I’ve even used it to add a spicy edge to a Bloody Mary – trust me, it’s a revelation!
For those who love to experiment, the variations are truly boundless. You can easily adjust the heat level by either including more of the pepper seeds for an extra fiery punch or removing them almost entirely for a milder, more aromatic experience. Don’t feel limited to just jalapenos; consider trying other peppers like serranos for a sharper heat, or even a mix of different chilies for a unique blend. Adding a touch of lime zest during the initial blending can introduce a bright, citrusy note that complements the heat beautifully. A hint of garlic powder or smoked paprika could also add another layer of complexity, transforming your basic flavored salt into a signature blend. The beauty of making it yourself is that you are the master of your flavors.
So, I implore you, don’t just read about this fantastic recipe – try it! Dedicate a little time this week to create your own batch of this sensational seasoning. I promise you, the aroma alone will be enough to get you excited, and the first taste will solidify its place as a staple in your kitchen. Once you experience the vibrant kick and incredible depth that homemade flavored salt brings to your cooking, you’ll wonder how you ever managed without it. After you’ve made it, and more importantly, after you’ve started incorporating it into your meals, I would absolutely love to hear about your experiences. Did you try a fun variation? What was your favorite dish to use it on? Share your thoughts, your successes, and even your creative ideas in the comments below or tag us on social media. Your culinary adventures inspire me, and I can’t wait to see what deliciousness you create! Happy seasoning!
Frequently Asked Questions About Flavored Salts
What kind of peppers can I use to make flavored salt?
While this recipe specifically highlights jalapenos, the world of chili peppers is your oyster! You can experiment with serrano peppers for a sharper, more intense heat, or even habaneros if you’re truly seeking a fiery kick. For a milder, smoky flavor, consider using chipotle peppers (dried smoked jalapenos). Bell peppers can also be used for a sweet, vibrant colored salt, though they won’t provide any heat. Just ensure your chosen peppers are fresh and firm for the best results.
How long does homemade flavored salt last?
When stored properly in an airtight container in a cool, dark place, homemade flavored salts can last for a very long time, often several months to a year. The salt acts as a natural preservative. However, for optimal flavor and potency, I recommend using it within 3-6 months. Over time, the vibrant color might slightly fade, and the intensity of the pepper flavor might diminish, but it will still be perfectly safe to use.
Do I need to dry the peppers before making the salt?
For most flavored salt recipes, especially those designed for longer shelf life, thoroughly drying the peppers (or pepper paste, as in our method) is crucial. Moisture is the enemy of salt and can lead to clumping or even mold growth. Our recipe incorporates a drying step to ensure all residual moisture from the fresh jalapenos is evaporated, resulting in a perfectly dry, free-flowing salt that will last. If you skip this step, your salt might clump and spoil quickly.
Can I make this recipe without a food processor?
A food processor certainly makes the initial blending of the peppers much easier and ensures a fine consistency. However, if you don’t have one, you can still make flavored salt! You would need to very finely mince the jalapenos by hand, then combine them with the salt. The drying process might take a little longer as the pieces will be larger. Alternatively, you could use a mortar and pestle for a more rustic, textured salt, though this will require more effort.
What are the best ways to store my Jalapeno Salt?
To keep your Jalapeno Salt fresh and flavorful for as long as possible, store it in an airtight glass jar or container. Make sure the container is completely dry before adding the salt. Keep it in a cool, dark place away from direct sunlight and humidity. A pantry shelf or kitchen cabinet is ideal. Avoid storing it near the stove or any area with fluctuating temperatures, as this can introduce moisture and reduce its shelf life.
Is Jalapeno Salt very spicy?
The spice level of your Jalapeno Salt can be entirely customized to your preference! Jalapenos themselves have a moderate heat level, typically ranging from 2,500 to 8,000 on the Scoville Heat Unit (SHU) scale. Most of the heat is concentrated in the seeds and the white pith inside the pepper. If you prefer a milder salt, simply remove all the seeds and pith before blending. For a spicier kick, leave some or all of them in. Our recipe provides guidance on how to adjust this, ensuring you get the perfect amount of heat for your palate.
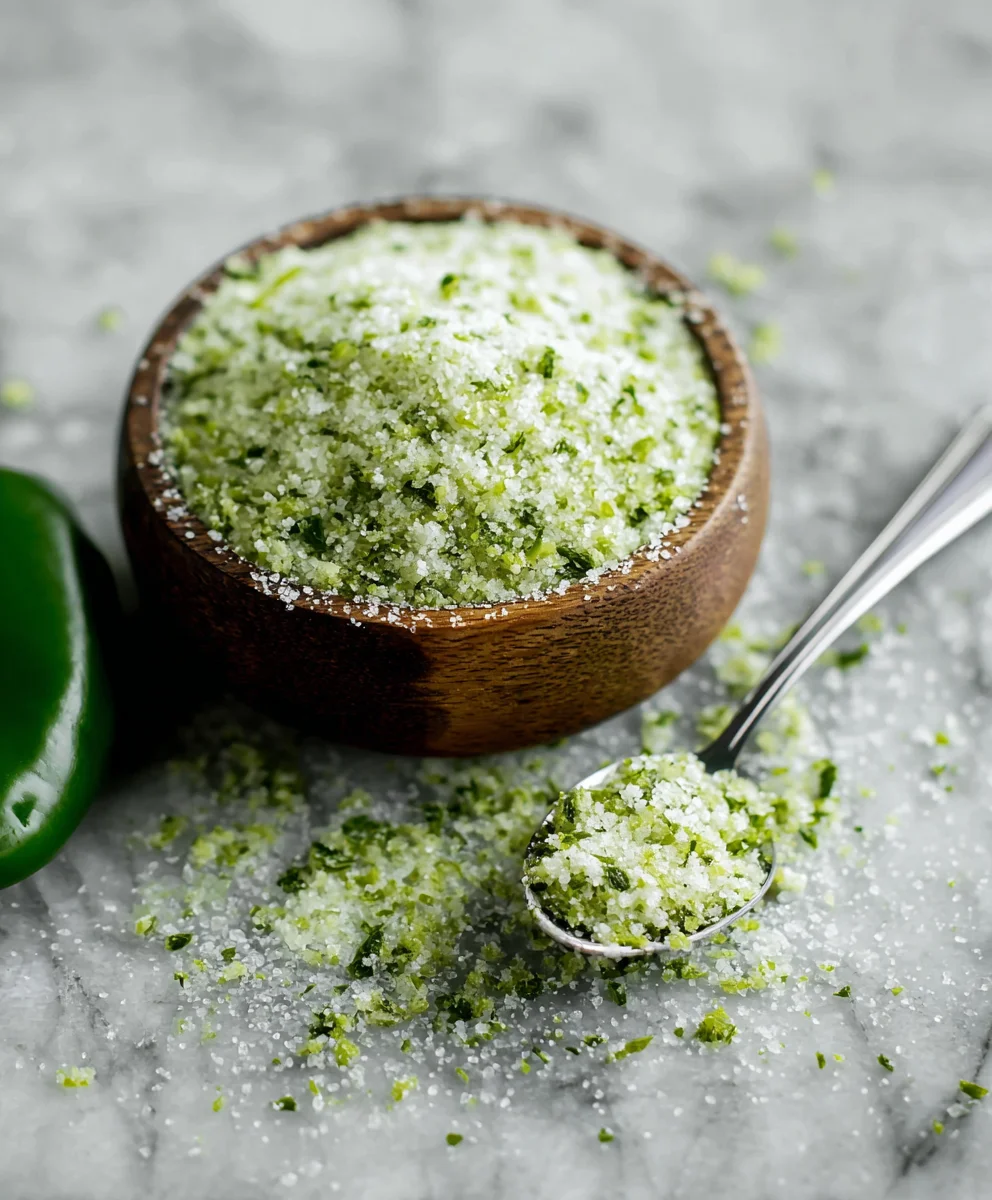
Easy Jalapeno Salt
Homemade Jalapeno Salt is a vibrant, fiery seasoning created by dehydrating and blending fresh jalapenos with sea salt, perfect for adding a spicy kick and fresh flavor to almost any dish. Control the potency and texture for a truly transformative culinary secret weapon.
Ingredients
-
10-12 medium Fresh Jalapenos
-
1 cup Coarse Sea Salt (or to taste)
Instructions
-
Step 1
Wash and thoroughly dry the fresh jalapenos. Wearing gloves, remove their stems, de-seed, and dice the peppers finely. -
Step 2
Spread the prepared diced jalapenos evenly on a dehydrator tray. Dehydrate at 125°F (52°C) for 6-10 hours, or until they are completely brittle. -
Step 3
Once dried, transfer the jalapeno pieces to the bowl of a food processor. Pulse 2-3 times, or until they are broken into small pieces similar to salt grains. Process further for a finer salt if preferred. -
Step 4
Combine the processed dried jalapenos with the coarse sea salt. Mix well. Adjust the ratio of jalapeno to salt based on your personal preference for spice level and flavor intensity. -
Step 5
Store the homemade Jalapeno Salt in an airtight container in a cool, dark place. Use it to infuse meals with fiery flavor!
Important Information
Nutrition Facts (Per Serving)
It is important to consider this information as approximate and not to use it as definitive health advice.
Allergy Information
Please check ingredients for potential allergens and consult a health professional if in doubt.


Leave a Comment