

I’m thrilled to share that the Oreo Dump Cake Recipe Just Ingredients is about to become your new favorite dessert secret. This phrase might sound almost too simple to be true, but prepare to be utterly amazed by the sheer ease and decadent results of this incredible treat. The concept of a “dump cake” has long been celebrated in home kitchens for its remarkably no-fuss approach, requiring you to simply combine ingredients in a pan and let the oven work its magic. It’s a brilliant testament to ingenious American home cooking that prioritizes maximum flavor with minimal effort.
By incorporating the iconic crunch and creamy filling of America’s favorite cookie, we elevate this classic comfort food into an absolutely irresistible chocolate lover’s dream. People universally adore this dish because it effortlessly blends the nostalgic warmth of a homemade dessert with the irresistible allure of Oreos. You’ll experience a delightful symphony of textures – the soft, warm, cake-like base mingling beautifully with chunks of crispy cookies, all enveloped in a rich, fudgy sauce. It’s the ultimate dessert for those busy weeknights or spontaneous gatherings when you need something spectacular with virtually no hands-on time. The incredible taste, the straightforward preparation, and the pure joy it brings make this particular Oreo Dump Cake Recipe Just Ingredients a consistently popular and adored choice.

Ingredients:
Here’s what you’ll need to create this incredibly simple yet utterly decadent dessert. This is an Oreo Dump Cake Recipe Just Ingredients, designed for maximum flavor with minimal fuss. Everything should be easily accessible from your local grocery store!
- 1 (15.25 ounce) package yellow cake mix: While yellow is my personal go-to for its classic, buttery flavor that complements the Oreos beautifully, you could experiment with a white cake mix for a slightly milder profile, or even a chocolate fudge cake mix if you’re a true chocoholic looking to double down on the cocoa intensity. Just make sure it’s a standard box mix, not a specific “pudding in the mix” or “super moist” variety, as these can sometimes alter the liquid absorption.
- 1 (14.3 ounce) package Oreo cookies: The star of our show! I typically opt for the original Oreos, but feel free to explore. Double Stuf Oreos will give you a creamier base layer, while Golden Oreos would create an entirely different, vanilla-centric flavor profile. You could even use some of the seasonal flavors if you’re feeling adventurous and want to create a holiday-themed dump cake! Make sure you have enough for both the bottom layer and a generous topping.
- 2 cups whole milk: Whole milk is preferred here because its higher fat content contributes to a richer, moister cake texture. Skim or low-fat milk can be used in a pinch, but the cake might turn out a little less tender and flavorful. If you’re feeling extra indulgent, or want an even creamier result, half-and-half or even light cream could be a luxurious substitute, though it might slightly thicken the batter.
- 1/2 cup (1 stick) unsalted butter: Melted butter is crucial for creating that wonderful, slightly crispy, golden-brown crust on top of our dump cake. Unsalted butter gives you more control over the overall saltiness of the dish; if you only have salted, you can still use it, but be mindful of any additional salt you might add elsewhere (though this recipe doesn’t call for much!).
- Optional additions for serving:
- Vanilla ice cream
- Whipped cream
- Chocolate syrup
- Extra crushed Oreos for garnish
Getting Ready: Prepping Your Workspace
- Preheat Your Oven: Begin by preheating your oven to 350°F (175°C). This ensures that when your cake goes in, it starts baking immediately and evenly. A properly preheated oven is key to consistent results, so don’t rush this step! Give it at least 15-20 minutes to reach the correct temperature, especially if your oven tends to be a bit sluggish.
- Prepare Your Baking Dish: Grab a 9×13-inch baking dish. This size is perfect for achieving the ideal cake-to-topping ratio and ensures even baking. You don’t typically need to grease or flour a dump cake dish, as the butter on top and the moisture from the milk usually prevent sticking. However, if you’re prone to sticking issues or just want extra peace of mind for easy serving and cleanup, you can lightly spray the bottom and sides with a non-stick cooking spray.
- Melt the Butter: Place your 1/2 cup (1 stick) of unsalted butter in a microwave-safe bowl or a small saucepan. Melt it completely. If using the microwave, heat in 20-30 second intervals, stirring in between, until fully melted and smooth. Set it aside to cool slightly while you prepare the other components. You don’t want to pour scorching hot butter directly onto your cake mix later.
Building the Foundation: The Oreo Layer
This is where the magic begins for our Oreo Dump Cake Recipe Just Ingredients – establishing that signature cookie base.
- Prepare the Oreo Base: Take approximately three-quarters of your package of Oreo cookies. You can eyeball this, but aim to save about a quarter of the package for a glorious topping later. Now, you have a few options for crushing them:
- The Bag Method (My Favorite): Place the Oreos in a large freezer-safe zip-top bag. Seal it, pressing out as much air as possible. Using a rolling pin, the bottom of a heavy skillet, or even a meat mallet, gently but firmly crush the cookies until they form coarse crumbs with some larger chunks mixed in. I actually prefer a mix of textures – some fine crumbs for absorption and some larger pieces for delightful bites of cookie in the finished cake. This method is incredibly satisfying and mess-free.
- The Food Processor Method: For a more uniform, finer crumb, pulse the Oreos in a food processor until they reach your desired consistency. Be careful not to over-process them into a paste; we’re aiming for crumbs, not butter.
- The Hand-Crushing Method: If you’re feeling old-school or don’t have the tools, you can simply twist and separate the cookies, then crumble them with your hands into the baking dish. This will give you very rustic, chunky pieces, which can be wonderfully textural!
Once crushed, spread these Oreo crumbs evenly across the bottom of your prepared 9×13-inch baking dish. Make sure to cover the entire surface from edge to edge. This forms the delicious, slightly softened cookie crust that makes a dump cake so unique and incredibly satisfying.
Creating the Cake Topping: Mix and Pour
This phase is all about combining our simple ingredients to create the cake-like topping that bakes over our Oreo base. Remember, it’s a dump cake, so precision is less critical than good distribution!
- Evenly Distribute the Dry Cake Mix: Open your package of yellow cake mix. Without mixing it with any liquids yet, sprinkle the dry cake mix evenly over the layer of crushed Oreos in your baking dish. It’s really important to get an even distribution here. If you have clumps of dry mix, they might not hydrate properly during baking, resulting in powdery spots in your finished cake. Use a spoon or your hands to gently spread it out, ensuring no large bare spots of Oreos are showing. This dry layer is what will absorb the milk and butter, transforming into a moist cake.
- Pour in the Milk: Slowly and carefully pour the 2 cups of whole milk over the dry cake mix layer. The goal here is to saturate the cake mix as evenly as possible without disturbing the layers too much. Try to pour it in a zigzag pattern or drizzle it all over the surface. Don’t worry if it looks like there’s too much liquid; the dry cake mix is designed to absorb it. Avoid pouring it all in one spot, as this could create a dense, under-hydrated area and an overly wet area. The key to a moist dump cake is even liquid distribution.
The Finishing Touch: Butter and Extra Oreos
These final layers before baking are crucial for texture and flavor, ensuring a golden, slightly crisp top and those delightful pockets of softened cookie.
- Drizzle with Melted Butter: Now, take your melted butter that you set aside earlier. Drizzle it evenly over the top of the milk-soaked cake mix. The butter won’t mix in completely; instead, it will sit on top in small pools and streaks. As the cake bakes, this butter will seep down into the dry cake mix, creating pockets of richness and helping the top layer to crisp up beautifully. It also contributes significantly to the golden-brown color and irresistible aroma of the baked cake. Don’t skip this step – it’s a game-changer for texture! If you want to ensure really even coverage, you can try spooning small amounts over the entire surface rather than just drizzling in a few lines.
- Add the Remaining Oreos: Remember that quarter package of Oreos you saved? Now’s their time to shine! Crush these remaining Oreos, either coarsely by hand or in a bag, just as you did for the bottom layer. Sprinkle these crushed cookies generously over the top of the butter and cake mix. These top Oreos will bake into a slightly chewy, slightly crispy layer, adding another fantastic dimension of flavor and texture to your finished dump cake. Some will sink into the cake, becoming soft and gooey, while others on the surface will retain a bit more crunch. This layering of textures is what makes an Oreo Dump Cake so enjoyable.
Baking to Perfection
Patience is a virtue, especially when waiting for a delicious dessert to emerge from the oven!
- Bake Until Golden and Bubbly: Carefully place your baking dish into your preheated 350°F (175°C) oven. Bake for approximately 45-55 minutes. The exact baking time can vary slightly depending on your oven, so keep an eye on it.
- What to Look For: The cake is ready when the top is beautifully golden brown, and the edges are bubbling vigorously. You might see some of the Oreos on top slightly crisping. The center should also appear set, not liquidy. If you gently jiggle the pan, the center should not slosh around too much.
- Checking for Doneness: While a toothpick test isn’t always perfectly reliable for dump cakes due to their unique, moist texture, you can insert a toothpick into the cake portion (avoiding the bottom Oreo layer). It should come out with moist crumbs attached, but not wet batter. The cake should pull away slightly from the sides of the dish.
- Troubleshooting: If the top is browning too quickly but the cake doesn’t seem fully set, you can loosely tent the dish with aluminum foil for the last 10-15 minutes of baking.
Don’t underbake! An underbaked dump cake can be overly gooey or soupy in the middle, while an overbaked one might dry out the cake portion. Aim for that perfect balance of moist cake and softened Oreos.
Cooling and Serving Your Delicious Oreo Dump Cake
The final steps, ensuring your delicious creation is ready to be devoured!
- Cool Before Serving: Once your Oreo Dump Cake is perfectly baked, carefully remove it from the oven. It will be incredibly hot, and the fillings will be very fluid. Allow the cake to cool on a wire rack for at least 15-20 minutes before attempting to serve. This cooling period is absolutely crucial:
- It allows the molten filling to set up and thicken, preventing a messy, soupy presentation.
- It helps the cake portion to firm up slightly, making it easier to scoop and serve neatly.
- It allows the flavors to meld and deepen, enhancing the overall taste experience.
I know it’s hard to wait when your kitchen smells incredible, but trust me, patience here will be rewarded! If you try to serve it too hot, it will be a glorious, delicious mess, but possibly not what you intended aesthetically.
- Serve Warm or at Room Temperature: This Oreo Dump Cake is absolutely divine served warm, perhaps a little gooey, straight from the pan after its initial cool-down. The warmth enhances the chocolate and vanilla flavors and makes the cake incredibly comforting. However, it’s also fantastic served at room temperature, where the cake portion becomes a bit firmer and the Oreo layers are wonderfully softened.
- The Ultimate Indulgence: For an unforgettable dessert experience, scoop a generous portion of the warm dump cake into a bowl. Top it with a big scoop of vanilla bean ice cream. The cold, creamy ice cream melting into the warm, chocolatey cake is a textural and temperature contrast that is simply heavenly.
- Whipped Cream Wonderland: If ice cream isn’t your preference, a dollop of freshly whipped cream provides a lovely, light counterpoint to the richness of the cake.
- Extra Flair: A drizzle of chocolate syrup or an extra sprinkle of finely crushed Oreos on top of your ice cream or whipped cream will add that professional touch and extra burst of flavor.
This Oreo Dump Cake Recipe Just Ingredients truly offers a remarkable dessert with minimal effort, making it perfect for last-minute gatherings or a simple weeknight treat. Enjoy every delicious spoonful!
Conclusion:
And there you have it, my friends! We’ve reached the sweet finale of our journey with what I genuinely believe is one of the most effortlessly delightful desserts you could ever whip up. This isn’t just a cake; it’s a celebration of simplicity, a testament to how incredible flavors can emerge from minimal effort. I’ve had the pleasure of making this more times than I can count, and every single time, it earns rave reviews. It’s the kind of dessert that makes you look like a culinary genius without requiring you to spend hours in the kitchen, and honestly, who doesn’t love that?
What makes this particular creation a must-try, in my humble opinion, is its uncanny ability to deliver an intensely satisfying experience with such an unfussy process. The magic truly happens in the oven, as the ingredients meld together into a wonderfully moist, chocolatey, and creamy dream. It’s rich without being overly heavy, sweet without being cloying, and carries that unmistakable nostalgic flavor of everyone’s favorite cookie. This cake strikes a perfect balance, making it suitable for almost any occasion – from a casual weeknight treat to a show-stopping potluck contribution. It’s a comfort food elevated, designed for enjoyment without any stress or complicated techniques. The ease of preparation means you spend less time stressing and more time savoring the delicious outcome.
Now, while this dump cake is absolutely divine straight out of the pan, I always love to offer a few suggestions to take your dessert experience to the next level. Serving it warm is always a winner. The warm, gooey cake contrasted with a scoop of something cold is simply heavenly. Think about pairing it with a generous scoop of vanilla bean ice cream; the way the ice cream slowly melts into the warm crevices of the cake creates a truly decadent spoonful. Alternatively, a dollop of freshly whipped cream can add an airy lightness that beautifully complements the cake’s richness. If you’re feeling extra fancy, a light drizzle of chocolate syrup or caramel sauce over the top just before serving adds an extra layer of visual appeal and flavor complexity. For those who prefer a more refreshing finish, a few fresh berries, like raspberries or strawberries, scattered alongside can cut through the sweetness beautifully, adding a touch of tartness and vibrant color.
But don’t stop there! The beauty of a dump cake lies in its incredible versatility. This recipe is a fantastic canvas for your own creativity. For instance, you could experiment with different flavored Oreo cookies – mint Oreos would lend a delightful coolness, or peanut butter Oreos would introduce a nutty dimension. Or, swap out the chocolate cake mix for a yellow cake mix or even a spice cake mix for an entirely different flavor profile. Instead of chocolate pudding mix, vanilla, cheesecake, or even white chocolate pudding would create fascinating new combinations. You could also fold in other sweet treats like chocolate chips, mini marshmallows, or even a handful of chopped nuts for added texture. Consider a sprinkling of shredded coconut for a tropical twist, or a swirl of cream cheese frosting on top once it’s cooled for an even richer experience. The possibilities are truly endless, and this is where the fun really begins. The core “Oreo Dump Cake Recipe Just Ingredients” provides a rock-solid foundation, but encourages you to play around and make it your own signature dessert.
So, I implore you, if you haven’t yet tried this miraculous dessert, now is the time. You deserve this kind of easy deliciousness in your life. It’s perfect for satisfying those spontaneous sweet cravings, for surprising guests, or simply for treating yourself after a long week. I promise you, from the moment you take your first bite, you’ll understand why I’m so enthusiastic about it. It’s genuinely one of those recipes that delivers maximum impact for minimum effort, making it a true kitchen hero.
Once you’ve experienced the magic, I would absolutely love to hear from you. Did you stick to the original recipe, or did you get adventurous with your variations? What were your favorite serving suggestions? Please, share your experiences, your successes, and any fun twists you came up with in the comments below. Your feedback and creativity inspire me, and I’m always thrilled to see how this recipe brings joy to your kitchens and dining tables. Happy baking, and even happier eating!
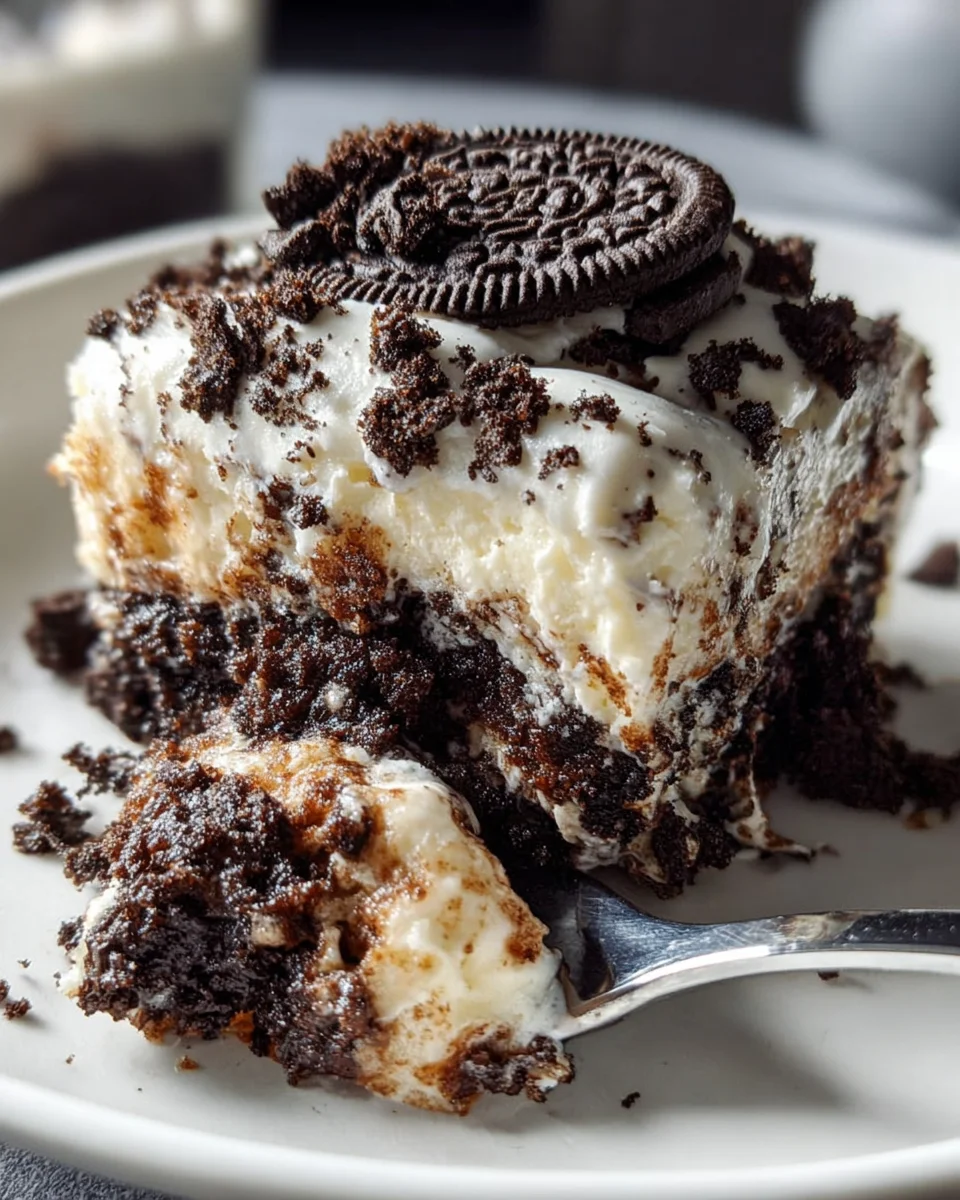
Oreo Dump Cake Recipe Just Ingredients
An incredibly easy and decadent Oreo Dump Cake recipe combining America’s favorite cookie with a simple cake mix, milk, and butter for a no-fuss, irresistible chocolate dessert perfect for any occasion.
Ingredients
Instructions
Important Information
Nutrition Facts (Per Serving)
It is important to consider this information as approximate and not to use it as definitive health advice.
Allergy Information
Please check ingredients for potential allergens and consult a health professional if in doubt.


Leave a Comment