

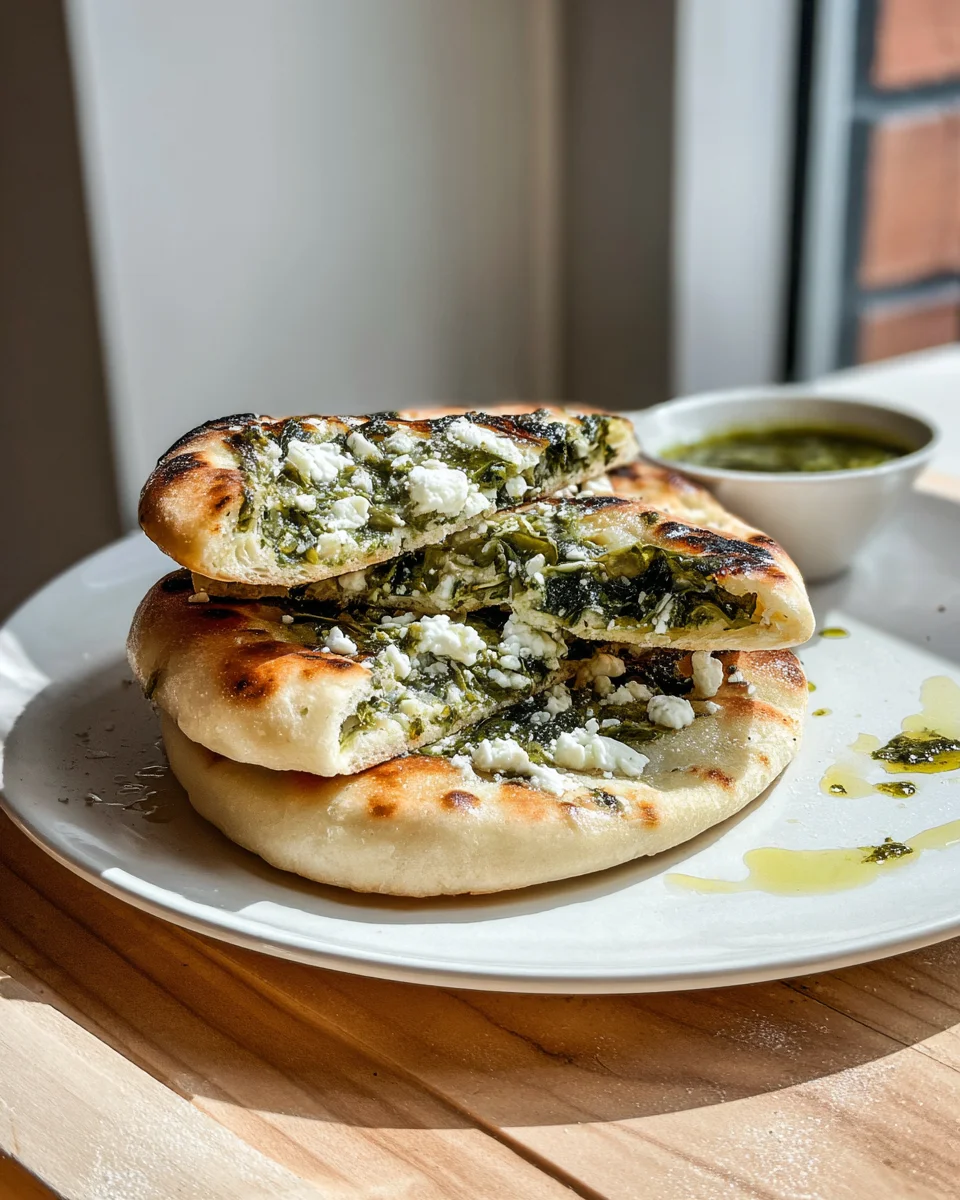
Feta Spring Flatbreads are truly a revelation, a vibrant symphony of flavors that perfectly captures the essence of the season. Imagine the sun-drenched shores of the Mediterranean, where ancient flatbread traditions meet the creamy, tangy embrace of authentic feta cheese. While flatbreads have graced tables across cultures for millennia, this recipe infuses that timeless staple with the freshest produce and herbs of spring, creating a dish that feels both ancient and utterly contemporary. People adore this dish for its incredible versatility and irresistible combination of textures and tastes. The salty, crumbly feta melts beautifully, contrasting with the tender flatbread and the crisp bite of fresh spring vegetables and herbs. Feta Spring Flatbreads are a delightful culinary escape, incredibly simple to assemble for a quick weeknight dinner, a light lunch, or even an impressive appetizer for gatherings. Each bite is a burst of freshness and comfort, making it an instant favorite you’ll want to make again and again.

Ingredients:
- For the Flatbread Dough:
- 3 cups (360g) all-purpose flour, plus more for dusting your work surface generously
- 1 teaspoon active dry yeast, ensuring it’s fresh and active
- 1 teaspoon granulated sugar, to feed the yeast and promote a lovely crust
- 1 teaspoon fine sea salt, for seasoning the dough itself
- 1 cup (240ml) warm water (aim for about 105-115°F / 40-46°C – it should feel comfortably warm to the touch, not hot)
- 2 tablespoons olive oil, plus an extra drizzle for greasing the bowl
- For the Feta Spring Filling:
- 8 ounces (225g) fresh spinach, thoroughly washed and roughly chopped; pick out any tough stems
- 1 tablespoon olive oil, for sautéing our spring vegetables
- 1 medium spring onion (scallion), ensuring you use both the white and light green parts, thinly sliced; this adds a mild oniony flavor
- 1/2 cup (75g) frozen green peas, thawed (fresh are absolutely wonderful too, if you can find them in season!)
- 6 ounces (170g) quality feta cheese, crumbled into small, delightful pieces; its salty tang is key
- 1/2 cup (120g) whole milk ricotta cheese, for a creamy, luscious texture that balances the feta
- 1/4 cup fresh dill, finely chopped, adding a beautiful aromatic and herbaceous note that screams “spring”
- 2 tablespoons fresh mint, finely chopped, for that signature spring freshness and a bright, cooling touch
- Zest of 1 small lemon, providing a vibrant, zesty counterpoint to the rich cheeses
- 1 large egg yolk (optional, but highly recommended for binding the filling and adding extra richness to every bite)
- 1/4 teaspoon freshly ground black pepper, to taste
- A generous pinch of red pepper flakes (optional, if you enjoy a subtle warmth and a little kick in your savory pastries)
- For Assembling and Baking:
- 2 tablespoons olive oil, for brushing the flatbreads before they go into the oven
- 1 tablespoon sesame seeds (optional, but they add a lovely nutty crunch and visual appeal to your golden flatbreads)
Preparing the Flatbread Dough for Your Feta Spring Flatbreads
- Activate the Yeast: In a large mixing bowl, or the bowl of your stand mixer if you’re using one, combine the warm water, granulated sugar, and active dry yeast. Give this mixture a gentle stir with a spoon. Allow it to sit undisturbed for about 5 to 10 minutes. You’ll know the yeast is active and happy when it becomes wonderfully foamy and bubbly on the surface, resembling a creamy cap. If it doesn’t foam, your water might have been too hot or too cold, or your yeast might be old; in such a case, it’s best to start again with fresh yeast and correctly tempered water. This activation step is absolutely crucial for ensuring light, airy, and beautifully risen Feta Spring Flatbreads. A lively yeast makes all the difference!
- Combine Dry Ingredients: While your yeast is busy activating, take a separate, medium-sized bowl and whisk together the all-purpose flour and the fine sea salt. Whisking ensures that the salt is evenly distributed throughout the flour, preventing any surprises of overly salty or bland spots in your dough.
- Form the Dough: Once you’ve confirmed your yeast is active and thriving, go ahead and add the 2 tablespoons of olive oil to the foamy wet mixture. Then, gradually incorporate the flour mixture into the wet ingredients. You can do this by hand with a sturdy wooden spoon or, if you’re using a stand mixer, with the dough hook attachment on low speed. Continue mixing until a shaggy, cohesive dough begins to form. At this stage, it might look a bit rough and untidy, but don’t worry; we’re just getting started on its transformation.
- Knead the Dough: Now for the satisfying part! Turn the dough out onto a lightly floured surface. Begin to knead by hand for about 8 to 10 minutes. The dough will likely feel quite sticky at first, but resist the strong urge to add too much extra flour, as this can make your flatbreads tough. As you continue to knead, the gluten will develop, and the dough will gradually become smoother, more elastic, and wonderfully less sticky. You’ll know it’s properly kneaded when it springs back slowly and resiliently when you gently poke it with your finger. If you’re using a stand mixer, attach the dough hook and knead on medium-low speed for approximately 6 to 8 minutes, or until the dough clears the sides of the bowl cleanly and achieves that beautiful smooth, elastic texture. Properly kneaded dough is undoubtedly the secret to a tender, pliable flatbread, providing the perfect soft and chewy canvas for our vibrant Feta Spring filling.
- First Rise (Proofing): Lightly grease a clean, large bowl with a small drizzle of olive oil. Place your beautifully kneaded dough into the bowl, turning it once to ensure the entire surface is coated with that thin layer of oil. This prevents it from drying out and sticking. Cover the bowl tightly with plastic wrap or a clean, damp kitchen towel. Now, find a warm, draft-free spot in your kitchen – perhaps a sunny corner, near a warm appliance, or even inside a slightly warm (but turned off!) oven. Let the dough rise for 1 to 1.5 hours, or until it has visibly doubled in size. The exact timing will depend significantly on the warmth and humidity of your environment. This slow and patient rise not only develops incredible flavor but also contributes significantly to the light and airy texture, making your future Feta Spring Flatbreads truly exceptional and delightful to eat.
Crafting the Vibrant Feta Spring Filling
- Prepare the Spinach: Heat 1 tablespoon of olive oil in a large skillet or sauté pan over medium heat. Add the washed and roughly chopped spinach. Cook, stirring frequently with tongs or a wooden spoon, until the spinach wilts down completely and all its moisture is released. This usually takes about 3-5 minutes. Once it’s fully wilted, immediately transfer the spinach to a fine-mesh sieve or colander. Here’s a vital step for perfect flatbreads: press out as much excess liquid as humanly possible! Too much moisture in your filling will inevitably make your lovely flatbreads soggy, nobody wants that. You can use the back of a spoon, your clean hands (once the spinach has cooled enough to handle), or even a clean kitchen towel to really squeeze out every last drop of water. Once thoroughly squeezed and drained, transfer the spinach to a cutting board and finely chop it again to ensure it’s well integrated into the filling.
- Sauté Spring Onion: Using the same skillet (no need to wash it, those leftover flavors are good!), add the thinly sliced spring onion. Sauté for 2-3 minutes over medium heat until they become wonderfully softened and fragrant, but be careful not to let them brown. This gentle sautéing mellows their flavor, making them tender and sweet within the filling without any harshness.
- Combine Filling Ingredients: In a medium-sized mixing bowl, crumble the feta cheese into small, uniform pieces. Add the creamy whole milk ricotta cheese, the thoroughly squeezed and sautéed spinach, the softened spring onion, and the thawed green peas.
- Introduce Fresh Herbs and Zest: Now, stir in the finely chopped fresh dill, the wonderfully aromatic fresh mint, and the bright, fragrant lemon zest. These beautiful fresh herbs are truly the heart and soul of the “spring” in our Feta Spring Flatbreads, bringing an incredible burst of freshness, color, and aroma that will awaken your senses.
- Season and Bind: Add the freshly ground black pepper and your optional pinch of red pepper flakes for that subtle warmth. If you’re using the egg yolk (which I truly do recommend for a richer flavor and to help bind the filling beautifully), add it now. Mix everything thoroughly with a spoon or spatula until all the ingredients are well combined and evenly distributed. Give the filling a taste and adjust seasonings if necessary, keeping in mind that feta cheese is already quite salty, so you likely won’t need to add much, if any, additional salt. The harmonious combination of creamy ricotta, tangy feta, tender spring vegetables, and bright herbs creates a balanced and utterly delicious filling that will make these flatbreads irresistible.
Shaping and Filling Your Delicious Feta Spring Flatbreads
- Prepare Your Workspace: Once your dough has gloriously doubled in size and looks wonderfully puffy, gently punch it down to release the trapped air. Turn the dough out onto a clean, lightly floured surface. Now, prepare two large baking sheets by lining them neatly with parchment paper; this will prevent sticking and make cleanup a breeze.
- Divide the Dough: Divide the dough into 8 equal portions. You can eyeball this, but for more uniform flatbreads, I suggest using a kitchen scale to ensure each piece weighs roughly the same. Each portion should be about the size of a golf ball or slightly larger. Gently roll each portion into a smooth, tight ball. This helps create an even surface for rolling.
- Roll Out the Flatbreads: Take one dough ball and, using a rolling pin, roll it out into an oval or round shape, aiming for about 6-7 inches (15-18 cm) in diameter and roughly 1/8 to 1/4 inch (3-6 mm) thick. Try your best to keep the edges slightly thicker than the center; this small detail will help wonderfully contain the filling during baking. Repeat this process with the remaining dough balls. As you work, keep the unworked dough balls covered with a clean kitchen towel to prevent them from drying out, which can make them harder to roll and shape.
- Fill the Flatbreads: Now for the delicious part! Carefully place about 2-3 tablespoons of the prepared Feta Spring filling onto one half of each rolled-out dough circle, making sure to leave a small, clear border around the very edge. It’s important not to overfill, as this will make sealing them a real challenge and could cause the filling to burst out during baking.
- Shape and Seal: Gently fold the empty half of the dough over the filling, creating a beautiful half-moon shape. Carefully press down on the edges firmly with your fingertips to seal them completely. For an extra secure seal and a lovely decorative touch, you can use the tines of a fork to crimp the edges all around. This not only prevents the filling from escaping but also adds a charming, rustic look to your Feta Spring Flatbreads. Alternatively, for a slightly different presentation, you could bring the edges up and pinch them together tightly in the center, forming a small “boat” or an open-faced style, but for true enclosed “flatbreads,” the half-moon is my favorite. Ensuring a good, tight seal is absolutely critical to keep all that delicious Feta Spring filling safely nestled inside during the baking process.
- Second Short Rise: Carefully transfer your perfectly shaped Feta Spring Flatbreads to your prepared baking sheets, ensuring you leave a little bit of space between each one to allow for expansion. Loosely cover them with a clean kitchen towel and let them rest for another 15-20 minutes. This brief second proofing period allows the dough to relax and puff up just a little bit more, contributing to a lighter, more tender texture in the final product. While they are happily resting, this is the ideal time to preheat your oven.
Baking Your Golden Feta Spring Flatbreads
- Preheat the Oven: Preheat your oven to a robust 400°F (200°C). If you’re fortunate enough to have a baking stone or steel, place it in the oven while it preheats. This will help achieve an extra crispy bottom crust on your flatbreads, though parchment-lined baking sheets will still yield fantastic results.
- Prepare for Baking: Just before your Feta Spring Flatbreads go into the oven, gently brush the tops of each one with the remaining 2 tablespoons of olive oil. This will help them achieve that gorgeous golden-brown color and a lovely slight crispness. If you wish, now is the time to sprinkle a generous amount of sesame seeds over the oiled surface; they add both a delightful nutty flavor and a wonderful visual appeal to the finished flatbreads.
- Bake to Perfection: Carefully place the baking sheets into your preheated oven. Bake for 18-25 minutes, or until the flatbreads are beautifully puffed up, wonderfully golden brown on both the top and the bottom, and the filling is visibly heated through and possibly bubbling gently inside. The exact baking time can vary quite a bit depending on the quirks of your specific oven, so I always recommend keeping a close eye on them after the 18-minute mark. You’re looking for that appealing golden crust and a thoroughly cooked, fragrant interior.
- Cool Slightly and Serve: Once your magnificent Feta Spring Flatbreads are baked to perfection, remove them from the oven and carefully transfer them to a wire rack to cool for just a few minutes. While they are undeniably tempting to eat straight away, allowing them to cool slightly helps the hot filling set, making them easier to handle and, crucially, prevents any burnt tongues!
Serving Suggestions and Enjoying Your Feta Spring Flatbreads
These savory flatbreads are incredibly versatile and truly shine as a light lunch, a satisfying and wholesome snack, or a delightful appetizer for any gathering, big or small. They are absolutely fantastic served warm, straight from the oven, where the feta is wonderfully soft and melty, and the fresh herbs release their full, intoxicating aroma. I personally love them just as they are, letting the vibrant, fresh spring flavors of the filling speak for themselves, unadorned.
However, if you’re looking to elevate the experience even further, consider pairing them with a simple side salad. A light vinaigrette dressing would complement them beautifully, especially one made with fresh lemon juice and good olive oil. A crisp cucumber and tomato salad, perhaps with a touch of red onion and more fresh dill, would offer a fantastic textural contrast and a refreshing counterpoint to the richness of the feta, adding another layer of seasonal freshness. For a more substantial meal or an extra creamy element, a generous dollop of plain Greek yogurt or a spoonful of homemade tzatziki sauce alongside offers a cooling, tangy counterpoint to the savory filling, creating a truly harmonious flavor profile that’s hard to beat. You could also offer a small dish of extra lemon wedges for those who crave an additional burst of citrusy brightness, enhancing that quintessential spring-like quality even further.
Leftovers, if you’re lucky enough to have any (these tend to disappear fast!), are also wonderfully delicious! Store them in an airtight container in the refrigerator for up to 2-3 days. To reheat, I find that a quick warm-up in a toaster oven or even a dry skillet over medium heat works best to restore some of that lovely crispness to the crust without making them soggy. While a microwave will heat them through, they might lose some of their desirable textural appeal, becoming a little softer. These Feta Spring Flatbreads are a testament to how simple, fresh ingredients, combined with a little care and attention, can create something truly special, memorable, and utterly delicious for any occasion.
Don’t be afraid to experiment with the filling! While this recipe beautifully captures the essence of spring, you could absolutely adapt it based on what seasonal vegetables are available in your local market or what your family prefers. A handful of finely chopped sun-dried tomatoes (rehydrated if packed dry) could add a deeper, umami note, or a sprinkle of toasted pine nuts could offer a delightful crunch and richness. For an extra layer of savory depth, a tiny bit of finely grated Parmesan or Pecorino Romano cheese mixed into the filling wouldn’t go amiss, although it would subtly shift the flavor profile slightly away from the purely Mediterranean freshness. The true beauty of these versatile flatbreads lies in their adaptability, allowing you to personalize them to your unique taste while still retaining that wonderful base of tangy feta and vibrant spring freshness. Enjoy the satisfying process of creating and savoring these wonderful culinary delights!
Conclusion:
Well, my friends, we’ve reached the end of our culinary journey, and I genuinely hope you’re as excited as I am about what we’ve explored today. This isn’t just another recipe; it’s an invitation to experience something truly special. I truly believe that our Feta Spring Flatbreads are destined to become a staple in your kitchen, offering a refreshing burst of flavor that’s both comforting and invigorating. What makes this dish an absolute must-try, you ask? It’s the impeccable balance of creamy, salty feta, the vibrant freshness of seasonal greens, and the wonderfully chewy texture of the flatbread itself. It’s a symphony of textures and tastes that dances on your palate, promising pure delight with every single bite. Seriously, this recipe is a game-changer!
Beyond its incredible taste, the beauty of these flatbreads lies in their sheer versatility and the ease with which you can bring such a sophisticated dish to life. Imagine the aroma filling your kitchen – that subtle earthiness of the baked flatbread mingling with the bright, herbaceous notes of spring, all underscored by the rich, tangy scent of warm feta. It’s an experience that starts long before the first bite. Whether you’re looking for a quick weeknight dinner that feels gourmet, a delightful brunch option to impress guests, or a stunning appetizer for your next gathering, these Feta Spring Flatbreads effortlessly rise to the occasion. They manage to be both satisfyingly hearty and wonderfully light, making them perfect for any time of year, though they truly shine when fresh produce is at its peak.
Now, while these flatbreads are undeniably spectacular on their own, don’t hesitate to elevate your meal with thoughtful pairings. For a complete and wholesome dinner, I love serving them alongside a crisp, peppery arugula salad simply dressed with lemon vinaigrette, or perhaps a light, chilled cucumber and dill soup on a warmer evening. They also pair beautifully with a simple green salad featuring cherry tomatoes and a balsamic glaze, adding a fresh counterpoint to the flatbread’s richness. If you’re hosting, consider cutting them into smaller wedges and arranging them on a platter with a side of homemade tzatziki or a vibrant red pepper hummus for dipping – they make an absolutely stunning appetizer. And for drinks? A chilled crisp white wine, like a Sauvignon Blanc or a dry rosé, would complement the flavors perfectly, enhancing the spring notes without overpowering the feta. Even a sparkling lemonade or a light herbal iced tea would be a delightful non-alcoholic option.
One of the things I adore most about this recipe is its incredible adaptability. Please, feel free to make it your own! Don’t have feta? Try goat cheese for a tangier profile, or even a soft mozzarella for a milder, creamier texture. Out of spinach? A mix of tender kale, Swiss chard, or even finely chopped asparagus would be equally delicious, maintaining that vital “spring” element. For a heartier meal, consider adding some grilled chicken strips, crispy bacon bits, or even roasted chickpeas for a vegetarian protein boost. If you’re feeling adventurous, a sprinkle of red pepper flakes can add a lovely kick, or a dusting of za’atar before baking will transport your taste buds straight to the Mediterranean.
The possibilities truly are endless, limited only by your imagination and what fresh ingredients you have on hand.
For those with dietary restrictions, gluten-free flatbreads work wonderfully, and many dairy-free feta alternatives are now available, making this a truly inclusive dish.
So, what are you waiting for? I wholeheartedly encourage you to roll up your sleeves, gather those fresh ingredients, and dive into making these incredible Feta Spring Flatbreads this week.
I promise you, the joy of creating and savoring such a vibrant, flavorful dish is truly rewarding.
And once you’ve experienced the magic for yourself, I would absolutely love to hear about it! Please, share your culinary triumphs – your photos, your variations, your serving suggestions – with me and our wonderful community. Your insights and experiences inspire us all, and seeing how you make these recipes your own is one of my greatest pleasures. Happy cooking, everyone!
Feta Spring Flatbreads
Feta Spring Flatbreads are a vibrant symphony of flavors, capturing the essence of spring. This recipe combines creamy, tangy feta with fresh produce and herbs in an easy-to-assemble flatbread, perfect for dinner, lunch, or appetizers.
Ingredients
Instructions
Important Information
Nutrition Facts (Per Serving)
It is important to consider this information as approximate and not to use it as definitive health advice.
Allergy Information
Please check ingredients for potential allergens and consult a health professional if in doubt.


Leave a Comment