

Ghostbusters Stay Puft Marshmallows! Who can forget the iconic, towering figure of the Stay Puft Marshmallow Man, lumbering through the streets of New York, a beacon of sugary destruction and undeniable charm? For fans of the classic 1984 film Ghostbusters, this character isn’t just a villain; he’s a beloved, albeit slightly terrifying, symbol of pop culture history. His transformation from an innocent corporate mascot into a giant, city-stomping sweet treat has cemented his place in cinematic lore, sparking imaginations and cravings for generations.
Why We Love These Iconic Marshmallows
Today, I’m thrilled to invite you on a culinary adventure that brings a piece of that fantastical world right into your kitchen. There’s something truly magical about homemade marshmallows – their incomparable fluffiness, the way they melt exquisitely in your mouth, and the sheer joy of creating a delightful confection from scratch. People absolutely adore this dish not only for its incredible taste and cloud-like texture, which far surpasses any store-bought variety, but also for the whimsical nostalgia it evokes. Imagine serving up these delightful, pillowy squares at your next movie night or themed party! We’re celebrating that sweet, memorable antagonist by crafting our very own Ghostbusters Stay Puft Marshmallows. Get ready to embrace the sweetness without the imminent threat of city-wide destruction – unless you count devouring an entire batch yourself!

Ingredients:
- For the Marshmallow Base:
-
Unflavored Gelatin: 3 packets (about 7 tablespoons or 21 grams). This is the magical ingredient that gives our Ghostbusters Stay Puft Marshmallows their signature bounce and structure. Make sure it’s unflavored; we want pure vanilla goodness to shine through.
-
Cold Water (for gelatin): 1/2 cup (120 ml). We’ll use this to “bloom” the gelatin, which means allowing it to absorb water and soften before we introduce it to the hot sugar syrup. This step is crucial for a smooth, lump-free marshmallow.
-
Granulated Sugar: 2 cups (400 grams). The main sweetener and structural component. Don’t skimp on this, as it contributes to the body and shelf-stability of your marshmallows.
-
Light Corn Syrup: 3/4 cup (180 ml). This isn’t just for sweetness; corn syrup is vital for preventing sugar crystallization, ensuring your marshmallows remain wonderfully smooth and not grainy. It also adds to their characteristic chewiness.
-
Cold Water (for syrup): 1/2 cup (120 ml). Used to dissolve the sugar and corn syrup, helping them reach the perfect temperature and consistency.
-
Vanilla Extract: 2 teaspoons. For that classic, comforting marshmallow flavor. You can use vanilla bean paste for an even richer, more gourmet flavor and beautiful flecks, or even the seeds from one vanilla bean for truly extraordinary results. This is what truly elevates our Ghostbusters Stay Puft Marshmallows from ordinary to extraordinary.
-
- For Dusting and Pan Preparation:
-
Powdered Sugar: 1/2 cup (60 grams). Essential for coating the pan and the finished marshmallows, preventing stickiness. It also gives them a lovely, soft exterior.
-
Cornstarch: 1/2 cup (60 grams). Mixed with powdered sugar, cornstarch further helps prevent sticking and absorbs any residual moisture, ensuring your marshmallows stay perfectly powdery and separate.
-
- Essential Equipment:
-
9×13 inch Baking Pan: Or a similar size. A larger pan will yield thinner marshmallows, a smaller pan will result in thicker ones. Since we’re making Stay Puft style, a pan that allows for a good height is preferable.
-
Large Stand Mixer with Whisk Attachment: This is non-negotiable for homemade marshmallows. A hand mixer might work for smaller batches, but the sustained, powerful whipping required to achieve that airy, fluffy texture demands a stand mixer. You’ll be whipping for a solid 10-15 minutes, and your arm will thank you!
-
Saucepan (heavy-bottomed): For cooking the sugar syrup. A heavy bottom helps distribute heat evenly and prevents scorching.
-
Candy Thermometer: Absolutely crucial. Achieving the correct syrup temperature (240°F/116°C) is key to the marshmallow’s texture. Don’t guess here; accuracy is paramount for perfect Ghostbusters Stay Puft Marshmallows.
-
Rubber Spatula: For scraping down the bowl and spreading the mixture.
-
Pastry Brush (optional): For brushing down sugar crystals from the sides of the saucepan.
-
Sifter or Fine-Mesh Sieve: For dusting the pan and marshmallows evenly.
-
Sharp Knife or Pizza Cutter: For cutting the set marshmallows. A pizza cutter can be surprisingly effective for clean, straight lines.
-
Phase 1: Preparation is Key to Stay Puft Success!
Before we dive into the delicious science of marshmallow making, a little preparation goes a long way to ensure a smooth and successful experience. Trust me, you don’t want to be scrambling for ingredients or equipment once the syrup is hot!
-
Prepare Your Pan: Take your 9×13 inch baking pan. Generously grease the entire interior with a neutral oil or non-stick cooking spray. I mean generously. Marshmallows are notoriously sticky, and a well-greased pan is your first line of defense. Once greased, set it aside.
-
Create Your Dusting Mixture: In a small bowl, combine the 1/2 cup of powdered sugar and 1/2 cup of cornstarch. Whisk them together thoroughly until well combined. Now, using a fine-mesh sieve or sifter, generously dust the bottom and sides of your greased pan with this mixture. Make sure every greased surface is covered. Tap out any excess. This creates a non-stick barrier that will allow your magnificent Ghostbusters Stay Puft Marshmallows to release easily. Set the remaining dusting mixture aside for later.
-
Bloom the Gelatin: In the bowl of your stand mixer (the one you’ll be using for whipping), pour the 1/2 cup of cold water. Evenly sprinkle the three packets of unflavored gelatin over the surface of the water. Do not stir it in; just let it sit and absorb the water. This process, called “blooming,” allows the gelatin to soften and dissolve more easily when heated, preventing lumps in your final marshmallow. It will thicken into a gel-like consistency. Let it sit for at least 5-10 minutes while you move on to the next step.
Phase 2: Crafting the Sweet Syrup Foundation
This is where we build the sweet, sugary core of our marshmallows. Precision is important here, especially with the temperature, so have your candy thermometer ready!
-
Combine Syrup Ingredients: In your heavy-bottomed saucepan, combine the 2 cups of granulated sugar, 3/4 cup of light corn syrup, and 1/2 cup of cold water. Give it a gentle stir to moisten all the sugar. Avoid stirring vigorously once it starts heating, as this can encourage crystallization.
-
Heat the Syrup: Place the saucepan over medium-high heat. Attach your candy thermometer to the side of the pan, making sure the tip is submerged in the syrup but not touching the bottom of the pan. Bring the mixture to a boil. As it boils, watch for any sugar crystals forming on the sides of the pan. If you see any, gently brush them down with a pastry brush dipped in a little water. These stray crystals can “seed” the entire batch and lead to a grainy marshmallow texture – something we definitely want to avoid for our perfectly smooth Ghostbusters Stay Puft Marshmallows!
-
Boil to Temperature: Continue to boil the syrup, without stirring, until the candy thermometer registers exactly 240°F (116°C). This specific temperature is known as the “soft ball” stage, and it’s critical for achieving the ideal marshmallow consistency. It ensures enough moisture has evaporated and the sugar concentration is just right for a stable, yet tender, marshmallow. This usually takes about 8-12 minutes, depending on your stove and saucepan.
-
Safety First! As soon as the syrup reaches 240°F (116°C), carefully remove the saucepan from the heat. Please be extremely cautious! The sugar syrup is incredibly hot and can cause severe burns. Do not touch it directly. Set it on a heat-proof surface nearby. Speed is important in the next step, but safety always comes first.
Phase 3: The Magical Transformation – Whipping Your Marshmallows to Fluffy Perfection
This is truly the most exciting part of the process, where a sticky liquid transforms into the cloud-like confection we adore. Your stand mixer is about to do some heavy lifting!
-
Pour Syrup Over Gelatin: With your stand mixer fitted with the whisk attachment, turn it on to its lowest speed. Carefully and very slowly, pour the hot sugar syrup in a thin, steady stream over the bloomed gelatin mixture in the mixer bowl. Pouring slowly allows the gelatin to gradually incorporate and prevents it from cooking or seizing. It also ensures the hot syrup is evenly distributed. Do not pour directly onto the whisk attachment, as it can splatter. Keep pouring until all the syrup is added.
-
Begin Whipping: Once all the syrup has been added, increase the mixer speed to medium-high (usually around 6-8 on a KitchenAid). Let the mixer work its magic. Initially, the mixture will be thin and clear, looking much like sticky liquid. But patience is key here!
-
Watch the Transformation: You’ll start to notice changes after about 5 minutes. The mixture will begin to thicken, turn opaque, and increase significantly in volume. Keep whipping! This process incorporates air, which is what gives marshmallows their iconic light and airy texture. The mixture will lighten in color, becoming brilliantly white, reminiscent of our iconic Ghostbusters Stay Puft Marshmallows.
-
Add Vanilla: Around the 8-minute mark, when the mixture is thick, white, and looks like a fluffy cloud, carefully add the 2 teaspoons of vanilla extract. Let it continue to whip for another 2-5 minutes. During this time, the vanilla will be thoroughly incorporated, and the marshmallow will continue to thicken and cool.
-
Check for Readiness: You’ll know the marshmallow mixture is ready when it’s incredibly thick, glossy, bright white, and has more than tripled in volume. When you lift the whisk attachment, the marshmallow should form a thick, soft peak that holds its shape. It should also be considerably cooler to the touch on the outside of the mixing bowl (though still warm). The mixture needs to be cool enough to hold its shape when poured, but still warm enough to be spreadable. If it’s too warm, it won’t set properly; if it’s too cool, it will be impossible to spread.
Phase 4: Setting the Stage for Your Stay Puft Creations
Now that you’ve whipped up a truly impressive batch of marshmallow goodness, it’s time to get it into the pan and let it firm up. This stage is relatively hands-off, but just as important for that perfect texture.
-
Pour into Prepared Pan: Working quickly (as the marshmallow continues to set as it cools), use your rubber spatula to scrape all of the marshmallow mixture into your prepared, dusted 9×13 inch baking pan. You might find it quite sticky, so a well-oiled spatula can help here. Get every last bit out of the bowl; it’s too delicious to waste!
-
Smooth the Top: With your spatula, gently spread the marshmallow mixture evenly into the pan. You can lightly wet or oil your spatula to make this easier, preventing it from sticking. Try to create a smooth, level surface. Don’t worry if it’s not absolutely perfect; a homemade charm is part of the fun of making your own Ghostbusters Stay Puft Marshmallows!
-
Let it Set: Leave the pan uncovered at room temperature for at least 4-6 hours, or preferably overnight. Do not refrigerate, as this can make the marshmallows tough and watery. The ambient air circulation is best for a perfect set. The longer it sits, the firmer it will become, making it easier to cut into those iconic blocky shapes.
Phase 5: Releasing Your Inner Marshmallow Man – Cutting and Finishing
The moment of truth! After patiently waiting, you’re now ready to transform that glorious slab of marshmallow into individual, irresistible Ghostbusters Stay Puft Marshmallows.
-
Prepare Your Cutting Surface: Liberally dust a large cutting board or clean countertop with the remaining powdered sugar and cornstarch mixture. You need a generous amount to prevent sticking. This dusting is crucial for handling the sticky marshmallow.
-
Release the Marshmallow: Run a thin, dry knife or spatula around the edges of the pan to loosen any sticking marshmallow. Then, invert the pan onto your generously dusted cutting surface. If you prepared the pan well in Phase 1, the entire block of marshmallow should release quite easily. If it sticks, gently lift an edge and help it out with your fingers.
-
Dust the Top: Once the marshmallow block is on your cutting surface, generously dust the top of it with more of your powdered sugar/cornstarch mixture. Ensure all exposed sticky surfaces are covered. This is what gives your Ghostbusters Stay Puft Marshmallows their matte, non-sticky finish.
-
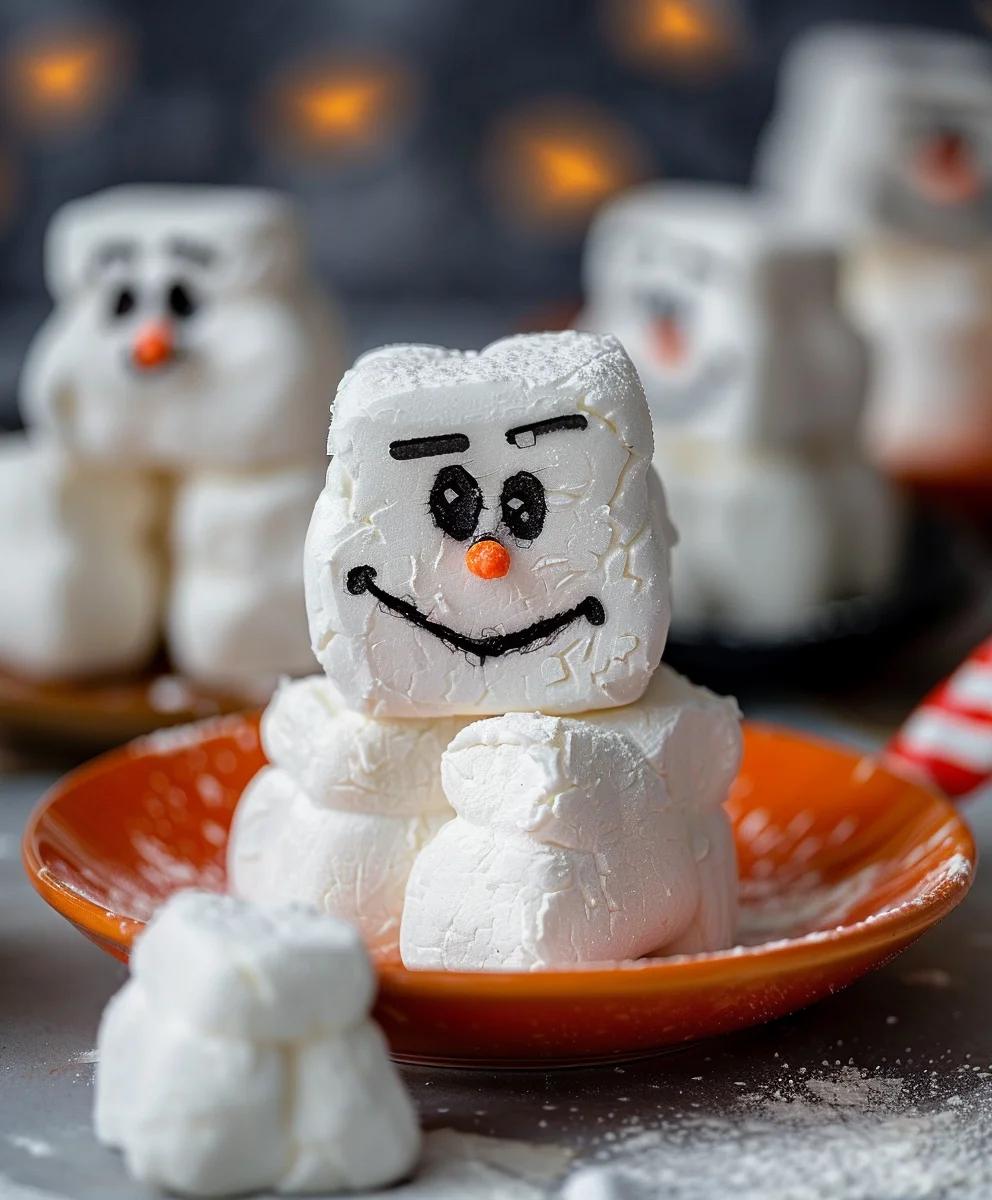
Cut into Stay Puft Shapes: Now for the fun part! Using a sharp, dry knife (or a pizza cutter, which works wonderfully for straight lines), cut the marshmallow into your desired “Stay Puft” sizes. For that classic, large Stay Puft Marshmallow Man look, I suggest cutting them into generous 2-inch by 2-inch squares, or even 2.5-inch squares for truly monumental marshmallows. Dip your knife or pizza cutter into the dusting mixture frequently to prevent sticking, and wipe off any accumulated marshmallow goo as needed for clean cuts. You can also lightly grease your knife with oil if you prefer.
-
Coat the Cut Sides: As you cut, each new surface will be sticky. Toss the freshly cut marshmallows into a bowl containing more of the powdered sugar/cornstarch mixture. Gently toss them around until all the sticky sides are completely coated. This ensures they don’t stick to each other or to your storage container. Give them a gentle shake to remove any excess powder.
-
Storage: Your magnificent homemade Ghostbusters Stay Puft Marshmallows are now ready to enjoy! Store them in an airtight container at room temperature for up to 2-3 weeks. Layer them with parchment paper if you’re worried about them sticking, though proper dusting should prevent this. They are perfect for snacking, hot cocoa, s’mores, or just marveling at your culinary creation. Enjoy the fluffy, vanilla-scented goodness!
Conclusion:
And there you have it, fellow bakers and fans of all things sweet and delightfully chewy! We’ve journeyed through the steps of creating something truly magical and incredibly delicious, a treat that transcends the ordinary. This isn’t just another dessert; it’s an experience, a delightful dive into childhood nostalgia and the pure joy of making something extraordinary with your own hands. The reward for your efforts is an impossibly light, wonderfully airy, and perfectly sweet confection that absolutely blows store-bought varieties out of the water. There’s a certain deep satisfaction that comes from whipping up a batch of these fluffy clouds, knowing exactly what went into them and marveling at their pristine, inviting appearance. It’s the kind of treat that brightens any day, makes a special occasion even more memorable, and truly impresses anyone lucky enough to get a taste. Forget bland, overly stiff squares; these homemade beauties possess a melt-in-your-mouth quality that you simply won’t find anywhere else. They’re soft, ethereal, and carry a delightful bounce, making every bite a blissful escapade into pure sugary bliss. You simply have to try them to understand the difference!
But the fun doesn’t stop once they’re cooled and cut! The versatility of these homemade marvels is truly remarkable. While they are utterly divine enjoyed simply on their own, perhaps with a cup of hot cocoa on a chilly evening, I highly encourage you to experiment. Imagine floating a few of these delightful creations atop a steaming mug of rich, dark hot chocolate, allowing them to gently soften and melt into a creamy, dreamy swirl of sweetness. For a truly iconic and incredibly satisfying experience, you absolutely must try them in s’mores. A perfectly toasted homemade marshmallow, sandwiched between graham crackers and melted chocolate, is a game-changer – the superior texture and flavor elevate this classic campfire treat to an entirely new dimension of gourmet indulgence. You could also chop them up and fold them into homemade rocky road ice cream or brownie batter for an extra layer of texture and sweetness.
Thinking about variations? The possibilities are endless! You could swirl in a touch of food coloring during the mixing process to create vibrant, festive shades for any holiday, transforming them into edible works of art. Try adding different extracts to the recipe: a hint of almond for a nutty depth, peppermint for a festive winter treat, or even a touch of rosewater for an exotic, floral twist. You could dust them with a mix of cocoa powder and powdered sugar for a mocha-inspired delight, or finely crushed freeze-dried raspberries for a burst of fruity flavor and a beautiful pink hue. For an extra layer of decadence, consider dipping one end of your finished marshmallows into melted dark chocolate and then sprinkling with sea salt, chopped pistachios, or shredded coconut. And for those truly dedicated to the theme, imagine a towering stack of these delectable confections, proudly presented as your very own, slightly less menacing, Ghostbusters Stay Puft Marshmallows. They’re not just a treat; they’re a canvas for your culinary creativity, ready to adapt to your wildest dessert dreams. Store them in an airtight container at room temperature, and they’ll retain their delightful freshness for up to a week, though I highly doubt they’ll last that long once people discover how irresistible they are!
So, what are you waiting for? Don’t let the idea of making marshmallows from scratch intimidate you. I promise, the process is far more straightforward and incredibly rewarding than you might imagine. With a little patience, a good stand mixer, and the right ingredients, you too can achieve these pillowy wonders right in your own kitchen. This isn’t just about following a recipe; it’s about embracing the joy of creation, the satisfaction of sharing something handmade with loved ones, and the sheer delight of tasting the difference homemade truly makes. I genuinely believe that once you try making these, you’ll never go back to store-bought again. The superior taste, the incredible texture, and the immense pride of accomplishment are simply unbeatable.
Share Your Sweet Success!
I would absolutely love to hear about your experience making these. Did you try a fun new flavor? Did you manage to create the perfect toasted s’mores? Perhaps you even had a Ghostbusters viewing party and these were the star of the show! Please don’t hesitate to share your photos, your tips, your triumphs, and any delicious variations you come up with in the comments below or on social media. Your culinary adventures inspire me and our whole community of home bakers. Let’s spread the joy of homemade goodness, one perfectly fluffy, unbelievably delicious marshmallow at a time. Go ahead, give it a try – you’ll be so glad you did, and your taste buds will thank you!
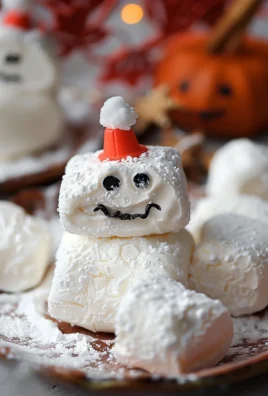
Ghostbusters Stay Puft Marshmallows (Decorated)
Recreate the iconic Stay Puft Marshmallow Man with this fun and easy recipe for decorating large marshmallows. Perfect for Ghostbusters fans and parties!
Ingredients
-
12 Large marshmallows (ensure pork-free if desired)
-
1 cup White chocolate chips (or melting wafers)
-
1 tsp Vegetable shortening (optional, for thinning chocolate)
-
1/4 cup Powdered sugar (for dusting, if needed)
-
1 Black edible marker
-
24 Candy eyes (2 per marshmallow)
Instructions
-
Step 1
Melt white chocolate chips with vegetable shortening (if using) in a microwave-safe bowl or double boiler until smooth and creamy. -
Step 2
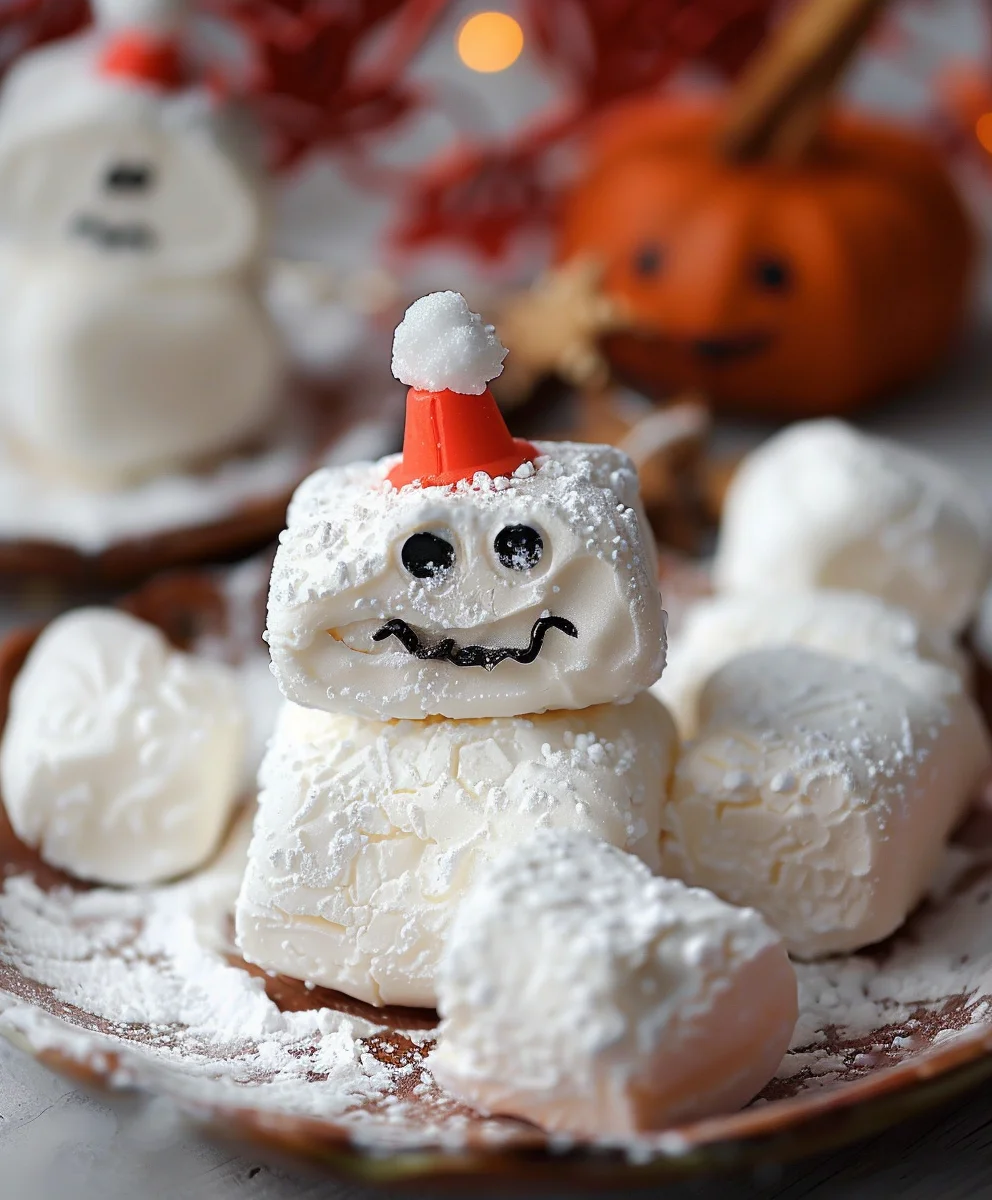
Dip each large marshmallow halfway into the melted white chocolate. Let excess drip off. Place dipped marshmallow on parchment paper and immediately attach two candy eyes onto the wet chocolate. -
Step 3
Allow the chocolate to set completely at room temperature or by refrigerating briefly (about 10-15 minutes). -
Step 4
Once chocolate is set, use the black edible marker to draw the iconic Stay Puft Marshmallow Man face details, including eyebrows, a smile, and the blue sailor collar lines, onto the white chocolate portion. -
Step 5
Serve your Ghostbusters Stay Puft Marshmallows immediately or store them in an airtight container at room temperature for up to a week.
Important Information
Nutrition Facts (Per Serving)
It is important to consider this information as approximate and not to use it as definitive health advice.
Allergy Information
Please check ingredients for potential allergens and consult a health professional if in doubt.
Leave a Comment