

Hawaiian Cinnamon Rolls: Prepare to be transported to a tropical paradise with every bite! Imagine the warm, comforting aroma of freshly baked cinnamon rolls mingling with the sweet, tangy scent of pineapple. These aren’t your average cinnamon rolls; they’re a delightful fusion of classic comfort food and vibrant island flavors.
While cinnamon rolls themselves have a rich history rooted in Northern Europe, the addition of pineapple and coconut is a modern twist, inspired by the abundance of these fruits in Hawaiian cuisine. This innovative combination brings a unique and exciting dimension to a beloved treat.
What makes Hawaiian Cinnamon Rolls so irresistible? It’s the perfect balance of textures and tastes. The soft, pillowy dough, swirled with cinnamon sugar, is complemented by the juicy bursts of pineapple and the creamy richness of coconut. The glaze, often infused with a hint of rum or pineapple juice, adds a final touch of tropical sweetness. People adore this dish because it’s both comforting and exotic, familiar yet refreshingly different. Whether you’re looking for a special breakfast treat, a crowd-pleasing dessert, or simply a taste of the islands, these rolls are guaranteed to bring a smile to your face. Get ready to bake up a batch of sunshine!

Ingredients:
- For the Dough:
- 3 ½ cups all-purpose flour, plus more for dusting
- ¼ cup granulated sugar
- 1 packet (2 ¼ teaspoons) active dry yeast
- 1 teaspoon salt
- 1 cup warm milk (105-115°F)
- ¼ cup unsalted butter, melted
- 2 large eggs, lightly beaten
- For the Filling:
- ½ cup unsalted butter, softened
- ¾ cup packed light brown sugar
- 3 tablespoons ground cinnamon
- ½ cup crushed pineapple, well-drained
- ½ cup shredded coconut, sweetened or unsweetened
- For the Cream Cheese Glaze:
- 4 ounces cream cheese, softened
- ¼ cup unsalted butter, softened
- 2 cups powdered sugar
- ¼ cup milk
- 1 teaspoon vanilla extract
Preparing the Dough:
- Activate the Yeast: In a large bowl, combine the warm milk, sugar, and yeast. Let it stand for 5-10 minutes, or until foamy. This step is crucial because it ensures that the yeast is alive and active, which is essential for the dough to rise properly. If the mixture doesn’t foam, your yeast might be old or the milk might be too hot or cold. If that happens, you’ll need to start over with fresh yeast and properly temperatured milk.
- Combine Wet and Dry Ingredients: Add the melted butter and beaten eggs to the yeast mixture. Whisk well to combine. In a separate bowl, whisk together the flour and salt. Gradually add the dry ingredients to the wet ingredients, mixing with a wooden spoon or a stand mixer fitted with a dough hook until a shaggy dough forms.
- Knead the Dough: Turn the dough out onto a lightly floured surface and knead for 6-8 minutes, or until it becomes smooth and elastic. Alternatively, knead the dough in a stand mixer with a dough hook for 5-7 minutes. The dough should be slightly tacky but not sticky. If it’s too sticky, add a tablespoon of flour at a time until it reaches the right consistency.
- First Rise: Place the dough in a lightly oiled bowl, turning to coat. Cover the bowl with plastic wrap or a clean kitchen towel and let it rise in a warm place for 1-1.5 hours, or until doubled in size. The warmer the environment, the faster the dough will rise. You can place the bowl in a slightly warmed oven (turned off!) or near a sunny window.
Making the Filling:
- Prepare the Filling Mixture: While the dough is rising, prepare the filling. In a medium bowl, combine the softened butter, brown sugar, and cinnamon. Mix well until smooth and creamy. Make sure the butter is truly softened; otherwise, it will be difficult to mix properly.
- Drain the Pineapple: Ensure the crushed pineapple is well-drained. Excess moisture can make the cinnamon rolls soggy. You can press the pineapple through a fine-mesh sieve to remove any excess juice.
- Combine Filling Ingredients: Gently fold the drained pineapple and shredded coconut into the cinnamon-sugar mixture. Set aside.
Assembling and Baking the Cinnamon Rolls:
- Roll Out the Dough: Once the dough has doubled in size, punch it down gently to release the air. Turn it out onto a lightly floured surface and roll it into a large rectangle, about 12×18 inches. Try to keep the rectangle as even as possible for uniform rolls.
- Spread the Filling: Spread the prepared filling evenly over the entire surface of the dough, leaving a small border along one of the long edges. This border will help seal the rolls.
- Roll Up the Dough: Starting from the long edge opposite the border, tightly roll up the dough into a log. Pinch the seam to seal it tightly. A tight seal will prevent the rolls from unraveling during baking.
- Cut the Rolls: Using a sharp serrated knife or dental floss, cut the log into 12 equal slices. For even slices, you can mark the log in the middle, then cut each half in half, and so on. Dental floss is a great alternative to a knife because it creates clean cuts without squishing the rolls.
- Second Rise: Place the cinnamon rolls in a greased 9×13 inch baking dish, cut-side up. Cover loosely with plastic wrap or a clean kitchen towel and let them rise in a warm place for another 30-45 minutes, or until they have puffed up slightly. This second rise is important for creating light and fluffy cinnamon rolls.
- Preheat the Oven: Preheat your oven to 350°F (175°C).
- Bake the Rolls: Bake the cinnamon rolls for 25-30 minutes, or until they are golden brown and cooked through. To prevent the tops from browning too quickly, you can loosely tent the baking dish with aluminum foil during the last 10 minutes of baking.
- Cool Slightly: Let the cinnamon rolls cool in the baking dish for about 10-15 minutes before frosting. This allows them to set slightly, making them easier to handle.
Preparing the Cream Cheese Glaze:
- Cream Butter and Cream Cheese: While the cinnamon rolls are baking, prepare the cream cheese glaze. In a large bowl, beat the softened cream cheese and butter together until smooth and creamy. It’s crucial that both the cream cheese and butter are softened to avoid lumps in the glaze.
- Add Powdered Sugar: Gradually add the powdered sugar, beating on low speed until combined. Be careful not to add the powdered sugar too quickly, or it will create a cloud of dust.
- Add Milk and Vanilla: Add the milk and vanilla extract and beat until smooth and creamy. Add more milk, one tablespoon at a time, if needed to reach your desired consistency.
Glazing and Serving:
- Frost the Rolls: Once the cinnamon rolls have cooled slightly, generously spread the cream cheese glaze over the tops.
- Serve Immediately: Serve the Hawaiian cinnamon rolls warm and enjoy! They are best enjoyed fresh, but leftovers can be stored in an airtight container in the refrigerator for up to 3 days. You can reheat them in the microwave for a few seconds before serving.
Conclusion:
This isn’t just another cinnamon roll recipe; it’s a tropical escape baked into a sweet, gooey treat! These Hawaiian Cinnamon Rolls are a must-try because they perfectly blend the comforting warmth of cinnamon with the bright, tangy flavors of pineapple and coconut. The result? An unforgettable taste sensation that will transport you straight to a sunny beach with every bite. The soft, fluffy dough, swirled with a luscious cinnamon-pineapple filling and topped with a creamy coconut glaze, creates a symphony of textures and tastes that will leave you craving more.
But why stop there? The beauty of this recipe lies in its versatility. For a truly decadent experience, try adding chopped macadamia nuts to the filling for an extra layer of crunch and nutty flavor. Or, if you’re feeling adventurous, swap out the pineapple for mango or papaya for a different tropical twist. These rolls are also fantastic served warm with a scoop of vanilla ice cream or a dollop of whipped cream. Imagine the warm, gooey cinnamon roll melting into the cold ice cream – pure bliss!
Serving Suggestions and Variations:
* Brunch Superstar: These rolls are the perfect centerpiece for a weekend brunch. Serve them alongside fresh fruit, yogurt, and a mimosa for a truly memorable spread.
* Dessert Delight: End your dinner party on a high note with these irresistible rolls. They’re sure to impress your guests and leave them wanting the recipe.
* Holiday Treat: Add a festive touch to your holiday celebrations with these unique cinnamon rolls. They’re a welcome departure from traditional holiday desserts.
* Icing Alternatives: While the coconut glaze is divine, feel free to experiment with other icing options. A cream cheese frosting with a hint of lime zest would also be delicious. Or, for a simpler option, dust the rolls with powdered sugar.
* Make-Ahead Magic: Prepare the rolls the night before and let them rise in the refrigerator overnight. This will save you time in the morning and allow the flavors to meld together even more. Just be sure to bring them to room temperature before baking.
I truly believe that once you try these Hawaiian Cinnamon Rolls, they’ll become a staple in your baking repertoire. They’re relatively easy to make, and the results are simply outstanding. The combination of familiar comfort and exotic flavors is truly irresistible.
So, what are you waiting for? Gather your ingredients, preheat your oven, and get ready to embark on a baking adventure. I’m confident that you’ll love these rolls as much as I do. And, most importantly, don’t forget to share your creations! I’d love to see your photos and hear about your experiences. Tag me on social media and let me know what you think. Did you try any variations? What did your family and friends think? Your feedback is invaluable, and it helps me continue to create and share delicious recipes with all of you. Happy baking, and aloha! I can’t wait to hear about your Hawaiian Cinnamon Rolls success!
Hawaiian Cinnamon Rolls: The Ultimate Tropical Treat Recipe
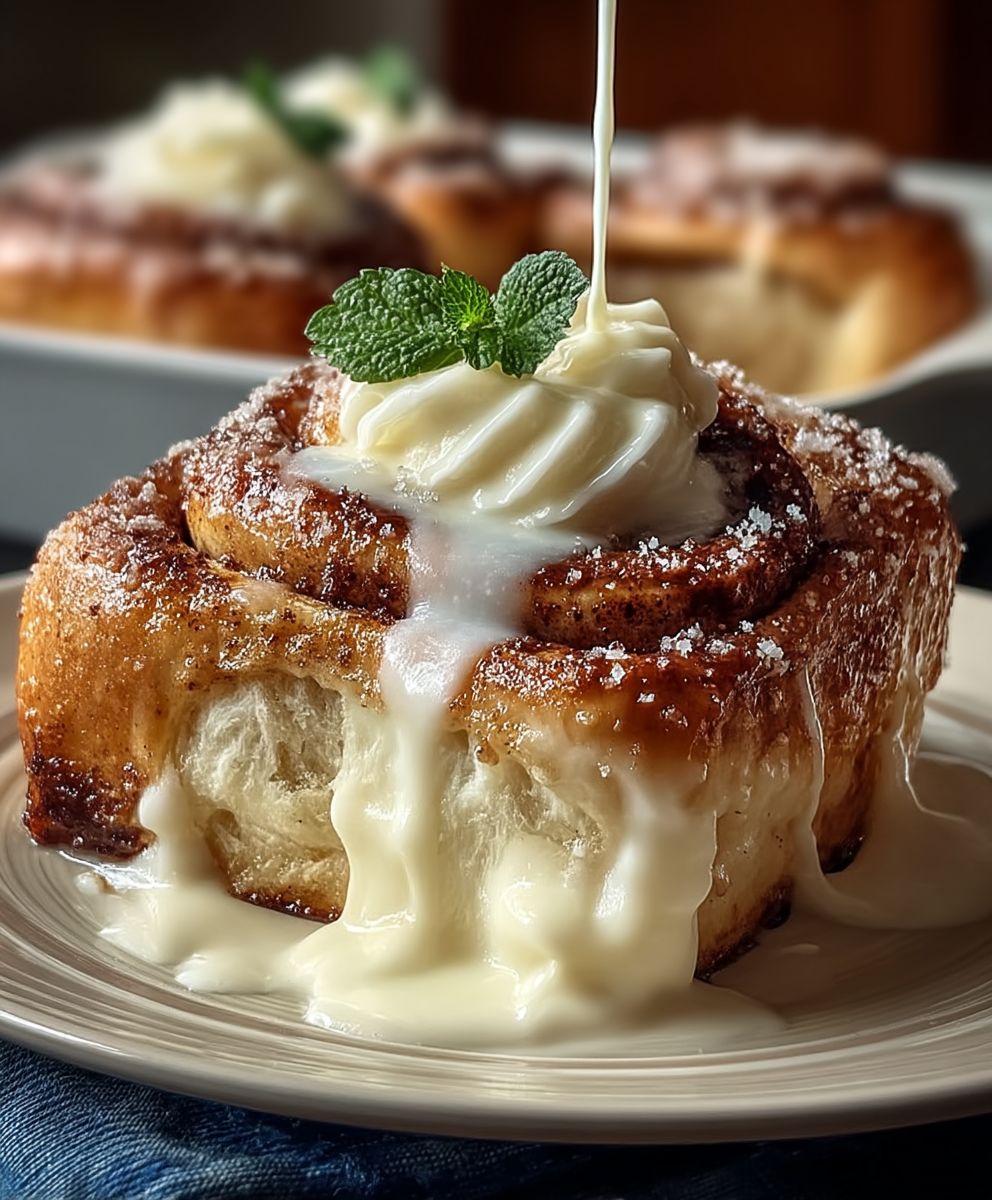
Soft, fluffy cinnamon rolls with a tropical filling of pineapple and coconut, topped with tangy cream cheese glaze.
Ingredients
- 3 ½ cups all-purpose flour, plus more for dusting
- ¼ cup granulated sugar
- 1 packet (2 ¼ teaspoons) active dry yeast
- 1 teaspoon salt
- 1 cup warm milk (105-115°F)
- ¼ cup unsalted butter, melted
- 2 large eggs, lightly beaten
- ½ cup unsalted butter, softened
- ¾ cup packed light brown sugar
- 3 tablespoons ground cinnamon
- ½ cup crushed pineapple, well-drained
- ½ cup shredded coconut, sweetened or unsweetened
- 4 ounces cream cheese, softened
- ¼ cup unsalted butter, softened
- 2 cups powdered sugar
- ¼ cup milk
- 1 teaspoon vanilla extract
Instructions
- In a large bowl, combine the warm milk, sugar, and yeast. Let it stand for 5-10 minutes, or until foamy.
- Add the melted butter and beaten eggs to the yeast mixture. Whisk well to combine. In a separate bowl, whisk together the flour and salt. Gradually add the dry ingredients to the wet ingredients, mixing with a wooden spoon or a stand mixer fitted with a dough hook until a shaggy dough forms.
- Turn the dough out onto a lightly floured surface and knead for 6-8 minutes, or until it becomes smooth and elastic. Alternatively, knead the dough in a stand mixer with a dough hook for 5-7 minutes. The dough should be slightly tacky but not sticky.
- Place the dough in a lightly oiled bowl, turning to coat. Cover the bowl with plastic wrap or a clean kitchen towel and let it rise in a warm place for 1-1.5 hours, or until doubled in size.
- While the dough is rising, prepare the filling. In a medium bowl, combine the softened butter, brown sugar, and cinnamon. Mix well until smooth and creamy.
- Ensure the crushed pineapple is well-drained.
- Gently fold the drained pineapple and shredded coconut into the cinnamon-sugar mixture. Set aside.
- Once the dough has doubled in size, punch it down gently to release the air. Turn it out onto a lightly floured surface and roll it into a large rectangle, about 12×18 inches.
- Spread the prepared filling evenly over the entire surface of the dough, leaving a small border along one of the long edges.
- Starting from the long edge opposite the border, tightly roll up the dough into a log. Pinch the seam to seal it tightly.
- Using a sharp serrated knife or dental floss, cut the log into 12 equal slices.
- Place the cinnamon rolls in a greased 9×13 inch baking dish, cut-side up. Cover loosely with plastic wrap or a clean kitchen towel and let them rise in a warm place for another 30-45 minutes, or until they have puffed up slightly.
- Preheat your oven to 350°F (175°C).
- Bake the cinnamon rolls for 25-30 minutes, or until they are golden brown and cooked through.
- Let the cinnamon rolls cool in the baking dish for about 10-15 minutes before frosting.
- While the cinnamon rolls are baking, prepare the cream cheese glaze. In a large bowl, beat the softened cream cheese and butter together until smooth and creamy.
- Gradually add the powdered sugar, beating on low speed until combined.
- Add the milk and vanilla extract and beat until smooth and creamy. Add more milk, one tablespoon at a time, if needed to reach your desired consistency.
- Once the cinnamon rolls have cooled slightly, generously spread the cream cheese glaze over the tops.
- Serve the Hawaiian cinnamon rolls warm and enjoy!
Notes
- Make sure your yeast is active. If the yeast mixture doesn’t foam, start over with fresh yeast and properly temperatured milk.
- Knead the dough until it is smooth and elastic. If it’s too sticky, add a tablespoon of flour at a time until it reaches the right consistency.
- Ensure the crushed pineapple is well-drained. Excess moisture can make the cinnamon rolls soggy.
- A tight seal will prevent the rolls from unraveling during baking.
- Dental floss is a great alternative to a knife because it creates clean cuts without squishing the rolls.
- This second rise is important for creating light and fluffy cinnamon rolls.
- To prevent the tops from browning too quickly, you can loosely tent the baking dish with aluminum foil during the last 10 minutes of baking.
- It’s crucial that both the cream cheese and butter are softened to avoid lumps in the glaze.
- They are best enjoyed fresh, but leftovers can be stored in an airtight container in the refrigerator for up to 3 days. You can reheat them in the microwave for a few seconds before serving.


Leave a Comment