

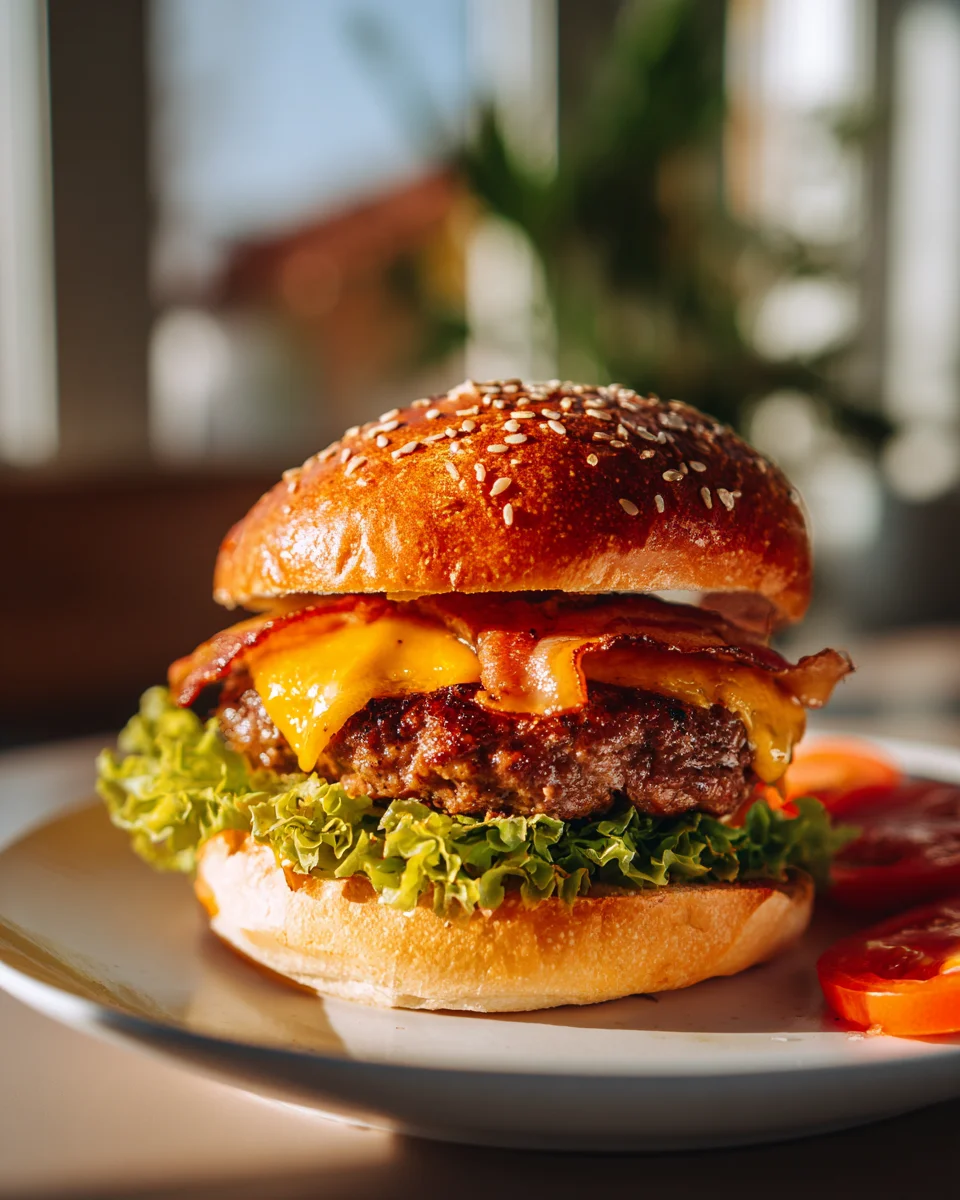
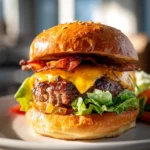
Beef Bacon Cheeseburgers With Caramelized Onions
Oh boy, do I have a treat for you today! Forget everything you thought you knew about cheeseburgers, because we’re taking things to a whole new level with my recipe for Beef Bacon Cheeseburgers With Caramelized Onions. This isn’t just any burger; it’s an experience, a symphony of flavors that will make your taste buds sing. What makes this particular burger so special, you ask? Well, we’re talking about a ridiculously juicy beef patty, blanketed in perfectly melted cheese, topped with crispy, savory beef bacon that adds an incredible, smoky depth of flavor. But the real game-changer here, the secret weapon that elevates this from great to absolutely unforgettable, is the slow-cooked, deeply sweet caramelized onions. They bring a rich, melt-in-your-mouth sweetness that perfectly balances the savory richness of the beef and cheese. You’re going to love how this recipe transforms a simple weeknight meal into something truly extraordinary, perfect for impressing friends or simply treating yourself to an indulgent, comforting dinner. Get ready to sink your teeth into pure burger bliss!

Ingredient Notes
Crafting the perfect Beef Bacon Cheeseburger with Caramelized Onions starts with understanding the star ingredients. Each component plays a crucial role in building that irresistible flavor profile we’re aiming for.
Ground Beef
- What I use: For juicy, flavorful burgers, I usually opt for 80/20 ground beef (80% lean, 20% fat). The fat renders down beautifully, keeping the patties moist and adding a richness that leaner beef can miss.
- Substitutions: You can certainly use 85/15 if you prefer a slightly leaner burger, but be mindful not to overcook it, as it can dry out more easily. For an even richer flavor, some butchers offer custom blends that might include brisket or short rib; these make for truly decadent burgers.
Beef Bacon
- What I use: This recipe specifically calls for beef bacon, which offers a distinct savory flavor and texture compared to its traditional counterpart. Look for good quality, thick-cut beef bacon that crisps up well. It’s the “bacon” in “bacon cheeseburger” and adds that essential salty, smoky crunch.
- Substitutions: While beef bacon is key to this specific burger’s identity, if you absolutely can’t find it, a good quality turkey bacon could be a very distant alternative, but know that the flavor profile will change significantly. I highly recommend sticking to beef bacon for the authentic experience.
Cheese
- What I use: Sharp cheddar is my go-to for cheeseburgers. It melts beautifully and its robust flavor stands up well to the beef and onions.
- Substitutions: Feel free to experiment! American cheese offers that classic gooey melt, while Swiss or provolone can add a different savory dimension. A smoked gouda could be fantastic if you want to lean into smoky notes.
Onions for Caramelizing
- What I use: Sweet onions like Vidalia or Walla Walla, or even just regular yellow onions, are perfect for caramelizing. They have a good amount of natural sugar, which helps them turn golden brown and deeply sweet.
- Substitutions: Red onions can also be caramelized, offering a slightly sharper, more robust flavor that mellows considerably with cooking.
Buns
- What I use: A good brioche bun or a soft potato bun is my preference. They are sturdy enough to hold all the fillings without falling apart, yet soft enough to complement the textures.
- Substitutions: Sesame seed buns are a classic choice, or you could opt for a whole wheat bun for a slightly healthier take. For gluten-free needs, select a sturdy gluten-free burger bun that won’t crumble.
Other Key Ingredients
- Butter or Oil: For caramelizing onions and cooking burgers. I usually use a combination of unsalted butter and a touch of olive oil for the onions.
- Non-Alcoholic Liquid for Onions: For deglazing and adding depth to the caramelized onions, I use a splash of vegetable broth or even just water. This helps scrape up those flavorful browned bits and keeps the onions from drying out.
- Salt and Freshly Ground Black Pepper: Simple, yet essential seasonings for both the beef and the onions.
- Optional Toppings: Crisp lettuce, ripe tomato slices, tangy pickle chips, and your favorite burger sauce (ketchup, mustard, a special aioli) are all welcome additions to complete your burger masterpiece.
Step-by-Step Instructions
Let’s get cooking! Here’s how I bring together these incredible Beef Bacon Cheeseburgers with Caramelized Onions, ensuring every element is perfect.
1. Caramelize the Onions (The Long but Worthwhile Step)
- Slice the Onions: Peel and thinly slice 2 large sweet or yellow onions. I aim for about 1/8-inch thick slices.
- Start Sautéing: In a large, heavy-bottomed pan or Dutch oven, melt 2 tablespoons of unsalted butter with 1 tablespoon of olive oil over medium-low heat. Add the sliced onions and a pinch of salt.
- Low and Slow: This is key! Cook the onions slowly, stirring occasionally (every 5-10 minutes), for 30-45 minutes. They will gradually soften, release their moisture, and begin to turn golden brown. Don’t rush this process; deep caramelization requires patience.
- Deglaze (Optional but Recommended): If the onions start to stick or develop dark spots too quickly, add a splash (about 1-2 tablespoons) of vegetable broth or water. Scrape up any browned bits from the bottom of the pan – that’s pure flavor! Continue cooking until the onions are a deep, rich brown, incredibly soft, and sweet. Set aside.
2. Cook the Beef Bacon
- Prepare the Bacon: Place 8 slices of beef bacon in a cold skillet (I prefer a cast-iron skillet for even cooking) over medium heat. This allows the fat to render slowly.
- Cook to Crispness: Cook for 8-12 minutes, turning occasionally, until the beef bacon is uniformly crisp and golden brown.
- Drain: Transfer the cooked beef bacon to a plate lined with paper towels to drain excess fat. Reserve about 1 tablespoon of the rendered bacon fat in the pan for cooking the burgers, if desired, for extra flavor.
3. Prepare the Burger Patties
- Form the Patties: Gently divide 1.5 lbs of 80/20 ground beef into 4 equal portions. Lightly form each portion into a patty, about ¾-inch thick and slightly wider than your buns (they’ll shrink a bit when cooked). Don’t overwork the meat, as this can make the burgers tough.
- Create a Dimple: Press a shallow indentation (a “dimple”) into the center of each patty with your thumb. This prevents the burgers from puffing up in the middle during cooking.
- Season Liberally: Season both sides of each patty generously with salt and freshly ground black pepper.
4. Cook the Burgers
- Heat the Pan: Heat the same skillet you used for the bacon (or a fresh one if you prefer) over medium-high heat. If you reserved bacon fat, add it now; otherwise, add a tablespoon of high-heat cooking oil.
- Sear the Patties: Place the seasoned patties in the hot skillet. For medium-rare, cook for 3-4 minutes per side. For medium, cook 4-5 minutes per side. Adjust cooking times for your desired doneness. Avoid pressing down on the burgers with your spatula, as this squeezes out the delicious juices.
- Add Cheese: During the last minute of cooking, place a slice of cheddar cheese on top of each patty. You can cover the skillet with a lid or a metal bowl for about 30 seconds to help the cheese melt perfectly.
- Rest the Burgers: Transfer the cooked cheeseburgers to a plate and let them rest for 2-3 minutes. This allows the juices to redistribute, ensuring a juicier burger.
5. Toast the Buns
- Toast: While the burgers are resting, lightly butter the cut sides of your burger buns. Place them cut-side down in the same hot skillet for 1-2 minutes, or until golden brown and lightly toasted. This creates a barrier against sogginess and adds flavor.
6. Assemble Your Masterpiece
- Build Your Burger: On the bottom half of each toasted bun, spread your favorite burger sauce (if using). Layer with crisp lettuce and tomato slices if you like.
- Add the Burger: Place a cheesy beef patty on top.
- Add the Bacon: Top with 2 slices of crispy beef bacon.
- Generous Onions: Spoon a generous mound of the warm caramelized onions over the bacon.
- Top it Off: Place the top half of the toasted bun on top and serve immediately. Enjoy your amazing Beef Bacon Cheeseburger with Caramelized Onions!
Tips & Suggestions
To really elevate your Beef Bacon Cheeseburgers with Caramelized Onions, I’ve got a few extra pointers:
- Patience with Onions is a Virtue: I cannot stress this enough. Rushing the caramelization process will result in browned, not truly caramelized, onions. Low heat and plenty of time are your best friends here. You’re developing complex, sweet flavors, not just browning them.
- Don’t Overwork the Meat: When forming your patties, handle the ground beef as little as possible. Overworking the meat can lead to dense, tough burgers. Gentle handling keeps them tender and juicy.
- Season Generously: Salt and pepper are crucial. Since the seasoning is only on the outside of the patty, don’t be shy. A good crust of seasoning contributes significantly to the burger’s overall flavor.
- Dimple for Flat Burgers: That little thumbprint in the center of the patty really works! It helps prevent the burger from bulging in the middle and shrinking into a ball, ensuring an even cook and a flat surface for your toppings.
- Toast Your Buns: Always, always toast your buns! It adds a crucial textural element, prevents the bun from getting soggy from the burger juices and sauces, and enhances the overall flavor.
- Don’t Press the Patties: Resist the urge to press down on the burgers with your spatula while they cook. This squeezes out precious juices, leading to a dry burger. Let the heat do its work.
- Make the Onions Ahead: Caramelized onions can be made a day or two in advance and stored in an airtight container in the refrigerator. Gently reheat them in a small pan over low heat before serving. This saves you time on burger night!
- Consider a Special Sauce: While the caramelized onions and beef bacon are stars, a simple homemade burger sauce (like a mix of mayonnaise, ketchup, relish, and a dash of hot sauce) can add another layer of deliciousness.
Storage
While these burgers are best enjoyed fresh, I understand that sometimes you might have leftovers or want to prepare components ahead of time. Here’s my advice:
- Caramelized Onions: These are excellent for making ahead. Store them in an airtight container in the refrigerator for up to 4-5 days. Reheat gently in a small pan over low heat or in the microwave before serving.
- Cooked Beef Bacon: Crispy beef bacon can be stored in an airtight container in the refrigerator for 2-3 days. For best results, reheat it in a dry skillet over medium heat until re-crisped.
- Cooked Burger Patties: If you have leftover cooked patties without the bun or toppings, store them in an airtight container in the refrigerator for up to 3 days. When reheating, I recommend a skillet over medium-low heat to gently warm them through without overcooking and drying them out.
- Assembled Burgers: I generally don’t recommend storing fully assembled burgers for more than an hour or two. The buns can become soggy, and the fresh toppings can wilt. If you must store an assembled burger, remove the fresh toppings and sauces, wrap the patty and bun separately, and reheat the patty as above, adding fresh toppings before serving.
- Freezing: Cooked burger patties can be frozen for up to 2-3 months. Wrap them individually in plastic wrap and then place them in a freezer-safe bag or container. Thaw in the refrigerator overnight before reheating. Caramelized onions can also be frozen in small portions for up to 3 months.
Final Thoughts
There’s something truly special about a homemade burger, and I genuinely believe our Beef Bacon Cheeseburgers With Caramelized Onions take that experience to an entirely new level. From the moment the rich, savory beef bacon sizzles alongside those sweet, slowly cooked caramelized onions (achieved perfectly with non-alcohol alternatives!), you know you’re in for a treat.
This isn’t just another cheeseburger; it’s a symphony of textures and flavors that come together in perfect harmony. The juicy beef patty, the crispy, salty beef bacon, the gooey melted cheese, and those irresistible, tender caramelized onions all contribute to a truly unforgettable bite. It’s the kind of meal that brings smiles to faces and pure satisfaction to every single person at the table.
So, go ahead and treat yourself, your family, or your friends to these incredible Beef Bacon Cheeseburgers With Caramelized Onions. I promise you, once you taste this masterpiece, you’ll understand why it’s destined to become a new favorite in your kitchen. Happy cooking!
Irresistible Beef Bacon Cheeseburgers & Caramelized Onions
- Total Time: 45 minutes
- Yield: 4 servings 1x
Description
Experience a whole new level of flavor with these Beef Bacon Cheeseburgers topped with sweet, caramelized onions. This recipe transforms a simple meal into a gourmet delight that will impress everyone at your table.
Ingredients
- 2 large sweet or yellow onions, thinly sliced
- 2 tablespoons unsalted butter
- 1 tablespoon olive oil
- 8 slices beef bacon
- 1.5 lbs 80/20 ground beef
- Salt
- Freshly ground black pepper
- 4 slices sharp cheddar cheese
- 4 brioche or soft potato buns
- Vegetable broth or water (for deglazing)
- Optional toppings: crisp lettuce, ripe tomato slices, tangy pickle chips, burger sauce (ketchup, mustard, aioli)
Instructions
- Peel and thinly slice the onions to about 1/8-inch thick.
- In a large, heavy-bottomed pan or Dutch oven, melt the butter with olive oil over medium-low heat. Add the sliced onions and a pinch of salt.
- Cook the onions slowly, stirring occasionally for 30-45 minutes until they are golden brown and sweet. If they start to stick, add a splash of vegetable broth or water to deglaze the pan.
- Place the beef bacon in a cold skillet over medium heat and cook for 8-12 minutes until crisp and golden brown. Drain excess fat and reserve about 1 tablespoon in the pan.
- Gently divide the ground beef into 4 equal portions and form each into a patty about ¾-inch thick. Press a dimple in the center of each patty and season both sides with salt and pepper.
- Heat the skillet over medium-high heat and add reserved bacon fat or cooking oil. Sear the patties for 3-4 minutes per side for medium-rare, adding cheese during the last minute to melt.
- Transfer the cooked burgers to a plate and let them rest for 2-3 minutes.
- While the burgers rest, butter the cut sides of the buns and toast them cut-side down in the skillet until golden brown.
- Assemble the burgers by spreading sauce on the bottom bun, adding lettuce and tomato, placing the patty on top, adding bacon, spooning caramelized onions over, and topping with the other half of the bun.
- Prep Time: 15 mins
- Cook Time: 30 mins
- Category: Dinner
- Method: Cooking
- Cuisine: American
Nutrition
- Serving Size: 1 burger
- Calories: 650
- Sugar: 5 g
- Sodium: 1200 mg
- Fat: 45 g
- Saturated Fat: 18 g
- Unsaturated Fat: 20 g
- Trans Fat: 0 g
- Carbohydrates: 30 g
- Fiber: 2 g
- Protein: 35 g
- Cholesterol: 100 mg
Keywords: Patience is key when caramelizing onions; low heat and time will yield the best flavor. Don't overwork the meat when forming patties to keep them tender and juicy. Toasting the buns prevents sogginess and enhances flavor.
Leave a Comment