

Old Fashioned Cinnamon Apple Crisp – just hearing those words evokes a rush of comforting memories, doesn’t it? I find myself instantly transported to crisp autumn evenings, the air filled with the intoxicating scent of baking apples and warm spices. This beloved dessert, a delightful cousin to the more elaborate apple pie, has graced tables for generations, offering a simpler yet equally satisfying way to celebrate the bounty of the harvest.
Historically, crisps gained popularity as an accessible dessert, particularly during times when a traditional pie crust seemed too time-consuming or ingredients were scarce. This rich background solidified its place as a cherished, comforting staple in many homes, a testament to its enduring appeal and ease.
Why We Adore This Classic Dessert
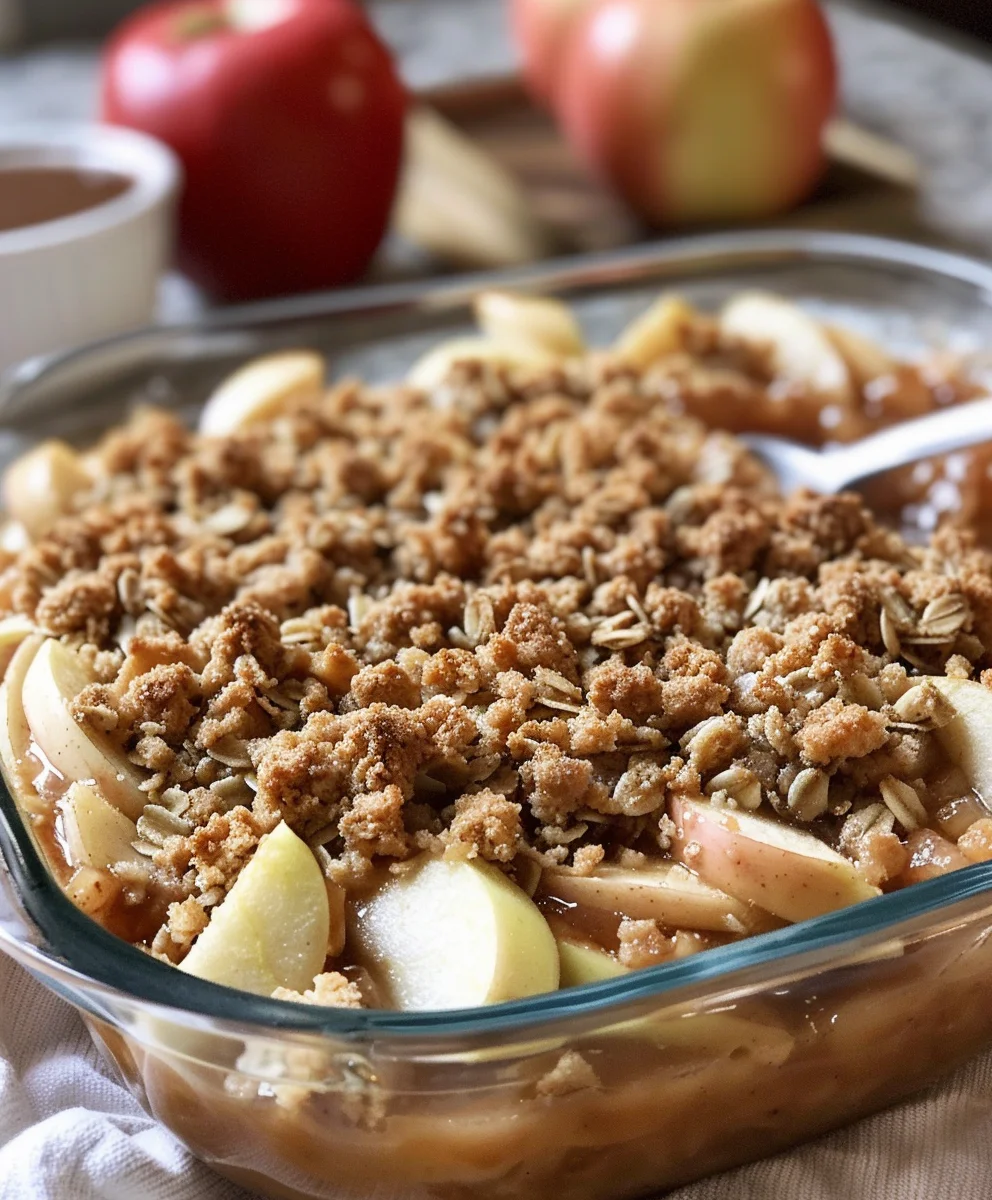
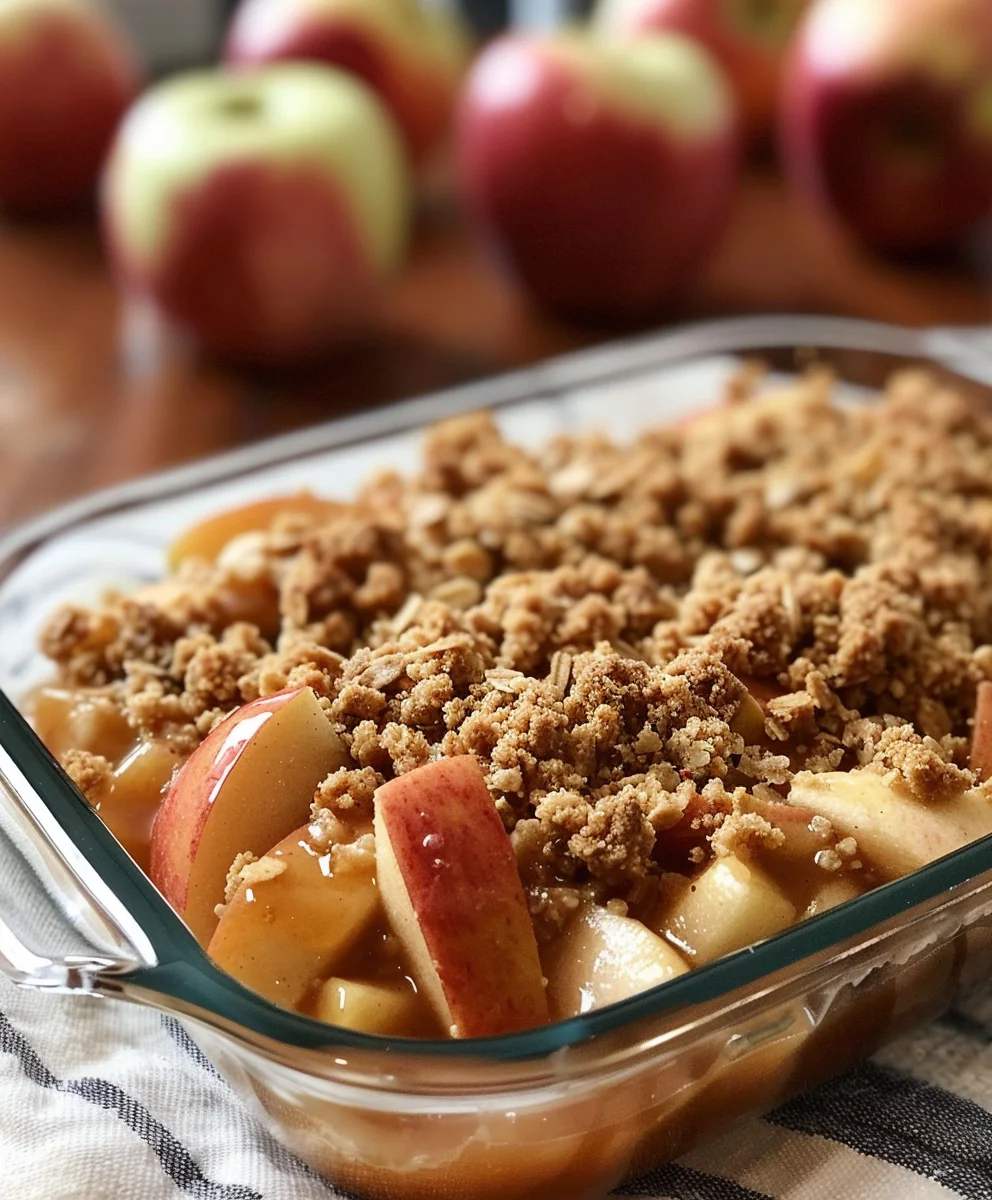
People simply adore this dish for its irresistible combination of flavors and textures. Imagine tender, sweet-tart apple slices, perfectly softened and infused with the warmth of cinnamon, nestled beneath a golden, buttery streusel topping that delivers an exquisite crunch with every spoonful. It’s the ultimate harmony of comfort and simple elegance, making this particular Old Fashioned Cinnamon Apple Crisp a perennial favorite that truly stands the test of time.
Whether served warm with a scoop of vanilla bean ice cream, a dollop of whipped cream, or enjoyed on its own, it’s a dessert that consistently brings smiles and warmth, embodying the very essence of homemade goodness and culinary nostalgia.

Ingredients:
- For the Apple Filling:
- 6-8 medium baking apples (about 3 pounds total), such as Granny Smith, Honeycrisp, Fuji, or a mix for complex flavor. I personally love a blend of tart Granny Smiths with a sweeter, crisp apple like Honeycrisp for the perfect balance in my Old Fashioned Cinnamon Apple Crisp.
- 1/2 cup granulated sugar (adjust to 1/3 cup if your apples are very sweet, or 3/4 cup if they are quite tart).
- 2 tablespoons all-purpose flour or cornstarch (this helps thicken the juices, so your crisp isn’t watery).
- 1 tablespoon fresh lemon juice (prevents browning and brightens the apple flavor, a little secret for an extra zesty Old Fashioned Cinnamon Apple Crisp).
- 1 teaspoon ground cinnamon.
- 1/4 teaspoon ground nutmeg (freshly grated is always superior, if you have it!).
- Pinch of salt.
- For the Streusel Topping:
- 1 1/2 cups old-fashioned rolled oats (not instant, we want that chewy texture!).
- 1 cup all-purpose flour.
- 1/2 cup packed light brown sugar.
- 1/4 cup granulated sugar.
- 1 teaspoon ground cinnamon.
- 1/2 teaspoon salt.
- 1 cup (2 sticks) unsalted butter, very cold and cut into 1/2-inch cubes. Keeping the butter cold is crucial for that crumbly, irresistible texture of our Old Fashioned Cinnamon Apple Crisp topping.
Preparing Your Apples: The Heart of Your Old Fashioned Cinnamon Apple Crisp
The foundation of any truly magnificent Old Fashioned Cinnamon Apple Crisp begins with perfectly prepared apples. This is where we lay the groundwork for a tender, flavorful filling that will truly sing with those warm, comforting spices.
- Choose Your Apples Wisely: First, select your apples. As I mentioned in the ingredients, I highly recommend a mix. Granny Smith apples offer a lovely tartness that cuts through the sweetness of the crisp, while Honeycrisp or Fuji apples bring a delightful sweetness and a firm texture that holds up well during baking. Avoid apples that turn to mush too quickly, as we want distinct, tender apple pieces, not applesauce.
- Peel, Core, and Slice: This is arguably the most time-consuming part, but it’s absolutely worth the effort for a smooth, pleasant texture in your finished Old Fashioned Cinnamon Apple Crisp. Using a good quality peeler, carefully remove all the skin from your apples. Then, core each apple. I find an apple corer makes quick work of this, but a paring knife works just as well.
- Slice Them Just Right: Now for slicing. I prefer to slice my apples into pieces that are about 1/4 to 1/2 inch thick. You can slice them into wedges, or half-moon shapes, or even chunky cubes – whatever you prefer! The key is to try and keep the pieces relatively uniform in size. This ensures that all the apple pieces cook evenly, resulting in a consistently tender filling for your Old Fashioned Cinnamon Apple Crisp. If some pieces are too thin, they might turn to mush, while thicker pieces could remain too firm.
- Toss with Flavor Enhancers: Place all your sliced apples into a large mixing bowl. Now, it’s time to add the magic! Sprinkle the granulated sugar, flour (or cornstarch), fresh lemon juice, ground cinnamon, ground nutmeg, and a pinch of salt over the apples.
- Gentle Coating is Key: Using a large spoon or your clean hands, gently toss the apples until they are thoroughly coated with all the spices and thickening agents. You want every apple slice to have a little kiss of that cinnamon-sugar goodness. The lemon juice is vital here; it not only brightens the flavor but also prevents the apples from browning while you prepare the topping. This mixture will become beautifully fragrant, giving you a sneak peek into the delicious aromas that will soon fill your kitchen from your baking Old Fashioned Cinnamon Apple Crisp. Set these aside while you prepare the glorious streusel topping.
Crafting the Irresistible Streusel Topping
Ah, the streusel topping! For me, this is what truly elevates an apple crisp from good to utterly phenomenal. It’s that perfect balance of crunchy, chewy, sweet, and buttery that makes every bite of Old Fashioned Cinnamon Apple Crisp a textural delight. Get ready to create magic!
- Combine Dry Ingredients: In a separate large mixing bowl, measure out your old-fashioned rolled oats, all-purpose flour, light brown sugar, granulated sugar, ground cinnamon, and salt. Whisk these dry ingredients together thoroughly. You want to make sure the sugars, flour, and spices are evenly distributed, so you don’t end up with pockets of plain flour or overly sweet sections in your streusel for your Old Fashioned Cinnamon Apple Crisp. The brown sugar adds a lovely molasses note and helps create that signature chewiness.
- The Cold Butter Advantage: Now, retrieve your very cold, cubed unsalted butter from the refrigerator. Using cold butter is absolutely paramount for a good streusel topping. If your butter is too warm, it will melt into the flour too quickly, resulting in a paste-like topping rather than distinct, crumbly pieces. Cold butter, when cut into the dry ingredients, creates tiny pockets of butter that melt slowly in the oven, producing that wonderful flaky, crumbly texture we all adore in an Old Fashioned Cinnamon Apple Crisp.
-
Cutting in the Butter: Add the cold butter cubes to your dry oat and flour mixture. There are a few ways to cut in the butter:
- Using a Pastry Blender: This is my preferred method. Work the pastry blender through the mixture, pressing down and twisting, until the butter is broken down into pea-sized crumbs.
- Using Your Fingertips: If you don’t have a pastry blender, your fingertips work wonderfully! Just be quick about it, as the heat from your hands can warm the butter. Rub the butter into the flour mixture between your thumb and fingertips until you have a coarse, crumbly mixture with some larger pea-sized pieces of butter still visible.
- Using a Food Processor: For a super-fast method, you can pulse the dry ingredients and cold butter in a food processor a few times until a coarse crumb forms. Just be careful not to overmix, or you’ll end up with a dough rather than a streusel.
The goal here is a mixture that resembles coarse crumbs, with some pieces ranging from the size of small peas to tiny pebbles. This varied texture is what gives the topping its incredible crunch and tenderness once baked into your Old Fashioned Cinnamon Apple Crisp. You don’t want to overmix; a few larger pieces of butter are a good thing!
Assembling Your Old Fashioned Cinnamon Apple Crisp
With our flavorful apple filling and our perfectly crumbly streusel topping ready, it’s time to bring it all together. This stage is quick and easy, leading us one step closer to that warm, inviting aroma of a baking Old Fashioned Cinnamon Apple Crisp.
- Preheat Your Oven: Before you start assembling, make sure your oven is preheating to 375°F (190°C). A properly preheated oven is crucial for even baking and achieving that beautiful golden-brown crust on your Old Fashioned Cinnamon Apple Crisp.
- Prepare Your Baking Dish: Lightly grease a 9×13-inch baking dish or a similar-sized oven-safe dish (approximately 3-quart capacity) with butter or cooking spray. While the crisp usually doesn’t stick too much, this step ensures easy cleanup and makes sure every bit of that delicious apple crisp comes out cleanly.
- Layer the Apples: Pour the prepared apple filling evenly into the bottom of your greased baking dish. Spread the apples out so they form a relatively uniform layer. The apples will cook down, so don’t worry if it looks like a lot initially. I love to make sure the apples are packed snugly, but not squished, as this helps them soften evenly and release their juices to form a lovely thick sauce.
- Evenly Distribute the Topping: Now, take your glorious streusel topping mixture and sprinkle it evenly over the layer of apples. Make sure to cover the apples completely from edge to edge. Don’t press the topping down; we want it to remain light and airy so it can bake up into those wonderful, crispy crumbs. The more evenly you distribute it, the more consistent the crunch in every bite of your Old Fashioned Cinnamon Apple Crisp.
Baking Your Golden-Brown Masterpiece
The moment of truth! Your kitchen is about to be filled with the most comforting aroma as your Old Fashioned Cinnamon Apple Crisp bakes to golden perfection. Patience is a virtue, but the wait is incredibly rewarding.
- Into the Oven: Carefully place your assembled baking dish into the preheated 375°F (190°C) oven. I always recommend placing the dish on a baking sheet, especially if your dish is very full, just in case any of those delicious apple juices bubble over. This saves you from a messy oven cleanup!
- Baking Time: Bake for 45-60 minutes. The exact baking time can vary depending on your oven and the thickness of your apple slices.
- Check for Doneness: You’ll know your Old Fashioned Cinnamon Apple Crisp is ready when the topping is beautifully golden brown and crispy, and the apple filling is bubbling vigorously around the edges. To be absolutely sure the apples are tender, carefully insert a thin, sharp knife or a skewer into the center of the crisp. It should go in easily with minimal resistance. If the topping is browning too quickly before the apples are tender, you can loosely tent the dish with aluminum foil for the last 15-20 minutes of baking.
- Cooling is Crucial: Once baked, carefully remove the crisp from the oven. This is a critical step for perfect texture: allow the Old Fashioned Cinnamon Apple Crisp to cool for at least 15-20 minutes on a wire rack before serving. I know it’s tempting to dig right in, but cooling allows the apple filling to set up and thicken properly. If you serve it too hot, the filling can be a bit too runny. Plus, it will still be piping hot and can easily burn your tongue.
Serving Suggestions and Enjoyment
Congratulations! You’ve successfully created a stunning Old Fashioned Cinnamon Apple Crisp. Now comes the best part: enjoying the fruits of your labor!
- Warm and Wonderful: Serve your Old Fashioned Cinnamon Apple Crisp warm. This is when the flavors are most vibrant, the apples are tender, and the topping has that perfect crisp-chewy texture.
- Classic Accompaniments: While delicious on its own, a scoop of vanilla bean ice cream is the quintessential companion for an apple crisp. The cold, creamy ice cream melting into the warm, spiced apples and crunchy topping is truly a match made in dessert heaven. A dollop of fresh whipped cream or a drizzle of warm caramel sauce also makes for an incredibly indulgent treat. For a more rustic touch, a spoonful of crème fraîche adds a lovely tang.
- Storage: If by some miracle you have leftovers (it rarely happens in my house!), you can store the Old Fashioned Cinnamon Apple Crisp covered in the refrigerator for up to 3-4 days. When you’re ready to enjoy it again, reheat individual servings gently in the microwave, or for a crispier topping, warm the entire dish in a 300°F (150°C) oven for about 15-20 minutes until heated through. The topping might lose a little bit of its initial crunch after refrigeration, but the flavors will still be absolutely delightful.
- Embrace the Comfort: This Old Fashioned Cinnamon Apple Crisp is more than just a dessert; it’s an experience. It evokes warmth, comfort, and nostalgia. Share it with loved ones, enjoy it on a cozy evening, or simply treat yourself to a delicious moment. The aroma alone is enough to lift spirits, and the taste is pure, unadulterated bliss. Every bite, filled with tender, spiced apples and that glorious, crunchy streusel, reminds me why some classic desserts truly stand the test of time. Enjoy every single spoonful of your homemade masterpiece!
Conclusion:
And there you have it, my friends! We’ve journeyed through the simple magic that brings a truly unforgettable dessert to life. If you’ve been searching for a recipe that marries warmth, comfort, and undeniable flavor, then look no further. This isn’t just another dessert; it’s an experience, a memory waiting to be made. What makes this recipe an absolute must-try, in my humble opinion, is its perfect harmony of textures and tastes. Imagine sinking your spoon into a luscious, tender apple filling, perfectly spiced with warm cinnamon, yielding just enough tang to balance the natural sweetness. Then, that glorious moment when you hit the topping – a golden, buttery, oat-studded crunch that shatters in your mouth, offering a delightful counterpoint to the soft fruit below. It’s the kind of dessert that fills your home with the most intoxicating aroma, instantly making any day feel a little cozier, a little more special. It’s truly a hug in a bowl, a dessert that speaks to the soul and evokes a sense of nostalgia, even if it’s your very first time making it.
Ultimately, what makes this Old Fashioned Cinnamon Apple Crisp truly special is its ability to deliver profound satisfaction with relatively minimal effort. You don’t need a culinary degree to achieve perfection here; the ingredients are humble, the steps straightforward, yet the outcome is nothing short of spectacular. It’s the ideal canvas for any occasion, from a casual family dinner to a more festive gathering. I promise you, one bite of this incredible dessert, and you’ll understand exactly why it deserves a permanent spot in your recipe collection. It’s the kind of dish that garners rave reviews and disappears quickly, leaving everyone content and craving just one more spoonful. The beauty of this crisp also lies in its adaptability; it’s a versatile treat that can be tailored to your mood or the contents of your pantry, ensuring it’s always a fresh and exciting prospect.
Serving Suggestions & Delightful Variations:
While this crisp is absolutely divine straight from the oven, still warm and fragrant, there are countless ways to elevate your serving experience. My personal favorite, and a classic for a reason, is a generous scoop of good quality vanilla bean ice cream. The cold, creamy sweetness slowly melting over the warm, cinnamon-spiced apples and crunchy topping is a symphony of textures and temperatures that truly can’t be beaten. But don’t stop there! A dollop of freshly whipped cream, perhaps infused with a hint of maple or bourbon, also makes a luxurious addition. For those with a sweet tooth, a drizzle of homemade caramel sauce or even a sprinkle of toasted pecans or walnuts can add another layer of flavor and crunch. Want to make it a decadent breakfast? Serve it alongside a dollop of Greek yogurt for a slightly healthier, yet utterly delicious, morning treat. Trust me, it’s a game-changer!
Feeling adventurous? This recipe is incredibly forgiving and welcomes your creative twists. You could introduce other fruits to the apple mixture – a handful of fresh cranberries for a tart pop, some sliced pears for a softer texture, or even a few berries for added color and flavor. Spice it up further by adding a pinch of nutmeg, a whisper of ground cloves, or a touch of allspice to your apple filling for an even richer autumn flavor profile. For a nutty twist on the topping, consider substituting some of the oats with chopped almonds or hazelnuts. If you’re catering to dietary restrictions, a gluten-free flour blend can easily be substituted for the all-purpose flour in the topping, ensuring everyone can enjoy this heavenly dessert. For a vegan option, simply swap out the butter for your favorite plant-based butter alternative. The possibilities are truly endless, allowing you to personalize this classic to your heart’s content and make it uniquely yours.
Your Turn to Bake and Share!
Now, it’s your turn to bring this incredible dessert to life in your own kitchen! I wholeheartedly encourage you to carve out some time this week, gather your ingredients, and immerse yourself in the joyful process of baking this amazing crisp. There’s an undeniable satisfaction that comes from creating something so delicious from scratch, and the aroma alone is worth the effort. Once you pull that golden, bubbling crisp from the oven, I guarantee you’ll be beaming with pride. Don’t hesitate, dive in, and let your kitchen be filled with the comforting scent of apples and cinnamon. I am so excited for you to experience the pure delight this recipe brings.
Once you’ve had a chance to bake and taste this exquisite creation, I would absolutely love to hear from you! What were your favorite parts of the process? How did you serve it? Did you try any variations or put your own unique spin on it? Please, share your experiences and photos in the comments section below. Your insights and culinary adventures inspire me and our entire community of home bakers. Let’s celebrate the simple, timeless pleasure of homemade desserts together. Happy baking!
Old Fashioned Cinnamon Apple Crisp
If there’s a dessert that embodies the warmth and comfort of fall, it’s the Old Fashioned Cinnamon Apple Crisp. This classic recipe brings together tender, juicy apples with a delightful cinnamon-spiced crumbly topping. The aroma alone is enough to make your home feel cozy and welcoming.
Ingredients
-
6 cups sliced apples (about 5-6 medium)
-
1 cup granulated sugar
-
3/4 cup all-purpose flour
-
1 cup old-fashioned rolled oats
-
1 tablespoon fresh lemon juice
-
2 teaspoons ground cinnamon
-
1/4 teaspoon ground nutmeg
-
1/2 teaspoon salt, plus a pinch
-
1/2 cup packed light brown sugar
-
1 cup (2 sticks) unsalted butter, very cold, cut into 1/2-inch cubes
Instructions
-
Step 1
Prepare Apple Filling: Peel, core, and slice apples (1/4-1/2 inch thick). In a large bowl, toss apples with 1 tablespoon lemon juice, 1 teaspoon ground cinnamon, 1/4 teaspoon ground nutmeg, a pinch of salt, 1/2 cup granulated sugar, and 2 tablespoons all-purpose flour until evenly coated. -
Step 2
Make Streusel Topping: In a separate bowl, combine 1 cup old-fashioned rolled oats, the remaining 1/2 cup granulated sugar, 1/2 cup packed light brown sugar, 1 teaspoon ground cinnamon, 1/2 teaspoon salt, and the remaining all-purpose flour (approx. 5/8 cup). Cut in the cold, cubed butter using a pastry blender or fingertips until a coarse, crumbly mixture forms. -
Step 3
Assemble & Bake: Preheat oven to 375°F (190°C). Lightly grease a 9×13-inch baking dish. Pour the apple filling into the dish, spreading evenly. Sprinkle the streusel topping evenly over the apples. Place on a baking sheet and bake for 45-60 minutes, until the topping is golden brown and crispy, and apples are tender and bubbling. -
Step 4
Cool & Serve: Remove from oven and let cool on a wire rack for at least 15-20 minutes to allow the filling to set. Serve warm, optionally with vanilla ice cream, whipped cream, or caramel sauce. Store leftovers covered in the refrigerator for 3-4 days.
Important Information
Nutrition Facts (Per Serving)
It is important to consider this information as approximate and not to use it as definitive health advice.
Allergy Information
Please check ingredients for potential allergens and consult a health professional if in doubt.


Leave a Comment