

Peppermint Patties – just the mention of these iconic confections can transport you back to childhood, conjuring images of festive celebrations and delightful indulgence. I find there’s something truly magical about the moment you bite through that crisp, dark chocolate shell to discover a cool, creamy, and intensely refreshing peppermint center. It’s a sensory experience that perfectly balances richness with an invigorating zing, a taste I’ve cherished for years.
For generations, these delightful mint-chocolate treats have held a special place in our hearts, particularly during the holiday season or as a thoughtful homemade gift. While commercial versions are widely popular, crafting your own Peppermint Patties allows for a personalized touch, often yielding a fresher, more vibrant flavor that simply can’t be replicated. People adore this classic candy for its unique texture – a firm yet yielding filling that melts delicately on the tongue – and the irresistible contrast between the bittersweet chocolate and the powerful, clean taste of peppermint. It’s a simple pleasure, yet profoundly satisfying, making it a beloved staple for any sweet tooth, and one I’m excited to share with you today.

Ingredients:
- For the Peppermint Filling:
- 4 cups (about 1 pound or 450g) powdered sugar (confectioners’ sugar) – This is the backbone of your perfect Peppermint Patties!
- 1/2 cup (1 stick or 113g) unsalted butter, softened to room temperature
- 1/4 cup (60ml) heavy cream or milk (heavy cream lends a noticeably richer and creamier texture)
- 1 teaspoon pure peppermint extract (start here, but feel free to adjust to your desired intensity!)
- 1/2 teaspoon vanilla extract (optional, but I find it adds a lovely depth that complements the peppermint without overpowering it)
- Pinch of salt (just a tiny bit to balance the sweetness and enhance all those lovely flavors)
- For the Chocolate Coating:
- 12 ounces (approximately 340g) high-quality semi-sweet or dark chocolate, finely chopped or in chip form. Choosing good chocolate is paramount for a professional finish and flavor for your Peppermint Patties.
- 1-2 tablespoons coconut oil or shortening (optional, but highly recommended for a smoother, glossier coating and easier dipping)
Equipment You’ll Need:
- Large mixing bowl
- Electric mixer (a handheld mixer works perfectly, but a stand mixer makes the job even easier)
- Measuring cups and spoons
- Rubber spatula
- Baking sheets
- Parchment paper or silicone baking mats (essential for preventing sticking!)
- Small saucepan and a heatproof bowl that fits snugly over it (for a double boiler method) OR a microwave-safe bowl
- Fork, candy dipping tools, or toothpicks (for coating the patties)
- An airtight container for storing your finished Peppermint Patties
Preparing the Peppermint Filling: The Heart of Your Peppermint Patties
This is where the magic begins, creating that iconic cool, creamy center for your homemade Peppermint Patties. Achieving the right consistency here is absolutely key to success, so take your time and enjoy the process!
- Soften the Butter: First things first, ensure your unsalted butter is genuinely at room temperature. This means it should be soft enough to indent easily with your finger, but not melted or greasy. If it’s too cold, it won’t cream properly with the sugar, leading to a lumpy filling. If it’s too warm, your filling might become too soft.
- Cream the Butter: In your large mixing bowl, combine the softened butter with your electric mixer. Beat it on medium speed for about 1-2 minutes until it becomes light, fluffy, and pale yellow. This incorporates air, which contributes to the pillowy texture of the patties.
- Add Extracts and Salt: Now, add the pure peppermint extract, vanilla extract (if using), and that crucial pinch of salt to the creamed butter. Continue to beat for another 30 seconds to fully incorporate these flavors. At this point, you’ll start to smell that wonderful, invigorating peppermint aroma!
- Gradually Introduce Powdered Sugar: This step requires a bit of patience and strategy. With your mixer on low speed, begin adding the powdered sugar, one cup at a time. After each addition, beat until just combined before adding the next. Powdered sugar tends to fly everywhere if you start too fast, so resist the urge to crank up the speed immediately. Once about half of the sugar is incorporated, the mixture will become quite thick and crumbly.
- Incorporate the Cream: At this stage, pour in the heavy cream (or milk). This liquid will help bring everything together into a cohesive dough. Continue mixing on low speed until the cream is fully absorbed.
- Finish Adding Sugar and Achieve Desired Consistency: Now, add the remaining powdered sugar, continuing to mix on low until it’s all incorporated. As the last of the sugar goes in, the mixture will transform from a crumbly mess into a thick, pliable, and somewhat stiff dough. You might need to increase the speed to medium-low to ensure everything is thoroughly combined. The goal is a dough that holds its shape well but is still soft and smooth.
- Check and Adjust Consistency: Use your hands to gently knead a small portion of the dough. It should be firm enough to roll into a ball without being overly sticky, but not so stiff that it cracks. If it feels too sticky, add another tablespoon or two of powdered sugar. If it feels too dry or crumbly, add a tiny bit more heavy cream (half a teaspoon at a time) until it reaches the desired consistency. Remember, consistency is key for perfect Peppermint Patties!
Shaping and Chilling Your Peppermint Patties: Patience is a Virtue
Once your peppermint filling is perfectly prepared, the next phase involves shaping it into those familiar rounds and chilling them to firm up for their chocolate bath.
- Prepare Baking Sheets: Line two large baking sheets with parchment paper or silicone baking mats. This is absolutely essential to prevent your delicate Peppermint Patties from sticking and making cleanup a breeze.
- Roll into Balls: Using a small cookie scoop (about 1-inch in diameter) or simply your hands, scoop out portions of the peppermint filling. Roll each portion into a smooth ball. The size of your scoop will determine the final size of your patties. I typically aim for about a 1-inch ball, which results in a standard-sized patty.
- Flatten the Balls: Place the rolled balls onto the prepared baking sheets, leaving a little space between each. Then, gently flatten each ball into a disc, about 1/4-inch thick. You can do this by pressing with the palm of your hand or using the bottom of a glass. Aim for uniform thickness so they chill and coat evenly. Don’t make them too thin, or they might break when dipping, but not too thick, or they’ll be hard to eat.
- Smooth the Edges (Optional but Recommended): For a professional look, you can gently smooth the edges of each disc with your fingertips. This creates those beautifully clean-edged Peppermint Patties we all love.
- Chill Thoroughly: This is a non-negotiable step for success. Transfer the baking sheets with the shaped peppermint discs to the refrigerator. Chill them for at least 30-60 minutes, or even longer, until they are very firm. This chilling time is critical because it prevents the patties from falling apart when you dip them into the warm chocolate. You can also place them in the freezer for about 15-20 minutes for a quicker chill, but keep a close eye on them to prevent freezing solid.
Melting the Chocolate: A Smooth Coating for Your Peppermint Patties
The chocolate coating is what elevates simple peppermint discs into true Peppermint Patties. A smooth, glossy, and perfectly set chocolate layer is the goal. I’ll share two reliable methods for melting your chocolate.
- Choose Your Melting Method:
-
Double Boiler Method (My Preferred Method for Control):
Fill a small saucepan with about 1-2 inches of water and bring it to a gentle simmer over medium-low heat. Place a heatproof bowl (glass or stainless steel) over the saucepan, ensuring the bottom of the bowl does not touch the simmering water. Add your finely chopped chocolate and the coconut oil or shortening (if using) to the bowl. Stir occasionally with a rubber spatula until the chocolate is completely melted and smooth. The gentle, indirect heat from the steam prevents the chocolate from scorching. Once melted, remove the bowl from the heat but keep it over the warm saucepan (off the heat) to keep the chocolate warm and fluid while you dip. If you notice any condensation, wipe it away immediately – water is the enemy of melting chocolate!
-
Microwave Method (Quicker, but Requires More Attention):
Place the finely chopped chocolate and the coconut oil or shortening (if using) in a microwave-safe bowl. Microwave on 50% power for 30-second intervals, stirring thoroughly after each interval. Chocolate retains its shape even when melted, so stirring is crucial to determine if it’s fully melted. Continue microwaving and stirring until the chocolate is smooth and no lumps remain. Be extremely careful not to overheat it, as chocolate can seize and become unusable very quickly. Overheated chocolate will be thick, grainy, and difficult to work with.
-
- Ensure Smoothness: Regardless of the method you choose, make sure your melted chocolate is completely smooth and free of any lumps. If using coconut oil or shortening, it should be fully incorporated, giving the chocolate a lovely, fluid consistency and a beautiful sheen. This smooth texture is essential for achieving an even, beautiful coating on your Peppermint Patties.
Coating Your Peppermint Patties: The Final Transformation
Now for the satisfying part – transforming those plain white discs into decadent, chocolate-covered Peppermint Patties! This step requires a steady hand and a bit of rhythm.
- Prepare Your Dipping Station: Have your bowl of melted chocolate ready and warm. Take one sheet of chilled peppermint patties out of the refrigerator at a time, leaving the others to chill while you work. Have another baking sheet lined with parchment paper nearby; this will be for the freshly coated patties to set on.
- Dip Each Patty: Using a fork, a candy dipping tool, or even two toothpicks, carefully pick up one chilled peppermint patty. Submerge it completely into the melted chocolate. Ensure it’s fully coated.
- Tap Off Excess Chocolate: Lift the patty out of the chocolate. Gently tap the fork or tool against the rim of the bowl a few times to allow any excess chocolate to drip back into the bowl. This helps create a thinner, more even coating and prevents a thick “foot” of chocolate around the base of your Peppermint Patties. You can also carefully run the bottom of the patty against the rim of the bowl.
- Place on Parchment Paper: Carefully transfer the coated patty to the prepared parchment-lined baking sheet. Gently slide it off the fork or tool.
- Repeat and Re-warm Chocolate: Continue this process with the remaining chilled patties. If your chocolate starts to thicken or cool too much, you can gently re-warm it using either the double boiler method or a very short burst in the microwave (10-15 seconds) until it’s fluid again. Maintaining the chocolate’s temperature and fluidity is key for a smooth finish on all your Peppermint Patties.
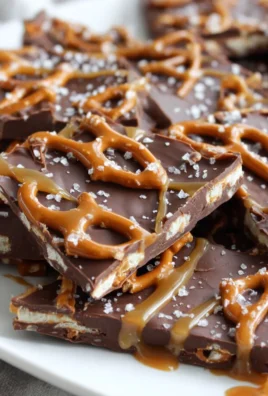
- Optional Decorations: If you wish, immediately after placing a coated patty on the parchment paper, you can create a decorative swirl on top using the tines of your fork, or sprinkle with a tiny pinch of flaky sea salt for a gourmet touch. Work quickly before the chocolate begins to set.
Setting and Storing Your Homemade Peppermint Patties: The Grand Finale
You’re almost there! Once coated, your beautiful Peppermint Patties just need a little time to set up perfectly before they’re ready to be enjoyed.
- Allow Chocolate to Set: Once all your peppermint patties are coated and arranged on the parchment-lined baking sheets, allow the chocolate to set completely. You can let them set at room temperature, which might take 1-2 hours depending on the warmth of your kitchen and the type of chocolate used. For a quicker set, you can carefully transfer the baking sheets to the refrigerator for 15-30 minutes, or the freezer for 5-10 minutes. The chocolate should be firm to the touch and no longer tacky.
- Peel and Enjoy: Once fully set, gently peel the Peppermint Patties off the parchment paper. They should come off cleanly without any sticking.
- Storage: Store your homemade Peppermint Patties in an airtight container at room temperature for up to 1-2 weeks, or in the refrigerator for up to 3-4 weeks. If storing in the refrigerator, I recommend letting them come to room temperature for about 10-15 minutes before serving, as the peppermint filling is best when slightly softened and creamy. They also freeze beautifully for several months in an airtight container; just thaw them in the refrigerator overnight or at room temperature for a few hours. Enjoy the fruits of your labor!

Conclusion:
So there you have it, friends! We’ve journeyed through the simple, joyful process of creating something truly magical in your own kitchen. This recipe isn’t just about mixing ingredients; it’s about crafting a moment of pure, unadulterated bliss. I genuinely believe that once you try your hand at these, you’ll understand why I’m so passionate about them. The satisfaction of biting into a perfectly chilled, homemade treat that’s bursting with refreshing mint and enveloped in rich, decadent chocolate is simply unparalleled. You’ll never look at store-bought versions the same way again, I promise. There’s an authenticity and a depth of flavor that only comes from ingredients you’ve chosen and a treat you’ve made with love.
What makes this particular recipe a true standout, you ask? It’s the impeccable balance. We’re not talking about an overpowering mint flavor that feels like toothpaste, nor a chocolate shell that cracks and crumbles. Instead, we achieve a smooth, creamy peppermint filling that melts in your mouth, perfectly complemented by a crisp, yet yielding, dark chocolate coating. It’s a symphony of textures and tastes, a cool rush of mint followed by the bittersweet embrace of chocolate. It’s the kind of treat that truly elevates any occasion, whether it’s a quiet evening at home or a bustling holiday gathering. They look sophisticated, but they are surprisingly simple to whip up, making them a fantastic project for bakers of all skill levels. Plus, the sheer joy of presenting these to guests or loved ones, knowing you made them from scratch, is a reward in itself.
Serving Suggestions and Creative Twists
Now, for the fun part – how to enjoy your incredible creations! Of course, these are phenomenal straight from the fridge, a perfect palate cleanser after a rich meal or a delightful pick-me-up any time of day. Imagine serving them alongside a steaming cup of coffee or a frothy hot chocolate for an extra layer of indulgence, where the mint perfectly cuts through the richness of the drinks. They make stunning additions to a dessert platter during the holidays, adding a festive touch and a refreshing counterpoint to heavier sweets like fruitcake or gingerbread. And don’t forget the gift-giving potential! Stacked elegantly in a small box, tied with a ribbon, these homemade Peppermint Patties are a thoughtful and much-appreciated present for friends, family, or even colleagues. Everyone appreciates a handmade treat, especially one that tastes this professional.
Feeling adventurous? The beauty of making treats from scratch is the endless opportunity for customization. While the classic dark chocolate is my go-to for its beautiful contrast, feel free to experiment with milk chocolate for a sweeter profile, or even white chocolate for a different aesthetic and flavor experience. You could sprinkle a little flaky sea salt on top before the chocolate sets for a beautiful sweet and salty contrast, or add a dash of espresso powder to the chocolate for a mocha-mint twist. For an extra festive touch, particularly around the holidays, add some crushed candy canes to the still-wet chocolate for a delightful crunch and extra burst of minty color. Or, if you’re not strictly in the mood for peppermint for future batches, try swapping out the peppermint extract for almond extract for a marzipan-like center, or a hint of orange zest and extract for a vibrant citrus twist. You can also play with their size – make them miniature for elegant, bite-sized delights or larger for a more substantial indulgence. The possibilities are truly only limited by your imagination and what you have in your pantry!
Your Culinary Adventure Awaits!
So, what are you waiting for? I wholeheartedly encourage you to roll up your sleeves, gather your ingredients, and dive into the wonderful world of homemade candy making. Trust me, the smiles you’ll see and the compliments you’ll receive will make every minute absolutely worth it. There’s a special kind of pride that comes from sharing something you’ve crafted with your own two hands, especially when it tastes this good. Once you’ve whipped up your batch, I would absolutely love to hear about your experience! Did you try any variations? What was your favorite part of the process? Please share your stories, tips, and even photos with me and our community – your insights inspire us all to keep creating and exploring in the kitchen. Let’s make delicious memories together. Happy baking, and happy indulging!
Homemade Peppermint Patties
Craft your own delightful homemade Peppermint Patties with a cool, creamy peppermint center enveloped in a crisp, dark chocolate shell. A classic treat perfect for holidays or any sweet craving.
Ingredients
Instructions
Important Information
Nutrition Facts (Per Serving)
It is important to consider this information as approximate and not to use it as definitive health advice.
Allergy Information
Please check ingredients for potential allergens and consult a health professional if in doubt.

Leave a Comment