

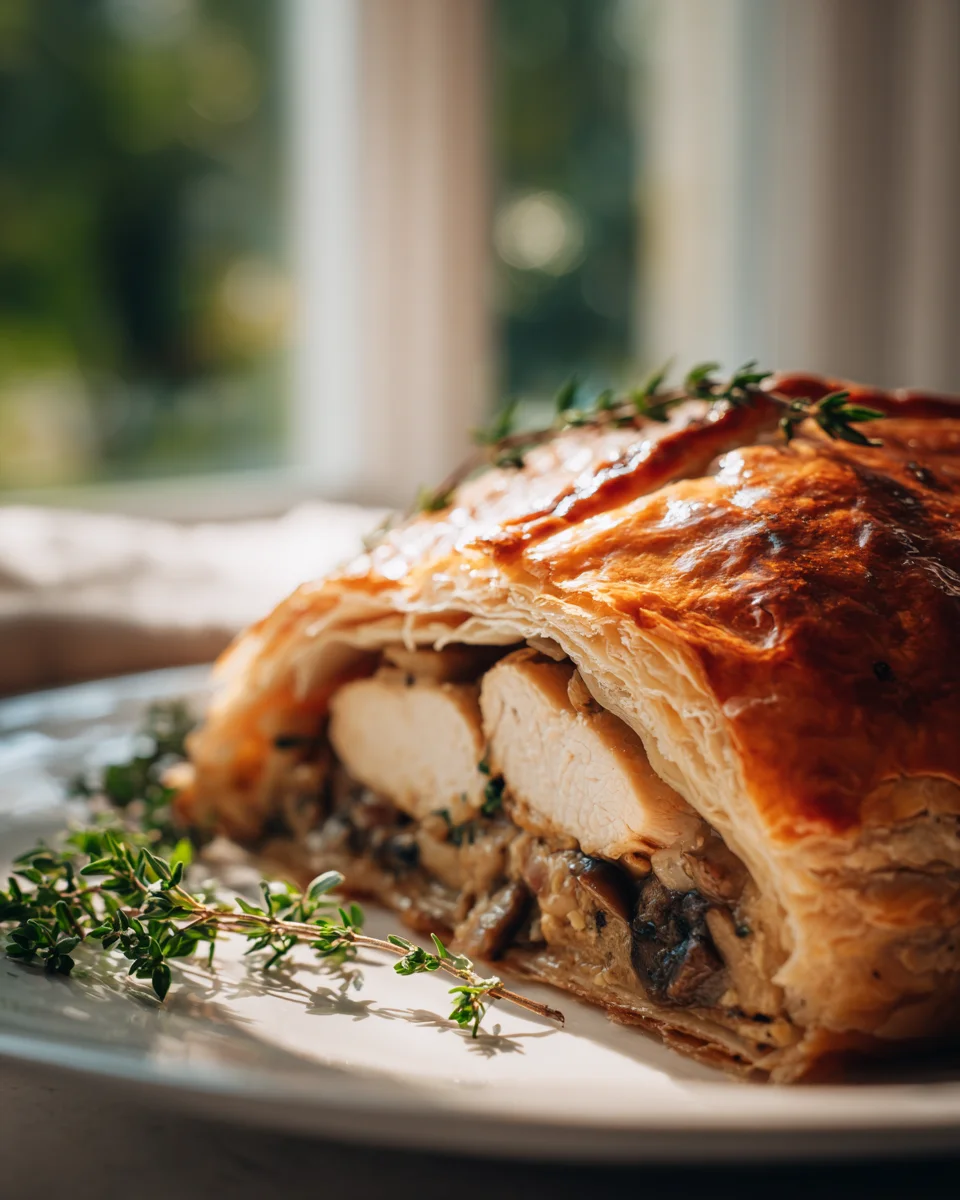
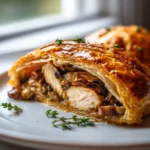
Chicken Wellington
Oh, Chicken Wellington! If there’s one dish that truly screams “special occasion” while still being wonderfully approachable, it’s this magnificent creation. I absolutely adore how it effortlessly combines elegance with incredible comfort. What makes it so special, you ask? Well, imagine tender, perfectly cooked chicken breast, nestled in a rich, savory mushroom and herb mixture (I love to make my duxelles with a splash of fragrant broth instead of alcohol for that extra layer of flavor!), all enveloped in a golden, flaky blanket of puff pastry. It’s a showstopper, plain and simple.
You, my friend, are going to absolutely love making and devouring this. There’s such a satisfying feeling that comes from slicing into that beautiful pastry to reveal the delicious layers within. Each bite is a delightful symphony of textures and flavors: the crisp, buttery pastry, the earthy mushroom filling, and the succulent chicken. It looks incredibly impressive, making it ideal for entertaining guests or simply treating yourself to something extraordinary. But don’t let its fancy appearance intimidate you – I’ll walk you through every step, and you’ll be amazed at how achievable this culinary masterpiece truly is. Get ready to impress everyone, especially your taste buds!

Ingredient Notes
Crafting a truly spectacular Chicken Wellington begins with understanding the role each ingredient plays. This isn’t just a dish; it’s an experience, and I want to guide you to success!
- Chicken Breasts: I always opt for boneless, skinless chicken breasts. The key here is uniformity. You’ll want to flatten them to an even ½-inch thickness. This ensures they cook evenly and fit beautifully inside the pastry. Don’t skip this step – a meat mallet or rolling pin works wonders, just cover the chicken with plastic wrap first to keep things neat.
- Puff Pastry: This is the golden, flaky heart of your Wellington! I highly recommend using an all-butter puff pastry if you can find it. The flavor and texture are simply superior. Store-bought, good quality frozen puff pastry is perfectly fine and saves a lot of time. Just remember to thaw it properly in the refrigerator before you begin. Keep it cold until ready to use; warm pastry is difficult to handle.
- Mushrooms for Duxelles: The flavorful mushroom paste, or duxelles, is a critical layer. I typically use cremini (baby bella) mushrooms for their deeper flavor, but white button mushrooms work well too. Freshness is key. The goal is to cook down the mushrooms, shallots, and garlic until almost all the moisture is gone – this prevents a soggy bottom crust, which is everyone’s Wellington nightmare!
- Shallots & Garlic: These aromatic powerhouses form the flavor base of our duxelles. Finely mincing them is important so they meld seamlessly into the mushroom paste.
- Non-Alcohol Alternative for Duxelles: Traditionally, a splash of fortified wine might be used, but for a fantastic non-alcoholic option, I love using a good quality balsamic vinegar or a rich chicken or vegetable broth. Balsamic adds a lovely depth and slight tang that complements the earthiness of the mushrooms beautifully. Just make sure to cook it off until the liquid has evaporated.
- Thinly Sliced Cured Beef: This layer, such as bresaola or finely sliced pastrami, serves a couple of crucial purposes. Firstly, it adds a wonderful savory depth and seasoning that elevates the dish. Secondly, and very importantly, it acts as a barrier, helping to prevent the chicken’s juices from making the puff pastry soggy. It’s a vital component for both flavor and structure.
- Dijon Mustard: A thin smear of Dijon on the chicken adds a zesty punch and helps the duxelles adhere. It’s a small touch that makes a big difference in flavor.
- Egg Wash: A simple mix of egg yolk and a splash of water. This is what gives your Wellington that gorgeous, glossy, golden-brown finish as it bakes. Don’t skip it!
- Seasonings: Salt, freshly ground black pepper, and perhaps a touch of fresh thyme for the duxelles. Simple, quality seasonings let the core ingredients shine.
Step-by-Step Instructions
Let’s get cooking! I’ve broken down the process into clear, manageable steps so you can create a show-stopping Chicken Wellington with confidence.
- Prepare the Chicken: First, pat your boneless, skinless chicken breasts completely dry with paper towels. Place them one at a time between two sheets of plastic wrap. Using a meat mallet or a rolling pin, pound them gently but firmly until they are about ½-inch thick and relatively even in size. Season generously on both sides with salt and freshly ground black pepper. Set aside.
- Make the Duxelles: Finely chop your mushrooms (I prefer using a food processor for speed, but a very sharp knife works too). You want them almost paste-like. In a large skillet over medium-high heat, melt a tablespoon of butter or heat a tablespoon of olive oil. Add the finely minced shallots and cook until softened, about 2-3 minutes. Add the minced garlic and cook for another minute until fragrant. Now, add the chopped mushrooms. Cook, stirring frequently, over medium-high heat. The mushrooms will release a lot of moisture. Continue cooking until most of the liquid has evaporated, about 10-15 minutes. Add your non-alcohol alternative (balsamic vinegar or broth) and cook until it has fully evaporated and the mixture is very dry. Stir in a teaspoon of fresh thyme, if using, and season with salt and pepper. Transfer the duxelles to a plate or shallow dish and spread it out to cool completely. This is crucial for preventing a soggy crust!
- Sear the Chicken (Optional but Recommended): While the duxelles cools, you can quickly sear the chicken. In a hot skillet, sear the flattened chicken breasts for about 1-2 minutes per side, just enough to get a light golden color. They won’t be cooked through. This adds another layer of flavor and helps prevent overcooking during the final bake. Let them cool slightly.
- Assemble the Wellington: On a lightly floured surface or a piece of parchment paper, unroll one sheet of thawed puff pastry. If using block pastry, roll it out to about a 12×10-inch rectangle. Spread a thin layer of Dijon mustard over one side of the cooled chicken breast.
- Layering Perfection: Arrange a layer of the thinly sliced cured beef (like bresaola) slightly overlapping, in the center of your puff pastry sheet. Make sure the cured beef forms a rectangle roughly the size of your chicken breast, with a little overhang. Next, spoon a generous amount of the cooled, dry duxelles over the cured beef, spreading it evenly.
- Place the Chicken: Carefully place the chicken breast, mustard-side down, on top of the duxelles.
- Wrap it Up: Bring one side of the puff pastry over the chicken, making sure it covers it entirely. Moisten the edges of the pastry with a little water or egg wash. Bring the other side of the pastry over, overlapping the first side. Press firmly to seal the seams. Trim any excess pastry, leaving about a 1-inch overlap. Fold in the short ends of the pastry and seal them securely. You want a tightly sealed package to keep all the deliciousness inside.
- Chill: Carefully transfer your assembled Chicken Wellington to a baking sheet lined with parchment paper, seam-side down. Cover loosely with plastic wrap and refrigerate for at least 30 minutes. This chilling step is vital – it allows the pastry to firm up, preventing shrinkage in the oven and helping it maintain its beautiful shape.
- Bake: Preheat your oven to 400°F (200°C). While the oven preheats, prepare your egg wash by whisking one egg yolk with a tablespoon of water. Remove the chilled Wellington from the fridge, brush the top and sides generously with the egg wash. If you like, score the top of the pastry lightly with a sharp knife (avoid cutting all the way through) to create a decorative pattern.
- Cook to Golden Perfection: Bake for 30-40 minutes, or until the puff pastry is deeply golden brown and puffed, and an instant-read thermometer inserted into the thickest part of the chicken reads 165°F (74°C). Cooking times can vary based on oven and chicken thickness.
- Rest: This is arguably the most important step for juicy chicken! Once baked, remove the Wellington from the oven and let it rest on the baking sheet for at least 10 minutes before slicing. This allows the juices to redistribute throughout the chicken, ensuring it remains moist and tender.
- Serve: Slice with a sharp, serrated knife into thick portions and serve immediately. Enjoy your culinary masterpiece!
Tips & Suggestions
Achieving a perfect Chicken Wellington can feel like a feat, but with these tips, I promise you’ll nail it every time. These are the little secrets I’ve learned along the way!
- The Duxelles Must Be Dry: I cannot stress this enough! Excess moisture from the mushrooms is the number one culprit for a soggy bottom crust. Cook it down until it’s almost paste-like and steaming stops. Spreading it thinly on a plate to cool also helps dry it out further.
- Keep Your Puff Pastry Cold: Puff pastry is a temperamental diva. It performs best when cold. Work quickly during assembly, and if it starts to get sticky or difficult to handle, pop it back in the fridge for 10-15 minutes to firm up. A cold pastry yields the flakiest results.
- Uniform Chicken Thickness: Pounding the chicken to an even ½-inch thickness is critical for consistent cooking. If some parts are thicker, they’ll be undercooked, while thinner parts might dry out.
- Secure Sealing is Key: When wrapping the chicken, make sure all seams are tightly sealed. Use a little water or egg wash to help the pastry stick to itself. Any gaps could allow juices to escape, leading to a dry interior or, again, a soggy exterior.
- Don’t Skip the Chill: Refrigerating the assembled Wellington before baking allows the butter in the puff pastry to firm up. This prevents it from shrinking too much in the oven and helps it hold its beautiful shape, ensuring a magnificent rise.
- Score for Beauty (and Steam Release): Lightly scoring the top of the pastry with a sharp knife not only adds a professional, decorative touch but also allows steam to escape during baking, contributing to a flakier crust. Just be careful not to cut all the way through!
- Listen to Your Thermometer: The only way to truly know if your chicken is cooked through without overcooking the pastry is to use an instant-read meat thermometer. Aim for an internal temperature of 165°F (74°C).
- The Power of Resting: This isn’t just a suggestion; it’s a command! Resting the Wellington for at least 10 minutes after baking allows the chicken’s juices to redistribute. Slice it too soon, and all those precious juices will run out, leaving you with dry chicken.
- Serving Suggestions: Chicken Wellington is a rich dish, so I like to pair it with simple sides that let it shine. Roasted asparagus, green beans, or a light salad with a vinaigrette are perfect complements. A creamy potato gratin or mashed potatoes can also be lovely for a more indulgent meal.
Storage
You’ve put so much effort into your magnificent Chicken Wellington, so let’s make sure you know how to store it properly to enjoy every last bit!
- Leftovers: If you happen to have any slices left (a rare occurrence in my house!), allow them to cool completely to room temperature. Then, transfer the slices to an airtight container and store in the refrigerator for up to 2-3 days.
- Reheating: For the best results and to revive that wonderful crispy pastry, I highly recommend reheating Chicken Wellington in the oven or a toaster oven.
- Preheat your oven to 350°F (175°C).
- Place the leftover slices on a baking sheet.
- Heat for about 15-20 minutes, or until the chicken is heated through and the pastry is crisp again. Microwaving is not recommended as it will make the pastry soggy.
- Making Ahead (Unbaked): This is a fantastic option if you’re planning for a dinner party! You can assemble the entire Chicken Wellington up to the point of baking (after the chilling step).
- Wrap the unbaked Wellington tightly in plastic wrap, then an additional layer of aluminum foil.
- Store in the refrigerator for up to 24 hours. When ready to bake, remove from the fridge, unwrap, egg wash, and bake as directed, adding an extra 5-10 minutes to the baking time to account for starting from a colder temperature.
- Freezing (Unbaked): You can freeze an unbaked Chicken Wellington for longer storage.
- Assemble and chill as directed.
- Wrap it very tightly in several layers of plastic wrap, then an outer layer of aluminum foil to prevent freezer burn.
- Freeze for up to 1-2 months.
- To bake from frozen: Unwrap, brush with egg wash, and bake at 375°F (190°C) for about 50-60 minutes, or until deeply golden and the chicken reaches 165°F (74°C). You might want to loosely tent with foil halfway through if the pastry is browning too quickly.
- Freezing (Baked): While it’s possible, I find the pastry loses some of its crispness when frozen after baking.
- Allow the baked Wellington to cool completely.
- Slice into individual portions.
- Wrap each slice tightly in plastic wrap and then foil.
- Freeze for up to 1 month.
- Reheat in a preheated oven (350°F / 175°C) from frozen for 25-30 minutes, or until heated through.
Final Thoughts
And there you have it – your very own masterpiece, Chicken Wellington! I truly hope you enjoyed the journey of creating this dish as much as I love sharing it with you. This isn’t just a meal; it’s an experience, a statement, and a delightful surprise with every forkful.
What makes Chicken Wellington so utterly special is that it brings together so many wonderful textures and flavors: the tender, perfectly cooked chicken, the rich, savory mushroom and beef duxelles, all encased in that golden, flaky puff pastry. It looks incredibly impressive, making it the perfect showstopper for any gathering, yet with these clear steps, it’s completely within your reach.
I promise you, the effort is incredibly rewarding. The moment you pull that golden parcel from the oven and slice into it, revealing the beautiful layers within, you’ll feel an immense sense of accomplishment. Give this Chicken Wellington a try – you’ll not only impress your guests but also treat yourself to a truly unforgettable culinary delight. Happy cooking!
Perfect Chicken Wellington: Flavorful Feast in Puff Pastry
- Total Time: 1 hour 10 minutes
- Yield: 4 servings
Description
This Chicken Wellington is a stunning dish that combines tender chicken breast with a rich mushroom and herb filling, all wrapped in flaky puff pastry. It’s perfect for special occasions or when you want to impress your guests with a delicious culinary masterpiece.
Ingredients
- Boneless, skinless chicken breasts
- All-butter puff pastry
- Cremini mushrooms (or white button mushrooms)
- Shallots
- Garlic
- Balsamic vinegar (or chicken/vegetable broth)
- Thinly sliced cured beef (like bresaola or pastrami)
- Dijon mustard
- Egg yolk
- Water
- Salt
- Freshly ground black pepper
- Fresh thyme (optional)
Instructions
- First, pat your boneless, skinless chicken breasts completely dry with paper towels. Place them one at a time between two sheets of plastic wrap. Using a meat mallet or a rolling pin, pound them gently but firmly until they are about ½-inch thick and relatively even in size. Season generously on both sides with salt and freshly ground black pepper. Set aside.
- Finely chop your mushrooms (I prefer using a food processor for speed, but a very sharp knife works too). You want them almost paste-like. In a large skillet over medium-high heat, melt a tablespoon of butter or heat a tablespoon of olive oil. Add the finely minced shallots and cook until softened, about 2-3 minutes. Add the minced garlic and cook for another minute until fragrant. Now, add the chopped mushrooms. Cook, stirring frequently, over medium-high heat. The mushrooms will release a lot of moisture. Continue cooking until most of the liquid has evaporated, about 10-15 minutes. Add your non-alcohol alternative (balsamic vinegar or broth) and cook until it has fully evaporated and the mixture is very dry. Stir in a teaspoon of fresh thyme, if using, and season with salt and pepper. Transfer the duxelles to a plate or shallow dish and spread it out to cool completely.
- While the duxelles cools, you can quickly sear the chicken. In a hot skillet, sear the flattened chicken breasts for about 1-2 minutes per side, just enough to get a light golden color. They won't be cooked through. This adds another layer of flavor and helps prevent overcooking during the final bake. Let them cool slightly.
- On a lightly floured surface or a piece of parchment paper, unroll one sheet of thawed puff pastry. If using block pastry, roll it out to about a 12×10-inch rectangle. Spread a thin layer of Dijon mustard over one side of the cooled chicken breast.
- Arrange a layer of the thinly sliced cured beef (like bresaola) slightly overlapping, in the center of your puff pastry sheet. Make sure the cured beef forms a rectangle roughly the size of your chicken breast, with a little overhang. Next, spoon a generous amount of the cooled, dry duxelles over the cured beef, spreading it evenly.
- Carefully place the chicken breast, mustard-side down, on top of the duxelles.
- Bring one side of the puff pastry over the chicken, making sure it covers it entirely. Moisten the edges of the pastry with a little water or egg wash. Bring the other side of the pastry over, overlapping the first side. Press firmly to seal the seams. Trim any excess pastry, leaving about a 1-inch overlap. Fold in the short ends of the pastry and seal them securely.
- Carefully transfer your assembled Chicken Wellington to a baking sheet lined with parchment paper, seam-side down. Cover loosely with plastic wrap and refrigerate for at least 30 minutes.
- Preheat your oven to 400°F (200°C). While the oven preheats, prepare your egg wash by whisking one egg yolk with a tablespoon of water. Remove the chilled Wellington from the fridge, brush the top and sides generously with the egg wash. If you like, score the top of the pastry lightly with a sharp knife to create a decorative pattern.
- Bake for 30-40 minutes, or until the puff pastry is deeply golden brown and puffed, and an instant-read thermometer inserted into the thickest part of the chicken reads 165°F (74°C).
- Once baked, remove the Wellington from the oven and let it rest on the baking sheet for at least 10 minutes before slicing.
- Slice with a sharp, serrated knife into thick portions and serve immediately.
- Prep Time: 30 mins
- Cook Time: 40 mins
- Category: Dinner
- Method: Baking
- Cuisine: French
Nutrition
- Serving Size: 1 slice
- Calories: 450
- Sugar: 2 g
- Sodium: 800 mg
- Fat: 25 g
- Saturated Fat: 10 g
- Unsaturated Fat: 12 g
- Trans Fat: 0 g
- Carbohydrates: 30 g
- Fiber: 2 g
- Protein: 30 g
- Cholesterol: 90 mg
Keywords: Ensure the duxelles is dry to prevent a soggy bottom crust. Keep the puff pastry cold during assembly for the best results. Use an instant-read thermometer to check the chicken's doneness.


Leave a Comment