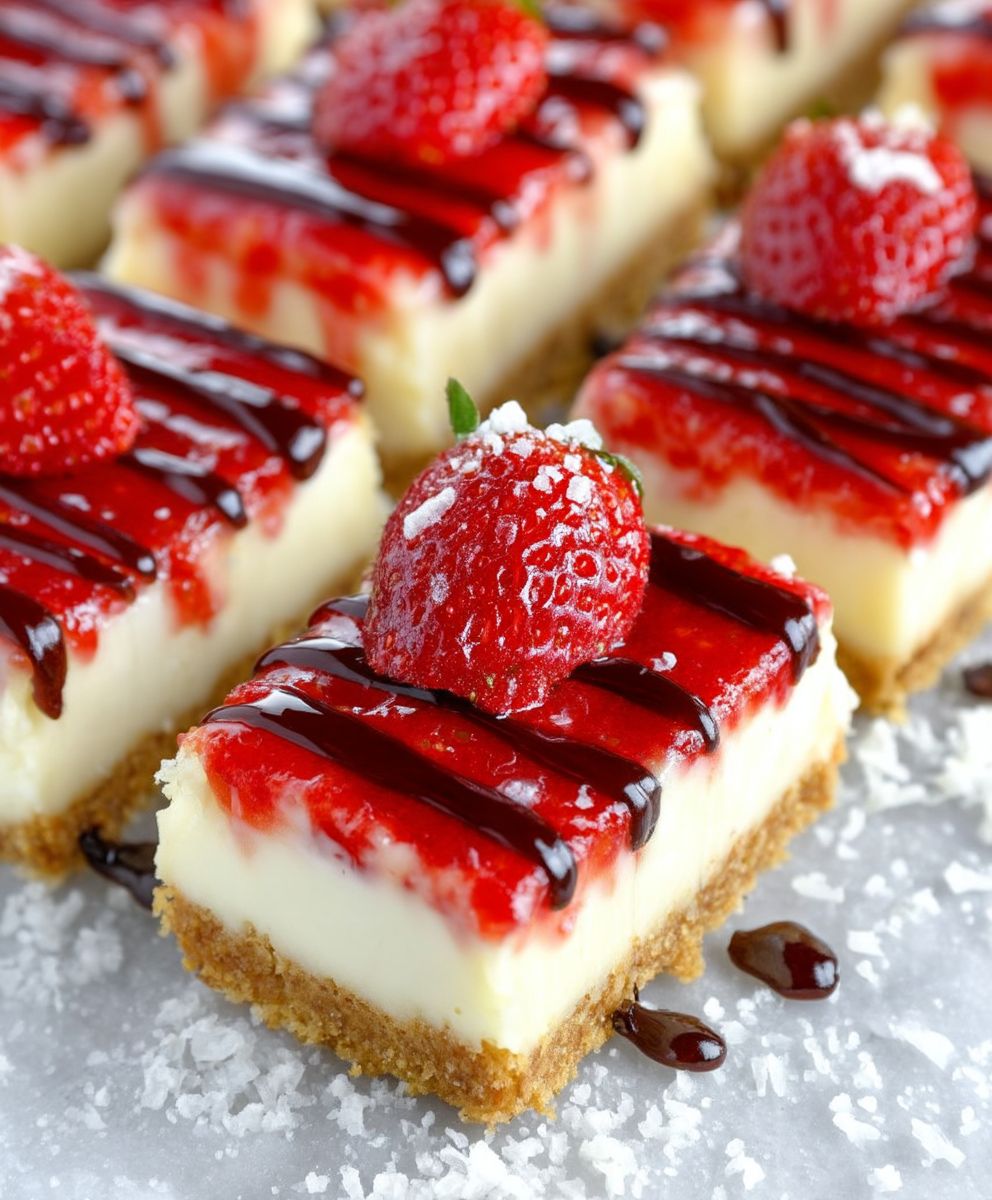
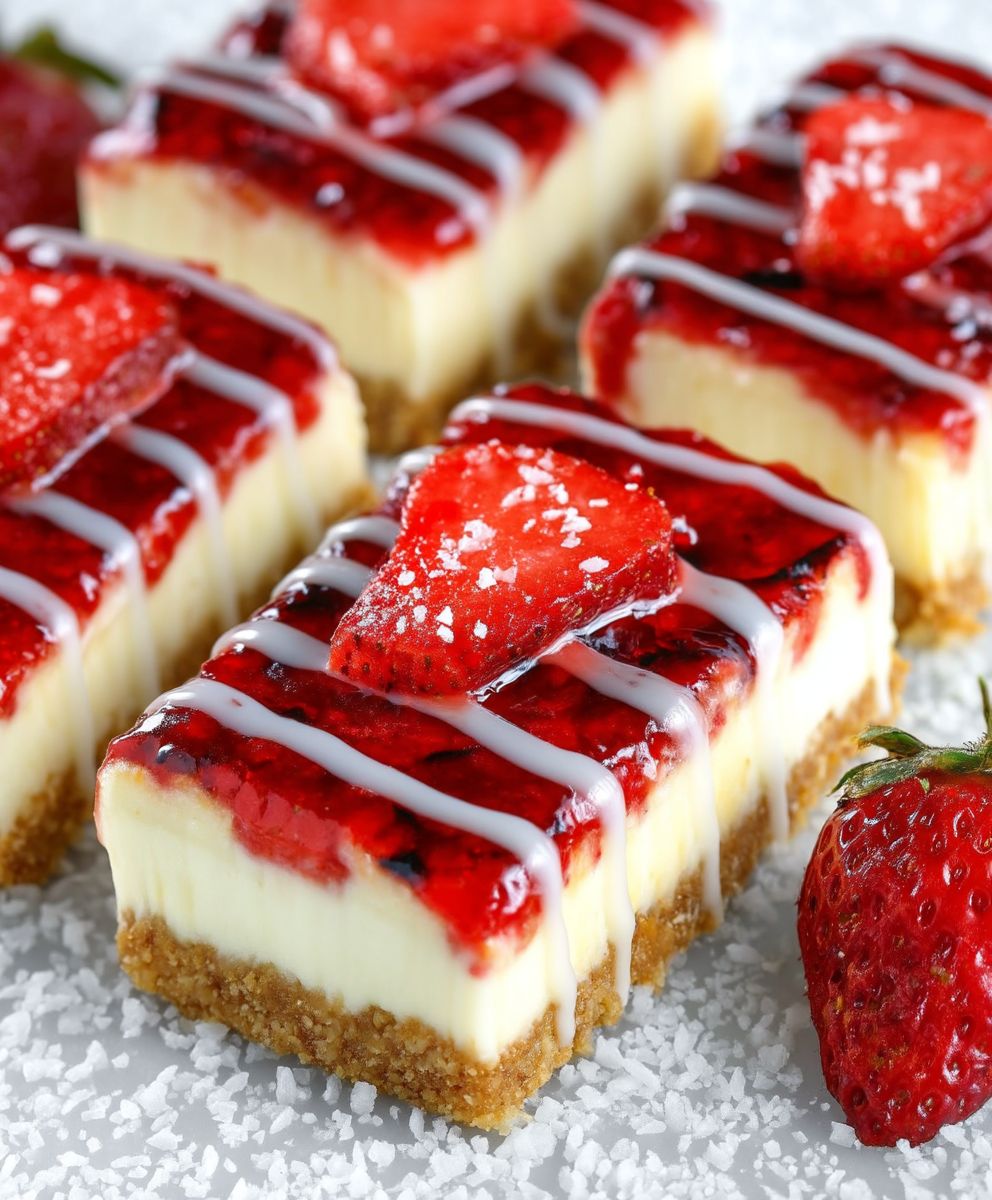
Philadelphia Cheesecake Bars: Prepare to be captivated by a dessert that perfectly balances creamy indulgence with effortless simplicity! Imagine sinking your teeth into a miniature cheesecake, its velvety smooth filling melting in your mouth, all nestled atop a buttery, crumbly crust. These aren’t just any cheesecake bars; they’re a taste of pure, unadulterated bliss.
While the exact origins of cheesecake are debated, its roots can be traced back to ancient Greece. However, the modern cheesecake, as we know and love it, truly blossomed in America, with Philadelphia Cream Cheese playing a pivotal role. It’s no surprise then, that Philadelphia Cheesecake Bars have become a beloved classic, synonymous with comfort and celebration.
What makes these bars so irresistible? It’s the harmonious blend of textures and flavors. The tangy cream cheese filling, the sweet graham cracker crust, and the sheer convenience of individual portions make them a crowd-pleaser for any occasion. Whether you’re hosting a party, craving a sweet treat after dinner, or simply want to brighten your day, these Philadelphia Cheesecake Bars are guaranteed to satisfy. I find that they are the perfect dessert to bring to potlucks because they are easy to transport and everyone loves them!
Ingredients:
- For the Crust:
- 1 1/2 cups graham cracker crumbs
- 1/4 cup granulated sugar
- 6 tablespoons (3 ounces) unsalted butter, melted
- For the Cheesecake Filling:
- 24 ounces cream cheese, softened to room temperature
- 1 cup granulated sugar
- 1 teaspoon vanilla extract
- 2 large eggs
- 1/4 cup sour cream
- Optional Toppings:
- Fresh berries (strawberries, blueberries, raspberries)
- Chocolate sauce
- Caramel sauce
- Whipped cream
Preparing the Crust:
- Preheat your oven to 350°F (175°C). This is crucial for even baking and a perfectly set cheesecake.
- In a medium bowl, combine the graham cracker crumbs, granulated sugar, and melted butter. Make sure the butter is evenly distributed throughout the crumbs. I like to use a fork to ensure everything is well mixed.
- Press the graham cracker mixture firmly into the bottom of a 9×13 inch baking pan. I find that using the bottom of a measuring cup helps to create a smooth and even crust. Don’t be afraid to really press it down! A well-packed crust is key to preventing it from crumbling later.
- Bake the crust for 8-10 minutes, or until lightly golden brown. This pre-baking step helps to set the crust and prevent it from becoming soggy when the cheesecake filling is added. Keep a close eye on it to prevent burning!
- Remove the crust from the oven and let it cool completely while you prepare the cheesecake filling. This is important because adding the warm filling to a hot crust can affect the texture of the cheesecake.
Making the Cheesecake Filling:
- In a large bowl, beat the softened cream cheese with an electric mixer until smooth and creamy. This is probably the most important step! Make sure your cream cheese is truly at room temperature. If it’s not, you’ll end up with lumps in your cheesecake. I usually leave mine out for at least an hour, sometimes longer, depending on the temperature of my kitchen.
- Gradually add the granulated sugar to the cream cheese, beating until well combined. Scrape down the sides of the bowl as needed to ensure all the sugar is incorporated.
- Add the vanilla extract and sour cream, and beat until just combined. Be careful not to overmix at this stage. Overmixing can incorporate too much air into the batter, which can cause the cheesecake to crack during baking.
- Add the eggs one at a time, beating after each addition until just combined. Again, be careful not to overmix. Just mix until the egg yolk disappears.
Baking the Cheesecake Bars:
- Pour the cheesecake filling over the cooled graham cracker crust, spreading it evenly. I like to use an offset spatula to get a nice, smooth surface.
- Bake in the preheated oven for 25-30 minutes, or until the edges are set and the center is just slightly jiggly. The cheesecake will continue to set as it cools.
- Turn off the oven and let the cheesecake bars cool in the oven with the door slightly ajar for 1 hour. This helps to prevent cracking by allowing the cheesecake to cool gradually. I usually prop the oven door open with a wooden spoon.
- Remove the cheesecake bars from the oven and let them cool completely at room temperature.
- Cover the cheesecake bars with plastic wrap and refrigerate for at least 4 hours, or preferably overnight. This allows the cheesecake to fully set and develop its flavor. I know it’s hard to wait, but trust me, it’s worth it!
Cutting and Serving:
- Once the cheesecake bars are fully chilled, cut them into squares or rectangles. I find that using a warm, wet knife helps to create clean cuts. Just run the knife under hot water and wipe it dry before each cut.
- Serve the cheesecake bars plain or with your favorite toppings. Fresh berries, chocolate sauce, caramel sauce, and whipped cream are all delicious options.
Tips for Success:
- Use room temperature cream cheese: This is the most important tip for a smooth and creamy cheesecake. If your cream cheese is not at room temperature, it will be difficult to beat out the lumps.
- Don’t overmix the batter: Overmixing can incorporate too much air into the batter, which can cause the cheesecake to crack during baking.
- Bake at a low temperature: Baking at a low temperature helps to prevent the cheesecake from cracking.
- Cool the cheesecake slowly: Cooling the cheesecake slowly helps to prevent cracking.
- Refrigerate for at least 4 hours: Refrigerating the cheesecake allows it to fully set and develop its flavor.
- Get creative with toppings: Feel free to experiment with different toppings to create your own unique cheesecake bars.
- For a richer flavor: Consider using full-fat cream cheese and sour cream. The extra fat content will contribute to a more decadent and flavorful cheesecake.
- Prevent a soggy crust: Make sure to press the graham cracker crust firmly into the pan. You can also brush the baked crust with a thin layer of melted chocolate to create a moisture barrier.
- Water Bath (Optional): For an even creamier cheesecake and to further minimize cracking, consider baking the cheesecake in a water bath. Wrap the bottom of your springform pan tightly with aluminum foil to prevent water from seeping in. Place the wrapped pan in a larger roasting pan and add hot water to the roasting pan until it reaches about halfway up the sides of the springform pan. Bake as directed.
- Freezing: These cheesecake bars freeze beautifully! Wrap them individually in plastic wrap and then place them in a freezer-safe container. They can be stored in the freezer for up to 2 months. Thaw in the refrigerator overnight before serving.
Variations:
- Chocolate Cheesecake Bars: Add 1/2 cup of unsweetened cocoa powder to the cheesecake filling.
- Lemon Cheesecake Bars: Add 2 tablespoons of lemon zest and 2 tablespoons of lemon juice to the cheesecake filling.
- Oreo Cheesecake Bars: Crush 1 cup of Oreo cookies and add them to the graham cracker crust or the cheesecake filling.
- Peanut Butter Cheesecake Bars: Add 1/2 cup of peanut butter to the cheesecake filling.
- Swirl Cheesecake Bars: After pouring the cheesecake filling over the crust, swirl in your favorite jam, fruit puree, or melted chocolate.
Troubleshooting:
- Cracked Cheesecake: If your cheesecake cracks, don’t worry! It’s still delicious. You can cover the cracks with whipped cream, fruit, or chocolate sauce. To prevent cracking in the future, try baking the cheesecake in a water bath or cooling it slowly in the oven.
- Soggy Crust: If your crust is soggy, make sure you are pressing it firmly into the pan and pre-baking it. You can also brush the baked crust with a thin layer of melted chocolate to create a moisture barrier.
- Lumpy Filling: If your filling is lumpy, make sure your cream cheese is at room temperature and that you are not overmixing the batter.
I hope you enjoy making these Philadelphia Cheesecake Bars! They’re a crowd-pleaser and perfect for any occasion. Let me know in the comments if you have any questions or if you try any of the variations! Happy baking!
Conclusion:
And there you have it! These Philadelphia Cheesecake Bars are truly a must-try for anyone who loves a creamy, decadent dessert that’s surprisingly easy to make. From the buttery, crumbly graham cracker crust to the smooth, rich cheesecake filling, every bite is pure bliss. I know I’ve made a lot of cheesecakes in my time, and these bars consistently get rave reviews. They’re perfect for potlucks, parties, or even just a special treat for yourself after a long day.
What makes these bars so special? It’s the perfect balance of textures and flavors. The crust provides a delightful contrast to the creamy filling, and the subtle tang of the cream cheese is perfectly complemented by the sweetness of the sugar and vanilla. Plus, the individual bar format makes them incredibly convenient to serve and enjoy. No need to worry about slicing a perfect piece – just grab a bar and indulge!
But the best part about this recipe is its versatility. Feel free to get creative and customize these bars to your liking. For a fruity twist, swirl in some raspberry or strawberry jam into the cheesecake batter before baking. Or, top the baked bars with fresh berries, chocolate shavings, or a drizzle of caramel sauce. If you’re a chocolate lover, add some cocoa powder to the graham cracker crust or mix chocolate chips into the cheesecake filling. The possibilities are endless!
Here are a few serving suggestions to elevate your Philadelphia Cheesecake Bars experience:
* Serve chilled: These bars are best enjoyed cold, so be sure to refrigerate them for at least a few hours before serving.
* Pair with coffee or tea: The rich, creamy flavor of the cheesecake pairs perfectly with a warm cup of coffee or tea.
* Add a dollop of whipped cream: A dollop of freshly whipped cream adds a light and airy touch to these decadent bars.
* Garnish with fresh fruit: A few fresh berries or a sprig of mint can add a pop of color and freshness to your presentation.
* Make mini bars: For a bite-sized treat, bake the cheesecake in a mini muffin tin.
I truly believe that this recipe will become a staple in your dessert repertoire. It’s simple enough for beginner bakers, yet impressive enough to wow your friends and family. The creamy texture and rich flavor of these Philadelphia Cheesecake Bars are simply irresistible.
So, what are you waiting for? Gather your ingredients, preheat your oven, and get ready to bake up a batch of these delicious cheesecake bars. I promise you won’t be disappointed!
And most importantly, I want to hear about your experience! Did you try the recipe? Did you make any variations? What did your friends and family think? Share your photos and comments in the comments section below. I can’t wait to see your creations and hear your feedback. Happy baking! I am sure you will love this recipe for Philadelphia Cheesecake Bars as much as I do.
Philadelphia Cheesecake Bars: The Ultimate Guide to Baking Perfection
Easy and delicious Philadelphia Cheesecake Bars with a graham cracker crust and creamy cheesecake filling. Perfect for any occasion!
Ingredients
- 1 1/2 cups graham cracker crumbs
- 1/4 cup granulated sugar
- 6 tablespoons (3 ounces) unsalted butter, melted
- 24 ounces cream cheese, softened to room temperature
- 1 cup granulated sugar
- 1 teaspoon vanilla extract
- 2 large eggs
- 1/4 cup sour cream
- Fresh berries (strawberries, blueberries, raspberries)
- Chocolate sauce
- Caramel sauce
- Whipped cream
Instructions
- Preparing the Crust:
- Preheat your oven to 350°F (175°C).
- In a medium bowl, combine the graham cracker crumbs, granulated sugar, and melted butter.
- Press the graham cracker mixture firmly into the bottom of a 9×13 inch baking pan.
- Bake the crust for 8-10 minutes, or until lightly golden brown.
- Remove the crust from the oven and let it cool completely while you prepare the cheesecake filling.
- Making the Cheesecake Filling:
- In a large bowl, beat the softened cream cheese with an electric mixer until smooth and creamy.
- Gradually add the granulated sugar to the cream cheese, beating until well combined.
- Add the vanilla extract and sour cream, and beat until just combined.
- Add the eggs one at a time, beating after each addition until just combined.
- Baking the Cheesecake Bars:
- Pour the cheesecake filling over the cooled graham cracker crust, spreading it evenly.
- Bake in the preheated oven for 25-30 minutes, or until the edges are set and the center is just slightly jiggly.
- Turn off the oven and let the cheesecake bars cool in the oven with the door slightly ajar for 1 hour.
- Remove the cheesecake bars from the oven and let them cool completely at room temperature.
- Cover the cheesecake bars with plastic wrap and refrigerate for at least 4 hours, or preferably overnight.
- Cutting and Serving:
- Once the cheesecake bars are fully chilled, cut them into squares or rectangles.
- Serve the cheesecake bars plain or with your favorite toppings.
Notes
- Use room temperature cream cheese: This is the most important tip for a smooth and creamy cheesecake.
- Don’t overmix the batter: Overmixing can incorporate too much air into the batter, which can cause the cheesecake to crack during baking.
- Bake at a low temperature: Baking at a low temperature helps to prevent the cheesecake from cracking.
- Cool the cheesecake slowly: Cooling the cheesecake slowly helps to prevent cracking.
- Refrigerate for at least 4 hours: Refrigerating the cheesecake allows it to fully set and develop its flavor.
- Get creative with toppings: Feel free to experiment with different toppings to create your own unique cheesecake bars.
- For a richer flavor: Consider using full-fat cream cheese and sour cream.
- Prevent a soggy crust: Make sure to press the graham cracker crust firmly into the pan. You can also brush the baked crust with a thin layer of melted chocolate to create a moisture barrier.
- Water Bath (Optional): For an even creamier cheesecake and to further minimize cracking, consider baking the cheesecake in a water bath. Wrap the bottom of your baking pan tightly with aluminum foil to prevent water from seeping in. Place the wrapped pan in a larger roasting pan and add hot water to the roasting pan until it reaches about halfway up the sides of the baking pan. Bake as directed.
- Freezing: These cheesecake bars freeze beautifully! Wrap them individually in plastic wrap and then place them in a freezer-safe container. They can be stored in the freezer for up to 2 months. Thaw in the refrigerator overnight before serving.


Leave a Comment