

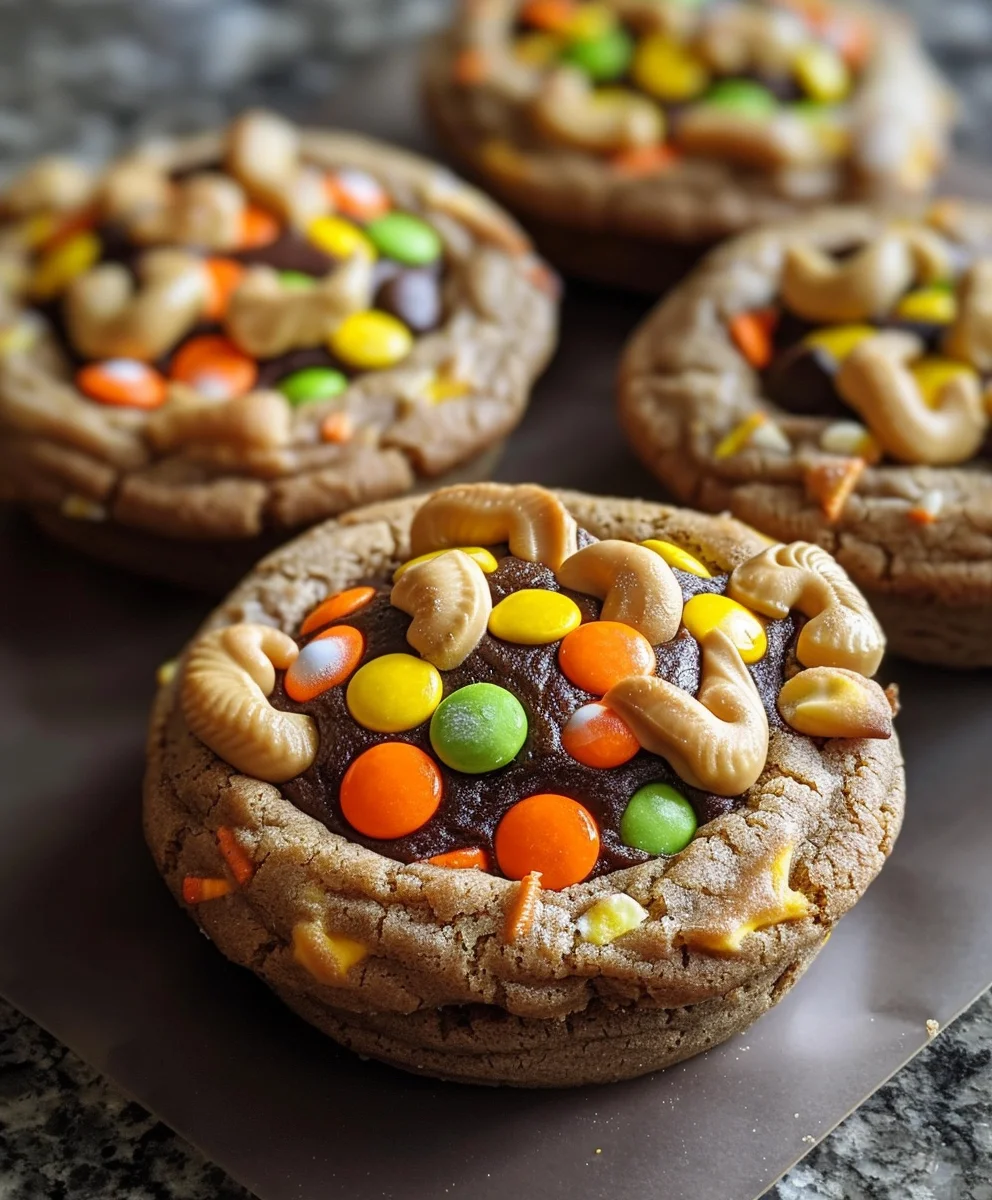
Halloween Cauldron Cookie Creation is not just a recipe; it’s an enchanting invitation to conjure up some truly magical treats this spooky season! As autumn leaves fall and the air grows crisp, our thoughts often turn to festive celebrations, and what could be more fitting than crafting edible delights that perfectly capture the spirit of Halloween? These delightful cookies, shaped like miniature bubbling cauldrons, have become a charming staple for countless trick-or-treaters and party hosts alike. They harken back to ancient tales of witches and wondrous potions, transforming a simple baked good into a whimsical piece of edible art that utterly captivates.
What makes this particular dish so beloved? It’s the irresistible combination of a perfectly tender, slightly chewy cookie base with vibrant, “bubbling” green icing and playful sprinkles that truly spark joy and creativity. Every bite offers a sweet escape into a world of holiday cheer, making them perfect for school parties, family gatherings, or just a fun afternoon project. The joy of decorating these cookies, whether alone or with family, adds an extra layer of memorable fun, making the entire Halloween Cauldron Cookie Creation process an experience in itself. Get ready to stir up some excitement and create wonderfully spooky and delicious treats that everyone will adore!

Ingredients:
- For the Cauldron Cookie Base:
- 2 ½ cups (300g) all-purpose flour, plus extra for dusting – I always recommend using a good quality unbleached all-purpose flour for the best cookie texture. It provides a sturdy, yet tender, base for our Halloween Cauldron Cookie Creation.
- 1 teaspoon baking powder – This little helper gives our cookies just a touch of lift, preventing them from becoming too dense and ensuring a pleasant bite without making them cakey.
- ½ teaspoon salt – A tiny amount of salt is crucial here. It doesn’t just add flavor; it beautifully balances the sweetness of the cookie and enhances all the other ingredients, making every bite more complex and delicious.
- 1 cup (226g) unsalted butter, softened to room temperature – This is an absolute non-negotiable! Room temperature butter creams beautifully with sugar, incorporating air and leading to a wonderfully tender, melt-in-your-mouth cookie. If your butter is too cold, it won’t cream properly, and if it’s too warm, your dough might become greasy.
- 1 ½ cups (300g) granulated sugar – The primary sweetener for our cookie base, giving it that classic, comforting sugar cookie taste.
- 2 large eggs, at room temperature – Just like the butter, room temperature eggs emulsify much better into the creamed butter and sugar mixture, resulting in a smoother, more homogenous dough. Remember to take them out of the fridge at least 30 minutes before you start.
- 1 teaspoon vanilla extract – A high-quality vanilla extract is a game-changer. It infuses our cookies with a warm, inviting aroma and flavor that truly elevates the entire experience. Don’t skimp on this!
- Green or purple gel food coloring (optional) – For that extra eerie and enchanting cauldron effect right in the cookie itself. Gel colors are preferred as they don’t add excess liquid to the dough.
- For the Bubbling Brew Royal Icing:
- 4 cups (480g) powdered sugar, sifted – Sifting is a step I never skip for royal icing. It removes any lumps, ensuring a silky-smooth icing that pipes beautifully and dries to a perfectly even finish.
- 3 tablespoons meringue powder – This is the secret ingredient for stable royal icing that dries hard and shiny. It provides structure and allows the icing to set, making our decorated cookies stackable and durable.
- ½ teaspoon vanilla extract (or almond extract for a different flavor profile) – Adding extract to the icing complements the cookie flavor beautifully. Almond extract offers a slightly more sophisticated, nutty note if you’re feeling adventurous!
- 6-8 tablespoons warm water, or as needed – This is where you’ll carefully adjust the consistency of your icing. Start with less and add slowly until you reach your desired flood and outline consistencies.
- Green or purple gel food coloring – To transform our icing into a bubbling, mystical brew. Choose vibrant shades to truly capture the Halloween spirit.
- Black gel food coloring – Essential for outlining the cauldron’s edge and creating those spooky handles. It adds wonderful definition.
- For the Spooky Decorations:
- Assorted Halloween sprinkles (bats, ghosts, stars, nonpareils) – My absolute favorite way to add instant festivity, texture, and a burst of color to any Halloween Cauldron Cookie Creation!
- Edible candy eyeballs – These little wonders instantly bring character and a wonderfully ghoulish touch to your “brew.”
- Miniature candy bones or skulls – Perfect for scattering into your witch’s brew, making it look authentically spooky and fun.
- Edible glitter (optional) – For an extra touch of magic and shimmer, making your cauldron brew truly enchanting and otherworldly. A little goes a long way!
Equipment You’ll Need:
- Stand mixer with paddle attachment or a large mixing bowl with an electric hand mixer – This makes the dough preparation significantly easier and ensures that all ingredients are thoroughly and evenly combined, which is key for a consistent cookie texture.
- Rubber spatula – Indispensable for scraping down the sides of your mixing bowl, ensuring no hidden pockets of unmixed ingredients are left behind.
- Rolling pin – To achieve a uniform thickness for your cookie dough, which is vital for even baking and a professional-looking finish.
- Cauldron-shaped cookie cutter (approximately 3-4 inches wide) – The star of our Halloween Cauldron Cookie Creation! Make sure it’s a good quality cutter for clean edges.
- Baking sheets – I recommend having at least two so you can rotate them, allowing one batch to cool slightly while another bakes.
- Parchment paper or silicone baking mats – Essential for preventing your cookies from sticking to the baking sheet and making cleanup an absolute breeze.
- Wire cooling racks – Crucial for allowing air to circulate all around your cookies as they cool. This prevents them from becoming soggy on the bottom and helps them maintain their crisp texture.
- Small bowls for separating icing colors – You’ll need several for your different colored icings and consistencies. Keep them clean and dry before use.
- Piping bags with small round tips (e.g., Wilton #2 or #3) – These are absolutely essential for precise outlining and flooding with royal icing. Good quality tips make a huge difference in control.
- Toothpicks or a scribe tool – These simple tools are surprisingly versatile! They help spread the icing into every corner, pop any pesky air bubbles, and create intricate details.
Phase 1: Crafting the Cauldron Cookie Dough
This is where the magic truly begins for our Halloween Cauldron Cookie Creation. Taking your time here ensures a delicious and well-structured base for all our spooky decorating!
- Combine Dry Ingredients: In a medium bowl, whisk together the 2 ½ cups of all-purpose flour, 1 teaspoon of baking powder, and ½ teaspoon of salt. I like to give it a good whisk for about 30 seconds to a minute to ensure these ingredients are thoroughly combined and evenly distributed. This step is important because it prevents clumps of baking powder or salt in your final cookies. Set this bowl aside for a moment.
- Cream Butter and Sugar: In the bowl of your stand mixer fitted with the paddle attachment (or a large bowl with an electric hand mixer), cream together the 1 cup (226g) of softened unsalted butter and 1 ½ cups (300g) of granulated sugar. Beat on medium speed for about 3-5 minutes, or until the mixture is visibly light, fluffy, and pale yellow. This creaming process is absolutely vital; it incorporates air into your butter and sugar, which contributes significantly to the cookie’s tender texture and prevents them from being dense. Make sure to scrape down the sides of the bowl occasionally with your rubber spatula to ensure everything is evenly mixed.
- Add Eggs and Vanilla: Beat in the 2 large room temperature eggs, one at a time, mixing well after each addition until fully incorporated. After the eggs, add the 1 teaspoon of vanilla extract and mix until just combined. It’s important to fully incorporate each egg before adding the next to ensure a smooth, emulsified dough.
- Gradually Add Dry to Wet: With the mixer on low speed, gradually add the dry ingredient mixture to the wet ingredients, a third at a time. Mix only until just combined. Do not overmix! Overmixing develops the gluten in the flour, which can lead to tough, chewy cookies. As soon as you see no more streaks of flour, stop the mixer.
- Add Optional Food Coloring: If you’re opting for green or purple cauldron cookies, now is the time to add your gel food coloring. Start with a few drops and mix on low speed until the desired vibrant color is achieved. Remember, gel colors are highly concentrated, so start small.
- Chill the Dough: Gather the dough into a ball, flatten it slightly into a disc, wrap it tightly in plastic wrap, and refrigerate for at least 1 hour. Personally, I find chilling it for 2 hours, or even overnight, yields the best results. This chilling step is crucial because it allows the butter to firm up, making the dough much easier to roll out and preventing your cookies from spreading excessively in the oven. It also gives the flavors time to meld.
Phase 2: Shaping and Baking Your Cauldron Cookies
Patience and precision in this phase will give you beautifully shaped and perfectly baked cauldron cookies, ready for their enchanting transformation!
- Preheat Oven and Prep Sheets: While your dough is chilling, preheat your oven to 375°F (190°C). Line two baking sheets with parchment paper or silicone baking mats. This prevents sticking and ensures even baking.
- Prepare Your Workspace and Roll Dough: Lightly flour a clean work surface and your rolling pin. Take out about half of your chilled dough from the refrigerator. If it’s too hard, let it sit for a few minutes to soften just enough to be workable. Roll the dough to about ¼ inch thickness. Uniform thickness is paramount here; it ensures all your cookies bake evenly. If your cookies are different thicknesses, some will be under-baked while others are over-baked.
- Cut Out Cauldron Shapes: Dip your cauldron-shaped cookie cutter in a little flour to prevent sticking, then press it firmly into the rolled-out dough. Place the cut-out shapes onto your prepared baking sheets, leaving about an inch between each cookie.
- Re-roll Scraps (Carefully!): Gently gather the dough scraps, lightly knead them together, and re-roll them to cut more cookies. Continue this process until you’ve used all the dough. Try not to overwork the dough as you re-roll it, as this can make the cookies tough. If the dough becomes too warm and sticky, pop it back into the fridge for 10-15 minutes before continuing.
- Bake to Golden Perfection: Bake the cookies for 8-11 minutes, or until the edges are lightly golden and the centers are set. The exact time will depend on your oven and the thickness of your cookies. Keep a close eye on them; sugar cookies can go from perfectly baked to over-baked quickly. You want them to be firm but still pale in the center.
- Cool Completely: Remove the baking sheets from the oven and let the cookies cool on the sheets for about 5 minutes. Then, carefully transfer them to a wire cooling rack to cool completely. It’s absolutely critical that your cookies are completely cool before you even think about decorating them with royal icing. Warm cookies will melt the icing and ruin your hard work.
Phase 3: The Enchanting Cauldron “Brew” Filling
Now for the fun part – creating that vibrant, bubbling brew! This royal icing will bring our Halloween Cauldron Cookie Creation to life with its incredible texture and color.
- Prepare the Royal Icing Base: In the bowl of your stand mixer fitted with the paddle attachment (or a large bowl with an electric hand mixer), combine the 4 cups (480g) of sifted powdered sugar and 3 tablespoons of meringue powder. Mix on low speed until just combined. Gradually add ½ teaspoon of vanilla extract and 6 tablespoons of warm water. Beat on medium-high speed for 5-7 minutes, until the icing is thick, glossy, and holds stiff peaks. This thorough beating is what gives royal icing its structure and the ability to dry hard. If your icing looks too thick, add water ½ teaspoon at a time until you reach your desired consistency.
- Divide and Color Your Icing: Divide your royal icing into several small bowls. Keep one bowl with a small amount of white icing for any optional details. In another bowl, add a few drops of black gel food coloring and mix until you achieve a rich, dark black. In the largest bowl, add your green or purple gel food coloring to create your “brew” color. Mix well until the color is vibrant and uniform.
- Achieve Outline Consistency: For the black icing, you’ll want an “outline” consistency. This means it should be thick enough to hold its shape when piped, but still flow smoothly. If your icing is too thick, add warm water a tiny drop at a time until it reaches a consistency where, if you lift your spatula, a ribbon of icing falls and takes about 15-20 seconds to disappear back into the bowl.
- Achieve Flood Consistency: For your green or purple “brew” icing, you’ll need a “flood” consistency. This should be thinner than the outline consistency, designed to spread and fill areas smoothly. Add warm water to your colored icing, a ½ teaspoon at a time, mixing thoroughly after each addition, until it reaches a consistency where a ribbon of icing dropped from your spatula disappears back into the bowl within 8-10 seconds. This timing is crucial for a smooth, even flood.
- Load Piping Bags: Fit your piping bags with small round tips (e.g., #2 or #3). Fill one bag with the black outline icing and another with your green/purple flood icing. Twist the tops of the bags to seal them.
- Outline Your Cauldron Cookies: Using the black icing, carefully pipe an outline around the edge of each cauldron cookie. Additionally, pipe a semi-circle or two at the top to create the cauldron’s rim and two small handles on either side. Take your time here; a steady hand makes all the difference for clean lines. Allow the black outline to set for about 10-15 minutes before moving to the next step. This prevents your flood icing from bleeding into the outline.
- Flood the Cauldron Base: Now, using your green or purple flood icing, carefully fill in the interior of the cauldron, staying within the black outline. Use a toothpick or scribe tool to gently spread the icing to the edges and into any corners. This tool is also perfect for popping any small air bubbles that rise to the surface, which ensures a perfectly smooth finish.
- Add Bubbles (Optional): While the flood icing is still wet, you can immediately add small dots of white or lighter green flood icing randomly over the “brew” to create a bubbling effect. Use your toothpick to gently swirl them slightly for a more organic look.
- Allow to Dry (Critically Important!): Place your decorated cookies on a flat surface or wire rack and allow the royal icing to dry completely. This will take anywhere from 6-12 hours, or even overnight, depending on the humidity in your environment. This step cannot be rushed; fully dried royal icing is essential for adding further decorations and for preventing smudges.
Phase 4: Conjuring the Decorations
With our brew set, it’s time to truly personalize each Halloween Cauldron Cookie Creation with delightful and spooky embellishments!
- Apply Sprinkles While Wet: If you want to embed sprinkles into your “brew,” you would do this immediately after flooding the cookie in Phase 3, Step 8, while the flood icing is still wet. Gently scatter your assorted Halloween sprinkles over the wet icing. The icing will dry around them, holding them in place.
- Add Candy Eyeballs and Bones: Once your flood icing is completely dry (after 6-12 hours), you can attach your candy eyeballs and miniature candy bones or skulls. To do this, use a tiny dab of fresh royal icing (you can mix a small amount of your leftover flood consistency icing with a bit more powdered sugar to make it thicker, or just use a bit of royal icing straight from the piping bag if it’s still good) to “glue” them onto the dry surface. Place them strategically in your brew to make it look like something is indeed bubbling up!
- Embellish with Edible Glitter (Optional): For an extra touch of shimmer and magic, gently brush or sprinkle edible glitter over your dried “brew.” A small, clean paintbrush can help you apply it precisely. This makes your cauldron look truly enchanted!
- Add Final Black Details: If desired, once all other decorations are dry, you can use your black outline icing to add very fine details, like a tiny spider crawling on the cauldron rim or small “steam” lines rising from the brew. This adds another layer of depth and artistry to your Halloween Cauldron Cookie Creation.
Phase 5: Assembling Your Spooky Masterpiece
The final touches make all the difference, bringing your Halloween Cauldron Cookie Creation to its glorious, spooky completion!
- Ensure Complete Drying: Double-check that all royal icing, including any attached decorations, is completely dry and hardened. This is paramount for preventing smudges and for allowing you to store or transport your cookies safely. If you’re unsure, give them another hour or two. Patience truly is a virtue in cookie decorating!
- Final Inspection: Take a moment to admire your work! Look at each Halloween Cauldron Cookie Creation and ensure it meets your spooky standards. Are the eyes facing the right way? Is the glitter sparkling just so? This is your chance for any last-minute, tiny adjustments.
- Storage Suggestions: Once completely dry, store your Halloween Cauldron Cookies in an airtight container at room temperature for up to 2 weeks. I like to layer them between sheets of parchment paper to protect the delicate icing. Avoid refrigerating, as condensation can cause the royal icing to become sticky or dull.
- Presentation: Arrange your finished cookies on a festive platter. They make a fantastic centerpiece for any Halloween party! For an extra dramatic effect, you could even place a small bowl of dry ice (used with caution and proper ventilation, and away from direct food contact) behind or among them to create a “smoking” cauldron display. These cookies are not just a treat; they’re a spectacular edible decoration!
Conclusion:
Well, there you have it, my friends! We’ve journeyed through the enchanting world of transforming simple ingredients into something truly magical and utterly delicious. This isn’t just another cookie recipe; it’s an invitation to unleash your inner artist and embrace the playful spirit of the season. I truly believe this Halloween Cauldron Cookie Creation is a must-try for anyone looking to add a sprinkle of whimsy and a whole lot of flavor to their festivities. What makes these cookies so irresistible, you ask? It’s their perfect balance of a tender, buttery base, the delightful crunch of their decorative elements, and that vibrant, eye-catching “brew” that just screams fun! They are surprisingly straightforward to make, meaning even novice bakers can achieve show-stopping results, while seasoned pros will find endless avenues for creative expression.
I’ve seen firsthand the smiles these cookies bring, from wide-eyed children marveling at their miniature cauldrons to adults appreciating the clever design and delightful taste. They’re more than just a treat; they’re a conversation starter, a centerpiece, and a testament to the joy of homemade goodies. Think about the aroma filling your kitchen as these bake – pure comfort! And the best part? The decorating stage is where the real fun begins. It’s a fantastic activity for families, a wonderful way to spend an afternoon with friends, or a relaxing solo project that yields incredibly satisfying results. Every time I make them, I find myself discovering a new little detail to add or a different color combination to try, making each batch uniquely mine. They encapsulate everything wonderful about seasonal baking – warmth, creativity, and sharing joy.
Now, let’s talk about how to enjoy your incredible creations and how you can make them even more “you”! These adorable cauldron cookies are incredibly versatile. Of course, they are absolutely perfect served alongside a tall glass of cold milk, or perhaps a steaming mug of hot cocoa on a chilly autumn evening. For a truly decadent dessert experience, imagine serving them warm, with a scoop of vanilla bean ice cream melting gently on the side, or even crushed over a bowl of pumpkin spice pudding. They also make magnificent edible gifts! Arrange a few in a cellophane bag tied with a festive ribbon, and you’ve got a thoughtful, handmade present that’s sure to delight neighbors, teachers, or party hosts.
Endless Possibilities for Your Cauldron Cookies:
- Cookie Base Variations: Don’t feel limited to a standard sugar cookie! Try a rich chocolate cookie base for an even darker, more mysterious cauldron, or a spiced gingerbread cookie for an autumnal twist. A snickerdoodle base could add a delightful cinnamon kick.
- “Brew” Customization: While green is classic, think about vibrant purple, spooky orange, or even a swirling mix of colors for your “brew” icing. Food gels offer intense colors that really pop. You could even add a tiny drop of mint extract to your green icing for a refreshing flavor surprise!
- Magical Embellishments: Beyond the classic sprinkles, consider edible glitter for a truly sparkling potion effect. Gummy worms, candy eyeballs, or tiny candy bones peeking out of the brew can add an extra layer of spooky fun. Crushed cookie crumbs around the base could mimic dirt or smoke.
- Dietary Adaptations: For those with dietary restrictions, remember that many gluten-free or dairy-free cookie recipes can be adapted to hold their shape for these cauldrons. Just ensure your chosen recipe is sturdy enough for cutting and handling.
- Beyond Halloween: While perfect for Halloween, the concept can be adapted! Imagine a “lucky pot of gold” cookie for St. Patrick’s Day with yellow “brew” and gold sprinkles, or even a “witches’ brew” for a magical-themed birthday party. The possibilities are genuinely endless once you master the basic technique.
I’ve shared my secrets, my tips, and my enthusiasm, and now it’s your turn! I genuinely hope you feel inspired to roll up your sleeves, gather your ingredients, and embark on your own Halloween Cauldron Cookie Creation adventure. There’s something incredibly satisfying about creating something beautiful and delicious with your own hands, and I promise you, the joy these cookies bring is well worth the effort. Don’t be shy – get baking! And once you’ve pulled your masterpieces from the oven, and perhaps even sampled a few (I won’t tell!), I would absolutely love to hear about your experience.
Did you try a different color for your brew? Did your kids add extra candy eyeballs? Were they the hit of your Halloween party? Please, share your stories, your triumphs, and even your comical kitchen mishaps (we all have them!). There’s a wonderful community of home bakers out there, and your experiences inspire us all. So, snap a photo, tell us all about your decorating adventures, and let’s celebrate the magic of baking together. Until next time, happy baking, and may your cauldrons always overflow with deliciousness!
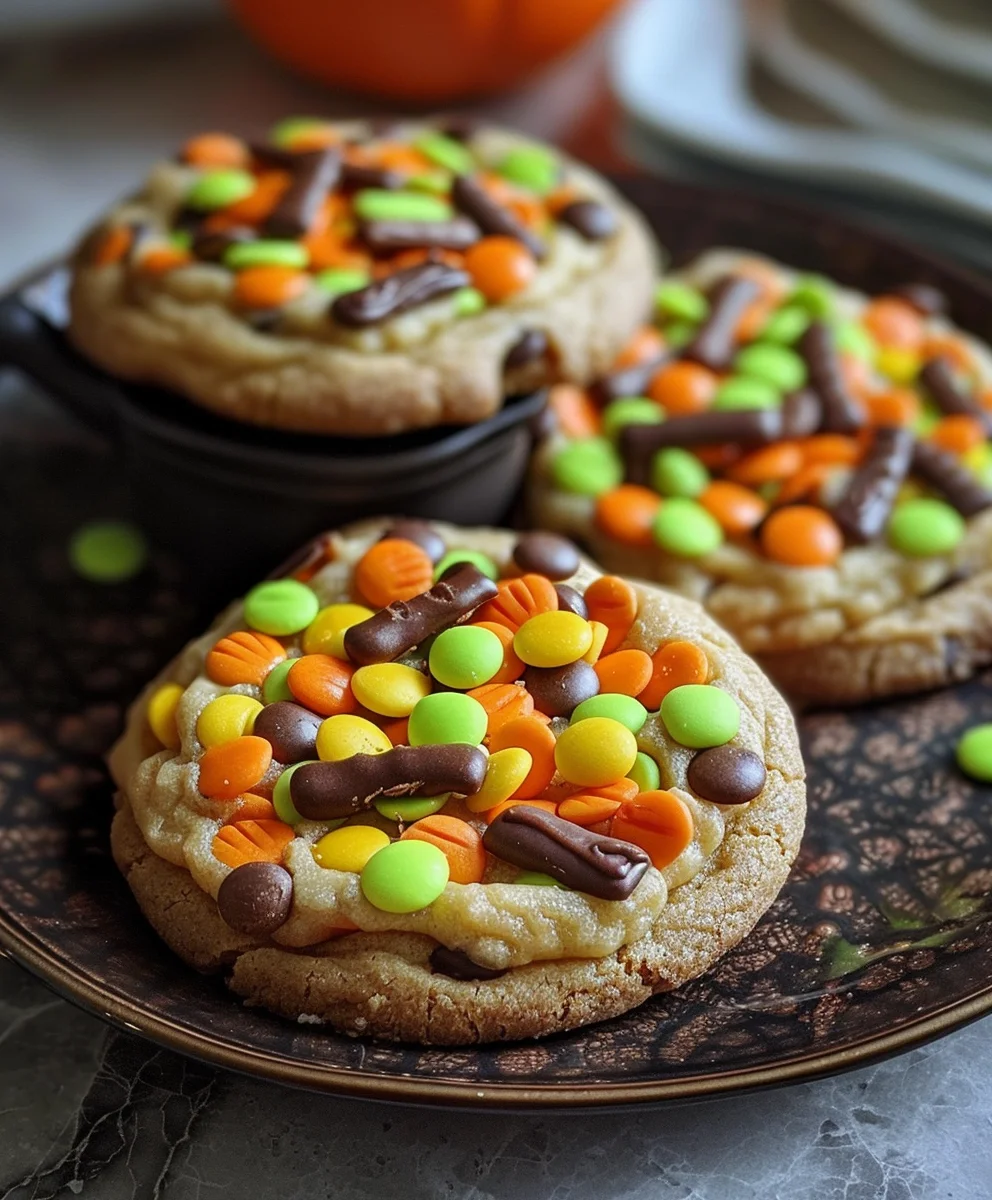
Spooky Halloween Cauldron Cookies: Easy & Delicious Treat Recipe
An enchanting invitation to conjure up magical Halloween Cauldron Cookies. These delightful cookies, shaped like miniature bubbling cauldrons, are a charming staple for spooky season celebrations, transforming a simple treat into a whimsical piece of edible art.
Ingredients
-
1 cup unsalted butter, softened
-
1 cup granulated sugar
-
1 cup brown sugar, packed
-
2 large eggs
-
2 tsp vanilla extract
-
3 cups all-purpose flour
-
1 tsp baking soda
-
1/2 tsp salt
-
1 cup chocolate chips
-
1 cup candy corn
-
4 cups powdered sugar, sifted (for royal icing)
-
3 tbsp meringue powder (for royal icing)
-
1/2 tsp vanilla extract (for royal icing)
-
6-8 tbsp warm water (for royal icing)
-
Green or purple gel food coloring (for icing)
-
Black gel food coloring (for icing)
-
Assorted Halloween sprinkles
-
Edible candy eyeballs
-
Miniature candy bones or skulls
-
Edible glitter (optional)
Instructions
-
Step 1
In a bowl, whisk 3 cups flour, 1 tsp baking soda, and 1/2 tsp salt. In a stand mixer, cream 1 cup softened butter with 1 cup granulated sugar and 1 cup brown sugar until fluffy (3-5 mins). Beat in 2 large eggs, one at a time, then 2 tsp vanilla. Gradually add dry ingredients, mixing until just combined. Fold in 1 cup chocolate chips and 1 cup candy corn. Form dough into a disc, wrap, and refrigerate for at least 1-2 hours. -
Step 2
Preheat oven to 375°F (190°C) and line baking sheets with parchment. Lightly flour a surface and rolling pin. Roll half of chilled dough to ¼ inch thickness. Use a cauldron-shaped cutter to cut shapes and place them on baking sheets. Re-roll scraps gently. Bake for 8-11 minutes until edges are lightly golden. Let cool on sheets for 5 mins, then transfer to a wire rack to cool completely. Ensure cookies are fully cool before icing. -
Step 3
In a stand mixer, combine 4 cups sifted powdered sugar and 3 tbsp meringue powder. Add 1/2 tsp vanilla extract and 6 tbsp warm water. Beat on medium-high for 5-7 mins until thick, glossy, and stiff peaks form. Adjust consistency with warm water: ‘outline’ for thick lines (15-20 sec ribbon test) and ‘flood’ for thinner filling (8-10 sec ribbon test). Divide icing: color one portion black (outline), and the largest portion green or purple (flood) for the ‘brew’. -
Step 4
Fill piping bags with black (outline) and colored (flood) icings, using small round tips. Carefully pipe a black outline around each cauldron cookie, including a rim and handles. Let the black outline set for 10-15 minutes. Then, fill the cauldron interior with green or purple flood icing, spreading to edges with a toothpick. While wet, add small dots of white or lighter green icing for ‘bubbles’ and swirl gently. Allow icing to dry completely for 6-12 hours or overnight. -
Step 5
Once royal icing is completely dry, use a tiny dab of royal icing to ‘glue’ edible candy eyeballs, miniature candy bones, or skulls onto the ‘brew’. If desired, scatter Halloween sprinkles over wet flood icing, or gently brush edible glitter over dried icing for shimmer. Optionally, use black outline icing for fine details like spiders or steam. Ensure all decorations are dry before storing. -
Step 6
Once completely dry, store cookies in an airtight container at room temperature for up to 2 weeks, layered with parchment paper. Avoid refrigeration. Arrange on a festive platter for a spectacular Halloween treat!
Important Information
Nutrition Facts (Per Serving)
It is important to consider this information as approximate and not to use it as definitive health advice.
Allergy Information
Please check ingredients for potential allergens and consult a health professional if in doubt.


Leave a Comment