

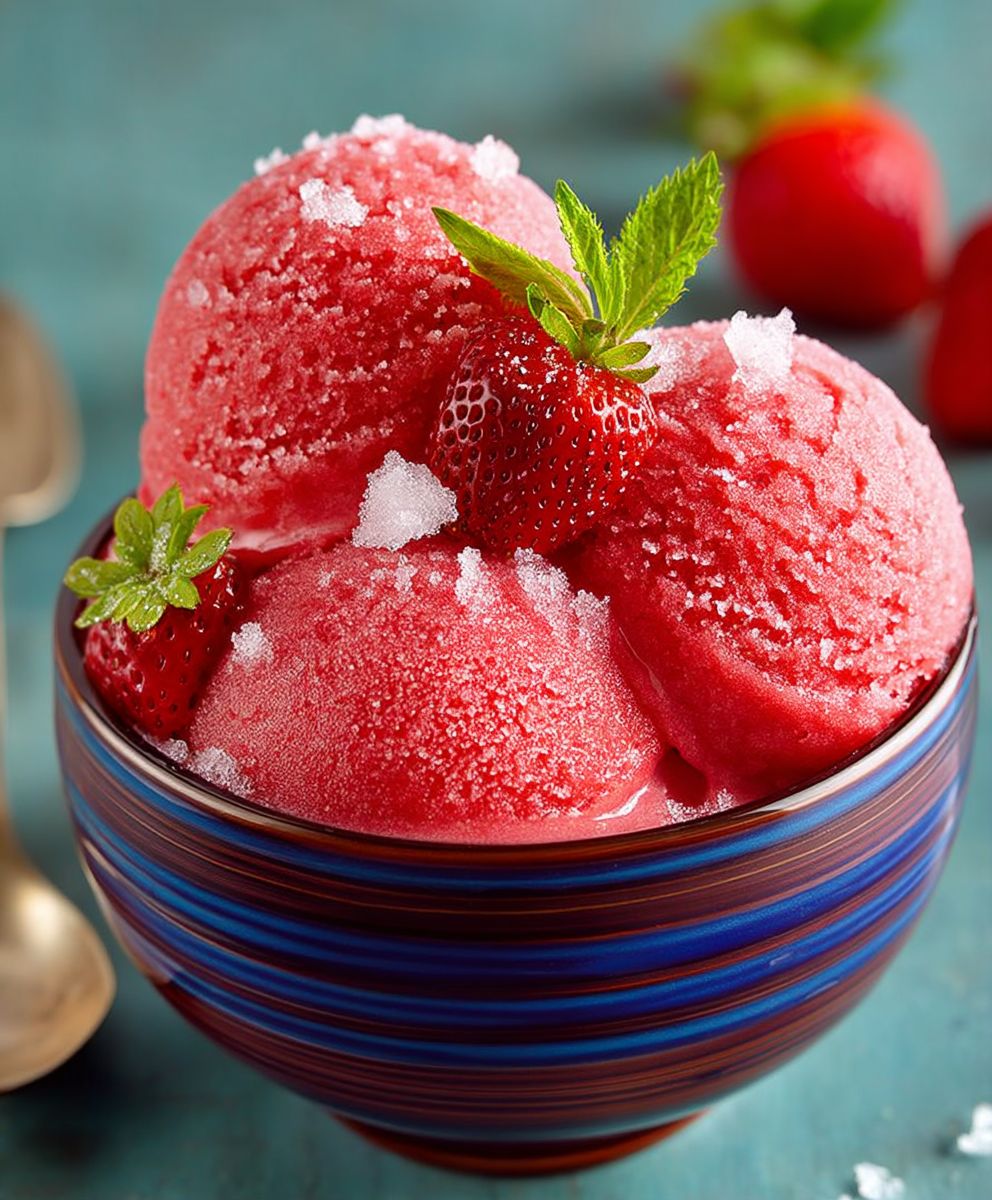
Strawberry Sorbet: the taste of summer captured in a spoon! Imagine a dessert so vibrant, so refreshing, it instantly transports you to a sun-drenched afternoon, surrounded by the sweet scent of ripe strawberries. That’s precisely what this delightful frozen treat offers. But this isn’t just any ordinary dessert; it’s a culinary experience that’s both simple and sophisticated.
While the exact origins of sorbet are debated, frozen desserts have been enjoyed for centuries, with early versions often involving snow or ice flavored with fruit juices. Over time, these evolved into the smooth, refined sorbets we know and love today. Strawberry Sorbet, in particular, has become a beloved classic, celebrated for its pure, unadulterated strawberry flavor.
What makes this dish so irresistible? It’s the perfect balance of sweet and tart, the incredibly smooth texture that melts in your mouth, and the sheer convenience of a dessert that requires minimal ingredients and effort. Whether you’re looking for a light and refreshing palate cleanser after a rich meal or a guilt-free indulgence on a hot day, this homemade strawberry sorbet is guaranteed to satisfy. Plus, it’s naturally vegan and gluten-free, making it a crowd-pleasing option for almost any dietary need. Get ready to experience the pure joy of summer with every spoonful!

Ingredients:
- 1 kg fresh strawberries, hulled
- 200g granulated sugar
- 120ml water
- 30ml lemon juice, freshly squeezed
- 1 tablespoon vodka (optional, but helps prevent ice crystals)
- Pinch of salt
Preparing the Strawberry Base:
- Wash and Hull the Strawberries: Begin by thoroughly washing your strawberries under cold running water. Gently remove the green hulls from each strawberry. This is crucial as the hulls can impart a bitter taste to your sorbet. Make sure to inspect each strawberry for any blemishes or bruises and discard any that are not in perfect condition.
- Macerate the Strawberries with Sugar: In a large bowl, combine the hulled strawberries and granulated sugar. Gently toss them together until the strawberries are evenly coated with sugar. The sugar will draw out the natural juices from the strawberries, creating a flavorful syrup. This process, called maceration, is essential for enhancing the strawberry flavor and creating a smoother sorbet texture. Cover the bowl with plastic wrap and let it sit at room temperature for at least 1 hour, or preferably in the refrigerator for 2-3 hours. The longer the strawberries macerate, the more flavorful your sorbet will be. I usually let mine sit for a couple of hours in the fridge.
- Blend the Macerated Strawberries: After the strawberries have macerated, transfer them along with the accumulated juices to a high-speed blender or food processor. Blend until completely smooth. You want to achieve a silky, lump-free puree. If you’re using a blender, you may need to stop and scrape down the sides a few times to ensure everything is fully incorporated. If you prefer an even smoother texture, you can strain the puree through a fine-mesh sieve to remove any seeds. This step is optional, but it can significantly improve the overall mouthfeel of the sorbet.
- Combine with Water, Lemon Juice, and Salt: In a separate bowl, whisk together the water, lemon juice, and a pinch of salt. The lemon juice adds a bright, tangy flavor that complements the sweetness of the strawberries, while the salt enhances the overall flavor profile. Add this mixture to the strawberry puree and stir well to combine. Taste the mixture and adjust the sweetness or tartness as needed. If it’s too tart, add a little more sugar. If it’s too sweet, add a touch more lemon juice.
- Add Vodka (Optional): If you’re using vodka, now is the time to add it to the strawberry mixture. Vodka helps to prevent the formation of large ice crystals, resulting in a smoother, more scoopable sorbet. Don’t worry, you won’t taste the alcohol in the final product. The alcohol content is minimal and will evaporate slightly during the freezing process.
Chilling and Freezing the Sorbet Base:
- Chill the Mixture: Pour the strawberry mixture into a container with a lid. Cover and refrigerate for at least 4 hours, or preferably overnight. Chilling the mixture thoroughly is crucial for achieving the best texture in your sorbet. It allows the flavors to meld together and ensures that the mixture is cold enough for the ice cream maker to work efficiently.
- Churn in an Ice Cream Maker: Once the mixture is thoroughly chilled, pour it into your ice cream maker. Follow the manufacturer’s instructions for your specific ice cream maker model. Generally, you’ll need to churn the mixture for 20-30 minutes, or until it reaches a soft-serve consistency. The churning process incorporates air into the mixture, creating a light and airy texture. Keep an eye on the sorbet as it churns, and stop the machine when it reaches the desired consistency.
- Harden in the Freezer: After churning, the sorbet will be quite soft. Transfer it to an airtight container and spread it evenly. Place a piece of parchment paper or plastic wrap directly on the surface of the sorbet to prevent ice crystals from forming. Seal the container tightly and freeze for at least 2-3 hours, or preferably overnight, to allow the sorbet to harden completely. This step is essential for achieving a firm, scoopable texture.
Serving and Storing:
- Soften Before Serving: Before serving, remove the sorbet from the freezer and let it sit at room temperature for 5-10 minutes to soften slightly. This will make it easier to scoop and will also enhance the flavors.
- Scoop and Serve: Use an ice cream scoop to portion the sorbet into bowls or cones. Garnish with fresh strawberries, mint leaves, or a drizzle of balsamic glaze, if desired.
- Store Properly: Store any leftover sorbet in an airtight container in the freezer. For best results, consume within 1-2 weeks. Over time, the sorbet may develop ice crystals, which can affect the texture. To minimize ice crystal formation, ensure the container is tightly sealed and avoid temperature fluctuations in your freezer.
Tips and Variations:
- Use High-Quality Strawberries: The quality of your strawberries will directly impact the flavor of your sorbet. Choose ripe, fragrant strawberries for the best results.
- Adjust Sweetness to Taste: The amount of sugar can be adjusted to suit your personal preferences. If your strawberries are particularly sweet, you may need to reduce the amount of sugar.
- Add Other Fruits: Feel free to experiment with adding other fruits to your sorbet, such as raspberries, blueberries, or peaches.
- Infuse with Herbs: For a more complex flavor, try infusing the strawberry mixture with fresh herbs, such as basil or mint. Simply add a few sprigs of herbs to the mixture while it’s chilling, and remove them before churning.
- Make it Vegan: This recipe is naturally vegan, so no substitutions are needed!
- No Ice Cream Maker? If you don’t have an ice cream maker, you can still make sorbet, although the texture may not be as smooth. Pour the chilled strawberry mixture into a shallow freezer-safe dish. Freeze for 1-2 hours, or until the edges begin to freeze. Use a fork to scrape the frozen edges towards the center, breaking up any ice crystals. Repeat this process every 30 minutes for 2-3 hours, or until the sorbet is frozen but still slightly soft.
Conclusion:
And there you have it! This Strawberry Sorbet recipe is truly a must-try, and I’m not just saying that because I created it. The vibrant color, the intense strawberry flavor, and the incredibly refreshing texture all combine to create a dessert experience that’s simply unforgettable. It’s the perfect palate cleanser after a rich meal, a delightful treat on a hot summer day, or even a sophisticated dessert to impress your guests.
What makes this sorbet so special? It’s the simplicity. With just a handful of ingredients and minimal effort, you can create something truly extraordinary. Forget store-bought sorbets loaded with artificial flavors and preservatives. This homemade version is bursting with the pure, unadulterated taste of fresh strawberries. It’s a celebration of summer in every spoonful!
But the best part? It’s incredibly versatile! While I adore it just as it is, there are so many ways to customize this Strawberry Sorbet to your liking.
Serving Suggestions and Variations:
* Classic Serving: Serve it in chilled glasses or bowls, garnished with a fresh strawberry and a sprig of mint.
* Sorbet Floats: Add a scoop to a glass of sparkling wine or prosecco for a sophisticated and bubbly treat.
* Sorbet Parfaits: Layer it with granola, yogurt, and fresh berries for a healthy and delicious breakfast or snack.
* Chocolate Pairing: Serve it alongside a rich chocolate cake or brownie for a delightful contrast of flavors. The tartness of the sorbet cuts through the richness of the chocolate perfectly.
* Infused Flavors: Experiment with adding other fruits or herbs to the sorbet. A few raspberries or a handful of basil leaves can add a unique and exciting twist.
* Boozy Sorbet: For an adult-only treat, add a splash of vodka or rum to the mixture before churning. Just be careful not to add too much, as it can affect the texture.
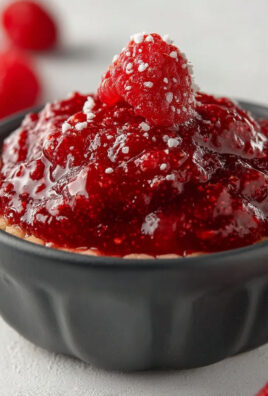
* Strawberry Sorbet Granita: If you don’t have an ice cream maker, you can still enjoy this recipe! Simply pour the mixture into a shallow dish and freeze, scraping with a fork every 30 minutes until it forms a slushy, icy texture. This creates a refreshing granita.
* Strawberry Sorbet Popsicles: Pour the sorbet mixture into popsicle molds and freeze for a fun and easy treat for kids (and adults!).
I truly believe that everyone should experience the joy of making their own homemade sorbet. It’s a rewarding and satisfying process, and the results are simply divine. Plus, it’s a great way to use up those extra strawberries you might have on hand.
So, what are you waiting for? Gather your ingredients, dust off your ice cream maker (or prepare for the granita method!), and get ready to create some magic. I’m confident that this Strawberry Sorbet will become a new favorite in your household.
I’m so excited for you to try this recipe! Once you do, please come back and share your experience in the comments below. I’d love to hear what you think, what variations you tried, and any tips or tricks you discovered along the way. Happy sorbet-making! I can’t wait to hear all about your delicious creations. Let me know if you have any questions, and I’ll do my best to help. Enjoy!
Strawberry Sorbet: The Ultimate Guide to Making It at Home
Refreshing homemade strawberry sorbet, bursting with fresh flavor. A simple, delicious frozen treat perfect for a hot day.
Ingredients
Instructions
Recipe Notes
- Use high-quality, ripe strawberries for the best flavor.
- Adjust the amount of sugar to your taste.
- Experiment with adding other fruits like raspberries, blueberries, or peaches.
- Infuse the mixture with fresh herbs like basil or mint while chilling.
- This recipe is naturally vegan.
- No Ice Cream Maker? Pour the chilled mixture into a shallow freezer-safe dish. Freeze for 1-2 hours, or until the edges begin to freeze. Use a fork to scrape the frozen edges towards the center, breaking up any ice crystals. Repeat this process every 30 minutes for 2-3 hours, or until the sorbet is frozen but still slightly soft.

Leave a Comment