

Chocolate Pumpkin Bread is not merely a seasonal delight; it’s a truly captivating symphony of flavors that perfectly encapsulates the warmth and comfort of autumn’s embrace. Imagine the earthy, comforting notes of pumpkin, subtly spiced, masterfully interwoven with the luxurious sweetness of chocolate chips. This delightful fusion creates an irresistible aroma that promises a cozy indulgence, filling your kitchen with the very essence of fall.
While classic pumpkin bread has long been a cherished staple of harvest seasons and holiday gatherings, offering a comforting taste of tradition, the thoughtful addition of chocolate transforms it into something truly extraordinary. It elevates a beloved classic, making it a modern favorite that still evokes the deep-seated, comforting traditions of the season. This unique combination brings together the wholesome appeal of a home-baked autumn treat with the undeniable allure of a decadent dessert.
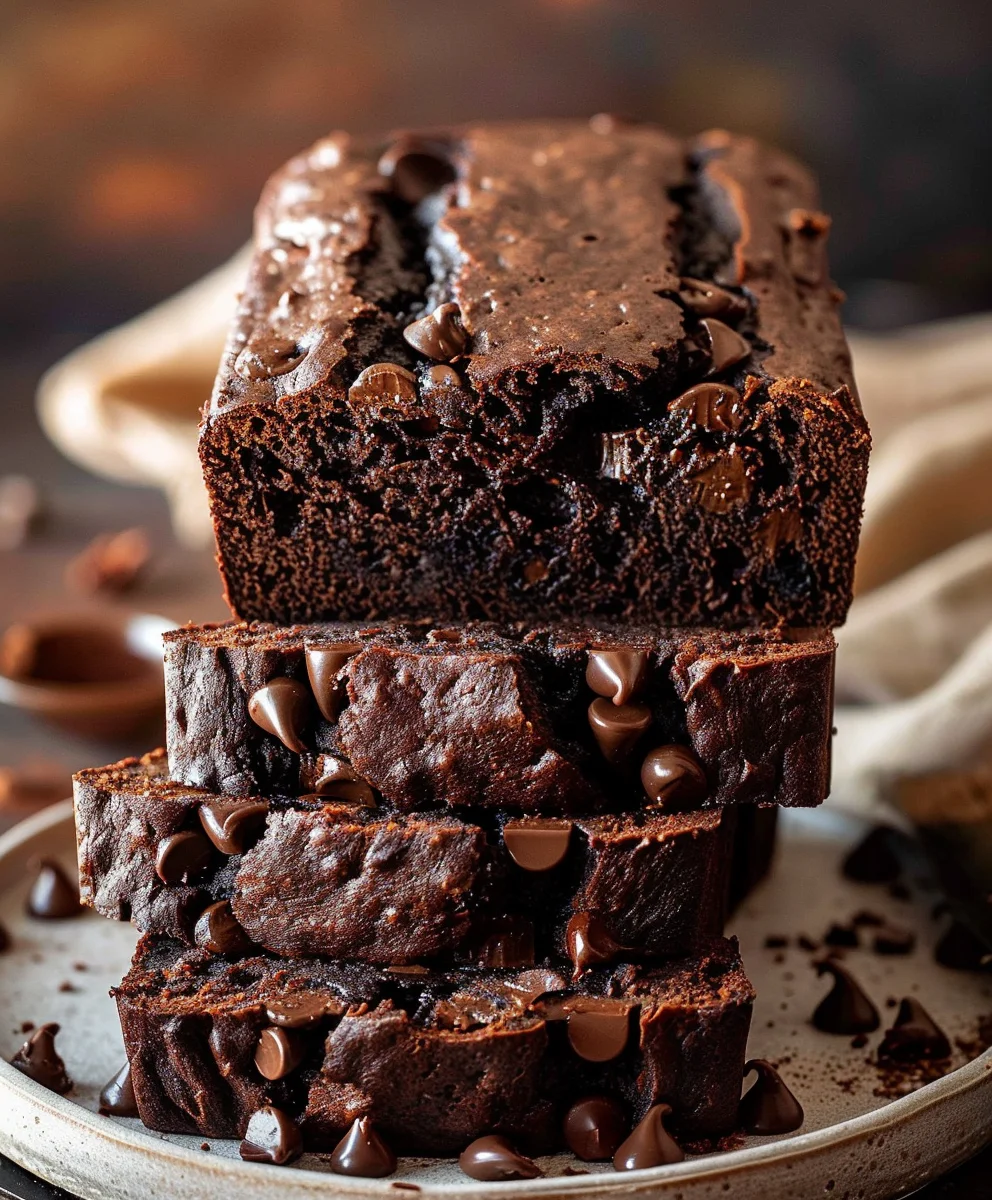
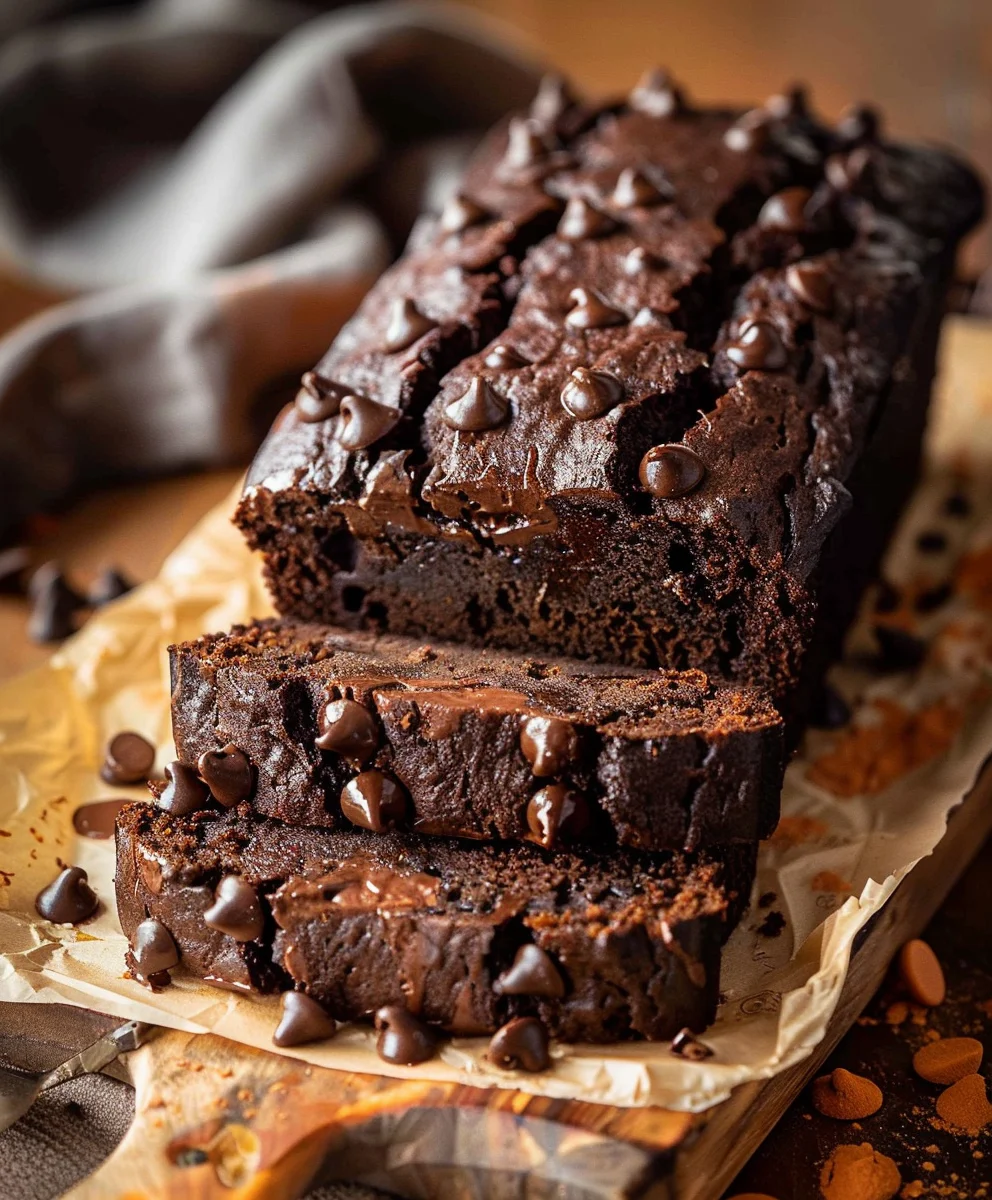
My recipe for Chocolate Pumpkin Bread is designed to be effortlessly satisfying, yielding a loaf that is wonderfully moist, incredibly tender, and generously studded with those delightful pockets of melted chocolate. It’s an ideal companion for a crisp morning coffee, a comforting afternoon tea, or as a thoughtful homemade gift. We are confident that once you experience this rich and tender blend, it will swiftly become a treasured and frequently requested addition to your autumnal baking repertoire.

Ingredients:
-
For the Wet Ingredients:
- 1 ½ cups (300g) Granulated Sugar: This provides the primary sweetness and helps with the texture of our delightful chocolate pumpkin bread.
- ½ cup (120ml) Vegetable Oil or Canola Oil: For a moist crumb and rich texture that truly makes this quick bread shine.
- 2 Large Eggs: Essential for structure and binding our ingredients together, ensuring a beautifully risen loaf.
- 1 teaspoon Pure Vanilla Extract: A touch of warmth and aromatic depth that complements both the pumpkin and chocolate flavors.
- 1 (15-ounce / 425g) Can Pumpkin Puree: Make sure it’s 100% pure pumpkin, not pumpkin pie filling. This is the heart of our chocolate pumpkin bread, providing moisture and that unmistakable fall flavor.
-
For the Dry Ingredients:
- 1 ¾ cups (210g) All-Purpose Flour: Spooned and leveled, for the perfect balance of structure and tenderness in your loaf.
- 2 teaspoons Baking Soda: Our leavening agent, crucial for achieving a beautiful rise and light texture.
- 1 teaspoon Ground Cinnamon: Essential for that cozy, autumnal spice profile.
- ½ teaspoon Ground Nutmeg: Adds a warm, slightly sweet, and aromatic complexity.
- ¼ teaspoon Ground Cloves: A hint of pungent sweetness to deepen the spice blend.
- ½ teaspoon Salt: Balances the sweetness and enhances all the wonderful flavors in our chocolate pumpkin bread.
-
For the Chocolatey Goodness:
- 1 cup (170g) Semi-Sweet Chocolate Chips: These melt into pockets of pure joy throughout the bread. Feel free to use dark chocolate chips if you prefer a less sweet contrast.
- ½ cup (85g) Mini Chocolate Chips (optional, for extra chocolate distribution): If you’re a serious chocolate lover, these ensure every slice has a generous speckling of chocolate.
Prepare Your Workspace & Preheat Oven
- Preheat your oven to 350°F (175°C). This is a crucial first step for any baking project, especially for a quick bread like our chocolate pumpkin bread. A properly preheated oven ensures that the leavening agents start working immediately, giving your bread a good rise and preventing a dense, sunken center. Don’t rush this part; let your oven come to temperature fully before you even think about putting the batter in.
- Prepare your loaf pan. I typically use a standard 9×5-inch (23×13 cm) loaf pan. Generously grease it with butter or non-stick baking spray. For an extra layer of non-stick insurance and easy removal, I love to line the bottom and two long sides of the pan with parchment paper, leaving an overhang on the sides. This creates “slings” that allow you to lift the baked chocolate pumpkin bread right out of the pan with ease. A well-prepared pan ensures your beautiful creation doesn’t stick and comes out perfectly intact.
- Gather and measure all your ingredients. This practice, known as “mise en place,” is a baker’s best friend. Having everything measured and ready to go before you start mixing not only saves time but also prevents you from forgetting an ingredient or making a mistake in the heat of the moment. It makes the entire process of creating your chocolate pumpkin bread much more enjoyable and less stressful.
Mixing the Wet Ingredients
- In a large mixing bowl, combine the granulated sugar and vegetable oil. Use a whisk or a sturdy spoon to mix these two ingredients together until they are well combined. You’re looking for a smooth, slightly thick consistency. This step is important because the oil disperses the sugar effectively, laying a foundation for a perfectly moist chocolate pumpkin bread. The oil contributes significantly to the tender crumb, keeping the bread moist for days.
- Add the eggs, one at a time, mixing well after each addition. Beat the first egg into the sugar and oil mixture until it’s fully incorporated and the mixture looks uniform. Then, add the second egg and repeat the process. This gradual addition ensures that the eggs emulsify properly with the other wet ingredients, contributing to the structure and richness of the batter. It also helps to prevent overmixing later on.
-
Stir in the pure vanilla extract and pumpkin puree. Add the rich, aromatic vanilla extract and the star of our show, the 15-ounce can of pumpkin puree, to the bowl. Mix everything thoroughly until the mixture is completely smooth and evenly orange in color. This is where the magic really starts to happen, as the pumpkin imparts its characteristic flavor and an incredible amount of moisture to what will become your glorious chocolate pumpkin bread. Make sure there are no streaks of unmixed pumpkin, as this ensures a consistent texture throughout the final loaf.
Expert Tip: Always use 100% pure pumpkin puree, not pumpkin pie filling, which contains added sugars and spices that would throw off the balance of this specific recipe.
Combining Dry Ingredients
-
In a separate medium-sized bowl, whisk together the all-purpose flour, baking soda, ground cinnamon, ground nutmeg, ground cloves, and salt. It’s crucial to whisk these dry ingredients thoroughly for about 30 seconds to a minute. This process isn’t just about combining them; it’s about aerating the flour and evenly distributing the leavening agent (baking soda) and all the wonderful spices throughout. An even distribution ensures that every bite of your chocolate pumpkin bread is perfectly spiced and that the bread rises uniformly, without any pockets of unmixed baking soda or overly spiced sections. Don’t skip this step – it’s a small effort that makes a big difference in the final quality of your loaf.
Why whisking dry ingredients separately matters: This step prevents lumps in the final batter and ensures that the baking soda is evenly distributed, leading to a consistent rise and tender texture in your chocolate pumpkin bread.
Bringing It All Together: The Chocolate Pumpkin Bread Batter
- Gently add the dry ingredients to the wet ingredients. Pour the bowl of whisked dry ingredients into the large bowl containing the pumpkin mixture. Now, with a spatula or a large spoon, begin to fold the dry into the wet.
- Mix until just combined. This is perhaps the most critical step in making any quick bread, and our chocolate pumpkin bread is no exception. Mix the batter only until you no longer see streaks of dry flour. It’s perfectly fine, and even desirable, to have a few small lumps. Overmixing develops the gluten in the flour, which can lead to a tough, dense, and chewy loaf, rather than the moist, tender crumb we’re aiming for. Stop mixing as soon as the flour is incorporated. Remember, gentleness is key for a truly tender chocolate pumpkin bread.
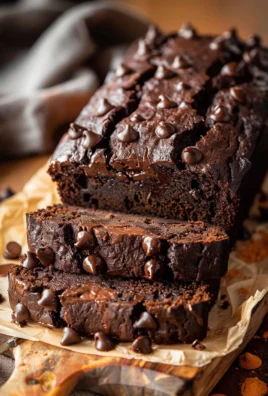
- Fold in the chocolate chips. Add your cup of semi-sweet chocolate chips (and the optional mini chocolate chips if you’re using them) to the batter. Gently fold them in with your spatula until they are evenly distributed throughout the batter. Again, be careful not to overmix here. You want those lovely pockets of melted chocolate to be dispersed without developing too much gluten. These chocolate chips are what transform a simple pumpkin bread into a decadent chocolate pumpkin bread, offering delightful bursts of sweetness and richness in every bite.
- Transfer the batter to the prepared loaf pan. Carefully spoon the thick, aromatic batter into your greased and possibly parchment-lined loaf pan. Use your spatula to spread it evenly into the pan, ensuring the top is relatively flat. You can gently tap the pan on your counter a couple of times to release any large air bubbles. This readiness means your beautiful chocolate pumpkin bread is almost ready for its journey into the oven.
Baking Your Chocolate Pumpkin Bread
- Place the loaf pan in the preheated oven. Carefully transfer the pan to the center rack of your oven. Placing it in the center ensures even heat circulation around the pan, which is vital for a consistent bake.
- Bake for 55-65 minutes. Baking times can vary slightly depending on your oven, so this is a general guideline. Around the 55-minute mark, your kitchen should be filled with the most incredible aroma of pumpkin and chocolate – a tell-tale sign that your chocolate pumpkin bread is nearing perfection.
-
Check for doneness. To determine if your chocolate pumpkin bread is fully baked, insert a wooden skewer or a toothpick into the very center of the loaf. If it comes out clean or with only a few moist crumbs attached (no wet batter), then your bread is ready. If it comes out with wet batter, continue baking in 5-minute increments, checking each time, until it passes the test. Don’t underbake! An underbaked quick bread can be gummy, while properly baked, it will be perfectly moist and tender.
Important Note: If the top of your chocolate pumpkin bread starts to brown too quickly before the center is cooked through, you can loosely tent it with a piece of aluminum foil for the remaining baking time. This prevents the top from burning while allowing the inside to finish cooking.
Cooling and Serving
- Cool the chocolate pumpkin bread in the pan for 10-15 minutes. Once your beautiful loaf emerges from the oven, resist the urge to immediately remove it. Allowing it to cool in the pan for this initial period helps the bread to set and firm up, making it less likely to crumble when you remove it. This crucial resting period also allows the internal temperature to equalize, further contributing to a moist texture.
- Remove from the pan and cool completely on a wire rack. After the initial cooling period, carefully run a knife around the edges of the pan (if you didn’t use parchment paper slings). Then, using the parchment paper overhangs or by gently inverting the pan, lift the chocolate pumpkin bread out and transfer it to a wire cooling rack. It is absolutely essential to let the bread cool completely on the rack. While it might be tempting to slice into that warm, aromatic loaf right away, cutting into hot quick bread can result in a gummy texture. Cooling completely allows the internal structure to stabilize and the moisture to redistribute evenly, ensuring you get that perfect, tender, and moist slice of chocolate pumpkin bread every time. This usually takes at least 1-2 hours, sometimes longer. Patience is a virtue here!
- Slice and enjoy! Once your chocolate pumpkin bread is fully cooled, slice it with a serrated knife into thick, generous pieces. Serve it plain, or if you’re feeling extra indulgent, a light dusting of powdered sugar or a dollop of whipped cream can elevate the experience. This bread is perfect for breakfast, a coffee break, or an afternoon treat. Its rich, comforting flavors make it a favorite for any occasion.
Storage and Reheating Tips for Your Chocolate Pumpkin Bread
- Storing for freshness. To keep your chocolate pumpkin bread wonderfully moist and fresh, store it at room temperature in an airtight container. If you have a bread box, that’s an excellent option too. It will stay fresh and delicious for 3-4 days. For longer storage, you can refrigerate it for up to a week.
- Freezing for later enjoyment. This chocolate pumpkin bread freezes beautifully! Once completely cooled, wrap the entire loaf or individual slices tightly in plastic wrap, then an additional layer of aluminum foil. Label it with the date. It will keep well in the freezer for up to 3 months.
- Reheating suggestions. To enjoy a slice of frozen chocolate pumpkin bread, you can either let it thaw at room temperature or gently warm it in a microwave for 15-30 seconds. If you’re reheating a whole loaf, thaw it overnight in the refrigerator, then warm it in a 300°F (150°C) oven for about 10-15 minutes until heated through. The warmth will bring out those incredible chocolate and pumpkin aromas once again, making it taste freshly baked.
Conclusion:
Well, friends, we’ve reached the delicious culmination of our culinary journey, and I genuinely hope you’re feeling as excited as I am about this incredible recipe. If there’s one thing I want you to take away from this, it’s that this isn’t just another quick bread; it’s an experience. We’ve meticulously crafted a recipe that delivers unparalleled moistness, a truly decadent crumb, and a flavor profile that perfectly balances the earthy, comforting notes of pumpkin with the rich, indulgent sweetness of chocolate. Imagine a bite that’s soft, tender, and infused with just the right amount of warm spice – cinnamon, nutmeg, and a whisper of ginger – all mingling beautifully with generous pockets of melted chocolate. It’s the kind of treat that doesn’t just satisfy a craving; it creates a moment of pure bliss. This recipe is a must-try because it consistently delivers a show-stopping loaf that tastes like it came from a gourmet bakery, yet it’s surprisingly simple to achieve in your own kitchen. It truly is the perfect harmony of autumn’s best flavors, elevated by the timeless appeal of chocolate. It’s comforting, it’s elegant, and it’s utterly irresistible.
Now that you’ve baked this masterpiece, let’s talk about how to truly savor it. While a warm slice of this bread, fresh from the oven, is absolutely divine on its own, I have a few suggestions to elevate your experience even further. For a simple breakfast or afternoon treat, try it alongside a steaming mug of coffee, a robust cup of Earl Grey tea, or even a tall glass of cold milk. The flavors truly sing when paired with a hot beverage. If you’re feeling a little more indulgent, a thin smear of cream cheese frosting (a simple mix of softened cream cheese, powdered sugar, and a touch of vanilla) takes it to a whole new level of dessert-worthy goodness. Alternatively, a dollop of freshly whipped cream or a scoop of vanilla bean ice cream makes for an incredible after-dinner treat. And speaking of versatility, feel free to make this recipe your own with some delightful variations! For an added crunch and nutty flavor, stir in a half cup of chopped walnuts or pecans with your chocolate chips. If you adore a more pronounced spice profile, don’t hesitate to add an extra pinch of cinnamon, a touch more ginger, or even a dash of allspice to the dry ingredients. You could also experiment with different types of chocolate chips – milk chocolate for a sweeter profile, dark chocolate for a more intense cocoa hit, or even white chocolate chips for a creamy contrast. Some readers have even told me they like to add a handful of dried cranberries for a tart counterpoint to the sweetness. You can also turn this batter into muffins! Simply adjust the baking time to about 20-25 minutes, or until a toothpick inserted into the center comes out clean. The possibilities are truly endless, and each variation simply enhances the magic of the core recipe.
So, my friends, what are you waiting for? I wholeheartedly encourage you to roll up your sleeves, preheat your ovens, and dive into making this wonderful recipe. Trust me, the aroma that will fill your kitchen as it bakes is worth the effort alone! There’s something incredibly satisfying about creating something so delicious from scratch, and I promise you’ll be incredibly proud of the beautiful, moist, and utterly delightful loaf you pull from your oven. This isn’t just a recipe; it’s an invitation to create warmth, comfort, and delicious memories. I truly believe this Chocolate Pumpkin Bread will become a new fall (or anytime!) favorite in your home. Once you’ve had a chance to bake it, please, please come back and share your experience with me! I absolutely love hearing from you. Did you try a fun variation? What did your family think? Did you serve it with coffee or ice cream? Your feedback, your photos, and your unique twists inspire me and our entire baking community. Don’t be shy – leave a comment below and let us know all about your baking adventure. Happy baking, everyone! I can’t wait to hear how much you love it.
Chocolate Pumpkin Bread
A moist and tender quick bread, combining the comforting flavors of pumpkin and warm spices with rich chocolate chips, perfect for a cozy fall treat. This recipe yields a beautifully risen loaf that is wonderfully satisfying.
Ingredients
-
¼ cup melted Butter
-
1 tsp Vanilla extract
-
1 Egg
-
⅓ cup Granulated sugar
-
½ cup Brown sugar
-
½ tsp Kosher salt
-
½ cup Greek yogurt
-
½ cup Cocoa powder
-
1 ½ cups Pumpkin puree
-
1 cup Flour
-
1 tsp Baking soda
-
1 cup Chocolate chips
Instructions
-
Step 1
Preheat oven to 350°F (175°C). Generously grease a 9×5-inch (23×13 cm) loaf pan, optionally lining with parchment paper for easy removal. -
Step 2
In a large bowl, whisk together the melted butter, granulated sugar, brown sugar, egg, vanilla extract, Greek yogurt, and pumpkin puree until smooth and well combined. -
Step 3
In a separate medium bowl, whisk together the flour, baking soda, cocoa powder, and kosher salt until thoroughly combined. -
Step 4
Gradually add the dry ingredients to the wet ingredients, mixing with a spatula until just combined. Do not overmix; a few lumps are fine. Gently fold in the chocolate chips until evenly distributed throughout the batter. -
Step 5
Pour the batter into the prepared loaf pan and spread evenly. Bake for 55-65 minutes, or until a wooden skewer inserted into the center comes out clean or with moist crumbs. If the top browns too quickly, loosely tent with aluminum foil for the remaining bake time. -
Step 6
Let the chocolate pumpkin bread cool in the pan for 10-15 minutes. Then, remove it from the pan and transfer to a wire rack to cool completely (at least 1-2 hours) before slicing. Serving while warm may result in a gummy texture. -
Step 7
Store leftover bread at room temperature in an airtight container for 3-4 days, or refrigerate for up to a week. For longer storage, wrap the cooled loaf or slices tightly in plastic wrap and then foil, and freeze for up to 3 months. Thaw at room temperature or gently warm in the microwave.
Important Information
Nutrition Facts (Per Serving)
It is important to consider this information as approximate and not to use it as definitive health advice.
Allergy Information
Please check ingredients for potential allergens and consult a health professional if in doubt.
Leave a Comment