

Homemade Apple Pie Filling is more than just an ingredient; it’s the very heart of a comforting classic, a symbol of warmth and nostalgia that truly elevates any pie or dessert. I am absolutely delighted to share with you my definitive recipe for achieving that perfect balance of tender, spiced apples, ensuring every bite is a delightful journey. There’s something uniquely satisfying about the aroma of cinnamon and apples simmering gently on the stove, instantly transporting you back to cherished memories of home and family gatherings. As an iconic dessert, apple pie holds a special place in many cultures, particularly in America, where it’s often synonymous with wholesome, homemade goodness and traditional celebrations.
People adore this dish not merely for its incredible taste—the delightful interplay of sweet and tart, perfectly softened apples, and aromatic spices—but also for its inviting texture and the sheer comfort it provides. Mastering your own Homemade Apple Pie Filling grants you complete control over the quality of ingredients, allowing you to choose the freshest apples and fine-tune the precise blend of spices that perfectly suits your palate. It’s an incredibly smart and easy way to prepare ahead, making pie-baking a breeze and guaranteeing a consistently delicious result every single time. Get ready to fill your kitchen with the most enticing aromas and create magic!

Ingredients:
Creating a truly magnificent Homemade Apple Pie Filling starts with selecting the finest ingredients. Each component plays a vital role in achieving that perfect balance of sweetness, spice, and tender apple texture that we all adore.
- 6-8 medium-sized baking apples (about 3 pounds total): I always lean towards a mix of varieties for the best flavor and texture contrast. Think Granny Smith for tartness and firmness, Honeycrisp for sweetness and a slight crunch, or Braeburn/Fuji for a good balance. Avoid apples that turn to mush too easily, as we want distinct pieces in our filling. This blend will give your Homemade Apple Pie Filling a complex and delightful character.
- ¾ cup granulated sugar: This provides a clean sweetness that allows the apple flavor to shine. Adjust this amount based on the natural sweetness of your chosen apples and your personal preference.
- ¼ cup packed light brown sugar: Brown sugar adds a deeper, molasses-rich sweetness and a subtle caramel note that complements the apples beautifully, contributing to the comforting aroma of your Homemade Apple Pie Filling.
- ¼ cup cornstarch (or all-purpose flour for a cloudier, slightly less smooth consistency): This is our thickening agent. Cornstarch creates a glossy, clear sauce, ensuring your Homemade Apple Pie Filling isn’t watery but wonderfully luscious. If you opt for flour, you might need a tiny bit more to achieve the same thickness.
- 1 teaspoon ground cinnamon: A classic and indispensable spice for apple pie. It brings warmth and depth, making the entire kitchen smell incredible as you prepare your Homemade Apple Pie Filling.
- ½ teaspoon ground nutmeg: Nutmeg adds another layer of aromatic spice, a hint of earthiness that perfectly rounds out the cinnamon and apple. Freshly grated nutmeg is always superior if you have it!
- ¼ teaspoon ground allspice (optional, or a tiny pinch of ground cloves): For an extra layer of complexity, allspice provides notes of cinnamon, nutmeg, and clove, while cloves offer a stronger, more pungent warmth. Use sparingly as they can be potent.
- Pinch of salt: Don’t skip this! A tiny bit of salt enhances all the other flavors, making the sweetness brighter and the spices more pronounced in your Homemade Apple Pie Filling.
- 2 tablespoons fresh lemon juice: This brightens the flavor of the apples and, crucially, helps prevent them from browning during preparation. It adds a lovely tang that cuts through the sweetness, balancing the overall taste of your Homemade Apple Pie Filling.
- ¼ cup water (or apple cider/juice for richer flavor): This liquid helps dissolve the sugars and cornstarch, creating the syrupy base for your filling. Apple cider or juice will infuse even more apple essence.
- 2 tablespoons unsalted butter: Added at the end, butter enriches the filling, giving it a beautiful sheen and a luxurious, smooth mouthfeel. It truly elevates the experience of your Homemade Apple Pie Filling.
- 1 teaspoon pure vanilla extract: Another finishing touch that adds warmth, depth, and a delightful aromatic quality, complementing the apple and spice symphony.
Preparing Your Apples for the Perfect Homemade Apple Pie Filling
The foundation of any outstanding apple pie is, naturally, the apples themselves. Taking the time to prepare them correctly ensures a consistent texture and allows them to cook evenly, resulting in a truly superior Homemade Apple Pie Filling.
- Select and Wash Your Apples: Begin by carefully selecting your apples. Look for firm, blemish-free fruit. As mentioned in the ingredients, a mix of varieties is ideal for a complex flavor profile and varied texture. Once you have your chosen apples, wash them thoroughly under cool running water. Even if you plan to peel them, washing removes any residues from the skin.
- Peel the Apples: This is a crucial step for a smooth Homemade Apple Pie Filling. Using a sharp vegetable peeler or a paring knife, carefully remove the skin from all the apples. I find that a good swivel peeler makes this task quick and efficient. Try to remove only the skin, leaving as much of the apple flesh intact as possible. As you peel each apple, you might notice some browning occurring, which is completely normal. Don’t worry, the lemon juice we’ll be adding soon will take care of that.
- Core the Apples: After peeling, the next step is to core your apples. You can use an apple corer, which is incredibly efficient for removing the central seed capsule with a single push. Alternatively, if you don’t have a corer, you can quarter the apples first and then use a small paring knife to carefully cut out the core from each quarter. Be sure to remove all seeds and any tough fibrous material around the core.
- Slice the Apples with Precision: This is arguably the most important step for texture in your Homemade Apple Pie Filling. Slice the peeled and cored apples into uniform pieces. I aim for slices about ¼ to ⅓ inch thick. Uniformity is key here; if your slices are all different sizes, some will cook down to mush while others remain too firm. You can slice them into half-moons if you quartered them first, or into rings and then half-rings if you cored them whole. A mandoline slicer can achieve perfect uniformity, but a steady hand and a sharp chef’s knife work just as well. Place the sliced apples into a large mixing bowl as you work.
- Add Lemon Juice Promptly: As soon as you have a good handful of apple slices in your bowl, drizzle them with some of the fresh lemon juice. This isn’t just for flavor; the acidity in the lemon juice acts as an antioxidant, preventing the apples from turning an unappetizing brown. Toss the apples gently to ensure the lemon juice coats all the surfaces. Continue peeling, coring, slicing, and adding lemon juice until all your apples are prepared. Give them a final thorough toss to ensure even coating. This initial care with your apples sets the stage for a bright, vibrant, and appealing Homemade Apple Pie Filling.
Crafting the Flavor Base: Mixing Dry Ingredients for Your Homemade Apple Pie Filling
While the apples are the star, the dry ingredients form the aromatic and thickening backbone of your Homemade Apple Pie Filling. Mixing them correctly beforehand ensures they are evenly distributed and prevents lumps in the final product. This simple step is vital for a smooth, perfectly spiced filling.
- Combine Sugars: In a separate medium-sized bowl, measure out your granulated sugar and light brown sugar. I love the combination of these two because the granulated sugar offers a clean, straightforward sweetness that lets the natural apple flavor shine, while the brown sugar introduces those deeper, almost caramel-like notes that truly complement the fruit. Using both adds complexity to the sweetness of your Homemade Apple Pie Filling.
- Add the Thickener: To the bowl with the sugars, add the cornstarch. If you’re using all-purpose flour instead, add it now. The cornstarch (or flour) is what will thicken the juices released by the apples during cooking, creating that signature luscious, spoonable consistency. It’s important to mix it with the sugars now because coating the cornstarch granules with sugar prevents them from clumping together when they hit the liquid, ensuring a smooth and clear thickened sauce.
- Introduce the Spices: Now it’s time for the aromatic elements! Measure in your ground cinnamon, ground nutmeg, and the optional ground allspice or clove. These spices are the heart of the pie’s comforting aroma and flavor. Cinnamon and nutmeg are classic pairings with apple, while allspice or clove can add a deeper, more complex warmth. Feel free to adjust the quantities to your personal taste; some people love a spicier pie, while others prefer a lighter touch.
- Don’t Forget the Salt: Add the tiny pinch of salt to the dry mixture. This small addition is a flavor enhancer, much like in savory cooking. It helps to brighten the sweetness and make all the other flavors pop, preventing your Homemade Apple Pie Filling from tasting flat.
- Whisk Thoroughly: Using a whisk, vigorously combine all the dry ingredients in the bowl. Whisk for at least 30 seconds to a minute, ensuring that there are no visible clumps of brown sugar or cornstarch and that the spices are evenly distributed throughout the mixture. You want a uniform, fragrant powder. This diligent mixing guarantees that every bite of your Homemade Apple Pie Filling will be perfectly seasoned and wonderfully textured. Once combined, set this bowl aside, ready to be introduced to your prepared apples.
The Cooking Process: Bringing Your Homemade Apple Pie Filling to Life
This is where the magic truly happens! Cooking the Homemade Apple Pie Filling on the stovetop before baking is a technique I swear by. It ensures the apples are perfectly tender, the sauce is wonderfully thick, and the flavors are fully developed. This pre-cooking step also prevents a watery, sunken pie, giving you a beautiful, stable filling every time.
- Combine Apples and Dry Mixture: Take your large bowl of lemon-coated apple slices. Sprinkle the entire whisked dry ingredient mixture evenly over the apples. Using a large spatula or your clean hands, gently toss the apples until every slice is coated with the sugar and spice mixture. Be thorough but gentle to avoid breaking the delicate apple slices. You’ll notice the apples starting to release some of their juices almost immediately as they react with the sugar. This is exactly what we want to happen for a moist Homemade Apple Pie Filling.
- Add Liquid and Transfer to Pot: Pour the ¼ cup of water (or apple cider/juice) over the coated apples. Give them another quick, gentle toss. Then, carefully transfer the entire contents of the bowl—apples, sugars, spices, and liquid—into a large, heavy-bottomed pot or Dutch oven. A heavy-bottomed pot is crucial here as it distributes heat more evenly and prevents scorching.
- Begin Cooking on Medium Heat: Place the pot over medium heat. Stir frequently and gently to prevent the apples from sticking to the bottom of the pot and to ensure even cooking. As the mixture heats up, the sugars will dissolve, and the apples will begin to soften and release more of their natural juices.
- Simmer Until Thickened: Continue cooking for about 8-12 minutes, or until the apples have softened slightly but are still holding their shape (they should be tender-crisp, not mushy) and the sauce has thickened to a syrupy consistency. You’ll know it’s thickening when your spatula leaves a clear trail on the bottom of the pot for a moment when stirred. The cornstarch needs to come to a boil for about a minute to fully activate its thickening power. The exact cooking time will vary depending on the variety of apples you’ve chosen and their initial firmness. Taste the apples at this point; they should be tender but still have a bit of bite. This is crucial for a great Homemade Apple Pie Filling as they will cook a little more in the oven.
- Stir in Butter and Vanilla: Once the filling has reached the desired consistency and the apples are tender-crisp, remove the pot from the heat. Add the 2 tablespoons of unsalted butter and the 1 teaspoon of pure vanilla extract. Stir gently until the butter has completely melted and is thoroughly incorporated into the filling. The butter will add a wonderful richness and a lovely sheen to your Homemade Apple Pie Filling, while the vanilla extract provides a warm, aromatic finish that ties all the flavors together beautifully.
- Adjust Seasoning (Optional): Now is the perfect time for a final taste test. Carefully scoop a small amount of the filling onto a spoon and let it cool for a moment before tasting. If you feel it needs more sweetness, you can stir in a tablespoon or two of granulated sugar. If you prefer more spice, a tiny pinch more cinnamon or nutmeg can be added. Remember, this is your Homemade Apple Pie Filling, so make it perfect for you!
Cooling and Storing Your Delicious Homemade Apple Pie Filling
Once your Homemade Apple Pie Filling is cooked to perfection, proper cooling and storage are essential. Not only does this ensure food safety, but it also allows the flavors to meld beautifully and the filling to set up to the ideal consistency. This section will guide you through getting your filling ready for its final destination, whether that’s a pie crust or another creative use.
- Cool Completely: Transfer the hot apple pie filling from the pot to a large, clean, shallow baking dish or a heat-proof bowl. Spreading it out in a shallow dish helps it cool down more quickly and evenly, which is important for food safety. Allow the filling to cool at room temperature for at least 1-2 hours, stirring occasionally to release steam and ensure even cooling. It is absolutely vital that the filling is completely cool before you use it in a pie crust or store it. Warm filling will make your pie crust soggy and could affect the texture of the baked pie. Patience here will be rewarded with a flaky crust and a perfectly set Homemade Apple Pie Filling.
- Refrigeration for Short-Term Storage: Once the filling has reached room temperature, you can transfer it to an airtight container. It will keep beautifully in the refrigerator for up to 5-7 days. The flavors will continue to deepen and develop during this time, making it potentially even more delicious on the second or third day. This is a fantastic option if you like to do some meal prep or want to have the filling ready for a spontaneous pie-making session later in the week. Having a batch of Homemade Apple Pie Filling on hand is a true culinary luxury.
- Freezing for Long-Term Storage: For longer storage, this Homemade Apple Pie Filling freezes wonderfully! Once completely cooled, spoon the filling into freezer-safe airtight containers or heavy-duty freezer bags. If using bags, lay them flat on a baking sheet until frozen solid for easier stacking and space saving. Thaw the filling overnight in the refrigerator before using. It can be frozen for up to 3-4 months without significant loss of quality or flavor. This is an excellent way to prepare for the holidays or to enjoy the taste of fresh apple pie well after apple season has passed. Imagine pulling out a batch of your delicious Homemade Apple Pie Filling on a chilly winter’s evening!
- Using Your Versatile Filling: While designed for pie, this luscious Homemade Apple Pie Filling is incredibly versatile. Beyond traditional double-crust or lattice-top pies, you can use it in a variety of other delightful ways:
- Apple Crumble or Crisp: Simply spoon it into an oven-safe dish, top with your favorite crumble or streusel topping, and bake until golden and bubbly.
- Turnovers or Hand Pies: Fill pre-made puff pastry or pie dough squares, fold, seal, and bake for individual treats.
- Topping for Breakfast: Serve warm over pancakes, waffles, oatmeal, or French toast for a decadent breakfast or brunch.
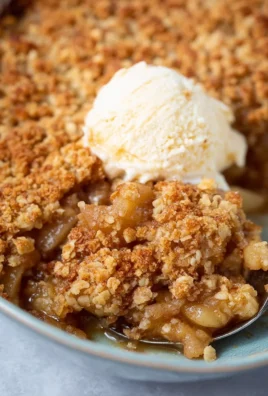
- Ice Cream Topping: A spoonful of warm Homemade Apple Pie Filling over a scoop of vanilla bean ice cream is a simple yet sublime dessert.
- Yogurt Parfaits: Layer with Greek yogurt and granola for a wholesome and flavorful snack.
- Cheesecake Swirl: Gently swirl cooled filling into a cheesecake batter before baking for a truly unique dessert.
- Reheating Instructions: If you plan to use your cooled or thawed filling warm, you can gently reheat it on the stovetop over low heat, stirring occasionally, or warm it briefly in the microwave. Be careful not to overheat, as this can make the apples too soft.
By following these cooling and storage guidelines, you ensure that your efforts in creating this wonderful Homemade Apple Pie Filling are preserved, allowing you to enjoy its delightful flavors whenever the craving strikes!

Conclusion:
And there you have it, my friends! We’ve reached the delicious culmination of our culinary journey. I genuinely hope you’re as excited as I am about the incredible potential this recipe holds. This isn’t just another apple filling; it’s a game-changer, a staple you’ll find yourself returning to time and time again. What makes this recipe an absolute must-try, you ask? Well, it’s simple: the unparalleled freshness, the vibrant, authentic apple flavor that shines through, and the sheer joy of creating something so utterly delightful from scratch. Forget those overly sweet, often bland, and additive-laden canned versions from the grocery store. Once you experience the difference of truly Homemade Apple Pie Filling, there’s simply no going back. You have complete control over the sweetness, the spice level, and even the texture of the apples, allowing you to tailor it perfectly to your family’s preferences. It’s comforting, it’s versatile, and it fills your kitchen with the most enchanting aromas as it simmers gently on the stove. This recipe offers a warmth and a homemade touch that permeates every dish it graces, turning a simple dessert into a memorable experience.
But the magic doesn’t stop at pie! Oh no, dear reader, the possibilities for this glorious concoction are practically endless, limited only by your imagination. Of course, the classic apple pie is a timeless masterpiece, and using this filling will elevate your pie to legendary status, earning you accolades from everyone who takes a bite. Imagine that flaky, golden crust cradling a generous helping of perfectly spiced, tender apples – pure bliss! However, I encourage you to venture beyond the traditional. This filling is absolutely divine spooned over vanilla bean ice cream for an impromptu, yet incredibly decadent, dessert. Try layering it into a yogurt parfait with granola for a wholesome and satisfying breakfast or brunch option. It also makes an exceptional topping for pancakes, waffles, or French toast, transforming your morning meal into something truly special. For a quick and easy dessert, simply warm a portion and serve it with a dollop of whipped cream or a scoop of custard. You could even use it to fill turnovers, strudels, or little hand pies for portable treats. Feeling a bit more adventurous? Consider incorporating it into a cheesecake swirl or as a luscious layer in a trifle. For those who love a bit of texture, don’t hesitate to stir in a handful of toasted pecans or walnuts right before serving. A dash of nutmeg or a whisper of ginger can also add another layer of aromatic complexity if you’re looking to vary the spice profile. And for a truly unique twist, perhaps a splash of bourbon or rum at the end of cooking for an adult-only indulgence! The key is to experiment and discover your own favorite ways to enjoy this incredible filling.
So, now it’s your turn! I’ve laid out all the steps, shared my secrets, and painted a picture of the deliciousness that awaits you. All that’s left is for you to roll up your sleeves, gather your ingredients, and embark on this wonderful culinary adventure. I promise you, the effort is minimal compared to the immense satisfaction and flavor payoff you’ll receive. There’s a profound sense of accomplishment and warmth that comes from creating something so delicious and wholesome for your loved ones with your own hands. Don’t be shy; give this recipe a try this weekend, or even tonight! I am genuinely excited for you to experience the difference a truly exceptional Homemade Apple Pie Filling makes. Once you’ve whipped up your batch and perhaps used it in a marvelous dessert or a delightful breakfast, I would absolutely love to hear about your experience. Did you stick to the classic pie, or did you try one of the serving suggestions? Did you add your own unique twist? Please share your stories, your triumphs, and even your questions in the comments below. Your feedback and creativity inspire not only me but also our entire community of food lovers. Let’s celebrate the joy of homemade goodness together! Happy cooking, and I can’t wait to see what delicious creations you come up with.

The Best Homemade Apple Pie Filling for Your Pies!
Homemade Apple Pie Filling is the very heart of a comforting classic, a symbol of warmth and nostalgia that truly elevates any pie or dessert. This recipe ensures a perfect balance of tender, spiced apples, making every bite a delightful journey.
Ingredients
-
9 cups fresh apples, peeled, cored and chopped into uniform sizes
-
2 tablespoons lemon juice
-
3 cups white sugar
-
2 tablespoons brown sugar
-
1/2 cup cornstarch
-
1 teaspoon ground cinnamon
-
1/2 teaspoon ground nutmeg
-
1/2 teaspoon coarse sea salt
Instructions
-
Step 1
Wash, peel, core, and slice 9 cups of apples into uniform ¼-⅓ inch pieces. Immediately toss with 2 tablespoons lemon juice in a large bowl to prevent browning. -
Step 2
In a separate medium bowl, whisk together 3 cups white sugar, 2 tablespoons brown sugar, ½ cup cornstarch, 1 teaspoon ground cinnamon, ½ teaspoon ground nutmeg, and ½ teaspoon coarse sea salt until well combined. -
Step 3
Sprinkle the whisked dry mixture evenly over the lemon-coated apples. Toss gently to coat every apple slice. Transfer the entire contents (apples, sugars, spices) to a large, heavy-bottomed pot over medium heat. Cook, stirring frequently and gently, for 8-12 minutes until apples are tender-crisp and the sauce has thickened to a syrupy consistency. Taste and adjust seasoning if needed. -
Step 4
Transfer the hot apple pie filling from the pot to a large, shallow baking dish or heat-proof bowl to cool completely at room temperature (at least 1-2 hours). Once cooled, store in an airtight container in the refrigerator for up to 5-7 days, or freeze for up to 3-4 months. Reheat gently on the stovetop or in the microwave if using warm.
Important Information
Nutrition Facts (Per Serving)
It is important to consider this information as approximate and not to use it as definitive health advice.
Allergy Information
Please check ingredients for potential allergens and consult a health professional if in doubt.


Leave a Comment