

Cherry Chia Pudding is more than just a delightful breakfast or a guilt-free dessert; it’s an invitation to a world where vibrant flavors meet exceptional nutrition. Imagine waking up to a creamy, satisfying treat bursting with the natural sweetness and slight tang of ripe cherries, perfectly balanced by the subtle nutty undertones of chia seeds. This isn’t just a fantasy; it’s the delicious reality that awaits you.
The journey of chia seeds, the tiny powerhouses at the heart of this pudding, stretches back to ancient civilizations like the Aztecs and Mayans, who revered them as a vital energy source. While the specific pairing with cherries may be a modern culinary marvel, the essence of nourishing the body with simple, wholesome ingredients remains timeless. It’s this rich heritage, combined with the convenience of an overnight preparation, that makes chia pudding a beloved staple in many kitchens.
What truly makes people fall in love with our Cherry Chia Pudding is its remarkable versatility and incredible health benefits. From its appealing ruby-red hue to its irresistibly smooth and satisfying texture, every spoonful is a treat for the senses. Rich in omega-3 fatty acids, fiber, and antioxidants from the cherries, it’s the perfect way to kickstart your day or enjoy a wholesome snack without compromise. I find it to be the ultimate blend of indulgence and wellness, proving that healthy eating can, and should, be utterly delicious and effortless.

Ingredients:
- For the Creamy Chia Pudding Base:
- 1 cup (240ml) unsweetened plant-based milk (I personally adore almond milk for its neutral flavor, but oat milk or cashew milk work beautifully too)
- 1/4 cup (40g) chia seeds (I always opt for organic white or black chia seeds for their excellent gelling properties and rich omega-3 content)
- 1-2 tablespoons maple syrup or agave nectar (adjust to your sweetness preference; for a less sweet option, you can start with 1 tablespoon)
- 1/2 teaspoon pure vanilla extract (a good quality extract truly makes a difference in enhancing the overall flavor profile of our Cherry Chia Pudding)
- Pinch of sea salt (just a tiny amount to balance and brighten all the flavors)
- For the Vibrant Cherry Topping:
- 1 1/2 cups (about 250g) fresh or frozen sweet cherries, pitted (if using fresh, ensure they are ripe and juicy; if frozen, there’s no need to thaw completely beforehand, as they’ll soften during cooking)
- 1-2 tablespoons water (only if using fresh cherries, or if your frozen cherries are particularly dry and need a little help getting started)
- 1 tablespoon maple syrup or agave nectar (again, taste and adjust – cherries vary greatly in sweetness)
- 1/2 teaspoon lemon juice (freshly squeezed is always best; it brightens the cherry flavor and adds a lovely tang that cuts through the sweetness)
- 1/4 teaspoon almond extract (this is optional, but it truly elevates the cherry flavor, giving it that classic dessert profile – a little goes a long way!)
- Optional Garnishes for Serving:
- Fresh mint leaves (for a pop of color and a refreshing aroma)
- Toasted slivered almonds or chopped pistachios (for added crunch and texture)
- Shredded coconut (sweetened or unsweetened, depending on your preference)
- Extra fresh cherries (for an inviting visual appeal)
- A drizzle of plant-based yogurt or coconut cream (for extra creaminess)
Preparing the Cherry Chia Pudding Base
- Gather Your Essentials: First things first, I like to lay out all my ingredients for the chia pudding base. This ensures a smooth and efficient process. Grab a medium-sized mixing bowl, a whisk, and your measuring cups. Having everything at hand prevents any last-minute scrambling.
- Combine Liquids and Sweetener: In that medium-sized mixing bowl, I carefully pour in the unsweetened plant-based milk. My personal favorite for this Cherry Chia Pudding is almond milk because of its subtle flavor that doesn’t overpower the cherries, but feel free to use oat, soy, or cashew milk – whatever you prefer! Next, I add the maple syrup (or agave nectar), starting with 1 tablespoon and reserving the second for later adjustment. Then, I stir in the pure vanilla extract and that tiny pinch of sea salt. These initial ingredients are the foundational flavor builders for our delicious Cherry Chia Pudding.
- Whisk Until Combined: I grab my whisk and gently, yet thoroughly, mix these wet ingredients together. The goal here isn’t just to combine them, but to ensure the maple syrup and salt are fully dissolved into the milk. This step might seem minor, but it’s crucial for an evenly flavored pudding. I keep whisking for about 30 seconds to a minute, making sure everything is beautifully integrated.
- Introduce the Chia Seeds: Now, for the star of our pudding – the chia seeds! I carefully sprinkle the chia seeds into the milk mixture. It’s important not to dump them all in at once, as they can clump together. Sprinkling them slowly helps them disperse evenly. As soon as they’re added, I immediately start whisking again.
- Vigorous Whisking for Perfect Hydration: This is a key moment for achieving that perfect, lump-free Cherry Chia Pudding texture. I whisk vigorously for at least 1 to 2 minutes. You’ll notice the mixture already starting to thicken slightly as the chia seeds begin to absorb the liquid. Consistent whisking during this initial phase prevents the chia seeds from settling at the bottom in a dense layer. I make sure to scrape down the sides of the bowl with my whisk to incorporate any stray seeds.
- First Rest Period and Stir: Once I’ve given it a good whisk, I let the mixture sit for about 5 minutes at room temperature. This brief pause allows the chia seeds to start their magical gelling process. After 5 minutes, I give the mixture another thorough stir or whisk. You’ll observe it’s already noticeably thicker. This second stir is vital to break up any potential clumps that might have formed and to redistribute the seeds, ensuring a uniform consistency for our Cherry Chia Pudding.
- Chilling for Optimal Texture: After that second stir, I cover the bowl – either with a lid if it has one, or tightly with plastic wrap – and place it in the refrigerator. The chilling time is crucial; it needs at least 4 hours, but I honestly find that leaving it overnight yields the very best results. Allowing the Cherry Chia Pudding to chill sufficiently ensures the chia seeds fully hydrate, creating that wonderful, creamy, and undeniably pudding-like texture we all crave. During this time, the flavors also meld together beautifully.
- Final Sweetness Adjustment (Optional): The next morning, or after the chilling period, I take the pudding out of the fridge. Before proceeding, I give it a taste. If I feel it needs a little more sweetness, this is the perfect time to stir in that remaining tablespoon of maple syrup or agave nectar. You can also add a splash more plant-based milk if you prefer a slightly thinner consistency. Remember, personal preference is key here for your ultimate Cherry Chia Pudding experience.
Crafting the Sweet Cherry Topping
- Prepare the Cherries: While your chia pudding is chilling, or just before you’re ready to serve, it’s time to prepare our glorious cherry topping. If you’re using fresh cherries, make sure they are thoroughly washed and pitted. I usually use a cherry pitter, but a small paring knife can work too – just be careful! If you’re using frozen cherries, there’s no need to thaw them; they’ll cook down beautifully straight from the freezer.
- Simmering the Cherries: I place the pitted cherries into a small saucepan. If using fresh cherries, or if your frozen cherries seem particularly dry, I add 1-2 tablespoons of water to help them along. I turn the heat to medium-low.
- Building Flavor and Texture: As the cherries begin to warm, I add the maple syrup (or agave nectar) and the fresh lemon juice. The lemon juice is incredibly important here; it brightens the natural sweetness of the cherries and provides a lovely counterpoint. If you’re using almond extract, I add it now as well. Stir everything gently to combine.
- Gentle Reduction: I let the mixture come to a gentle simmer, then reduce the heat to low. I continue to cook, stirring occasionally, for about 8 to 12 minutes. During this time, the cherries will soften, release their juices, and the liquid will begin to thicken slightly. The goal is for the cherries to become tender and for the sauce to be slightly syrupy, creating a luscious topping for our Cherry Chia Pudding. If you prefer a chunkier topping, you can cook it for less time. For a smoother sauce, you can mash some of the cherries with the back of a spoon as they cook, or even blend a portion of it once cooled.
- Cooling the Topping: Once the cherry topping has reached your desired consistency, I remove the saucepan from the heat. It’s important to let the topping cool down significantly, or even fully, before adding it to your chilled Cherry Chia Pudding. Warm topping could affect the pudding’s texture. I usually transfer it to a small bowl to help it cool faster.
- Final Taste Test for the Cherries: Once cooled, I always give the cherry topping a quick taste. This is your chance to adjust. Does it need a little more sweetness? A bit more lemon for tang? Perhaps another tiny drop of almond extract to really pop? Make it perfect for your palate! This homemade cherry topping is what truly makes this a spectacular Cherry Chia Pudding.
Assembling and Serving Your Cherry Chia Pudding
- Retrieve the Chilled Pudding: Once your creamy chia pudding base is perfectly chilled and set, and your vibrant cherry topping has cooled, it’s time for the exciting part – assembly! I carefully retrieve the bowl of Cherry Chia Pudding from the refrigerator. You’ll notice it has transformed into a wonderfully thick, gelatinous, and spoonable consistency.
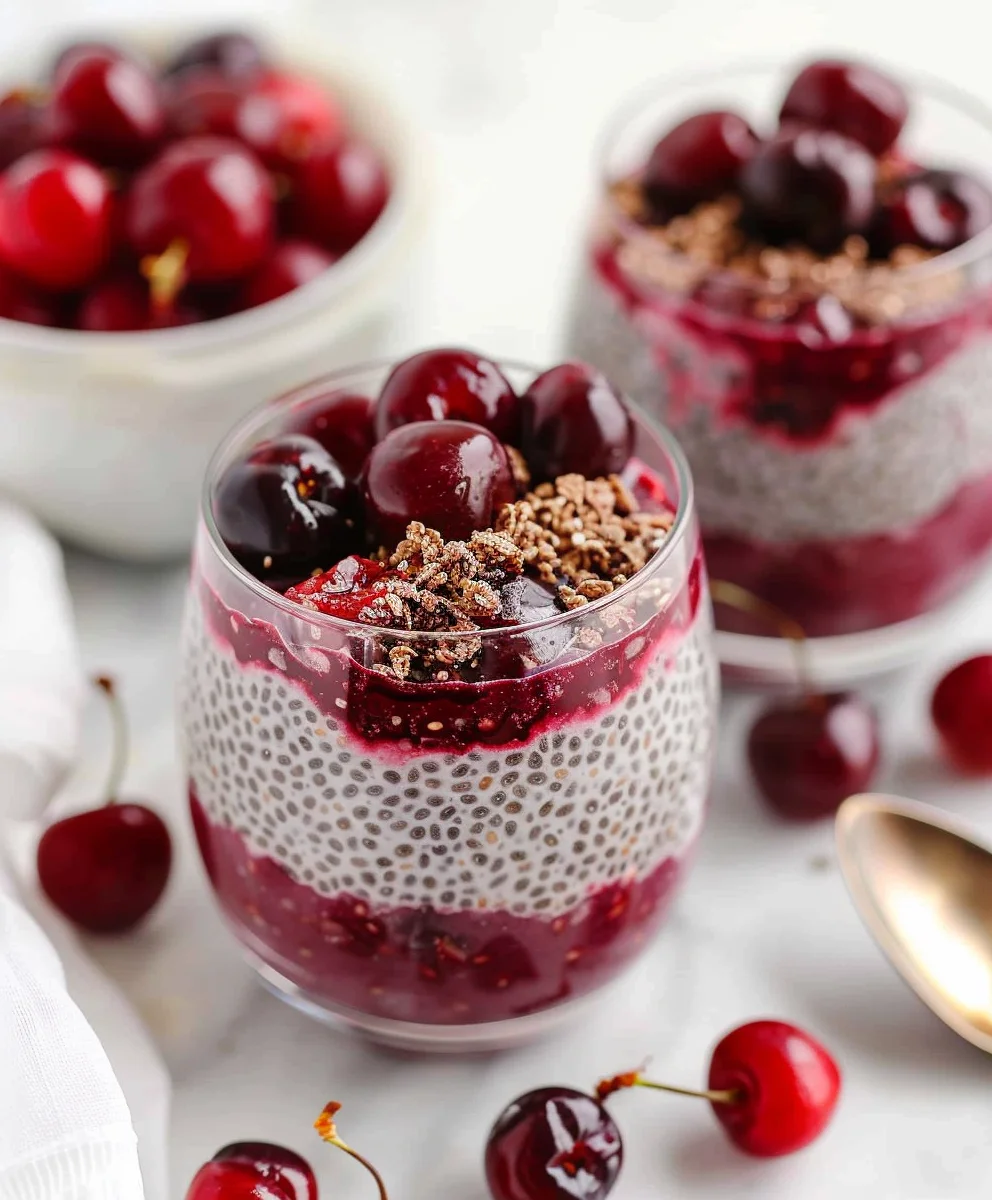
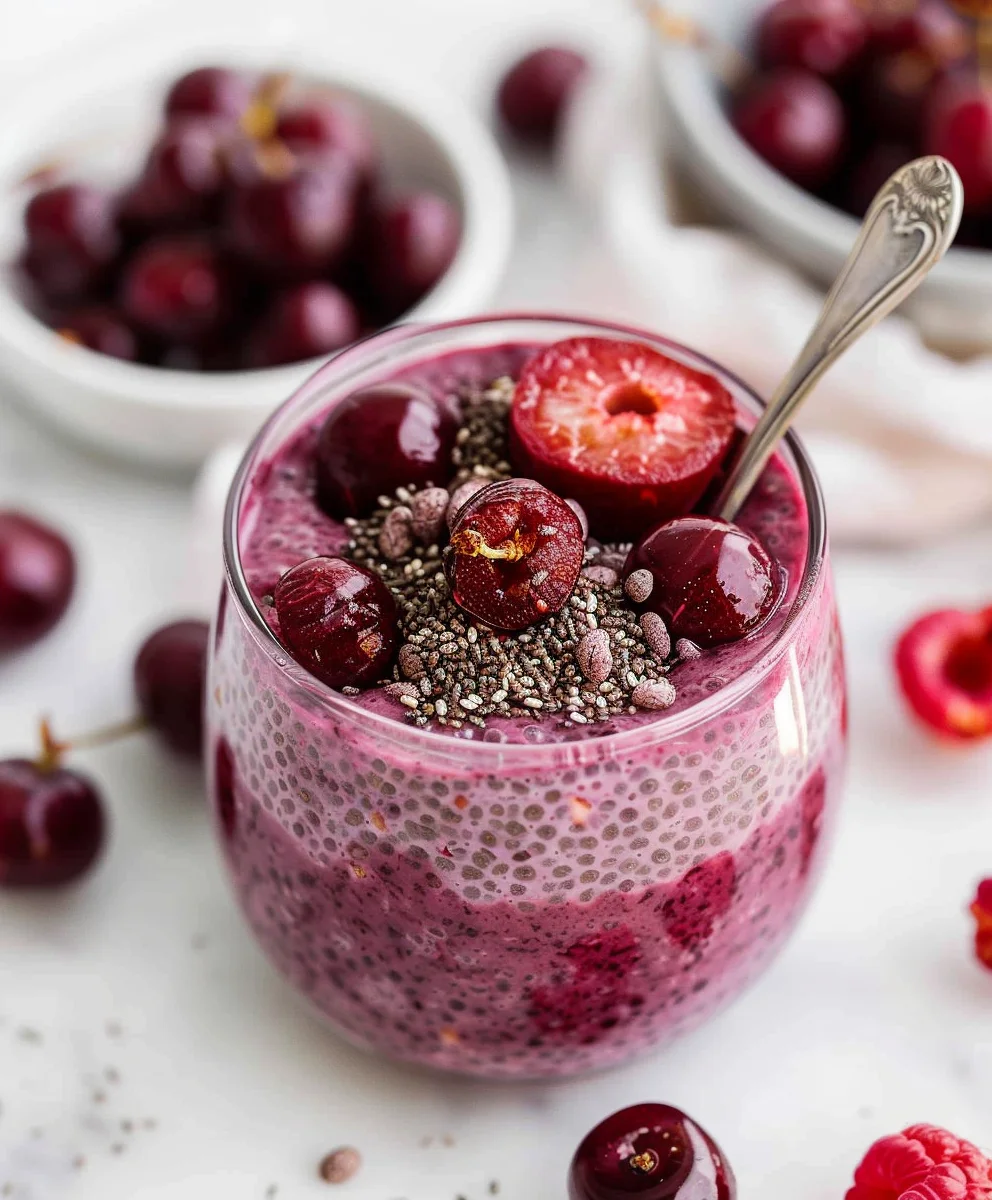
- Layering in Serving Glasses: I like to serve this Cherry Chia Pudding in clear glasses or jars to show off the beautiful layers. I start by spooning about half of the prepared chia pudding base into the bottom of each serving glass. This creates a solid foundation for our delightful layers. I try to make this layer as even as possible.
- Adding the Cherry Layer: Next, I spoon a generous portion of the cooled cherry topping over the first layer of chia pudding. The rich, ruby red of the cherries against the creamy white of the pudding is simply stunning. I make sure to get some of those luscious cherry pieces in there too, not just the sauce. This combination of textures and flavors is what makes the Cherry Chia Pudding so irresistible.
- Repeat for More Layers (Optional): For a truly decadent and visually appealing Cherry Chia Pudding, I often repeat the layering process. I add another layer of chia pudding, followed by another layer of the cherry topping. This creates a beautiful alternating pattern that makes each spoonful a delight. You can customize the number of layers based on the size of your serving glasses and your personal preference.
- Garnish with Flair: This is where you can truly make your Cherry Chia Pudding shine! I love to finish each glass with some thoughtful garnishes. A few fresh mint leaves tucked into the side add a refreshing aroma and a beautiful pop of green. A sprinkle of toasted slivered almonds or chopped pistachios provides a wonderful crunch and nutty flavor that complements the cherries perfectly. Sometimes, I’ll even add a few extra fresh cherries on top for an inviting presentation. The garnishes not only enhance the visual appeal but also add delightful textures and subtle flavor notes to your homemade Cherry Chia Pudding.
- Serve Immediately or Chill Further: Your stunning Cherry Chia Pudding is now ready to be enjoyed! You can serve it immediately, reveling in the fresh, creamy, and fruity goodness. Alternatively, if you’ve assembled it ahead of time, you can cover the individual glasses and chill them in the refrigerator for up to 2-3 days. The flavors will continue to meld beautifully. Just be aware that some garnishes like nuts might soften slightly over time, so if you’re preparing ahead, you might want to add them just before serving.
- Enjoy Every Spoonful: I encourage you to savor each and every spoonful of this vibrant, healthy, and incredibly satisfying Cherry Chia Pudding. It’s truly a labor of love that pays off with a delightful breakfast, a wholesome snack, or even a light dessert. The combination of the creamy chia base and the sweet-tart cherry topping creates a harmonious experience that I find utterly delightful.
Conclusion:
Well, friends, we’ve reached the sweet end of our culinary journey with this delightful recipe, and I truly hope you’re feeling as inspired as I am to whip up a batch (or two!) of this incredible treat. If you’re looking for a breakfast that feels indulgent yet is packed with wholesome goodness, a snack that satisfies without the guilt, or even a light dessert that everyone will adore, then this recipe is absolutely, unequivocally a must-try. It’s not just a dish; it’s a feeling – a comforting, vibrant burst of flavor that brightens any part of your day. The simplicity of its preparation belies the sophisticated taste it delivers, making it a perfect fit for busy mornings or an effortless make-ahead option for meal prepping throughout the week. I find immense joy in knowing that I’m fueling my body with something so nutritious, yet so utterly delicious, and I can’t wait for you to experience that same satisfaction.
What makes this particular recipe stand out, you ask? It’s the harmonious blend of textures and tastes, of course! The creamy, almost mousse-like consistency of the chia pudding itself, punctuated by the juicy, slightly tart sweetness of cherries, creates a symphony on your palate. It’s naturally sweetened, incredibly versatile for dietary needs (vegan, gluten-free, dairy-free – check, check, and check!), and surprisingly filling, keeping those pesky hunger pangs at bay until your next meal. It’s a truly wholesome option that doesn’t compromise on flavor or satisfaction. Imagine waking up to a ready-made breakfast that not only tastes like a dream but also provides a powerful punch of omega-3s, fiber, and antioxidants. That’s precisely what you get here. I’ve often found myself reaching for this recipe when I need a moment of mindful eating, something that feels good from the first spoonful to the last, making it a staple in my kitchen for both its health benefits and its sheer deliciousness.
Elevate Your Experience: Serving Suggestions & Variations
Now, while this recipe is utterly fantastic as is, part of the fun of cooking is making it your own! Here are some of my favorite ways to enjoy and vary this magnificent dish. For an extra layer of crunch and healthy fats, I love adding a sprinkle of toasted slivered almonds, chopped walnuts, or even some pumpkin seeds right before serving. A dollop of dairy-free yogurt (coconut or almond) can add a lovely tang and extra creaminess. Fresh berries – blueberries, raspberries, or sliced strawberries – are always a welcome addition, complementing the cherries beautifully. If you’re feeling a bit decadent, a few dark chocolate shavings or a drizzle of maple syrup can transform it into a more dessert-like experience. For those who prefer a little extra sweetness, a tiny dash of vanilla extract stirred into the pudding base, or a pinch of cinnamon, can really deepen the flavor profile.
Don’t be afraid to experiment with the liquid base either. While I adore using almond milk for its subtle flavor, coconut milk will give you a richer, creamier pudding, and oat milk lends a lovely, slightly nutty sweetness. You could even layer it with a different fruit puree at the bottom for an added surprise – perhaps a mango or peach puree for a tropical twist, creating beautiful, vibrant contrasts. The beauty of this recipe lies in its adaptability. Picture it: a clear glass filled with vibrant layers of Cherry Chia Pudding, topped with a rainbow of fresh fruits and nuts, ready to brighten your morning or uplift your afternoon. It’s truly a canvas for your culinary creativity, inviting you to play with textures and flavors until you discover your perfect combination, making each serving a unique and delightful experience tailored just for you.
Your Turn! Share Your Delicious Journey!
So, what are you waiting for? I wholeheartedly encourage you to give this recipe a whirl. It’s simple, it’s nourishing, and most importantly, it’s incredibly delicious. Whether you’re a seasoned cook or just starting your culinary adventures, I promise you’ll find this recipe to be a rewarding experience that quickly earns a permanent spot in your rotation. Once you’ve made it and tasted the magic for yourself, I would absolutely love to hear about your experience! Did you stick to the recipe, or did you venture into your own creative variations? What were your favorite toppings? Did it become your new go-to breakfast, snack, or even a guilt-free dessert? Please, don’t keep your delicious journey to yourself! Share your thoughts, your tips, and especially your mouth-watering photos with me and our community of food lovers. Your feedback and creativity inspire not just me, but everyone looking for wholesome and delightful meal ideas. Happy cooking, and I can’t wait to see what you create!
Cherry Chia Pudding
Wake up to a quick, healthy, and delicious Cherry Chia Pudding! This creamy, satisfying treat combines the vibrant sweetness of cherries with the nutritional power of chia seeds, perfect for breakfast, a snack, or a guilt-free dessert.
Ingredients
-
½ cup (70 g) frozen cherries
-
½ cup (125ml) dairy-free milk
-
2 teaspoons maple syrup
-
⅛ teaspoon almond extract
-
3 tablespoons (30 g) whole chia seeds
Instructions
-
Step 1
In a bowl, combine dairy-free milk, 1 teaspoon maple syrup, and ⅛ teaspoon almond extract. Whisk thoroughly until well combined. -
Step 2
Add the whole chia seeds, whisking vigorously for 1-2 minutes to ensure even dispersion and prevent clumping. Let the mixture sit for 5 minutes, then whisk again. -
Step 3
Cover the bowl and refrigerate for at least 4 hours, or preferably overnight, until the pudding is thick and set to a creamy consistency. -
Step 4
In a small saucepan, combine the frozen cherries and the remaining 1 teaspoon of maple syrup. Simmer over medium-low heat for 8-12 minutes, stirring occasionally, until the cherries soften and release their juices, forming a slightly syrupy sauce. -
Step 5
Remove the cherry topping from heat and allow it to cool completely before assembling with the pudding. You can transfer it to a separate bowl to speed up cooling. -
Step 6
Spoon the chilled chia pudding into serving glasses. Layer with the cooled cherry topping. Repeat layers if desired. Serve immediately and enjoy.
Important Information
Nutrition Facts (Per Serving)
It is important to consider this information as approximate and not to use it as definitive health advice.
Allergy Information
Please check ingredients for potential allergens and consult a health professional if in doubt.


Leave a Comment