

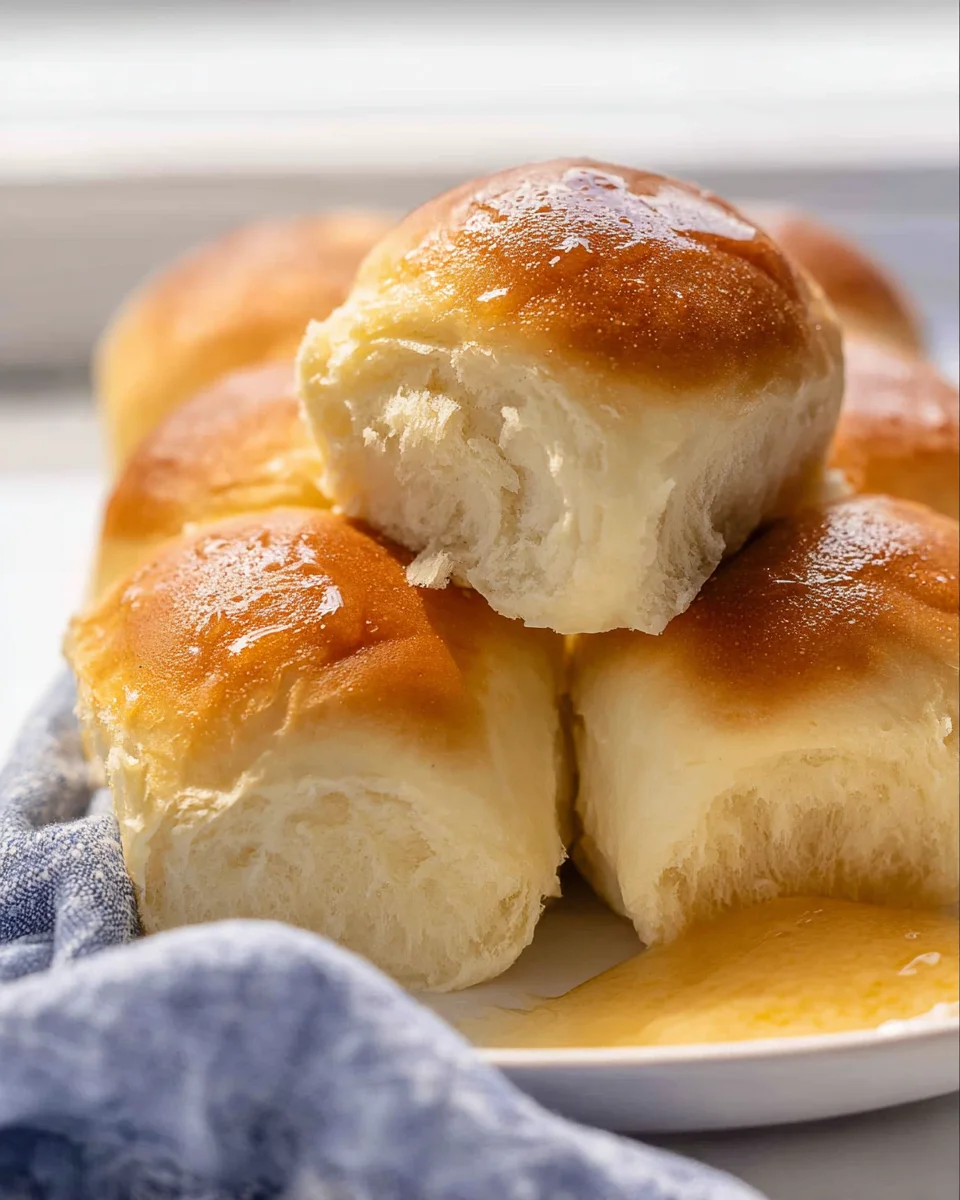
Texas Roadhouse Rolls are more than just a side dish; they are a culinary experience that brings warmth, comfort, and pure delight to any meal. Have you ever found yourself tearing into one of those incredibly soft, slightly sweet, and utterly addictive rolls, slathered with that heavenly honey cinnamon butter, wishing you could recreate that magic in your own kitchen? I certainly have! These iconic rolls have garnered a devoted following, becoming a signature staple of the popular American steakhouse and a beloved treat for countless diners nationwide. It’s a taste of home, even when you’re dining out, and the tradition of enjoying these fresh-baked wonders is something truly special.
There’s a profound reason why people absolutely adore these fluffy wonders. Their golden-brown crust gives way to an unbelievably light and airy interior, a perfect canvas for the melted butter that soaks right in. It’s not just the impeccable taste or the melt-in-your-mouth texture that makes these Texas Roadhouse Rolls so special; it’s also the nostalgic comfort they evoke, reminding us of joyful meals shared with family and friends. Now, imagine bringing that beloved restaurant experience right to your dining table. I am thrilled to guide you through mastering this beloved recipe, ensuring every bite is just as perfect as you remember.

Ingredients:
- 1 cup (240ml) warm water (between 105°F and 115°F or 40°C and 46°C)
- 1/2 cup (120ml) warm milk (whole milk preferred, between 105°F and 115°F or 40°C and 46°C)
- 1/2 cup (113g or 1 stick) unsalted butter, softened and divided
- 1/2 cup (100g) granulated sugar, divided
- 2 1/4 teaspoons (1 packet) active dry yeast
- 1 large egg, room temperature
- 1 teaspoon salt
- 4 1/2 to 5 cups (540g to 600g) all-purpose flour, plus more for dusting
- Melted butter, for brushing after baking (approximately 1/4 cup)
Activating the Yeast: The Foundation of Fluffy Texas Roadhouse Rolls
The journey to creating these irresistible Texas Roadhouse Rolls begins with awakening our little friends, the yeast. Believe me, this step is crucial for that signature fluffy texture we’re aiming for. Grab a large mixing bowl, one that will eventually hold all your dough. Into this bowl, pour your 1 cup of warm water. It’s really important that the water is within the specified temperature range (105°F to 115°F). If it’s too cold, the yeast won’t activate properly, and if it’s too hot, you risk killing it entirely, which would be a tragedy for our rolls!
Next, sprinkle in the entire packet of active dry yeast. Don’t stir it just yet. Let it sit there for about a minute, giving it a moment to absorb some of that warmth. After a minute, add 1 tablespoon of your granulated sugar to the bowl. The sugar acts as food for the yeast, helping it to get nice and bubbly. Now, gently stir the mixture until the yeast and sugar are dissolved. You’ll want to set this mixture aside in a warm spot for about 5 to 10 minutes. During this time, you should start to see a foamy layer forming on the surface. This foam is a beautiful sign that your yeast is alive and well, actively working, and ready to make your rolls rise beautifully. If you don’t see any foam, it might mean your yeast is expired, or the water temperature was off. In that case, it’s best to start over with fresh yeast and carefully recheck your water temperature to ensure perfect results for your Texas Roadhouse Rolls.
Preparing the Dough: Mixing and Kneading for Perfection
- Heating the Milk and Butter: While your yeast is busy blooming, let’s prepare the wet ingredients for our dough. In a small saucepan, combine the 1/2 cup of warm milk, 1/4 cup of the softened unsalted butter (reserve the other 1/4 cup for later dough incorporation), and the remaining granulated sugar (minus the 1 tablespoon you used for the yeast). Gently heat this mixture over medium-low heat, stirring occasionally, until the butter is completely melted and the sugar is dissolved. You don’t want it to boil, just warm enough to melt everything together. Once melted, immediately remove the saucepan from the heat. This warm mixture needs to cool down to a lukewarm temperature, similar to your yeast mixture, around 105°F to 115°F. Allowing this mixture to cool sufficiently is critical; adding it too hot will kill your active yeast, and we definitely don’t want that! You can speed up the cooling process by placing the saucepan in an ice bath or simply letting it sit on the counter for a while, stirring periodically.
- Combining the Wet Ingredients: Once both your yeast mixture and your milk mixture are at the appropriate lukewarm temperature, it’s time to bring them together. Pour the cooled milk and butter mixture into the bowl with your activated, foamy yeast. Add the room-temperature egg and the 1 teaspoon of salt. Give everything a good whisk to thoroughly combine all these wonderful wet ingredients. The salt is essential here not just for flavor but also for regulating yeast activity and strengthening the gluten structure.
- Adding the Flour and Kneading: Now for the flour, which will transform this liquid into a cohesive dough. Gradually add the all-purpose flour, about 1 cup at a time, mixing well after each addition. I usually start with a sturdy wooden spoon or a spatula. After about 3-4 cups of flour, when the mixture becomes too stiff to stir, it’s time to switch to your hands or, even better, a stand mixer fitted with a dough hook. Continue adding flour, a little at a time, until the dough comes together and starts to pull away from the sides of the bowl. It should be soft, slightly sticky, but manageable. Avoid the temptation to add too much flour, as this can result in dense, dry rolls. We’re aiming for light and airy Texas Roadhouse Rolls, so a slightly tacky dough is perfect.
-
The Kneading Process: Whether you’re kneading by hand or using a stand mixer, this step is vital for developing the gluten, which gives the rolls their structure and chewiness.
- By Hand: Turn the dough out onto a lightly floured surface. Knead for 8-10 minutes. Push the dough away from you with the heel of your hand, fold it back over, rotate it a quarter turn, and repeat. You’ll notice the dough gradually transform from sticky and shaggy to smooth, elastic, and less sticky. It should spring back when you gently poke it.
- With a Stand Mixer: Using the dough hook attachment, knead on medium-low speed for 6-8 minutes. The dough should become smooth, elastic, and should clear the sides of the bowl, though it might stick a little to the bottom.
To check if your dough is adequately kneaded, perform the “windowpane test.” Pinch off a small piece of dough and gently stretch it. If you can stretch it thin enough to see light through it without it tearing, your gluten is well-developed, and your dough is ready for its first rise. If it tears easily, continue kneading for a few more minutes.
First Rise: Giving the Dough Time to Develop Flavor and Volume
Once your dough is perfectly kneaded, it’s time for its beauty sleep, also known as the first rise or bulk fermentation. Lightly grease a large clean bowl with a little oil or cooking spray. Place the dough ball into the bowl, turning it once to ensure it’s lightly coated with oil all over. This prevents a dry skin from forming. Cover the bowl tightly with plastic wrap or a clean kitchen towel. Now, find a warm, draft-free spot in your kitchen. This could be a slightly warmed oven (turned off!), near a sunny window, or just on the countertop in a warm room. The ideal temperature for rising dough is around 75-80°F (24-27°C).
Let the dough rise for 1 to 1 1/2 hours, or until it has doubled in size. Visual cues are more important than strict timing here. The exact time can vary depending on the temperature of your kitchen. When it has doubled, you should be able to gently poke it with a floured finger, and the indentation should remain. This indicates a successful first rise, brimming with wonderful flavors and ready for the next stage of becoming our beloved Texas Roadhouse Rolls. This slow, steady rise is what gives the rolls their incredible depth of flavor and tender crumb.
Shaping the Rolls: The Iconic Square Design
- Punching Down and Resting: Once your dough has doubled in size, gently punch it down to release the trapped gases. This step helps to redistribute the yeast and nutrients, creating a more even texture in the final rolls. Turn the dough out onto a lightly floured surface. At this point, you can add the remaining 1/4 cup of softened unsalted butter. Gently fold and knead the butter into the dough until it’s fully incorporated. This extra butter enhances the richness and tenderness of the rolls, making them truly melt-in-your-mouth delightful, just like the authentic Texas Roadhouse Rolls. Allow the dough to rest for 5-10 minutes. This brief rest helps the gluten relax, making the dough much easier to roll out without it springing back too much.
- Rolling Out the Dough: Using a rolling pin, roll the dough into a large rectangle, approximately 1/2 to 3/4 inch thick. Don’t roll it too thin, or your rolls will be flat. We’re aiming for substantial, fluffy squares. The dimensions might be roughly 12×18 inches or similar, depending on your dough’s elasticity and initial size. Make sure the thickness is as even as possible across the entire rectangle for uniformly sized rolls.
- Cutting the Rolls: Now for the classic square shape! Use a pizza cutter or a sharp knife to cut the dough into individual squares. I usually aim for squares that are about 2×2 inches. This size is perfect for creating those generous, shareable rolls. You’ll get quite a few rolls from this batch, typically around 30-36, which is fantastic if you’re feeding a crowd or want plenty of leftovers (though I doubt they’ll last long!).
- Arranging on Baking Sheets: Lightly grease two large baking sheets or line them with parchment paper. Carefully transfer the cut dough squares to the prepared baking sheets, leaving about 1 inch of space between each roll. They will expand quite a bit during the second rise and baking, so adequate spacing is important to prevent them from fusing together completely, although a little touching is often desired for that soft side effect.
Second Rise: Building Volume for Irresistibly Light Texas Roadhouse Rolls
Once all your lovely squares are arranged on the baking sheets, it’s time for their second and final rise. This step is crucial for achieving that characteristic light and airy texture of true Texas Roadhouse Rolls. Loosely cover the baking sheets with plastic wrap or a clean kitchen towel. Again, find a warm, draft-free spot for them to rise. Let them rise for another 45-60 minutes, or until they look noticeably puffy and have nearly doubled in size. They should look soft and pillowy. To test if they’re ready, gently poke a roll with a floured finger; if the indentation slowly springs back halfway, they are perfectly proofed and ready to bake. If it springs back too quickly, they need more time. If it collapses, they might be over-proofed, but don’t worry, they’ll still be delicious! This second rise is where they truly gain their potential for incredible volume and softness.
Baking the Rolls: The Golden Perfection
- Preheat the Oven: About 15-20 minutes before your rolls are finished with their second rise, preheat your oven to 350°F (175°C). Ensuring your oven is fully preheated is important for consistent baking and an even golden crust.
- Bake Until Golden: Carefully place the baking sheets into the preheated oven. You may need to bake them in batches if both sheets don’t fit comfortably on one rack without touching the sides. Bake for 12-18 minutes, or until the tops are beautifully golden brown. Keep a close eye on them, especially towards the end, as oven temperatures can vary. The rolls should look puffy and cooked through. If you have an instant-read thermometer, the internal temperature should be around 200-210°F (93-99°C).
- Cooling: Once baked to perfection, remove the baking sheets from the oven.
Finishing Touches: Butter Makes Everything Better
This is where the magic truly happens, taking your homemade bread to the next level of Texas Roadhouse Rolls authenticity! While the rolls are still piping hot, immediately brush their tops generously with melted butter. The heat of the rolls will absorb the butter, creating an incredibly soft crust and adding that signature rich, buttery flavor that everyone loves. Don’t be shy with the butter here; it’s a key component to their deliciousness.
Allow the rolls to cool on the baking sheets for a few minutes before transferring them to a wire rack. While they are amazing warm, allowing them to cool slightly helps them set and makes them easier to handle. Serve these glorious homemade Texas Roadhouse Rolls warm with extra butter or, for an authentic experience, a side of homemade cinnamon honey butter. They are perfect alongside any meal or simply as a delightful snack on their own. Enjoy the fruits of your labor – you’ve just created a batch of truly extraordinary rolls!
Tips and Tricks for Perfect Texas Roadhouse Rolls
- Room Temperature Ingredients: Always aim to use room temperature eggs and milk for baking. This helps them incorporate more smoothly into the dough and allows the dough to rise more efficiently. Cold ingredients can shock the yeast and slow down fermentation.
- Don’t Over-Flour: It’s tempting to keep adding flour if the dough feels sticky, but too much flour will result in dry, dense rolls. A slightly tacky dough after kneading is ideal. Use just enough flour to prevent sticking on your work surface.
- The “Warm Spot” for Rising: If your kitchen is cool, you can create a warm environment for your dough to rise. Turn your oven on to its lowest setting (or just to “warm”) for 1-2 minutes, then turn it off. Place the covered bowl of dough inside. The residual heat will create a perfect proofing environment. Make sure it’s not too hot, though!
- Testing Yeast Activity: If you’re unsure about your yeast, especially if it’s been sitting in your pantry for a while, always perform the activation step. If it doesn’t foam, discard it and get new yeast. This saves you from wasting all your other ingredients on dough that won’t rise.
- Storage: These Texas Roadhouse Rolls are best enjoyed fresh and warm on the day they are baked. However, they can be stored in an airtight container at room temperature for up to 2-3 days. Reheat them briefly in the microwave or oven to restore their softness.
- Freezing for Later: You can freeze baked rolls! Once completely cooled, place them in a freezer-safe bag or container for up to 2-3 months. Thaw at room temperature and warm in the oven or microwave before serving. You can also freeze the unbaked dough after the first rise: wrap it tightly and freeze. Thaw in the refrigerator overnight, then proceed with shaping, second rise, and baking. For best results, it’s often better to freeze the baked rolls.
- Cinnamon Honey Butter: To truly replicate the Texas Roadhouse experience, don’t forget the cinnamon honey butter! Simply combine 1/2 cup softened unsalted butter with 1/4 cup honey and 1/2 teaspoon ground cinnamon. Mix until light and fluffy. It’s the perfect accompaniment to your warm, fluffy Texas Roadhouse Rolls.
- Even Thickness for Even Baking: When rolling out the dough, take care to achieve an even thickness throughout the rectangle. This ensures that all your rolls bake at the same rate and come out perfectly cooked, without some being underdone and others overdone.
- Don’t Rush the Rises: Patience is a virtue in bread making. Rushing the rising times will result in denser, less flavorful rolls. Let the dough take its time to double in size for both the first and second proofing. The slow fermentation process develops complex flavors that you simply can’t achieve by speeding things up.
Troubleshooting Common Issues with Yeast Dough
- Dough Not Rising: If your dough isn’t rising, the most common culprits are inactive yeast (check water temperature and yeast freshness) or a too-cold environment. Ensure your water is not too hot (killing the yeast) or too cold (slowing it down too much).
- Dense Rolls: This usually means you’ve added too much flour, or the dough wasn’t kneaded enough, or it didn’t rise long enough. Make sure your dough is soft and elastic after kneading, and give it ample time to proof.
- Dry Rolls: Again, too much flour is a common cause. Also, ensure you don’t overbake them. Overbaking removes too much moisture. The internal temperature of 200-210°F (93-99°C) is a good indicator of doneness without drying them out.
- Rolls Spreading Too Much: This can happen if the dough is over-proofed, meaning it rose for too long and the gluten structure weakened too much to hold its shape. Or, if the dough was too wet initially (not enough flour).
By following these detailed instructions and tips, you’re well on your way to baking a batch of the most delicious, fluffy, and authentic Texas Roadhouse Rolls right in your own kitchen!
Conclusion:
Oh, my goodness, we’ve reached the end of our baking journey, and I genuinely hope you’re as excited as I am about the prospect of these incredible rolls gracing your table! This isn’t just another bread recipe; it’s an invitation to bring a touch of restaurant magic right into your own kitchen. After all the measuring, mixing, and the delightful waiting as the dough performs its wondrous alchemy, you’re not just baking rolls—you’re crafting an experience that will undoubtedly impress and delight everyone lucky enough to try them.
Why This Recipe is an Absolute Game-Changer
Let me tell you, if there’s one recipe that has consistently brought smiles, sighs of contentment, and requests for “more, please!” in my household, it’s this one. The reason this particular roll recipe stands out as a true must-try is multifaceted. First and foremost, it’s about the undeniable, mouth-watering flavor. Each bite delivers that perfect balance of slight sweetness, a rich buttery undertone, and a delicate yeasty warmth that is simply irresistible. Then there’s the texture – oh, the glorious texture! We’re talking about a roll that’s incredibly soft, almost cloud-like on the inside, with a tender crumb that practically melts in your mouth. The exterior, brushed with butter right out of the oven, achieves that coveted golden hue and a subtle, appealing chewiness that contrasts beautifully with the interior. It’s this combination of unparalleled flavor and ethereal texture that truly sets these apart. They don’t just complement a meal; they elevate it, transforming a simple dinner into a special occasion. This recipe captures the essence of those beloved, iconic Texas Roadhouse Rolls, bringing that unmistakable, addictive quality directly to your home with surprising ease and a rewarding sense of accomplishment. Imagine the intoxicating aroma filling your kitchen – that alone is worth the effort, I promise you.
Serving Suggestions & Delightful Variations
Now that you’ve got these golden beauties hot out of the oven, the possibilities are endless! Of course, the classic pairing with homemade honey cinnamon butter is practically mandatory. Seriously, don’t skip it; the creamy sweetness of the butter infused with a hint of cinnamon transforms these rolls into an even more indulgent treat, enhancing their natural flavors beautifully. Beyond that, these rolls are the quintessential accompaniment to almost any hearty meal you can imagine. Picture them alongside a slow-cooked pot roast, ready to sop up all those delicious, savory juices. They’re fantastic with a robust chili, a comforting beef stew, or even a simple grilled chicken or pork chop dinner. I’ve personally enjoyed them as a side to a vibrant garden salad, a hearty pasta dish, or even just as a comforting snack with a cup of coffee, and they never disappoint. Their versatility is truly one of their greatest strengths.
But why stop at savory? These versatile rolls can venture into sweet territory too! For breakfast or brunch, consider splitting them and using them to make an incredible French toast – the slight sweetness of the roll is absolutely perfect for soaking up egg batter. Or, for a quick dessert, pull them apart into bite-sized pieces and drizzle with a little melted butter, a sprinkle of cinnamon sugar, and maybe some warmed apple slices for a deconstructed apple pie effect that is utterly divine.
Feeling adventurous with variations? Try incorporating some savory elements directly into the dough or as a topping. A sprinkle of garlic powder and dried herbs like oregano or rosemary before baking can give them a whole new personality, turning them into wonderful dinner rolls for an Italian-inspired meal. You could also stuff them with a small cube of cheddar or mozzarella cheese before baking for a delightful gooey center that oozes with flavor. For a sweeter twist, consider adding a handful of plump raisins, dried cranberries, or mini chocolate chips to the dough for a unique breakfast bun or a delightful after-dinner treat. Don’t be afraid to experiment with shaping either – knots, twists, or even mini pull-apart loaves can add a fun and aesthetically pleasing touch to your presentation.
Your Turn to Create and Share!
So, what are you waiting for? I wholeheartedly encourage you to roll up your sleeves, gather your ingredients, and embark on this incredibly rewarding baking adventure. There’s an immense sense of satisfaction that comes from pulling a tray of perfectly golden, fragrant rolls from your oven, knowing you made them from scratch with your own hands. This isn’t just about following a recipe; it’s about creating warmth, comfort, and delicious memories for yourself and your loved ones that will last long after the last crumb is gone. The joy these rolls bring is truly immeasurable, and the feeling of accomplishment is second to none. Once you experience the magic of baking your own batch, I have a feeling they’ll become a regular feature in your kitchen, just as they have in mine. Please, when you do try this recipe, I would absolutely love to hear about your experience! Share your photos, your triumphs, your serving ideas, or any delightful variations you come up with. Tag me, leave a comment, or simply send a mental high-five across the internet. Your culinary journey is inspiring, and I can’t wait to see your wonderful creations. Happy baking, my friends!
Texas Roadhouse Rolls Copycat: Sweet, Fluffy & Easy Recipe
Texas Roadhouse Rolls are more than just a side dish; they are a culinary experience that brings warmth, comfort, and pure delight to any meal. These incredibly soft, slightly sweet, and utterly addictive rolls, slathered with heavenly honey cinnamon butter, are a signature staple. Recreate this beloved restaurant experience right at your dining table with this sweet, fluffy, and easy recipe.
Ingredients
Instructions
Important Information
Nutrition Facts (Per Serving)
It is important to consider this information as approximate and not to use it as definitive health advice.
Allergy Information
Please check ingredients for potential allergens and consult a health professional if in doubt.


Leave a Comment